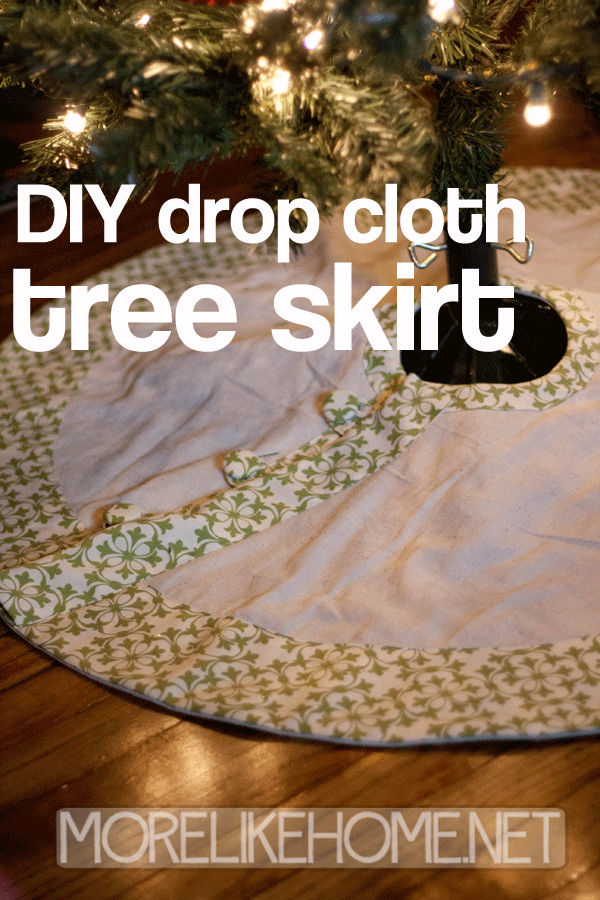
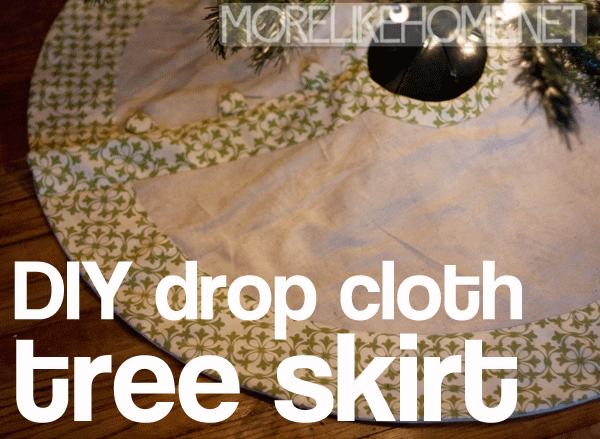
I've struggled with tree skirts in the past. I've settled for ones that weren't really my style (because they were on super sale), waged war against a glittery beast that left my whole house sparkling, and last year just bought a big drop cloth to wrap around the base of the tree. The drop cloth was by far my favorite to date because it was simple and neutral and really fit my Christmas decorating style.

But this year we made a sad decision. Our super-hugenormous tree just isn't in the cards (or our space) this year. *cry* So we are opting for one of our smaller trees instead. But smaller tree means a smaller tree skirt space and I was worried my drop cloth would drown the tree. But I also really like that tree skirt. And then I had one of those "oh. duh." moments. Why not just make the drop cloth into a spiffy new smaller tree skirt??

This design is based on Amy Butler's free tree skirt, but I've had a hard time with her patterns in the past (user error? Likely.) so I just kind of winged it to make a similar skirt. I also made mine smaller to fit my tree better. This tutorial is for a 36" round tree skirt, but really you could follow the step with any size tree skirt! Ready to get started? Full tutorial below!
Supplies:
- canvas drop cloth (at least 36" wide. Some sizes have seams down the middle but I bought the biggest one and was able to get a full skirt on each side of the seam and had leftover fabric for other projects)
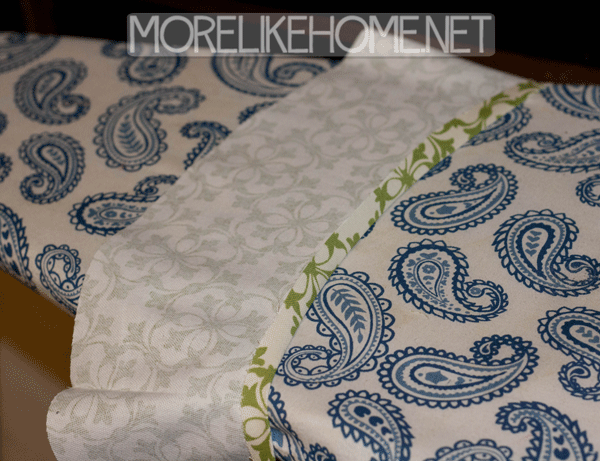
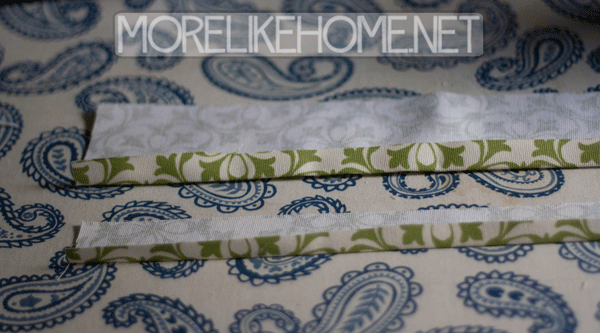
- just over 1 yard of accent fabric (I used a duck cloth, but you can use just about anything. You'll need more for a bigger skirt.)
- three fabric cover buttons (I used 1 1/8")
- thread

Rotate the string around your center point marking every two inches or so, lined up with the 18" mark on your string. This will outline your tree skirt.
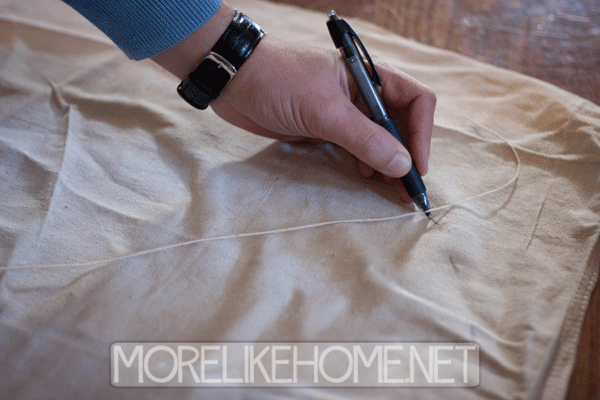
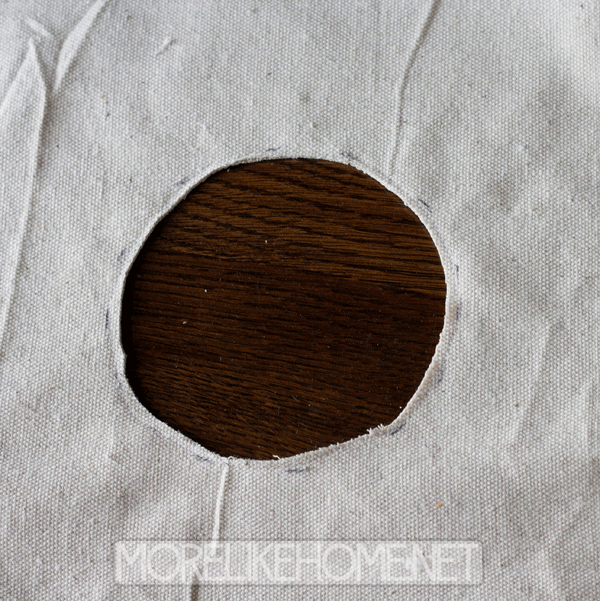
Now make another mark on your string about 4" out from the center point. Rotate the string around marking ever inch or so. This will be the opening for the tree trunk.

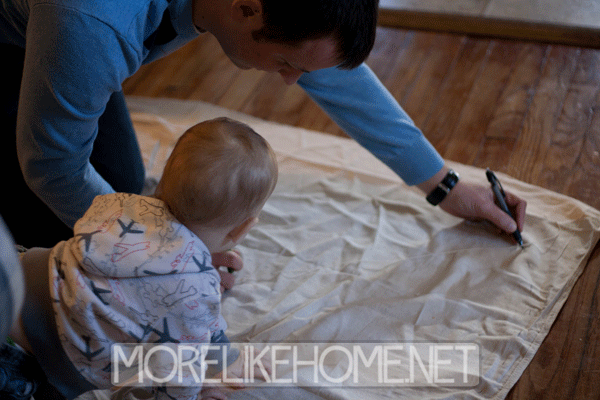
It's helpful to have a helper...
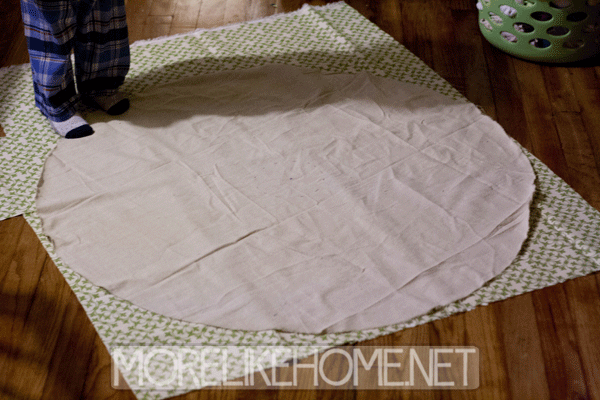
Cut out your tree skirt around the 18" marks (ignore the center marks for now, we'll deal with those later. Then you can use that skirt as a template to cut out a second circle from the drop cloth. I made my skirt with two layers of fabric to give it more body. You would be fine with just one layer if you prefer, or you could use felt as the backing to make it a little stiffer.

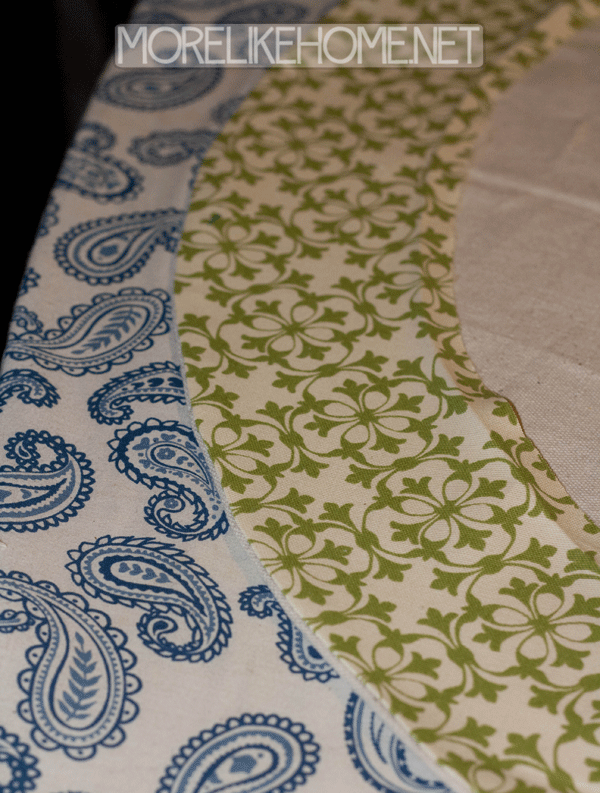
Now use one of the pieces as a pattern to cut out a cut out a circle from your accent fabric.
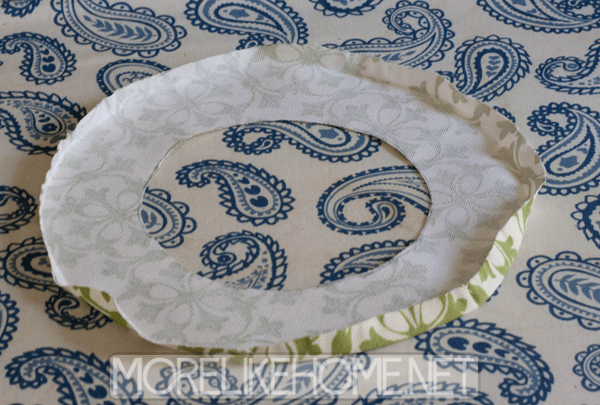
Working around the perimeter of this circle, every two inches measure in 5" and make a mark. Then cut around the marked line. This will leave you a ring of accent fabric. (you can make your ring wider or narrower depending on how much accent fabric you want to show on your tree skirt)

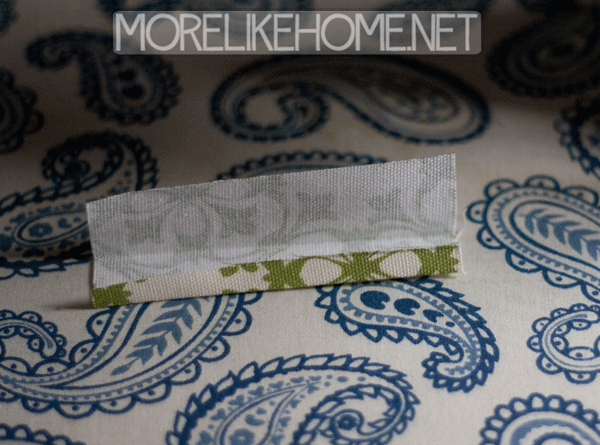
Press the inside edge of the ring under about 1/2" like this:
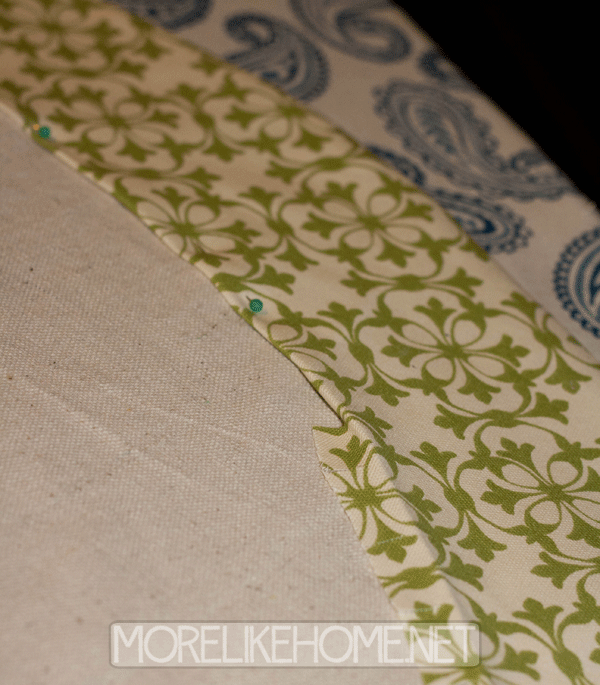
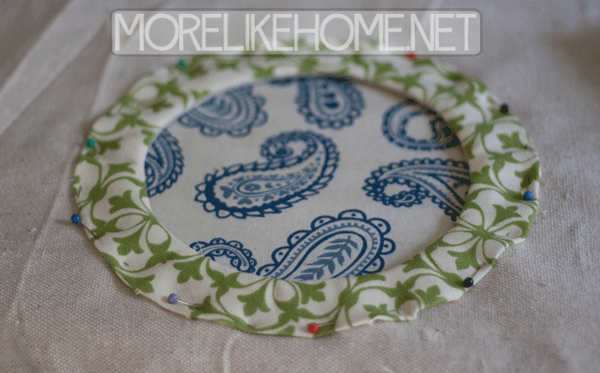
Now lay the drop cloth with the center circle marks face down on the floor. Lay the second drop cloth on top. Then lay your accent ring face down on top, lining up the outside edges. Pin everything in place.
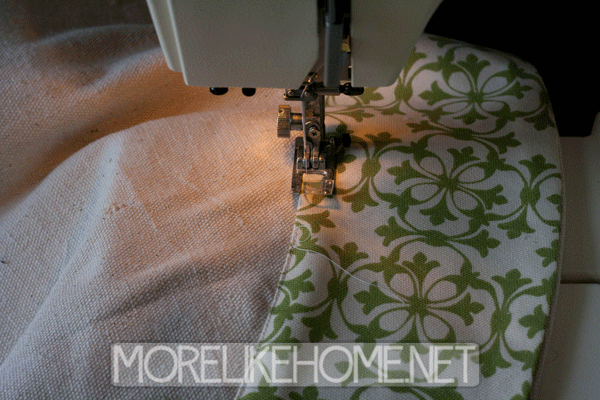
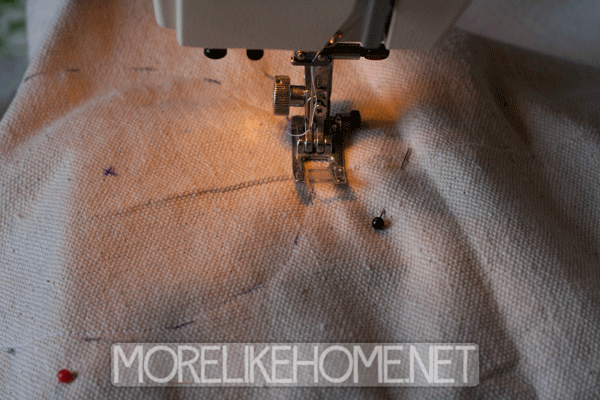
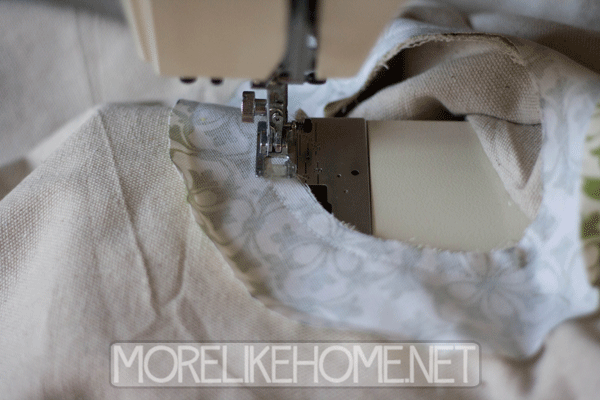
Sew around the outside edge of the tree skirt with a 1/2" seam allowance.
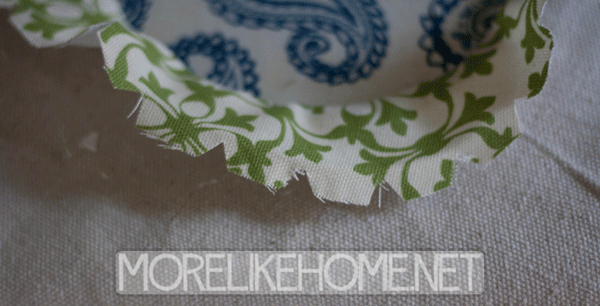
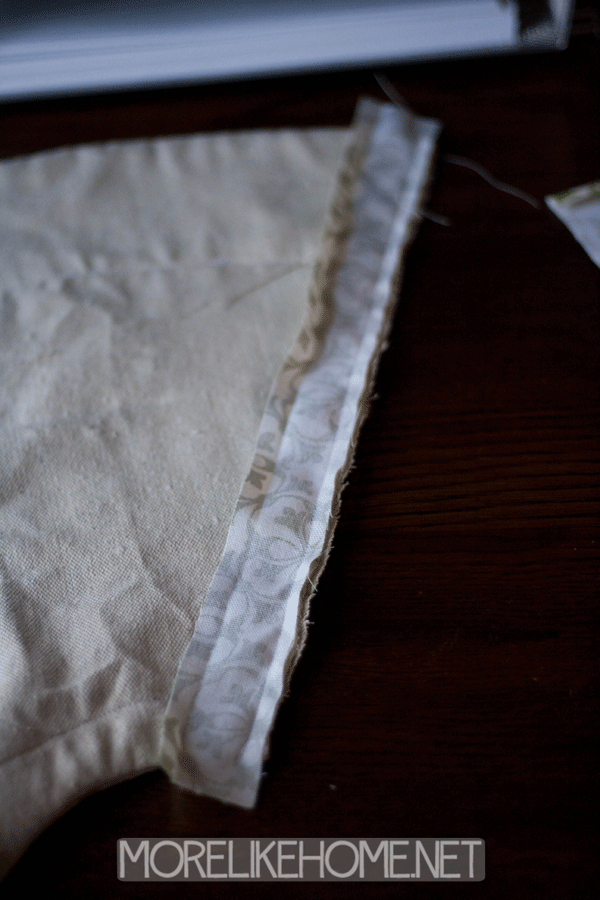
Then clip the curve all the way around the skirt like shown below. Be careful not to clip through the line of stitching!
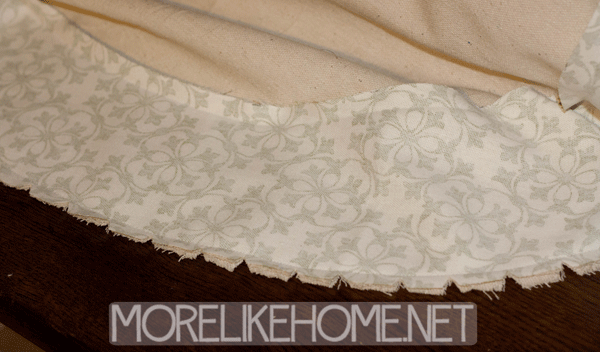
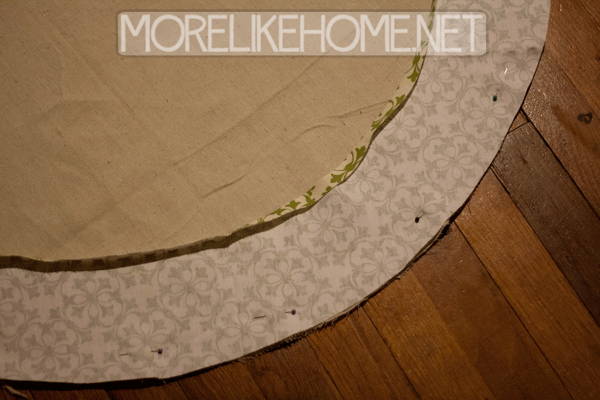
Now flip the ring of accent fabric around to the front side of the skirt and press around the seam. (make sure the seam is pushed out so you have a nice rounded edge)
Around inside edge of the ring, clip the the fabric as shown below. The 1/2" line you pressed earlier will be your guide, clip close to the line but NOT through it.

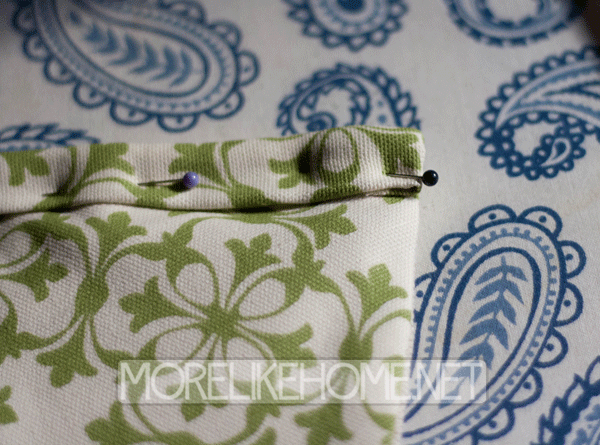
Now fold the clipped edge under along the pressed line and pin it in place.
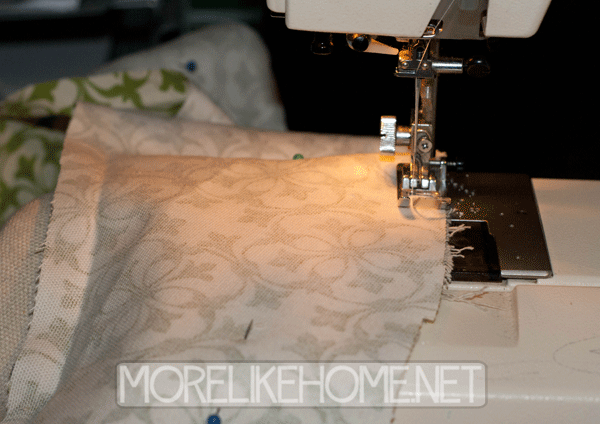
Stitch along the folded edge, as close to the edge as you can get. Your outside trim is done!
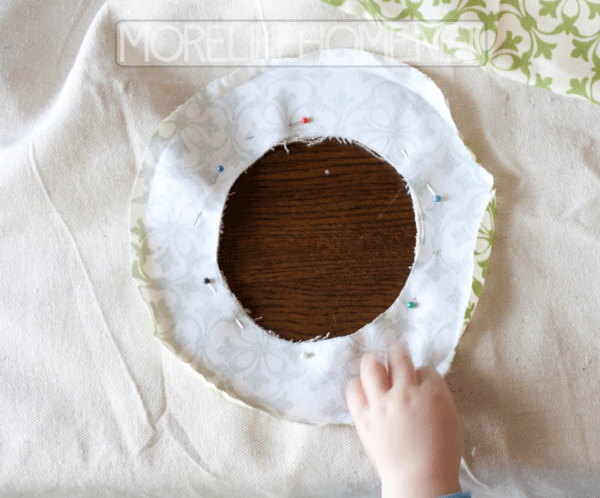
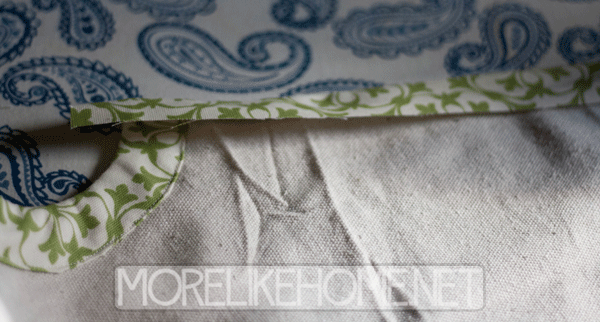
Now we'll work on the inside trim. Start by stitching around the inside circle lines you marked earlier. This will just make sure the layers don't shift while we're working.
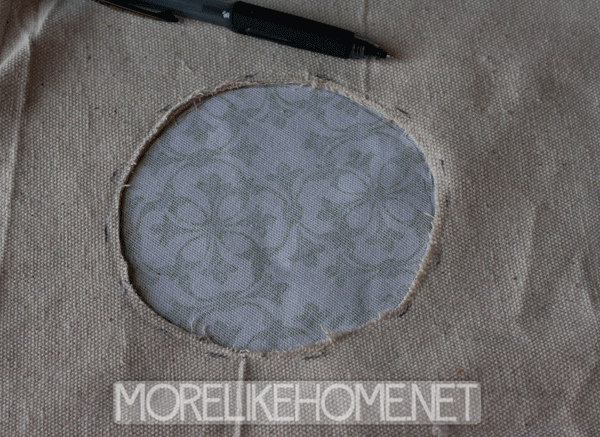
Cut out the circle just inside your stitching line.
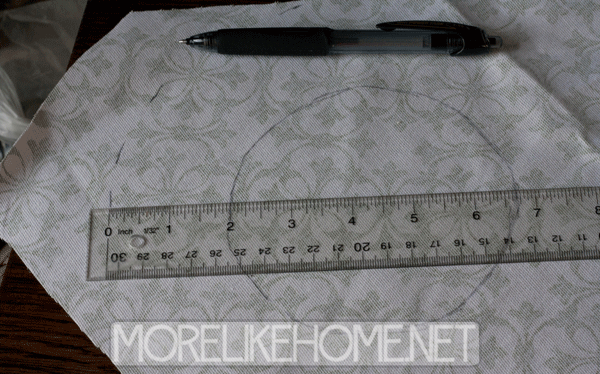
Now we'll use this circle as a template. Lay it on top of your accent fabric and trace the circle.
Working around the circle, measure out 2" and make a mark every inch or so. Cut out along the marks, and then cut out the center circle. You'll be left with a smaller ring of fabric.
Press the outside edge under 1/2".
Lay this ring right side down on the wrong side of the tree skirt and line up the center edges. Pin it in place.
Sew around the inside edge with a 1/2" seam allowance.
Clip the edges around the center as shown below. Be careful not to clip through your stitching!
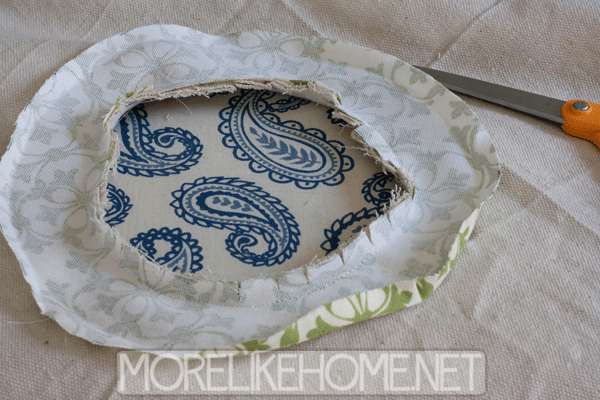
Flip the ring around to the right side of the skirt and press it to get a nice crisp edge.
Now clip around the outside edge as shown below. Again, the 1/2" line you pressed earlier will work as your guide. Clip close to the line but not through it.
Tuck under the clipped along the pressed line and pin it down.
Stitch along the folded edge, staying as close to the edge as you can.
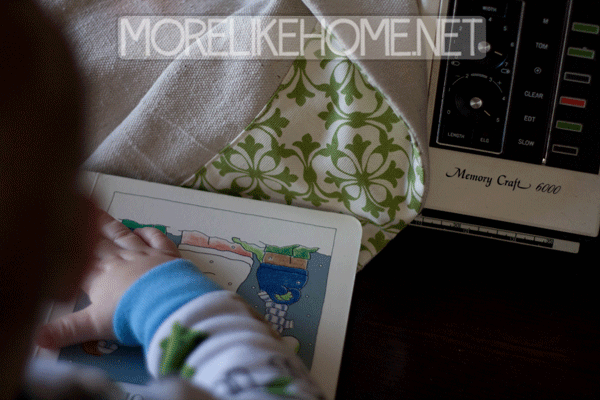
Take a break to read a book to Baby B. He insists. Practice your upside-down-reading skillz while you're at it.
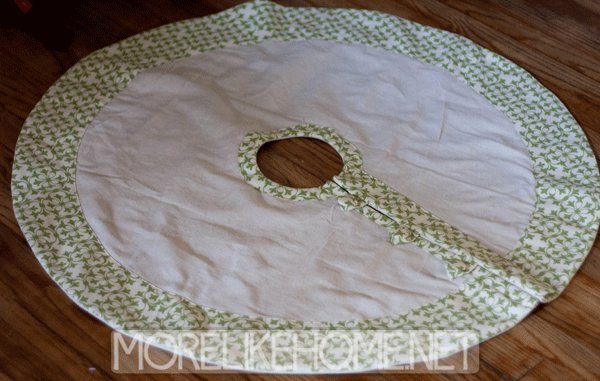
Now that both edges are finished, we can work on the seam & buttons. Start by folding the skirt in half. Cut along the fold line on ONE side of the skirt.

It will look like this:
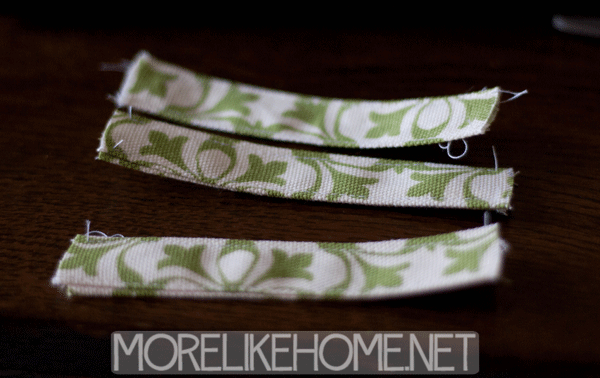
Now let's make the button loops. Cut three strips of accent fabric about 4 x 2.5" (if you use a different button size you made need to adjust the loop size). Fold each strip in half longways and press, then open it up and fold each long edge in about 1/4" and press.
Fold each button loop in along the center pressed line and stitch down both long sides, as close as you can get to the edge (shoot for 1/16 - 1/8"). Set the button loops aside.
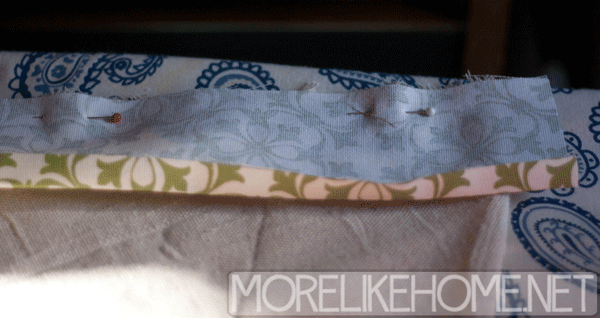
Now cut strips of accent fabric to finish off the seam you just cut. You'll need one strip 4" wide by 18" long, and one strip 2" wide by 18" long. After you cut out each strip, fold one long edge under about 1/4 - 1/2" and press (I just eyeball it instead of measuring).
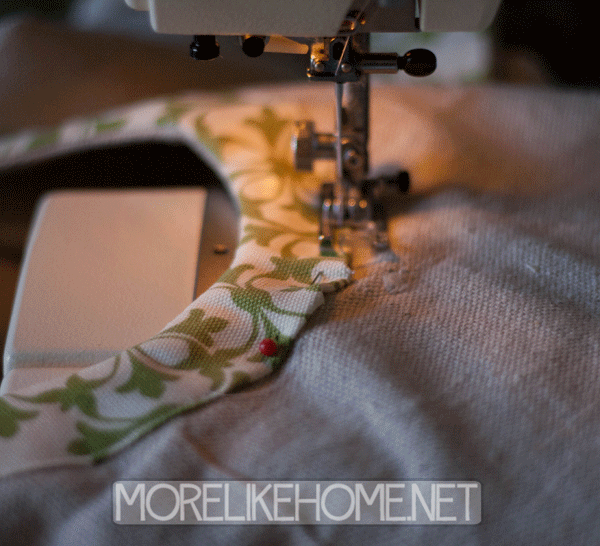
Attach the narrower strip first. Lay it face down on the wrong side of the tree skirt lining up the un-pressed edge of the trim with the the raw edge of the skirt. The strip will be longer than the skirt, so center it on the raw edge to leave about 1.5" of extra hanging over each end. Pin it in place. Sew along the raw edge with a 1/4" seam allowance.
Flip the trim piece around to the right side of the tree skirt and press along the seam to make a nice crisp edge.
Fold the raw edge of the trim fabric under along the line you pressed earlier and pin it down.
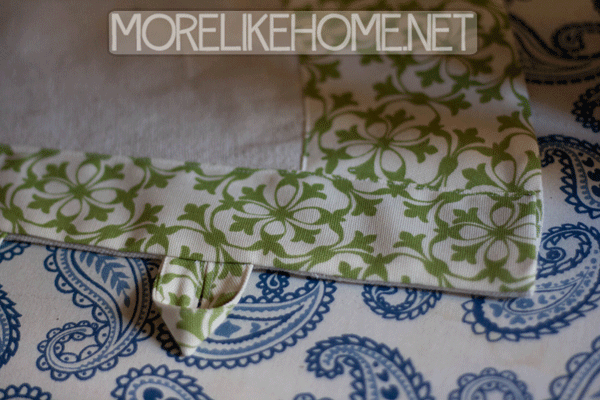
At each end, fold the fabric tail down and tuck it all under the trim piece. You are NOT wrapping it around to the back of the skirt. It should be tucked between the skirt body and the trim piece you are pinning down. Hopefully that makes sense. This should leave no raw edges exposed anywhere.
Sew along the folded edge, staying as close to the edge as you can get. If you want you can sew across the ends of the trim as well, but I felt there were too many layers of fabric to try to sew through and I liked how it looked without any stitches across the ends. If you left enough of a tail, you shouldn't have to worry about it coming un-tucked.

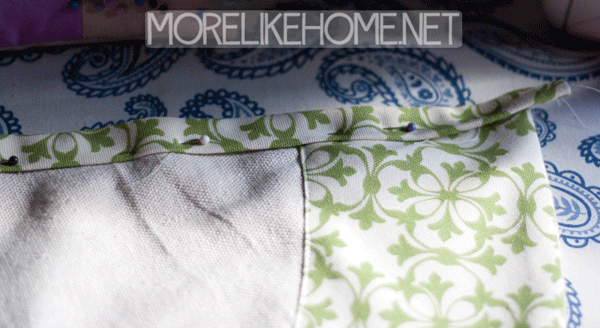
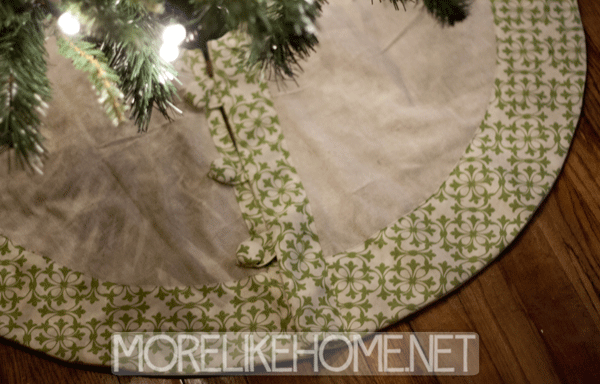
Before we attach the wider edge trim, we need to attach the button loops. On the back side of the tree skirt, line up both raw ends of each loop with the raw edge of the tree skirt and pin them in place as shown below. I centered mine on the drop cloth part of my skirt (so they wouldn't get lost on the trim fabric). Baste them in place if you like, I just pinned mine and went with it. :)

Now lay the trim fabric face down on top of the loops, lining up the unfolded edge of the trim with the raw edge of the skirt. Again you'll want to center the trim piece and leave a 1.5" tail overhanging each end. Pin it in place. Finish the trim piece just like you did with the narrower piece. Sew along the raw edge with a 1/4" seam allowance, flip it to the right side of the skirt and press along the seam, tuck the folded edge under along the pressing line and pin it down, tuck under the tail end of the trim (it will look tidier if you match the curve of the skirt when you tuck it under), then sew along the folded edge staying as close to the edge as you can. Again, I didn't sew across the short ends.
Finish the trim piece just like you did with the narrower piece. Sew along the raw edge with a 1/4" seam allowance, flip it to the right side of the skirt and press along the seam, tuck the folded edge under along the pressing line and pin it down, tuck under the tail end of the trim (it will look tidier if you match the curve of the skirt when you tuck it under), then sew along the folded edge staying as close to the edge as you can. Again, I didn't sew across the short ends.
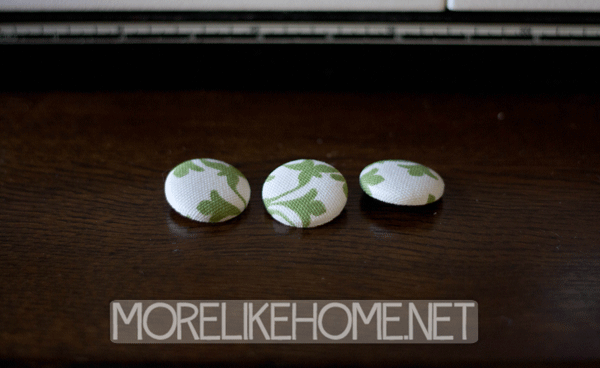
All that's left are the buttons! I bought a Cover Button Kit that came with three 1 1/8" buttons at Joann Fabric. With a 40% off coupon it was only $1.80!

I followed the directions on the package to cover the buttons with scraps from my accent fabric.
Line up the two edges of your tree skirt and make a mark inside each button loop to show where you want to attach your buttons.
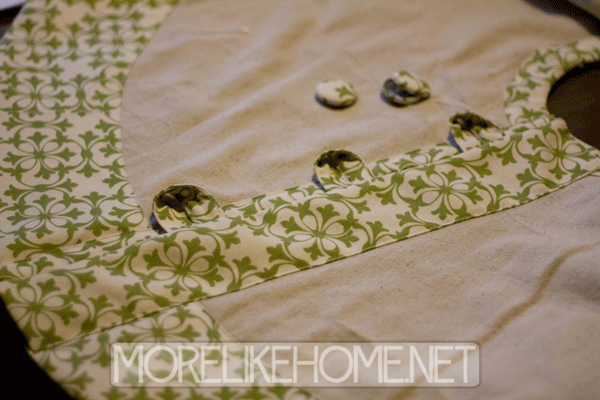
Use a need and thread to hand sew the buttons in place. During this part Baby B was a pinning fiend. It kept us both happy.

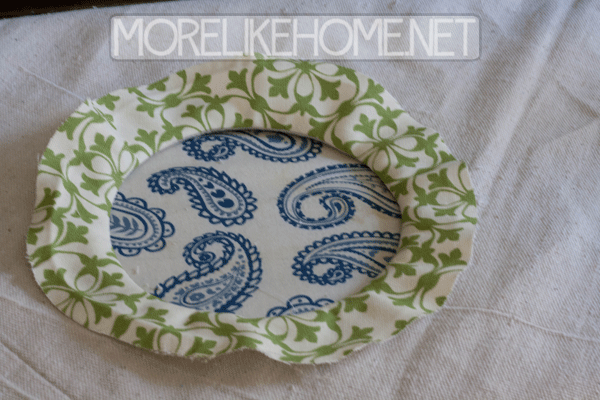
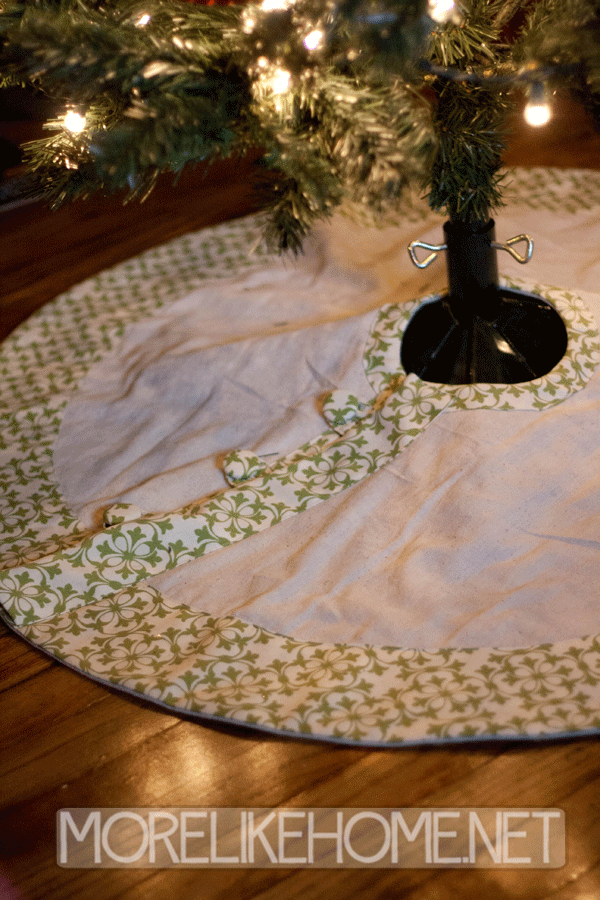
Ta-da! All done!
Dress up your tree and enjoy!
This is just the tree skirt I've been waiting for! Have fun and make one that fits your Christmas style just right. Maybe one trimmed in fancy red velvet or rustic burlap? You could even trim it with more drop cloth to keep is super neutral!
Like I mentioned before, you can easily adjust the size to fit any tree as well. Just measure the diameter of your tree to determine the size of your skirt (and leave the center hole the same size unless you have a really big tree trunk).
If you end up making a tree skirt I'd LOVE to hear what fabrics you used and see pics if you have some! Enjoy!
Is your tree up yet? Mine totally is. I told N I had to put it up to get pictures of the new tree skirt. :)
***I'm linked up with Cottage Magpie & Songbird for the Inspirations for the Season Linky Parade! Check out some more great Christmas inspirations there!***

I just made a DIY tree skirt so that I could have one that I liked too! I wish that I would have waited until your tutorial came out though, I may have to alter a few things on mine!
ReplyDeleteOh, I hate it when that happens! Darn pinterest. ;)
DeleteI LOVE it!! I need one...hmmmm...
ReplyDeleteIt is wonderful! I just had the conversation with my Honey about going with just the small fake tree this year but our children will be disappointed. I just don't want to change everything around to make space for a tree. Thanks for stopping by P3. Hope you and your husband enjoy many hot chocolate moments this season! :)
ReplyDeleteWow, that is a beautiful tree skirt. Thank you so much for the tutorial.
ReplyDeleteGreat job on the tree skirt! I really like the design, especially how you covered the buttons in your accent fabric.
ReplyDeleteWhich makes me wonder, is it customary to arrange the tree skirt with the seam in the front of the tree or towards the rear?
Sorry for such a silly question, but i'm kinda new to this.
Not a silly question at all! The seam would traditionally go in the back, but it turned out so pretty I thought it would be a shame to hide it! So for now at least I have it facing front. :)
DeleteAn excellent tutorial! I've been searching and searching for one that showed how to sew the body of the skirt and the edge together. My problem is I have so many ideas and only one tree!! :P
ReplyDeleteI'm with you, it's hard not to make a new tree skirt every year! :) Glad I could help you with yours. Have fun!
DeleteThanks
ReplyDelete