
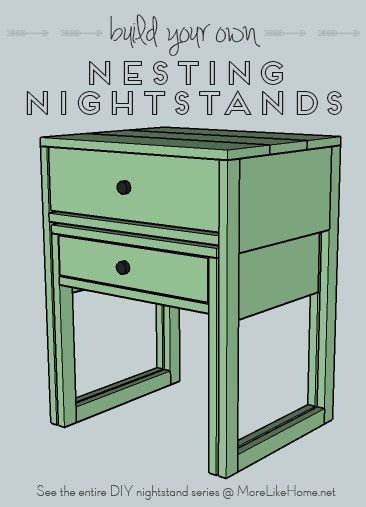
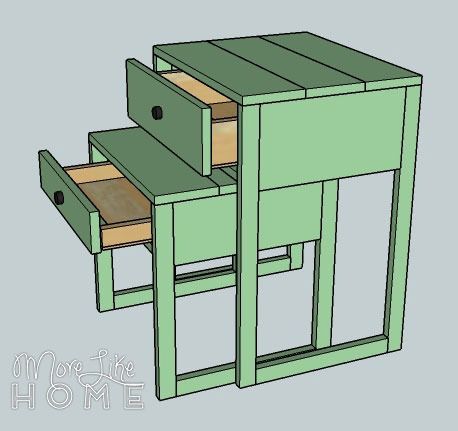
It's already day 17 in our DIY nightstand series! See the entire series here. Today's plan is one of our favorites in the series. It's nesting tables that are like two nightstands in one!

You can separate them when you need more space (too many books to read, anyone?) and tuck them back in when you don't. They U-shaped legs help the tables slide neatly together to look like a finished piece.
I spotted just a little glimpse of some nesting tables in a Better Homes & Gardens magazine that inspired the plans today. I made the top drawer a little deeper but tried to keep the clean lines and simple style.
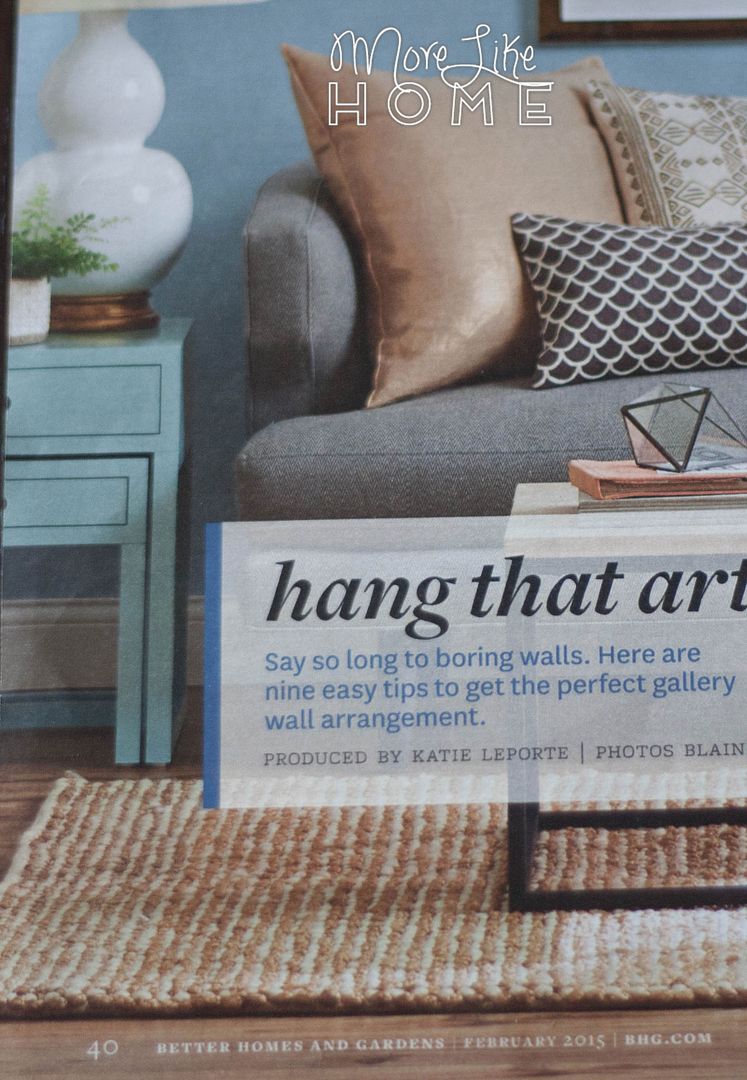
image via Better Homes & Gardens magazine
You can alter the length of the legs to get the height you need for your bed. But don't stop there! These nesting tables are also great in the living room!
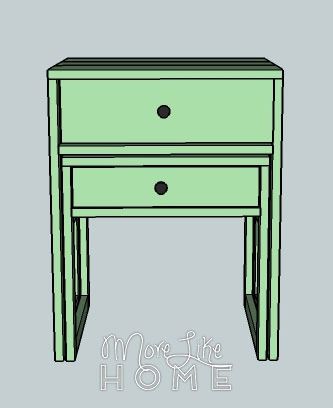
Two tables = two drawers for double the hidden storage! Ready to build your own? Let's get started!
Shopping List:
3 - 1x2 @ 8'
1 - 1x2 @ 6'
1 - 1x4 @ 8'
2 - 1x6 @ 8'
1 - 1x8 @ 6'
1/4" plywood (look for a project panel about 2' x 4')
1 set 12 -13" side-mount drawer slides
1 set 13 - 14" side-mount drawer slides
2 drawer pulls
wood filler
wood glue
1 1/4" screws
2" screws
Kreg Jig with 1 1/4" pocket screws (optional)
finishing nails (optional)
Finished Dimensions: 20" wide x 26" high x 16 1/2" deep
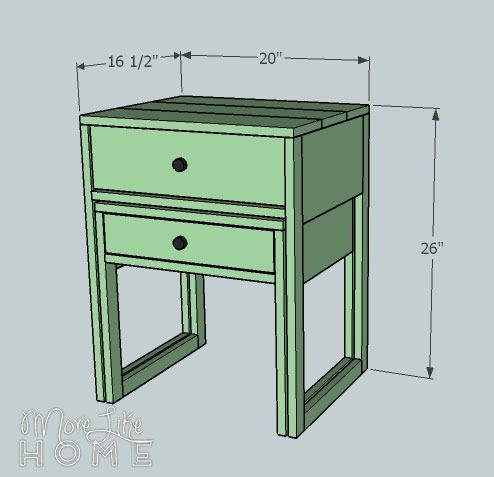
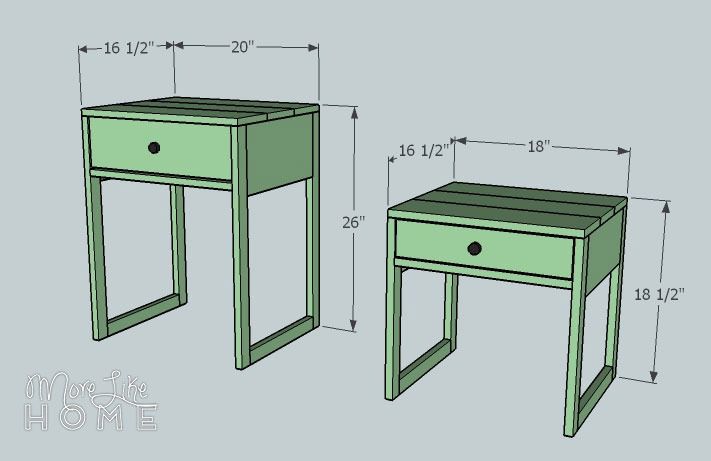
Large Table Dimensions: 20" wide x 26" high x 16 1/2" deep
Small Table Dimensions: 18" wide x 18 1/2" high x 16 1/2" deep
Remember to always double check your measurements before you cut. Use 1 1/4" screws unless otherwise indicated. Pre-drill your holes and countersink your screws. Always use glue before you screw the boards together (you don't have to let it dry first), I'm not going to list it in every step, but it's a good idea to glue everything! Be safe, and have fun!
Large Table Cut List:
(A) 4 - 1x2 @ 25 1/4" (legs)
(B) 2 - 1x2 @ 13 1/2" (side bottom)
(C) 2 - 1x8 @ 13 1/2" (side top)
(D) 1 - 1x8 @ 18 1/2" (back)
(E) 1 - 1x2 @ 18 1/2" (drawer trim)
(F) 3 - 1x6 @ 20" (top)
(G) 1 - 1x2 @ 20" (back stop, optional)
(H) 1 - plywood @ 17 1/2 x 14 1/4" (drawer bottom)
(I) 2 - 1x4 @ 14 1/4" (drawer sides)
(J) 2 - 1x4 @ 16" (drawer back)
(K) 1 - 1x6 @ 18 1/4" (drawer front)
Small Table Cut List:
(L) 4 - 1x2 @ 17 3/4" (legs)
(M) 2 - 1x2 @ 13 1/2" (side bottom)
(N) 2 - 1x6 @ 13 1/2" (side top)
(O) 1 - 1x6 @ 16 1/2" (back)
(P) 1 - 1x2 @ 16 1/2" (drawer trim)
(Q) 3 - 1x6 @ 18" (top)
(R) 2 - 1x2 @ 13 3/4" (drawer sides)
(S) 2 - 1x2 @ 14" (drawer back)
(T) 1 - plywood @ 15 1/2 x 13 3/4" (drawer bottom)
(U) 1 - 1x4 @ 16 1/4" (drawer front)
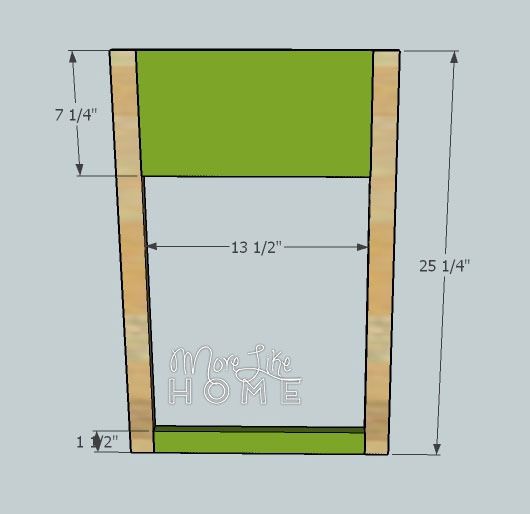
We're going to build the large table first. Start by attach two legs (A) to each side bottom (B) and side top (C) piece. Keep the top and bottom edges flush. Use a Kreg Jig, or drill through the legs into the side boards with 2" screws. You'll end up with two side sections like this:
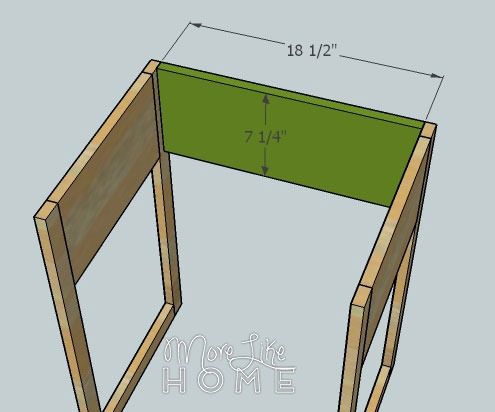
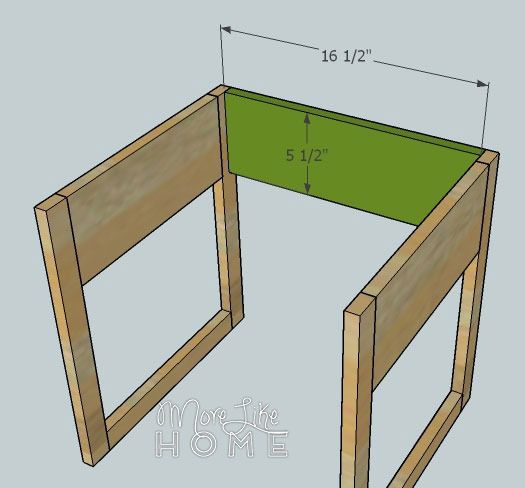
Use the back board (D) to connect the two side sections you just built. Keep the top and back edges flush. Use a Kreg Jig or drill through the legs into the back board.
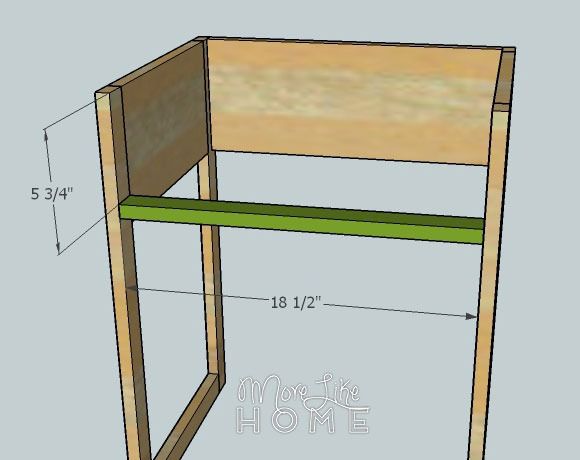
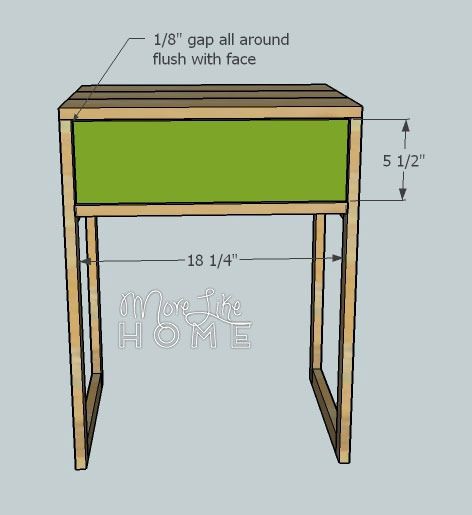
Use the drawer trim (E) to connect the side boards in the front. The trim board needs to be set down 5 3/4" from the top edge of the legs. Use a Kreg Jig or drill through the legs into the trim board.
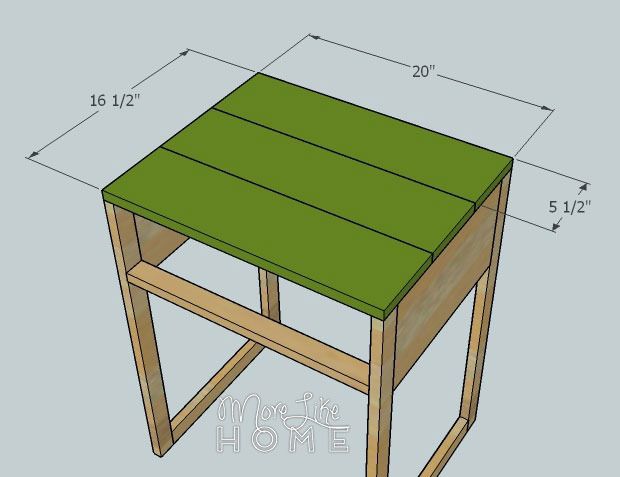
Check for square (measure corner-to-corner both ways across the top. the measurements should be equal) then lay the three top boards (F) side by side on top. If you have a Kreg Jig you can attach the top boards to each other first. If not it's no biggie, just screw them in place one at a time. You can use a Kreg Jig to attach the top from underneath (no holes to fill = yay!) or drill down through the top into the sides and back.
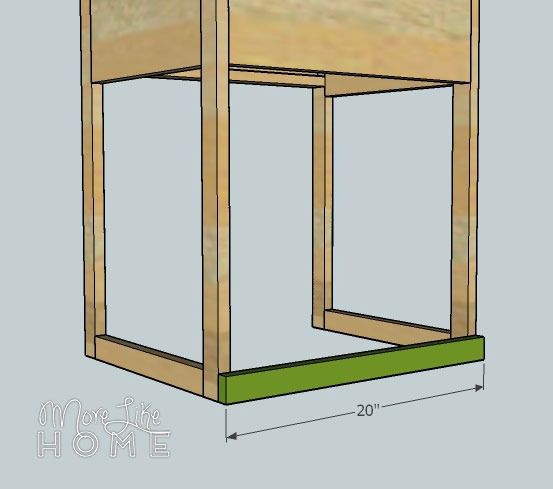
This part is optional. If you're worried about the small table being pushed in too far (like if the tables won't be against a wall) you can attach an extra trim piece (G) across the back of the legs. The small table will stop when it hits the trim. In most cases this won't be necessary.
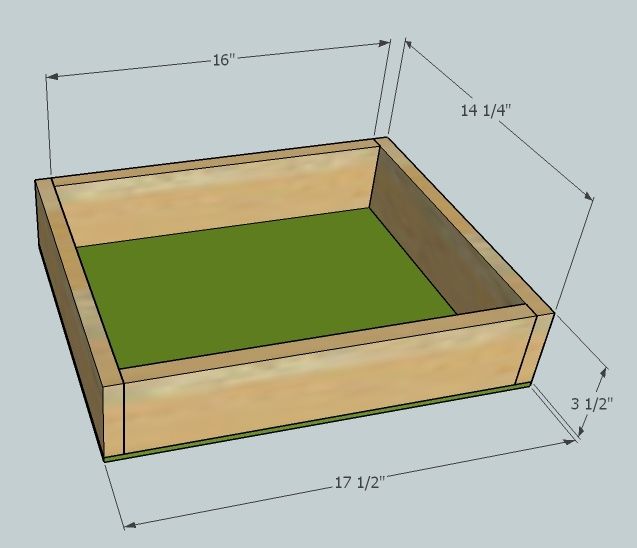
Now you can build the drawer box. Start by double checking the opening on your table. Most drawer slides require your drawer box to be 1" narrower than the opening. Start by attaching the drawer back boards (J) between the two side boards (I). You can use a Kreg Jig or drill through the sides into the back. Lay this frame upside down, then lay the drawer bottom (H) on top. Drill through the drawer bottom into the sides and backs. (This isn't usually how I do drawer bottoms, but since these drawers are so shallow I wanted to leave as much depth as possible).
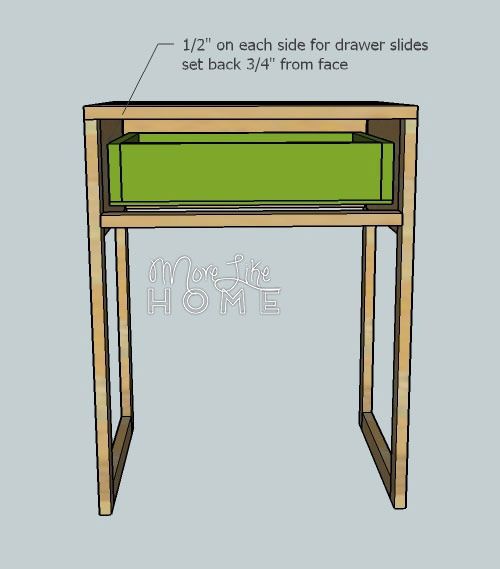
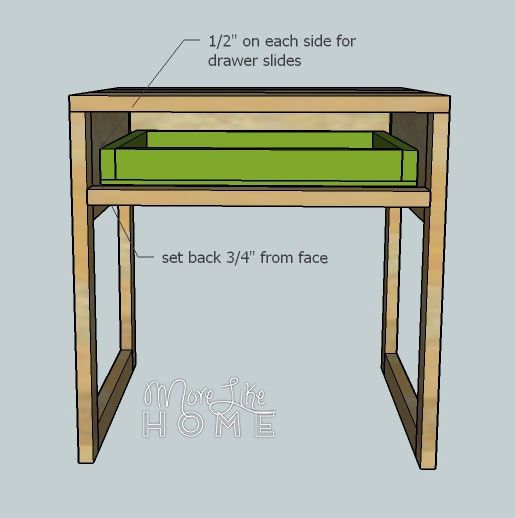
Follow the instructions on your drawer slides to install the drawer box. Keep it level and make sure it ends up recessed 3/4" from the face of the nightstand (so you drawer front ends up flush later).
Set the drawer front (K) in place over the drawer box. Center it with a 1/8" gap all around. Attach the drawer front to the drawer box with glue and finishing nails. Once I have my drawer front secure enough to remove the drawer, I like to reinforce it with a couple screws from the inside.
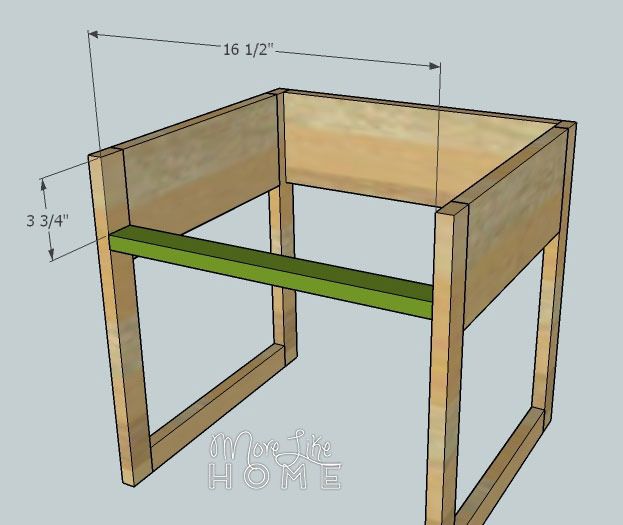
Now you can build the small table in the same way. I won't repeat all the details, since you just built a bigger version. Start by attaching two legs (L) to each side bottom (M) and side top (N) piece.

Use the back board (O) to connect the two side sections.
Attach the drawer trim (P) between the front legs. For this table the trim needs to be set down 3 3/4" from the top edges of the legs.
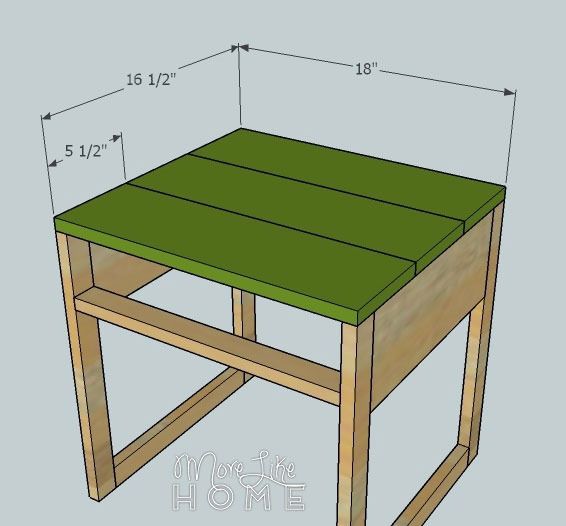
Attach the three top boards (Q) side by side (don't forget to check for square first!)
Build the drawer box. Start by attaching the drawer backs (S) between the drawer sides (R). Then screw the drawer bottom (T) to the bottom.

Follow the instructions on your drawer slides to install the drawer box. Keep it level and make sure the box ends up recessed 3/4" from the face of the nightstand.
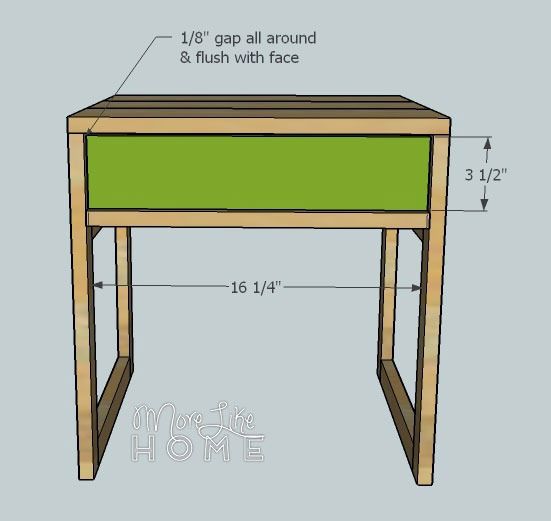
Set the drawer front (U) in place over the drawer box and center it with a 1/8" gap all around. Use glue and finishing nails to attach the face, then reinforce it with a couple screws from inside.
Whew. The building is done! Now you just have to finish it. Start by filling any holes with wood filler. Let it dry, then sand it smooth (repeat if necessary). Then sand the whole table smooth for a great finished product (a good sanding can be the difference between looking professional vs. crafty). Then finish with any paint or stain and polyurethane you like. Install your drawer pulls.

I'm liking these in a pale mint or aqua, but a moody gray would also be great. Have fun and find your perfect style! If you find you're always needing more tabletop space (and have room to do this) you can completely unstack the tables. And even tuck a couple baskets underneath for blankets.

I'm thinking one of these would also be great by my desk. It would be an easy way to add work space when I need to spread out a little more!

Tomorrow is the last day in our nightstand series. If you're a new builder or just looking for something ridiculously fast and easy, tomorrow's plan is just what you need!

No comments:
Post a Comment