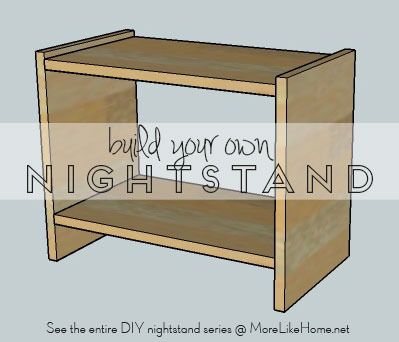
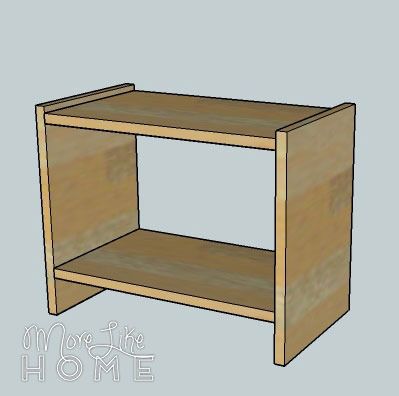
We've made it to the final day in our DIY nightstand series! See the entire series here. Today's plan is the fastest, easiest nightstand we've shared thus far. Kind of like no homework the day before spring break? It's a simple design with lots of open storage.
P.S. Now you can build a matching coffee table, too!

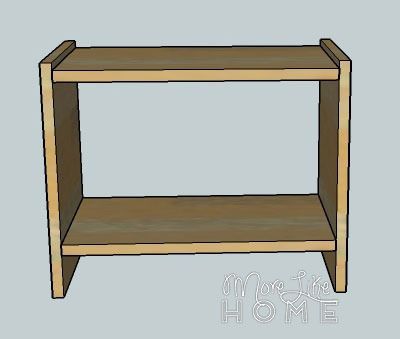
This super simple build is a great way to get your feet wet in DIY, or a great first project for kids who want to follow in your footsteps! The open storage is perfect for stacking all your favorite books, or tucking in a few baskets for extra blankets.
This nightstand is inspired by another Ikea find. It's very affordable, but the beauty of DIY is that you can adjust it to any size you need. Plus it's a good option if you're not one of the lucky people that live next to Ikea!
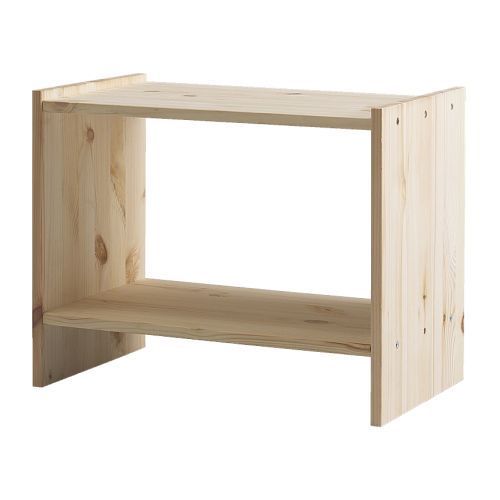
image via Ikea.com
Shopping List:
1 - 1x12 @ 8'
wood filler
wood glue
1 1/4" screws
Kreg Jig with 1 1/4" pocket screws (optional)
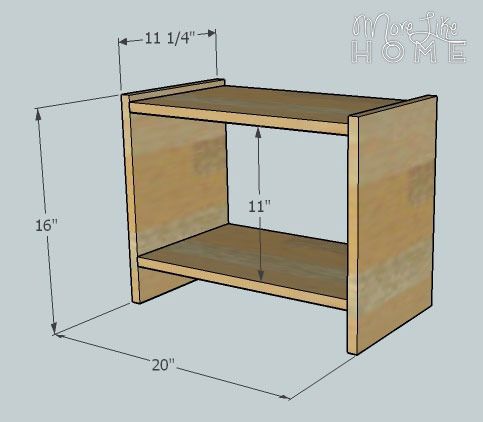
Finished Dimensions: 20" wide x 16" high 11 1/4" deep
Remember to always double check your measurements before you cut. Use 1 1/4" screws unless otherwise indicated. Pre-drill your holes and countersink your screws. Always use glue before you screw the boards together (you don't have to let it dry first), I'm not going to list it in every step, but it's a good idea to glue everything! Be safe, and have fun!
Cut List:
(A) 2 - 1x12 @ 16" (sides)
(B) 2 - 1x12 @ 18 1/2" (shelves)
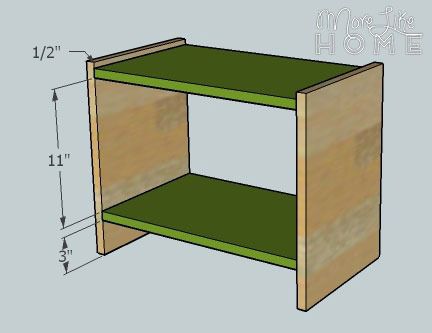
Attach the two shelves (B) between the two side boards (A). That's it! The bottom shelf should be set up 3" from the bottom and the top shelf should be down 1/2" from the top (leaving 11" between the shelves). Use a Kreg Jig or drill through the sides into the ends of the shelves. If you want to add a little stability, you could add a 18 1/2" length of 1x12 (or any other scrap board) along the back edge of the bottom shelf as a trim piece. This would keep the nightstand from leaning over time, and would also prevent items on the bottom shelf from being pushed off the back.
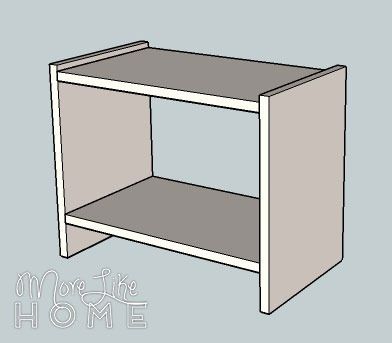
The building is done, now you just have to finish it! Start by filling any holes with wood filler. Let it dry, then sand it smooth (repeat if necessary). Then sand the whole table smooth for a great finished product (a good sanding can be the difference between looking professional vs. crafty). Then finish with any paint or stain and polyurethane you like. If you like the natural wood look just go with a coat of clear poly.
But it would also look great in a crisp white paint!
Thanks for hanging with us for the last 18 days! We hoped you enjoyed this series as much as we did. We'd love to hear which plan was your favorite or what you'd like to see from us in the future (and no, it doesn't have to be a nightstand). :)

No comments:
Post a Comment