Hey guys! It's time for the closet reveal! You saw a peek of it in the bunk room reveal (check that out here if you missed it), but the final details are done and this closet is already working hard for our boys. This was a 100% low-budget use-what-we-have project because seriously, guys, you don't have to spend a fortune to create a beautiful home for your family! Here's a reminder of where we started and where we left off during the bunk room reveal:
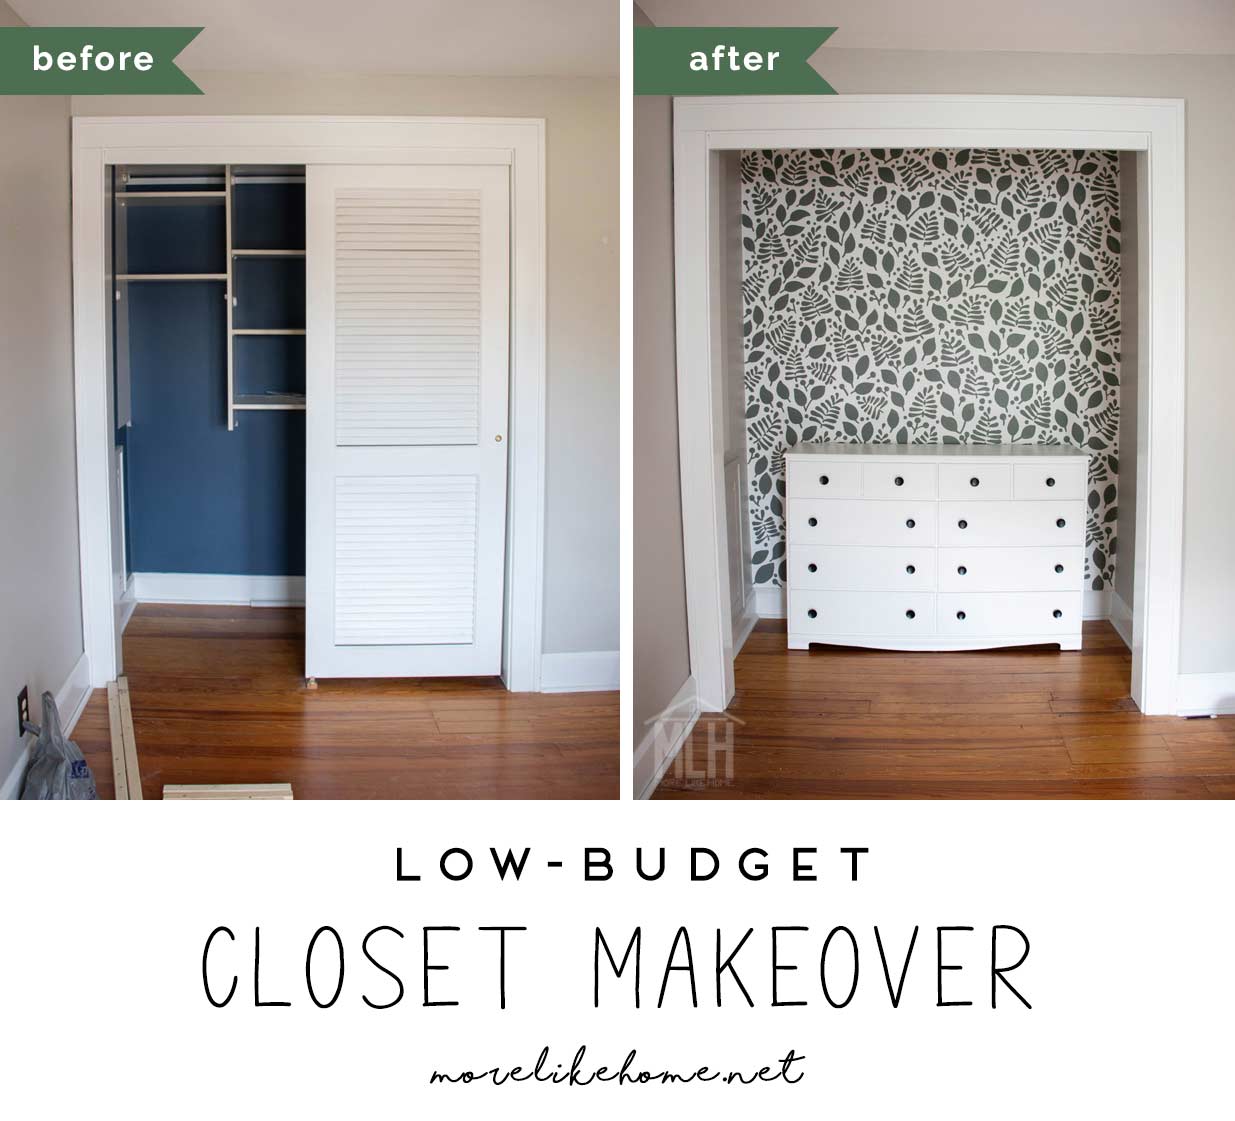
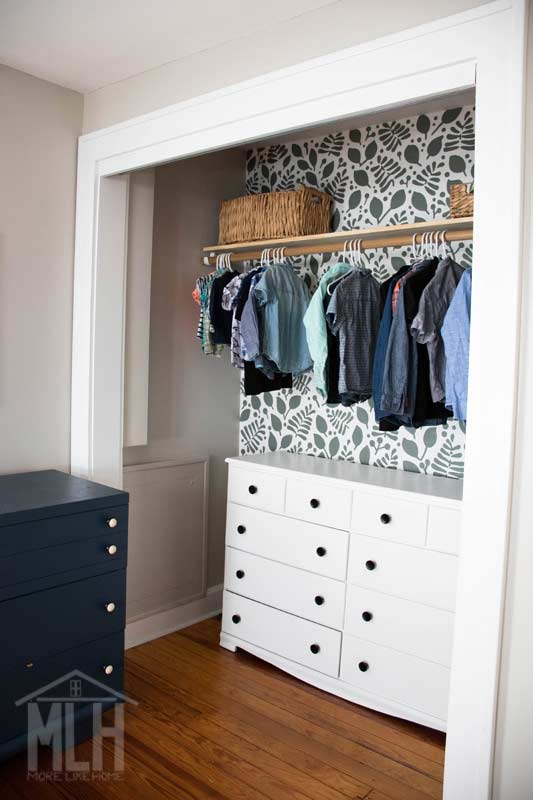
And here's their closet today:

I'll go into more details in a minute, but here's a rundown of this low-budget closet makeover:
- remove closet doors
- remove built-in closet organizers
- fill holes and paint walls
- paint leaf pattern on back wall
- refinish second-hand dresser
- install clothes rod and shelf
We already had almost everything we needed for the project and were as thrifty as we could be with the rest. A big chunk of the impact was just removing what was already there - and that was totally free!
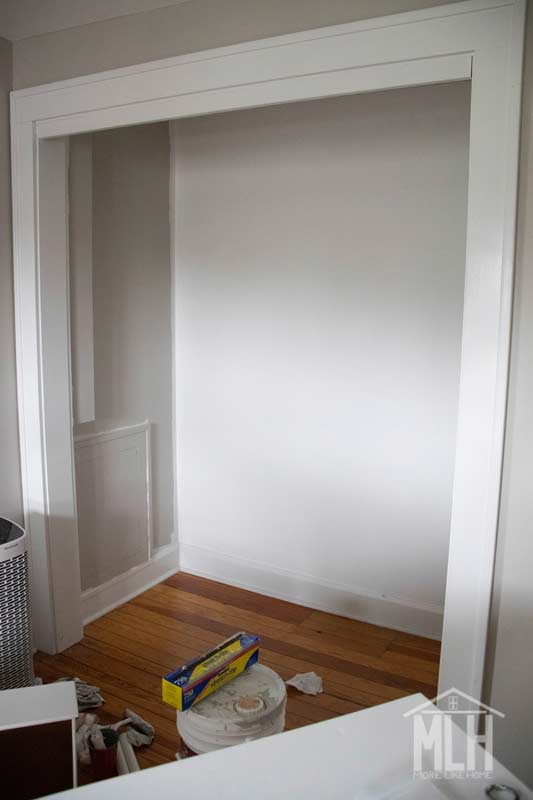
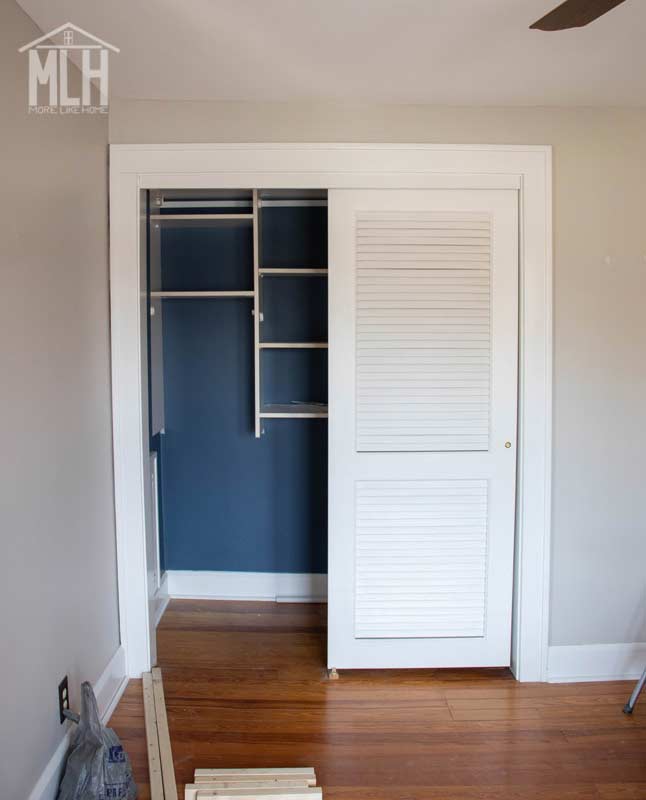
The first step was creating a clean slate, so we started by removing the closet doors. This is the second closet in this house we've removed the doors from. I know, it sounds crazy to give up a good closet, but we need to make these spaces work the best they can for our family and we just didn't need a traditional closet here! For now we stashed all the closet doors in the basement so we can put them back up if we ever move... since most people probably want a closet with doors.
We also removed the closet organizers. One of the keys to making this room work for our boys was being able to fit three dressers, and we just couldn't do that if we left the closet how it was. Since we opened it up, we were able to fit the third dresser inside the closet!
After all the organizers were pulled out, I patched all those holes left in the walls, sanded them down, and painted the whole closet. The side walls are painted with leftover paint from the bedroom walls (Fossil Gray from Home Depot - it's the same gray we used in most of our house!) and the back wall is painted white (Valspar Swiss Coffee - left over from the
DIY built-in cabinet project in the nook off of our kitchen).
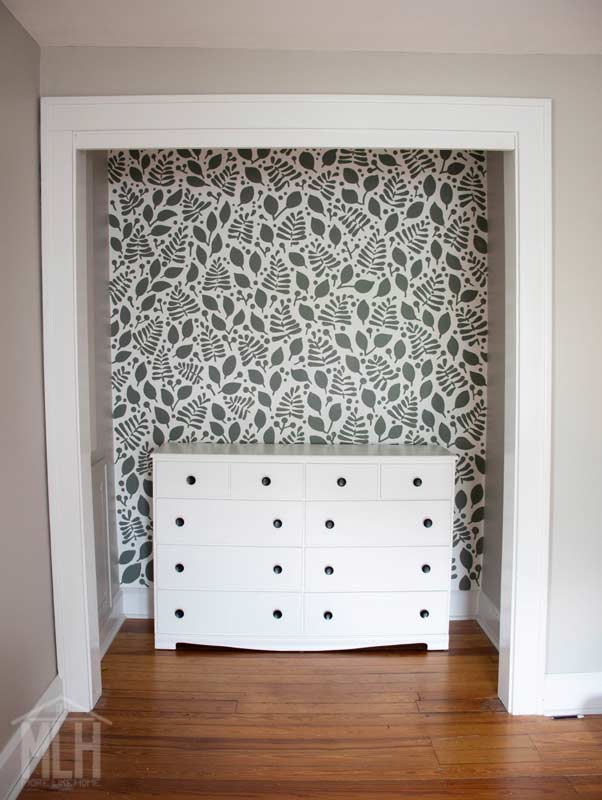
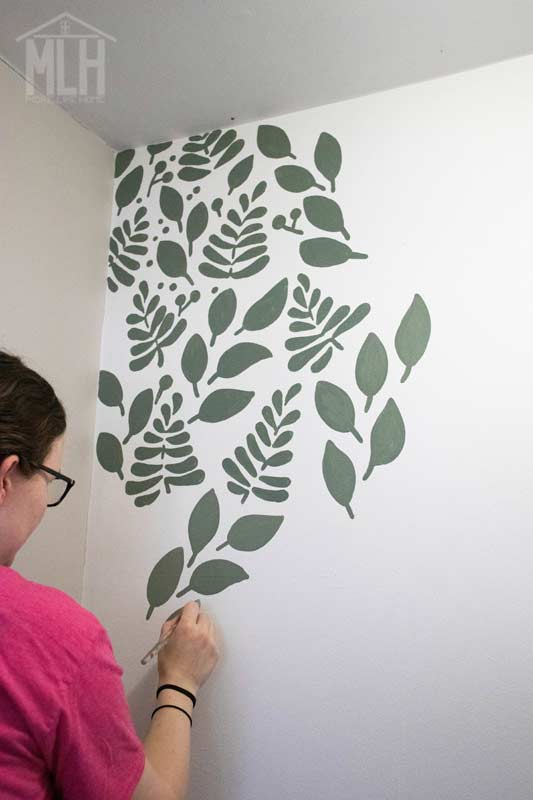
Once we had a clean slate, my sister came in and worked her magic on the back wall. I knew I needed this closet to be really functional, but I also wanted to make sure it was beautiful and felt like a feature in the room and not an afterthought. This was a key element that made the space really beautiful! At first I thought about using wallpaper, but I realized I had a much cheaper (a.k.a. free) option right at my finger tips - the leftover paint from
the bunk beds we built for the boys (Retreat from Lowe's)! I was going to take a swing at hand-painting it myself, but my very artsy sister swooped in and made it absolutely stunning.
I was like "I want it leafy. Here's leftover paint. Good luck." and she
whipped up this masterpiece. I'm a little sad that it's not wallpaper
because I want to be able to use it everywhere.
This option also gave us a design bonus - matching the color of the bunk beds to keep the styling really clean, and the monochromatic scheme keeps it from feeling to busy (which is especially important to keep in mind if you'll have a lot of stuff going on in front of an accent wall like this - like a clothes rack!)
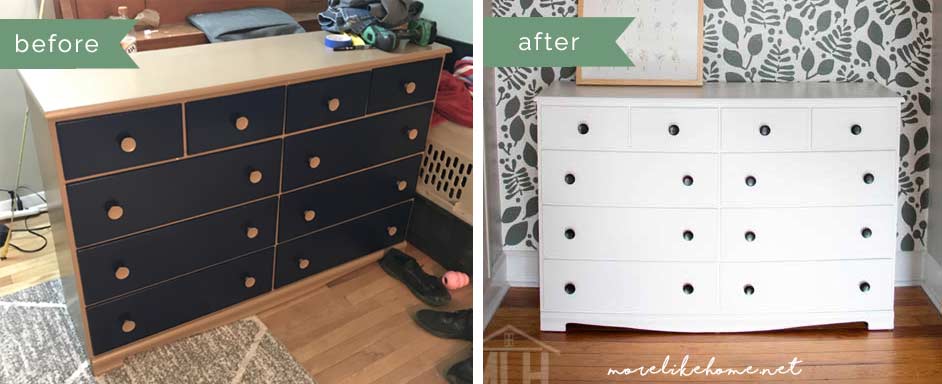
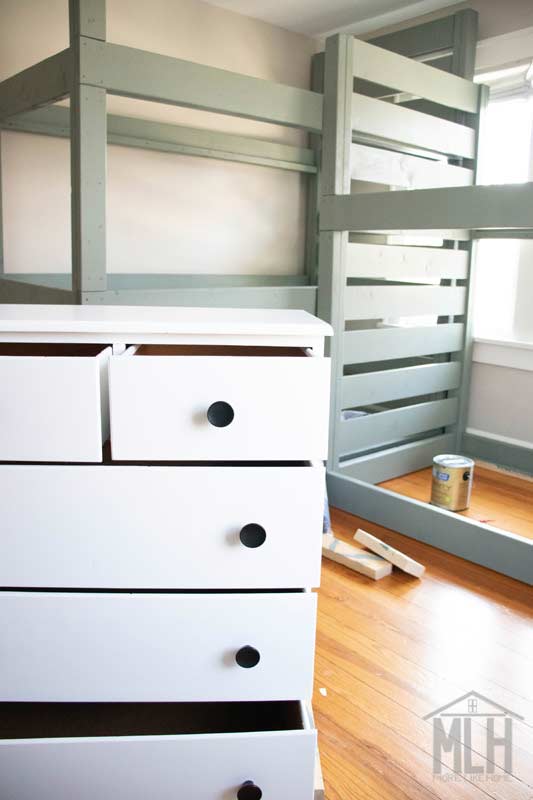
Then I worked on the dresser that would go in the closet. My sister found this one at an estate sale for just $10! She is great at looking past the finish and flaws to see the bones of a piece, and this one was almost identical to the $250 Ikea dresser I had been looking at!
I started by removing the knobs and spray painting them satin black (I used left over
Rustoleum Universal spray paint).
Then I sanded the dresser just enough to rough it up a bit to help the
paint stick, and painted it with the same Valspar Swiss Coffee that I
used for the back wall of the closet.
(I've found that sticking to a
couple key colors throughout the house is really helpful - it saves
money over buying a bunch of different colors, makes touch-ups super
easy since we always have those colors, and makes it easy to swap things
around the house since everything is cohesive!).
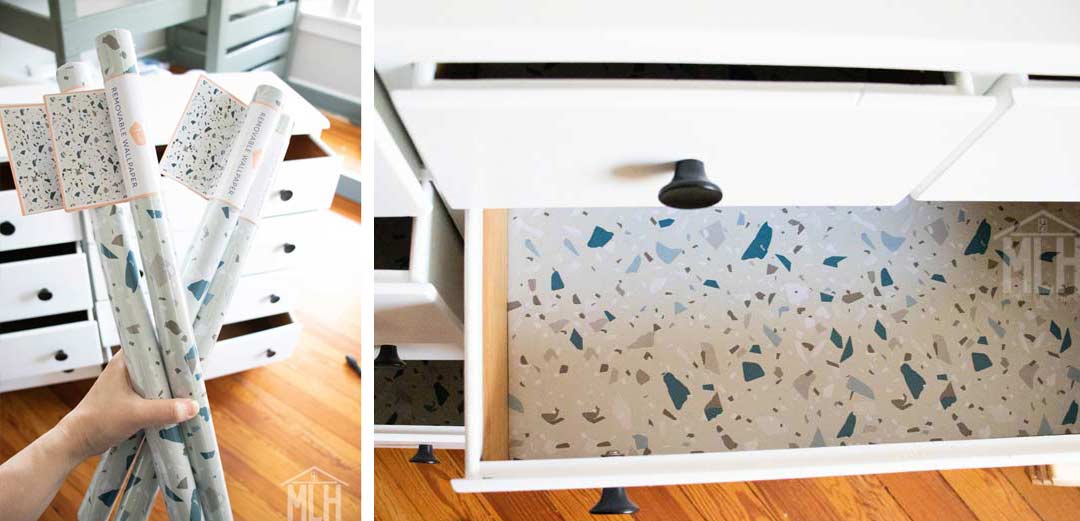
To finish off the dresser, I used a few small rolls of removable wall paper from the Target dollar spot to line the drawers.
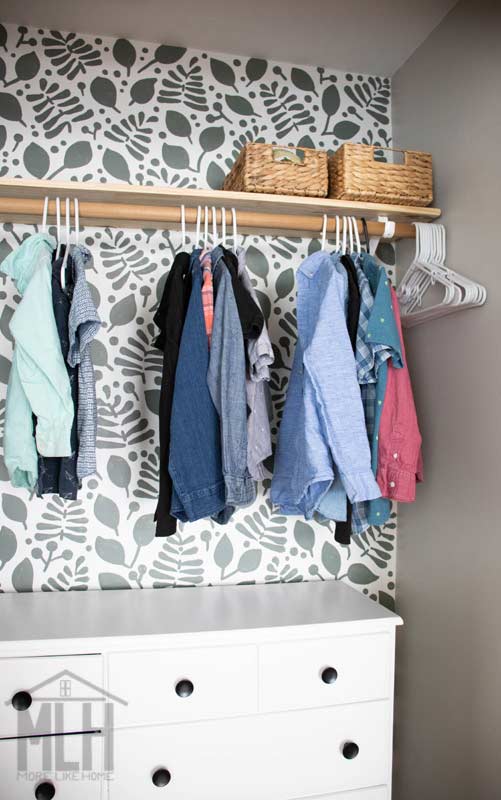
That's as far as I made it by the bunk room reveal. But I still had a few more details to add before the closet was totally done. The boys still needed a place to hang button-up shirts, and I knew we needed a little wood to warm up all the whites and grays going on in here.
Luckily I was able to hit both those birds with one stone by installing a super basic hanging rod with natural wood tones! A good part of this was luck because I just relocated the brackets and rod I had installed in the closet in their old room. So I already had the wooden rod this space really needed, and the brackets happened to be white which was perfect because they just kind of disappear against the back wall. The only thing I had to to buy for this portion of the project was a 1x12 board to use as a shelf across the top of the brackets. Now, I know people are into all kinds of fancy (and expensive) brackets at the moment, but basic old-school ones (
like these) are super affordable
and super practical. They hold the rod, and a the shelf sits right across the top. Easy, guys. I used a stud finder when I installed the brackets to make sure they can hold up to five boys!
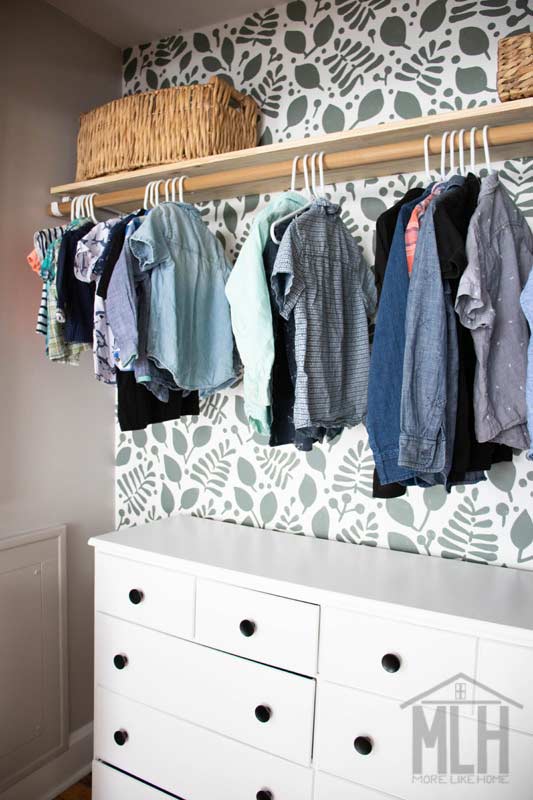
I tried to be mindful as I wrapped up the storage + styling for this closet. It's a small space and it's open to the room so I wanted to keep it looking as neat and uncluttered as possible. One super affordable way to do that in a closet is to stick with a single color of hangers. They don't have to be expensive or fancy, just keeping them all the same really helps to simplify and streamline things. I use those cheap plastic hangers you can get anywhere for like $2 and always buy white. Easy!
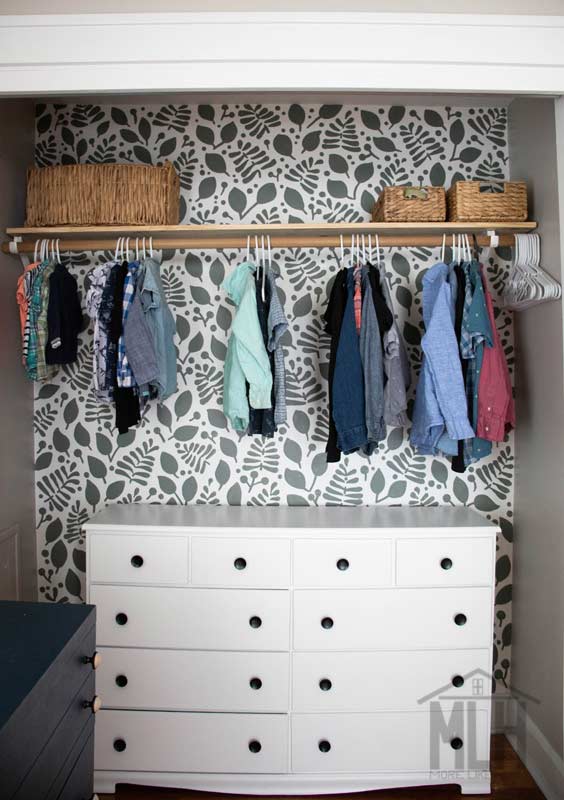
To add some functional storage to the top shelf, I just stuck a few natural fiber baskets up there. Again I was looking for something with a warm, natural feel (like the wooden shelf and rod) to help warm up the other cooler colors. Which was easy because I'm a little bit of a basket hoarder and I had all three of these in the basement already. I keep a small stash in the basement since our needs are always changing - whenever I empty a basket of something we don't need anymore, I put it in the basement until I find a new place it's needed! It's so easy (and free) to "shop" the basement for things like this.
And that was it for our closet makeover! It took a few days to get it all together, but it was a really simple, straightforward project - and affordable to boot!
Cost Breakdown:
- $10 - dresser
- $12 - removable wall paper for the drawers (it makes me laugh that this cost more than the dresser!)
- $12 - board for the top shelf
- $2 - extra pack of white hangers
I did run out of Swiss Coffee paint part way through and had to buy another gallon. I don't know if that counts toward this project or just counts as a staple since I use it all the time. Do with it what you will.
So far this setup has been just perfect for what we need. You can check out the rest of their bunk room here, and hopefully we'll have a playroom update headed your way soon!
So what do you think? Were we crazy to open up this closet? Or would you do the same thing?


What a great way to have a functional, attractive closet for little boys without worrying about them breaking closet doors off their hinges!
ReplyDelete