


I also added pages for some of his favorite things like apples, baths, books, etc.

I wanted it to be a fun book, and when I saw this dinosaur album at Hobby Lobby I thought it would be perfect. And it was a bonus that it had a $2.50 Clearance sticker on it! (If you want a non-clearance album, Hobby Lobby rotates their sales so photo albums are half-off every few weeks.) If you want a long term, higher quality album I'm a big fan of Creative Memories, but since Baby B might destroy it I decided to go with a cheaper album for him.

I used a free site called PicMonkey to edit all my pictures. It's really easy to use (and did I mention free?). Just upload pictures from your computer to get started. Here's how I edited the pictures for my book:
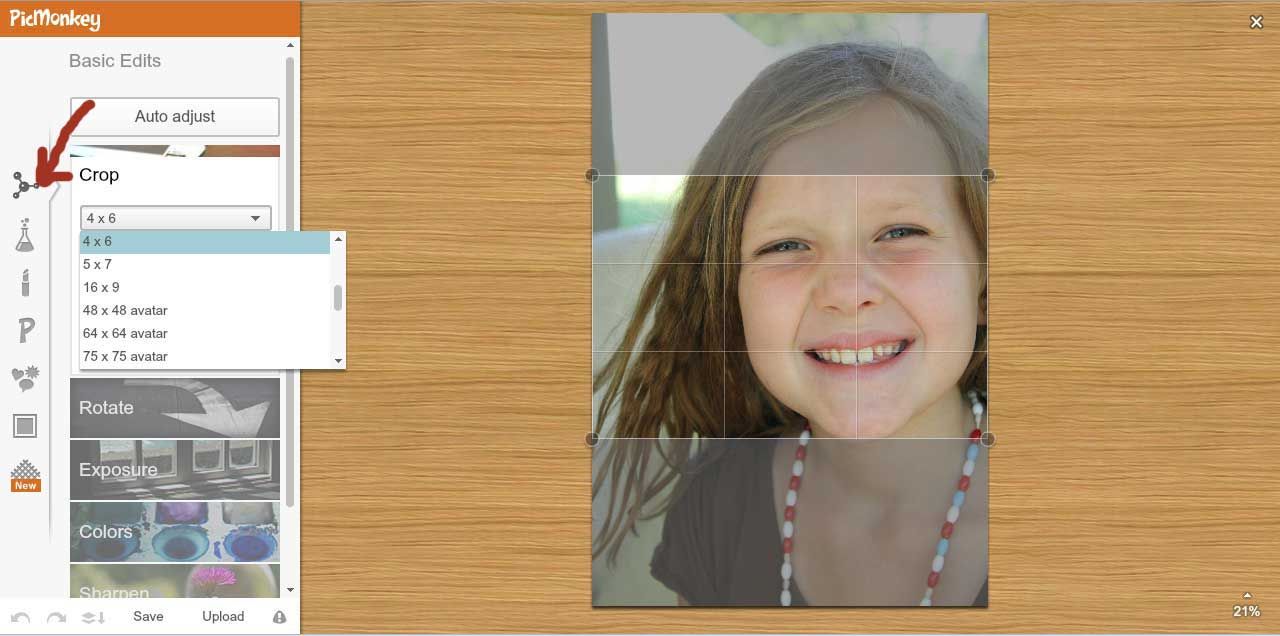
Cropping
I wanted all my pictures to be horizontal 4x6's, so I started by cropping all my pictures to get the right size & layout, and to show close-ups of the faces. Click the little atom-ish icon for basic edits (you can also rotate your photo, adjust color and exposure, and do touch-ups here if you need to). Click "Crop" in the menu, then use the drop-down menu to lock the photo ratio you need (I did 4x6). Then just drag the corners of the crop box to highlight the area you want to crop and hit "apply".
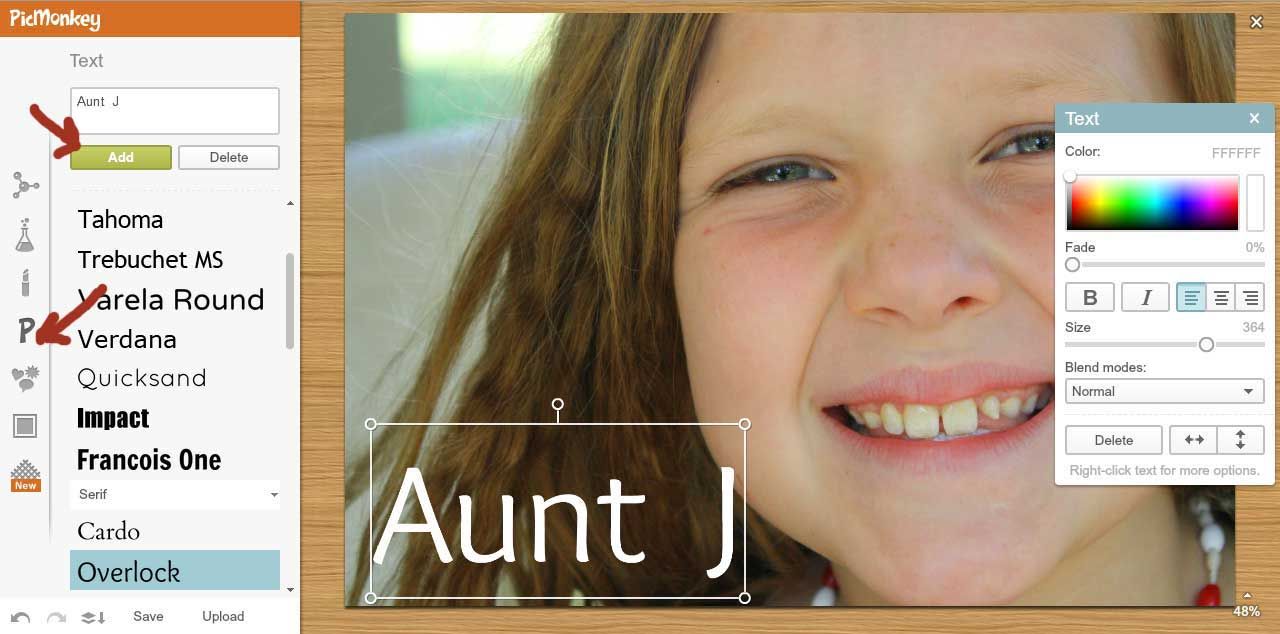
Add Text
I wanted the names printed right on each picture. To do this start by clicking the "P" icon to open the text options. Select the text style you want (I used "overlock"), type your text in the text box, and click "add". This will make the text appear on your picture. Now you can drag it where you want on the picture, and drag the corners of the text box to adjust the size of the font. You can also change colors and alignment in the text window. When you are done just click anywhere on the picture and the text window will disappear. This is actually where I stopped with my book (and skipped to the "save" step), but I almost went with a special effect so I'll show you that too....
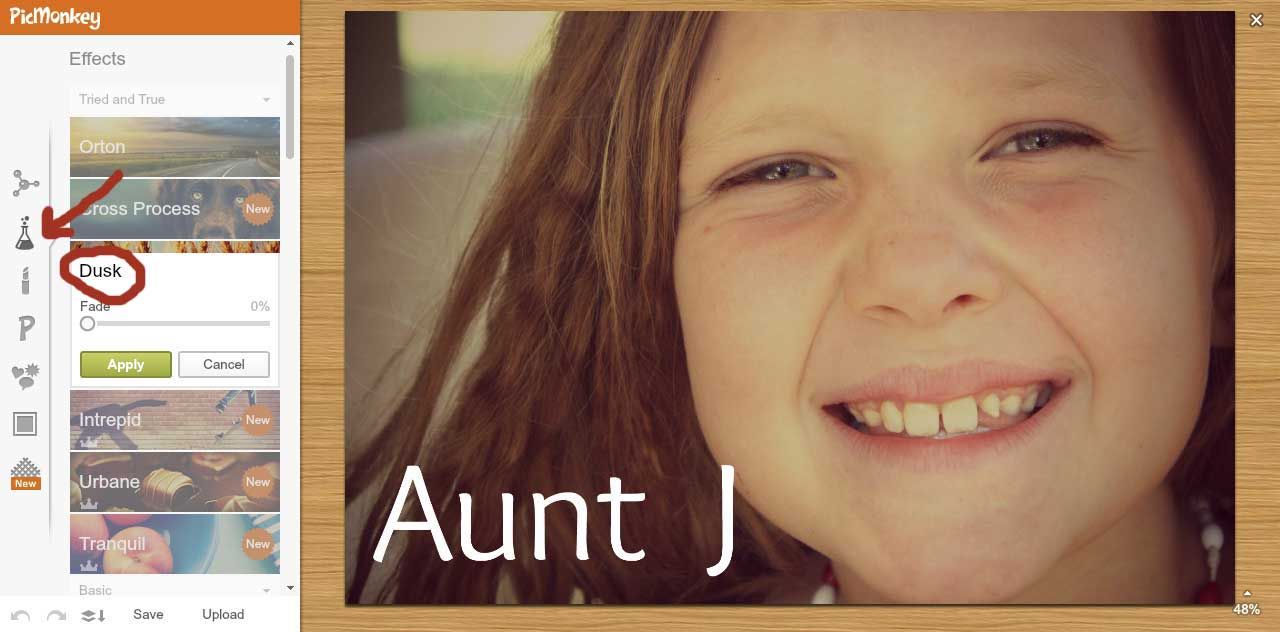
Effects
Now you can add fun colors or effects to your photos. Click the test tube icon to bring up the effects options. Then just click the different effect options to see what they do! I ended up really liking one called "dusk" because it gave a nice faded effect. When you find the one you like, just hit "apply". In the end I didn't go with an effect because I thought Baby B would like it most if it looked just like nice, colorful, real life.
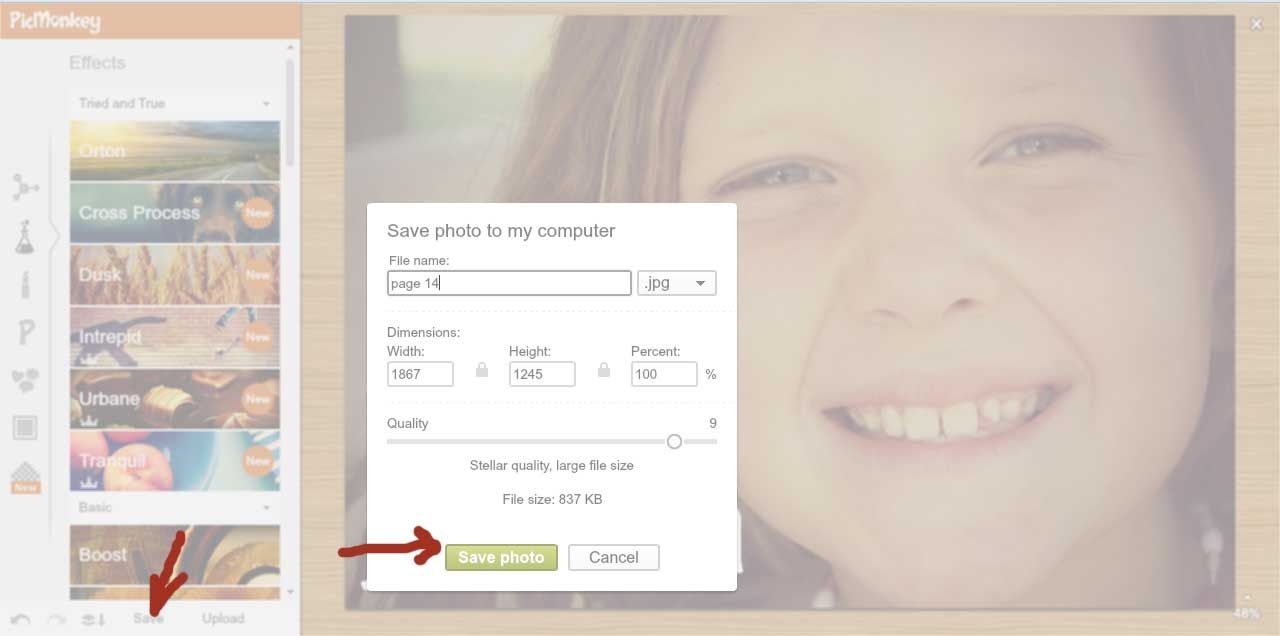
Save
Don't forget to save your photo when you are done! The program only edits one picture at a time so you have to discard one to start another. So make sure you save your edited picture before uploading another!
My album is made for 5x7 photos, but I went with 4x6 photos instead once I found out how much 5x7s cost. I couldn't find a set of 5x7s for less than $25, which just didn't make sense for a book for a little boy to drag around. Especially when I knew I could get 4x6s for much less. And when I centered them on the page, it looked like the nice white edges were intentional. That was a freebie. :)

I always order prints from the Walgreens photo site. If you get many pictures printed, I definitely recommend signing up for their email list! They send an email every week about what sales and offers they have that week. 4x6 prints are on sale as low as $0.10 each at least once a month. I VERY rarely pay more than that for prints, only if I need something printed right away and can't wait for the next sale. They also have free offers occasionally and we've gotten free 8x10 prints, 25 free 4x6 prints (what?!), and even a few free photo books (had to pay shipping on those). Another bonus for me is that Walgreens is just a few blocks away so Baby B and I can walk over to pick up prints. :) I got these prints for just $0.11 each, and spent under $3.00 total including tax!
This was probably my favorite gift I made for Baby B, just because it is so personal. And he already likes to touch all the faces. :) The hardest part of this was collecting all the pictures I needed, but once I had that done it was easy, albeit a little time consuming to choose an editing style and edit the photos. And I am sooooo happy with how it turned out!
Have you ever made any kind of photo book for a little someone?
Thanks so much for this idea! I just made one for baby C for his Birthday next week. I love that it is cute but also educational for baby :)
ReplyDeleteYay! I'm glad you made one! How did it turn out?
DeleteHappy Birthday to Baby C! :)