

Today we're making my only other bag-type project - a super easy clutch!

This is seriously easy to make and pretty affordable to boot. It's great for quick runs to the store or can tuck inside a bigger bag to help you stay organized. The finished size is about 9" wide x 7" tall.

Here's what you need to make one:
- 1/2 yard main body fabric (duck cloth or similar weight, I used a floral duck cloth)
- 1/2 yard accent body fabric (duck cloth or similar weight, I used brown corduroy)
- 1/2 yard lining fabric (I used quilting cotton)
- 1/2 yard medium weight fusible interfacing
- 3/4" button (I bought a fabric covered button kit to make a matching button)
- 3" of elastic cord
- thread

Start by prewashing and drying your fabrics. Then cut out the following pieces:
1 main panel - 10 x 13"
1 accent panel - 10 x 8"
1 lining - 10 x 20"
1 interfacing - 10 x 20"

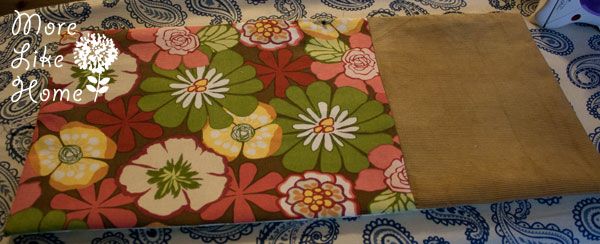
Lay the accent panel face down on top of the main panel and line up one of the 10" edges. Pin it.

Sew along that edge with a 1/2" seam allowance. Then press the seam open.

Pin the elastic cord to the other 10" end of the main panel. Center it with 5" on either side and keep both ends lined up with the edge of the fabric.

Apply the interfacing to the back side of the lining fabric. Then lay the fabric face down on top of the exterior piece you just assembled (with right sides together) and pin it.

Stitch around the outside edge with a 1/2" seam allowance, leaving a 4" opening on one side for turning. (I back stitched a couple times over the elastic cord to make sure it will hold)

Clip the corners.

Flip the clutch right side out through the opening you left in the side. Push out the corners nice and square. Tuck the fabric in at the opening and pin the opening closed. Iron the whole thing to get the edges nice and crisp.
Topstitch around the edge of the clutch with a 1/4" seam allowance.

Fold the clutch right where the main panel meets the accent panel like this:

Pin it in place. This will make the pocket of your clutch. Stitch right along the top stitching lines on the sides of the accent panel (my brown fabric), back stitching at each end.

Fold the flap down to see where the elastic sits and mark where you want your button to go (leave a little slack so you can still button the clutch when it is full! If I make another one I might put on a couple buttons so there are more options for buckling it). Sew the button in place with a needle & thread. I used a button cover kit to cover a button with matching pink quilting cotton, but you can buy any pre-made button too! Just maybe make a bigger elastic loop if you use a bigger button.

And you're done! Unless you want to make a couple more... and who would blame you?
This is the perfect size to hold my wallet, phone and keys. So I can toss it in the diaper bag and still find whatever I need easily! And if I wasn't dragging diapers everywhere I go it would be nice to grab for quick runs to the store or a night out. You could add a wrist strap to make it even more convenient!

Here's about what it would cost to make one:
$3.50 - main panel duck cloth 30% off (mine was a leftover in my scrap bin)
$3.50 - accent duck cloth 30% off (mine was left over from other projects)
$1.90 - lining fabric from the clearance bin
$1.00 - interfacing on sale
$0.80 - elastic 50% off
$2.00 - button kit 50% off
$0.00 - thread left over from other projects
Total: $10.70
But you can get at least two clutches out of everything except the interfacing, so it comes out to under $7.00 per clutch. And I even used left over scraps for the main and accent panels so my cost per clutch was more like $3.50.

You could fill it with gifts to make a first aid kit or spa kit, or put in a couple diapers and wipes and so she can toss it in her purse for outings.

What would you do with a handy little clutch?

No comments:
Post a Comment