

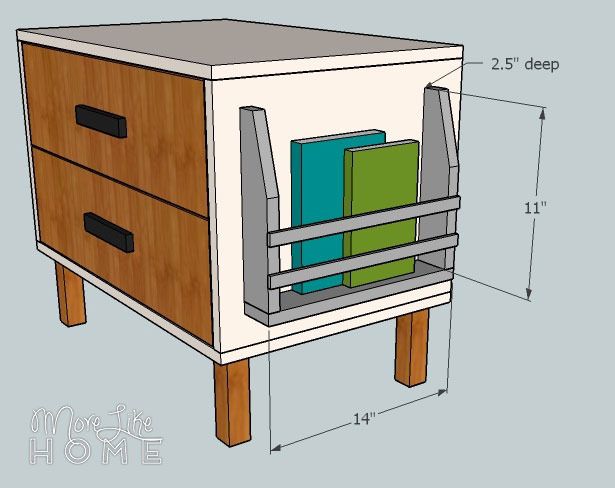
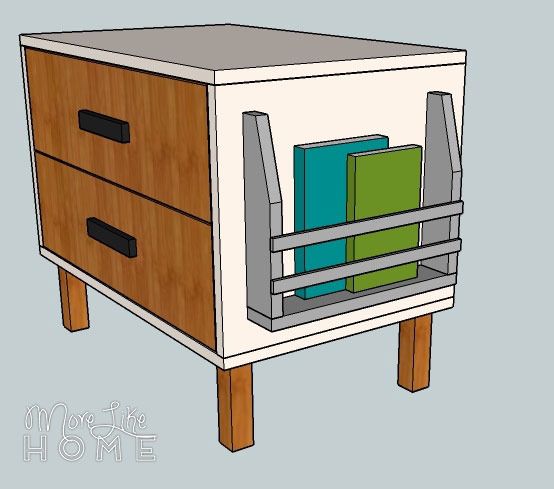
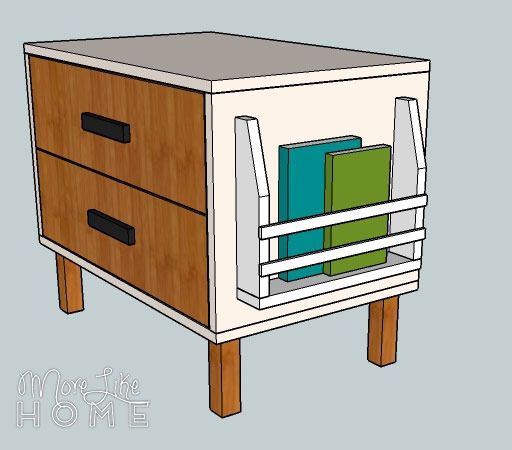
Welcome back! We're ready for day eleven of our nightstand series and hope you are too! You can see the entire series here. Today's project is a really simple (and cheap!) add-on that can be used with several of our nightstands to add storage and keep your tabletop clutter-free. It's an easy built-in book rack! Our book rack is sized to fit the mini-dresser nightstand we shared yesterday, but seriously guys, it is so easy to adjust the size to fit whatever nightstand you are building, or even to add on to a nightstand you already have!

Shopping List:
1 - 1x3 @ 4'
1 - narrow decorative molding, about 3/4" tall (roughly this size, any style you like)
wood filler
wood glue
1 1/4" screws (depending on the thickness of your dresser you may need a few longer screws to install the finished book rack)
Kreg Jig with 1 1/4" pocket screws (optional)
finishing nails (optional)
Remember to always double check your measurements before you cut. Use 1 1/4" screws unless otherwise indicated. Pre-drill your holes and countersink your screws. Always use glue before you screw the boards together (you don't have to let it dry first), I'm not going to list it in every step, but it's a good idea to glue everything! Be safe, and have fun!
Cut List:
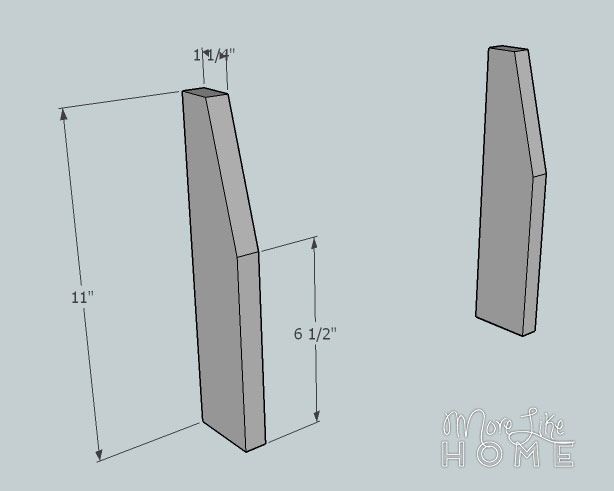
(A) 2 - 1x3 @ 11" (sides)
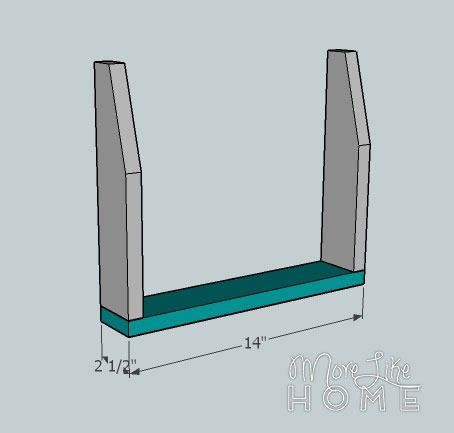
(B) 1 - 1x3 @ 14" (bottom)
(C) 2 - trim @ 14" (front)
Start by cutting the top edge of sides (A) at an angle. The easiest way to do this is to measure in 1 1/2" from one corner and make a mark, then 4 1/2" down from the same corner and make another mark. Draw a line connecting the two marks and cut along the line. The angled edges make it easier to get books in and out, plus it reduces the chances of jamming a finger if you reach in without looking.
Attach the bottom board (B) across the bottom edges of the two sides. Use a Kreg Jig or drill up through the bottom into the side boards. Don't forget the glue, and keep all the edges flush. Using a wider board for the sides and bottom will give you a thicker book rack to hold more books, but will also mean your nightstand will be pushed farther from your bed.
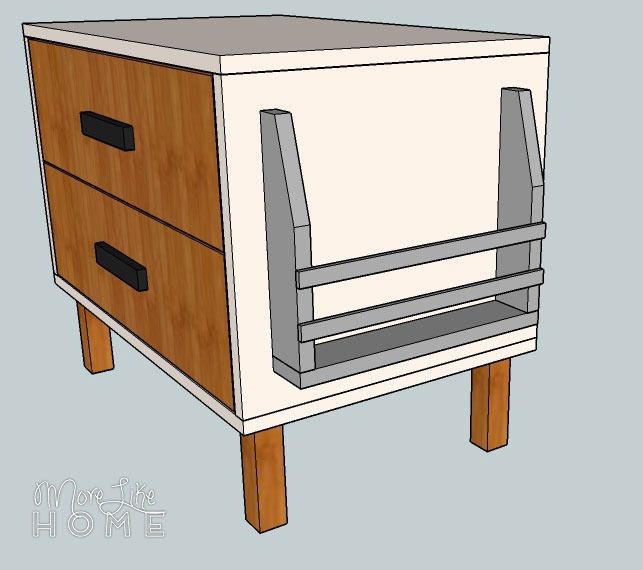
Attach the two trim pieces (C) across the front of the book rack with finishing nails and glue. Just put them wherever looks good, but make sure they are level.

To attach the book rack to your nightstand (you may want to paint or stain it first) remove the drawers from the dresser and drill out through the side of the dresser into the sides and bottom of the book rack.
The building is done, now you just have to finish it! If you didn't already, of course. Start by filling any holes with wood filler. Let it dry, then sand it smooth (repeat if necessary). Then sand the whole table smooth for a great finished product (a good sanding can be the difference between looking professional vs. crafty). Finish it off with any paint or stain and polyurethane you like. You could go with a different color or shade to make it stand out.
Or make it the same color as the dresser so it blends in. Fill it up with books and read away!
And as an added bonus project today, this is a nightstand lighting idea I spotted on pinterest a couple weeks ago. A simple corded light wrapped around a bracket from Ikea. Remember, you nightstand lighting doesn't have to be limited to a tabletop lamp! Something like this adds interest and saves that valuable tabletop space for more important things... like hot chocolate and the three books you're trying to read right now.
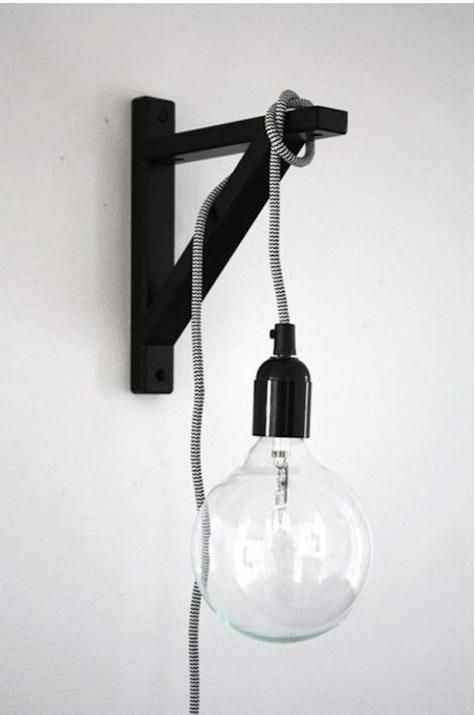
image via pinterest
Stay tuned - we have 17 more days of DIY nightstands coming up!

No comments:
Post a Comment