
I like the idea of saving energy, but even more than that I've been looking for ways to spend more of our day outside, which made this a perfect solution for us. I bring the boys out to play, hang up some laundry, and wait for it to dry. Ok, we might not stay out the whole time it dries, but it's a great motivator to get us out the door!
It easily holds a full load of laundry, plus a load of cloth diapers at the same time. If you have a big "laundry day" during the week it may be worth adding a third pole to double your hanging space.
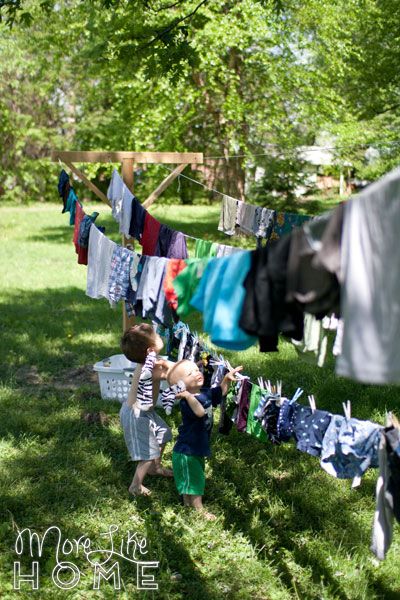
But we haven't even got to my favorite part yet. See it down there?
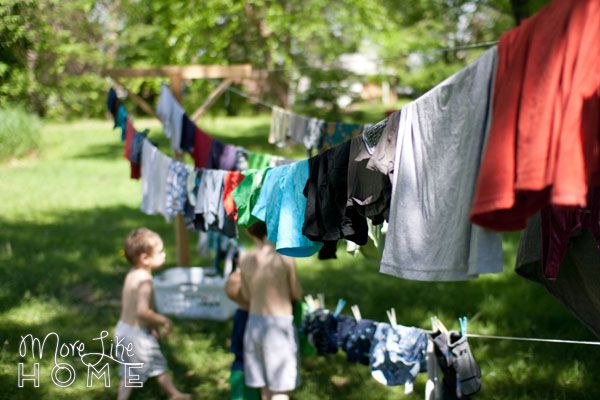
We snuck in a little child-height line so the boys can help hang the laundry. Or in the little one's case, trail behind removing every single clothes pin followed by an enthusiastic "uh-oh!"

Turns out these boys love a clothespin.

Here's all you need to build your own:
- 3 - 8' long 4x4 boards (We used Douglas Fir boards because they are naturally more weather resistant than pine, without the chemicals of a pressure treated board. The only place we found these locally was Home Depot. You can read more about outdoor wood choices here.)
- 1 - 8' long 2x4 board (we did regular pine for this one, so they may need replaced sooner than the poles. You could swap in another 4x4 if you want Douglas Fir.)
- 3 - 50' long nylon clotheslines (or just 2 if you aren't doing a child line)
- a large eye-hook and carabiner to make the child line moveable (you could do this for all the lines if you are in a small space!)
- 5/8" Speedbor drill bit
- 3" and 4" wood screws
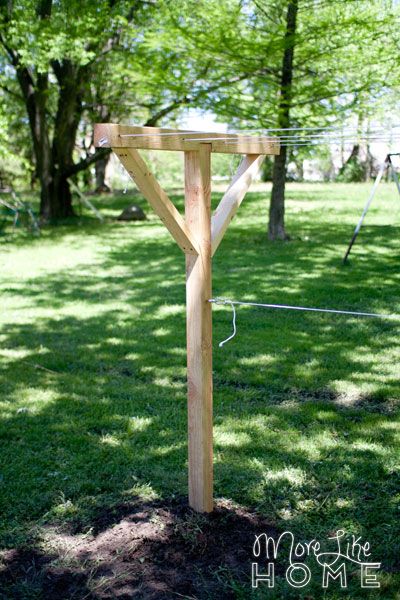
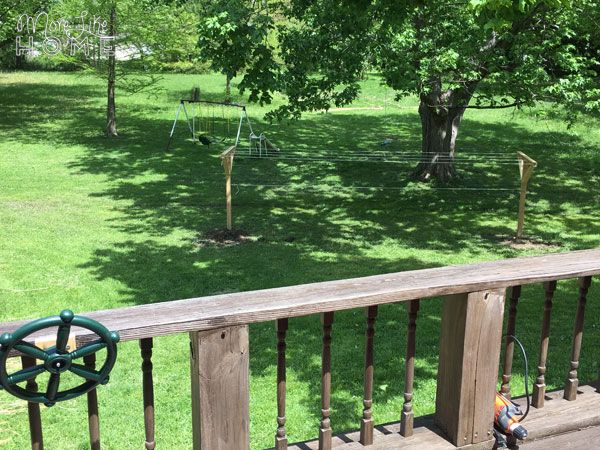
Each pole ends up 4' wide 8' tall (but once it's in the ground only 5.5 - 6' tall). We spaced ours 20 feet apart, but you have some leeway there too. Spacing them farther apart will give you more space to hang (you'll need longer clotheslines!) but the lines will sag more if you don't get them tight enough.
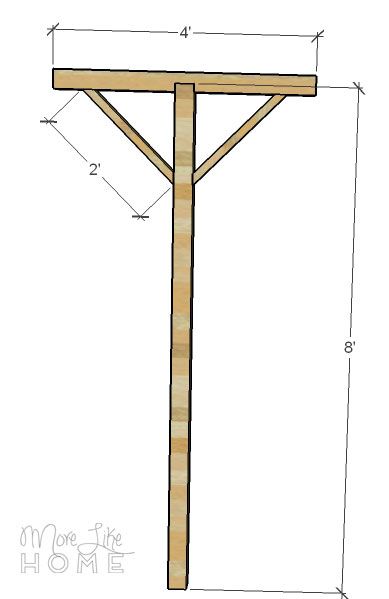
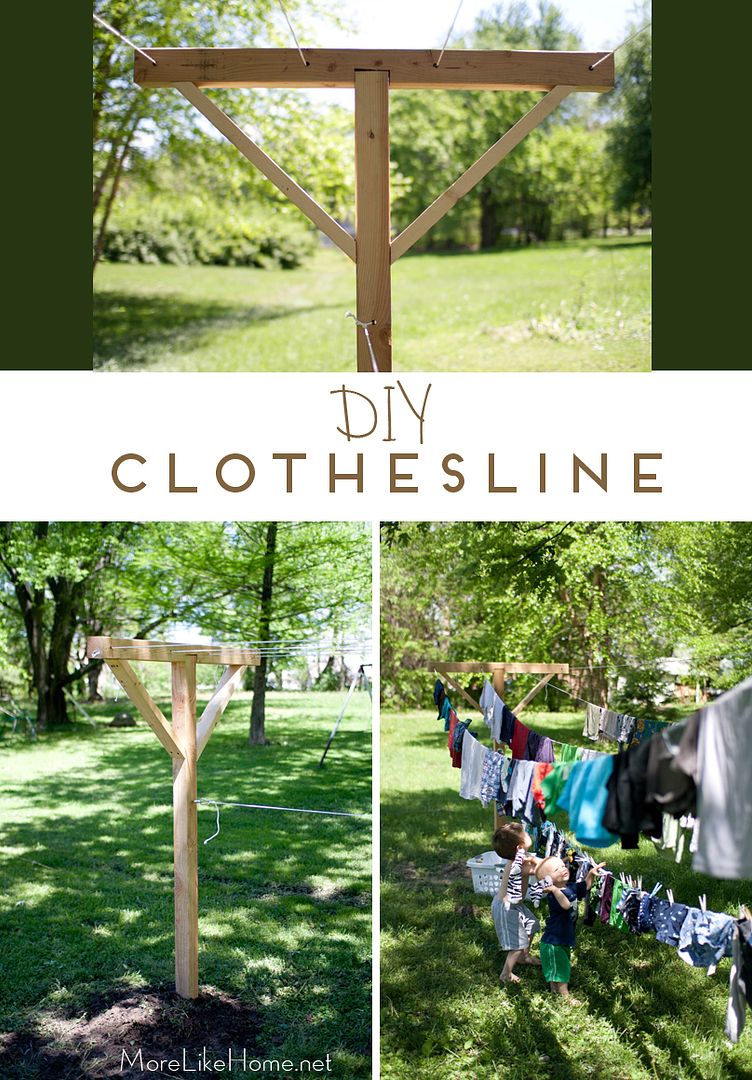
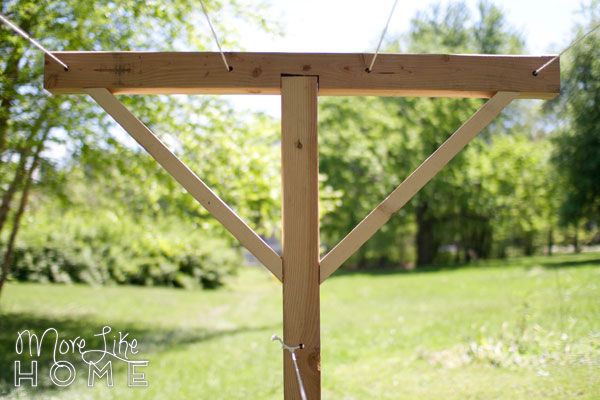
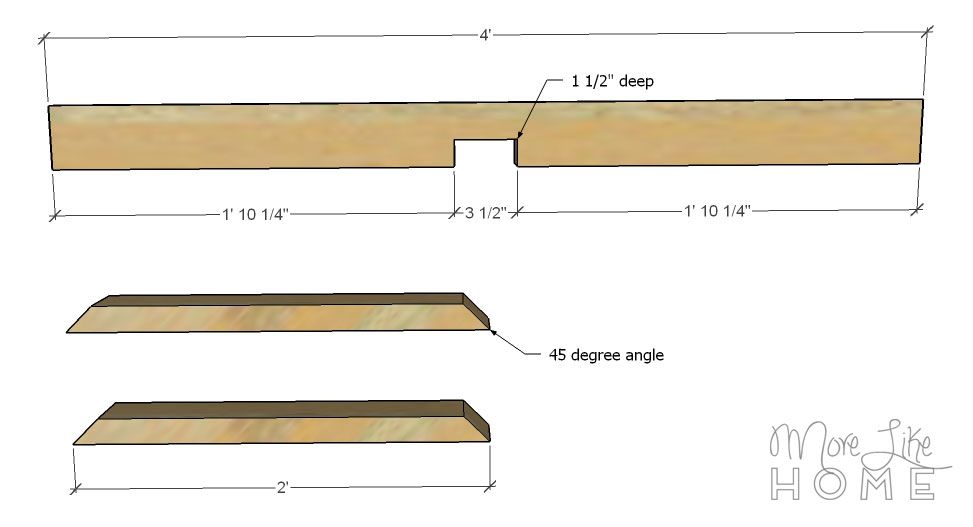
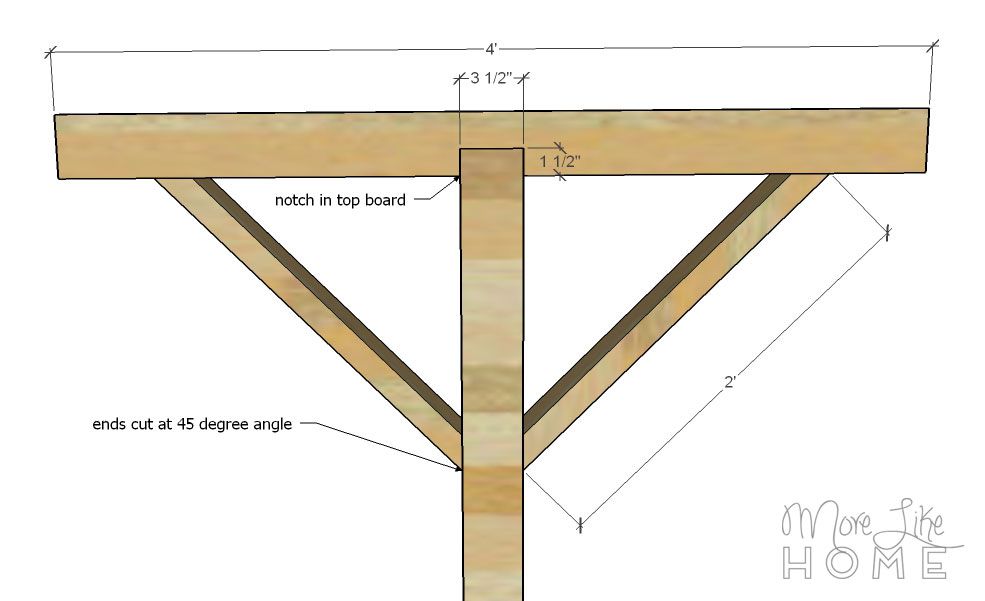
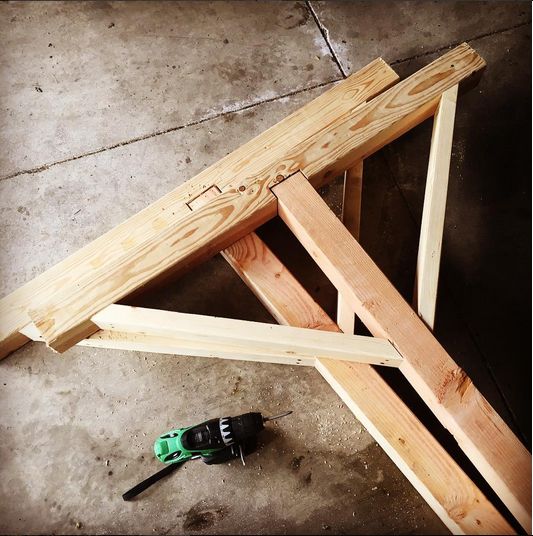
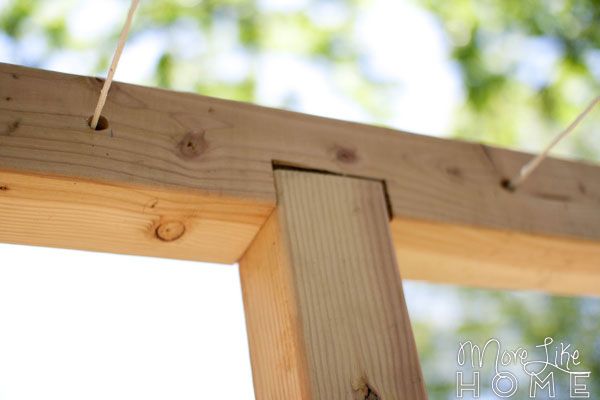
For the top board, cut one 4x4 in half to make two 4' long boards. Cut a notch in the bottom of each top board that is 3.5" wide and 1.5" deep. Make sure it's centered with 22.25" on each side.
Cut the 2x4 into four 2' long sections and cut the ends of each section at a 45 degree angle (perpendicular, not parallel).
Fit the notch of the top board onto the end of an 8' long 4x4 and attach it with 4" screws. Predrill holes and countersink the screws.
Attach a 2x4 on either side by drilling through the ends into the 4x4s with 3" screws.
At this point the poles sat in my garage for probably two weeks. As is my custom.
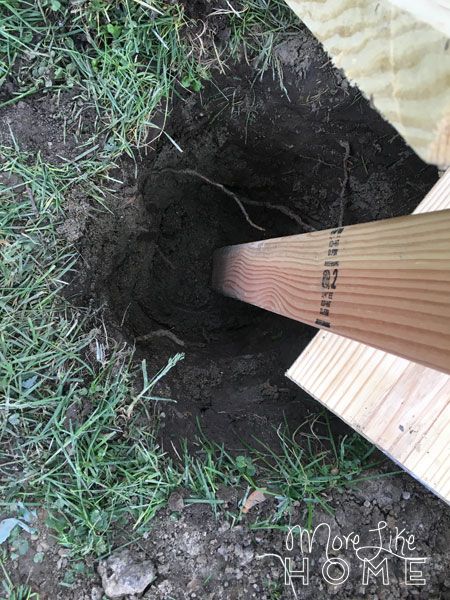
We dug holes about 2.5 feet deep and set the poles in. We used some scrap lumber to hold the poles level (make sure you level front-to-back and side-to-side), then poured concrete into the hole. We really wanted to anchor these babies since the holes aren't super deep. I used an old 5-gallon bucket and a hoe to mix half the bag of concrete mix with water (I tried the whole bag at first and I couldn't mix all the way to the bottom. Much less move the bucket.).
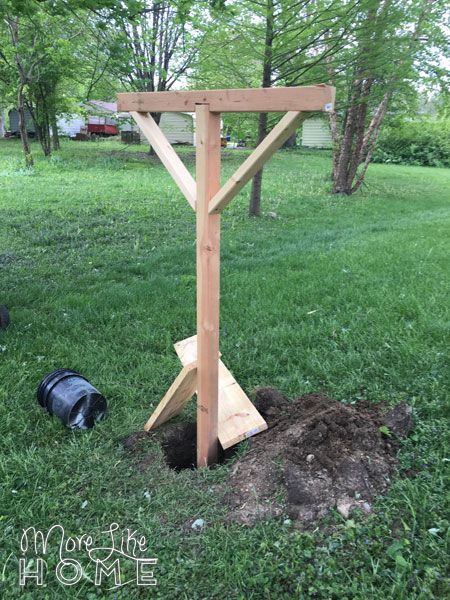
We started with one bag of concrete divided between the two holes, and it was barely a little puddle at the bottom. One it dried the poles were still pretty wiggly. So we picked up two more bags and gave each pole its own. So much better. These babies didn't move an inch after that.
After the concrete dried we filled the hole with dirt and piled the extra up around the base of the pole.
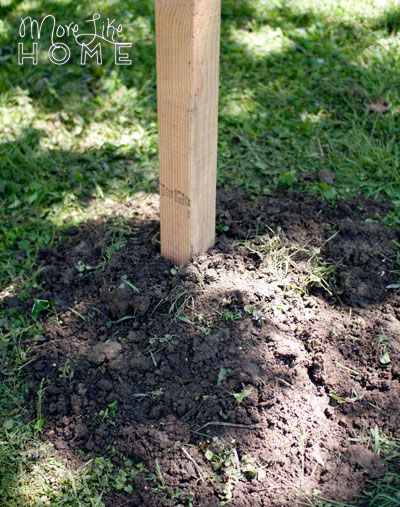
We took advantage of those dirt piles and planted a bunch of seed the boys got in their Easter baskets from Gramma. Morning glories, snapdragons, and a perennial mix. Hopefully they pop up soon!

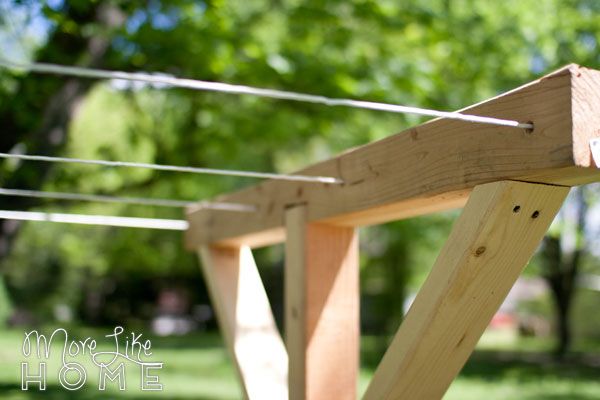
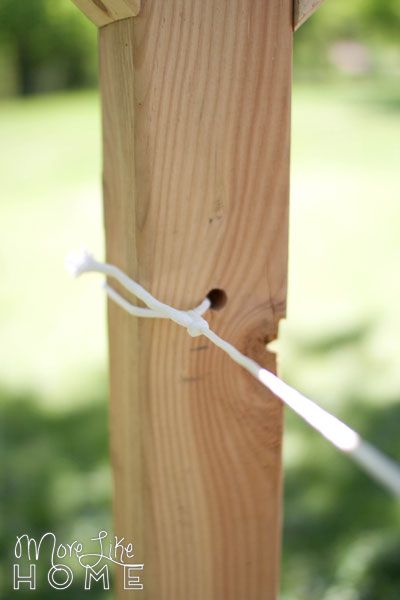
Once the poles were steady, we drilled holes for the clothes lines. The right drill bit made all the difference in the world to get through these thick boards. We tried several of our bits with no success, then ran to the store and bought a 5/8" Speedbor bit (which is a very fitting name, it powered through in seconds).
I wanted four lines so we spaced the holes just under 1' apart.

We used two 50' nylon clotheslines (they were under $4 each). We ran one through the far left holes, then back through the next set of holes and tied the ends together. Then did the same thing on the right side.

We also put it a shorter kid-height line so the boys can help with laundry (it was their idea!). We drilled a hole in one pole about 3' off the ground (I had the boys stand with their arms up to see how high to put it) and tied a piece of clothesline through the hole.
We wanted this line to be moveable so we wouldn't.... clothesline ourselves... when we mow. #nailedit
So at the other end we tied the clothesline to a carabiner and put a large eye-hook in the that pole. When it's time to mow we just unclip the line and drape it up over the pole.

I had a long debate about where to put the poles, and thank goodness the voice of reason (a.k.a. husband) convinced me to stop overthinking it and put them close to the deck.
So far the boys have wanted to help every time. We'll see if that lasts.
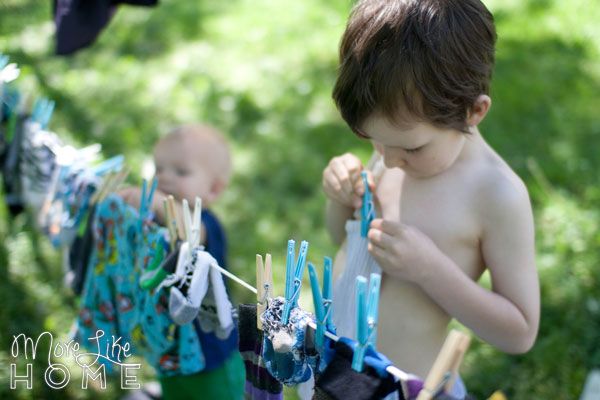
They also enjoy trying to throw things onto the top lines when the bottom one is full. I expect that one will last.
At first the lines were sagging pretty low (see below). After a couple uses they stretched out quite a bit and we were able to retie them with the new slack. Now they've been holding great with much less sag.

I'd love you hear your favorite tips for spending more time outside!
No comments:
Post a Comment