Pages
Saturday, December 24
Merry Christmas 2016
Friday, December 16
Christmas Eve Box 2016
Every year since becoming parents we've had a box to open Christmas Eve after we finish off our Advent calendar. It's filled with new jammies to wear that night, a movie, hot cocoa, popcorn, and homemade marshmallows (read all about it here). Our snacks will be the same as last year, but this year's pajamas are a bear set by Carters! We don't do matching sets every year, but these were so cute I thought all the boys would like them. Turns out it's a little tricky to find them in all three sizes (especially since I just wanted to order from one store) and it took a little hunting. But I'd already made up my mind and I can be stubborn like that. My hunt turned to random google searching until somehow, at last, I found them all in stock at Macy's. Whew. And my bonus prize was that it was actually the lowest price I had seen for them - $12 for two pairs!
Our movie this year is Finding Dory. Being the big Finding Nemo fans that we are, this was a pretty easy choice. I might have watched it already. Shhh.
That's the stuff we've done every year. But this year we're making it a little more fun... because it starts with a treasure hunt! We'll open a box with the movie, snacks, and baby's pajamas, but the big boys will each have a clue instead! I'm planning to have them follow a series of three or four clues and maps around the house to find a package with their jammies... and a mini lego set for them to do during the movie. Because we're all about those bricks, 'bout those bricks (and those riddles).
Do you do a Christmas Eve box? What do you put in it?
I'll be honest, I'm a little worried about putting a toy in this box - like it will somehow ruin our kids or something - but Husband would probably say I'm over thinking it. And I know he'd be right. But I am what I am. :)
^ I end every text I sent with a happy face. It's spilling over into blogging. I can't stop won't stop.
It's not even that late but I think this is a ramble. Merry Christmas and peace out, peeps.
Wednesday, December 14
Custom Book Ornament DIY
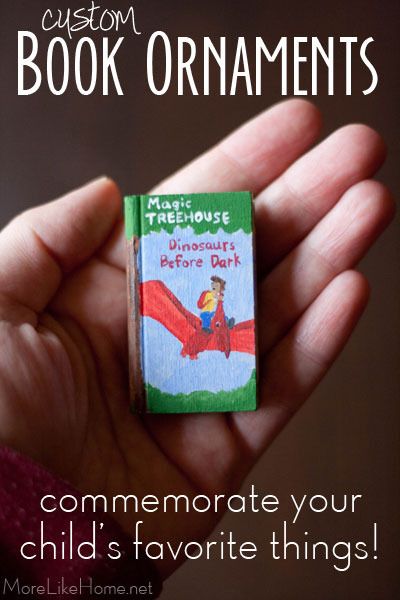
It started when he was a baby and he loved - LOVED - a little green block. So for his first Christmas we found a duplicate block, made an ornament, and named it his Christmas Pickle. It was super easy (you can see how we made it here) and we decided it needed to be a yearly tradition! Since then we've added things like wooden train tracks and a stuffed monkey. Last Christmas he was really into Magic Treehouse books and we were reading through them as fast as we could get our hands on them, so a book ornament seemed like the perfect thing!
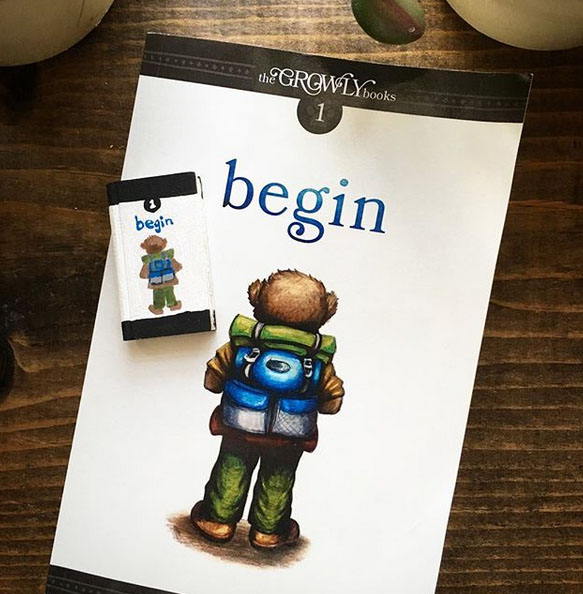
I added the first Growly book in 2018. We loved this series!
Wednesday, October 26
Toon Link Costume Tutorial
What you need:
- green knit fabric (I had some sitting in my closet from a yard sale, the amount you need will depend on the size of the child... or adult)
- a shirt to use as a size template
- Small amount of dark green knit fabric for the hat trim (I cut up an old tshirt)
- brown fabric for the belt (I used leftover corduroy, but just about anything would work)
- yellow felt for the belt buckle
- thread
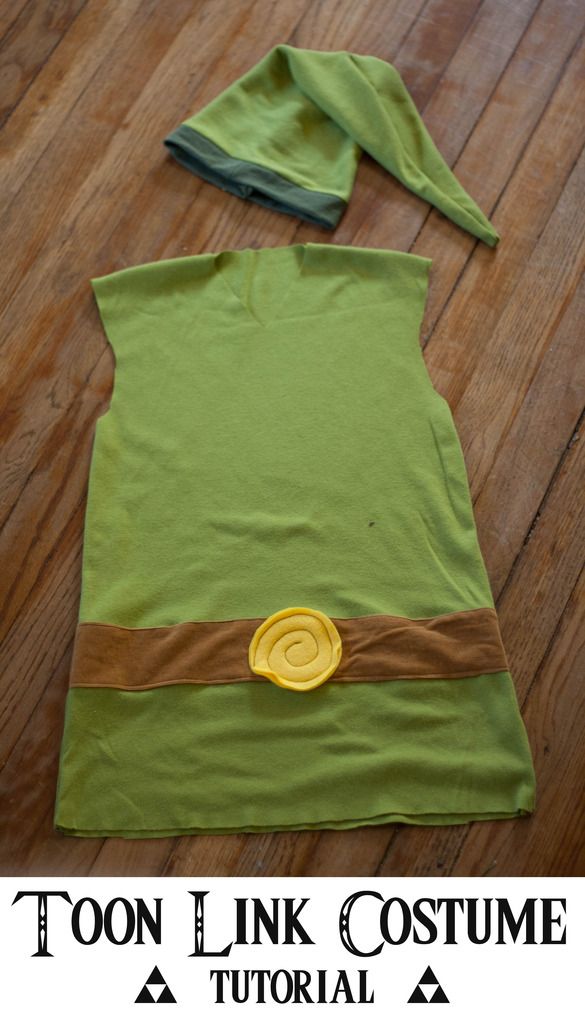
To make the top, I folded a piece of light green knit fabric in half and laid one of his shirts on top to to use as a pattern. I cut the costume a couple inches larger so he'll be able to use it for a few years, and cut the sleeves to be a tank-style top. I also cut it several inches longer than his t-shirt (since Toon Link's shirt is a little long) but... it might be a little too long. Oops. I'd go a little shorter than this next time. Use the first piece as a pattern to cut a second piece for the back.
On the front piece I cut the neck down a little more into a V. Then I laid a belt section on top of each shirt piece and lined them up at the same height. Cut strips of brown about 3" wide. If it's a woven fabric (I made the belt with left over brown corduroy), fold the raw edges under about 1/4" and press them to keep them in place. If it's a knit, you don't need to worry about fraying and can just set it in place without folding the edges under.
Monday, October 17
Bringing in Fall (on a Budget!)
The first thing you need to know is Aldi has their pumpkins on sale for $2 this week. $2. For these huge pumpkins. We bought several for inside and outside. We flanked the fireplace and put one pumpkin up in the boys' room.
Up on the mantle we have the DIY "thankful" banner we made for free (tutorial here) and added a few mini pumpkins (a bag of four was $3 at Aldi. They also have the best prices on apple cider. Aldi is the place to be for Fall!).
I was also looking for some kind of greenery that would be a little more fall-ish for the mantle. I was hoping to find cotton stems (like these) but I couldn't find them locally and I didn't want to pay shipping. But I thought leafy branches would be a little more fall-ish than the houseplant I had up there. These were on sale for 50% off at Hobby Lobby and were only $2.50 each. They also had red & orange fall leaf stems if that's more your speed.
Monday, October 10
Fujifilm INSTAX Instant Photo Christmas Ornaments & Visa Gift Card GIVEAWAY!
We have a new favorite Christmas tradition, and I am so excited to share it with you guys today! We're making instant-photo keepsake ornaments that are as easy as they are fun. And the best part? We'll be adding photos year after year while we watch these boys grow!
But first: let's rewind for a second. Last year we shared some really sweet Christmas photos we took of the boys. We turned our favorites into wood-transfer artwork to bring out with our Christmas decorations every year, and toyed with the idea of doing repeat photos every year to watch the boys grow. But realistically, storing that many big wooden photos long term seemed a little daunting. Enter the Fujifilm INSTAX 70 camera. And just like that, the game changed.
The Fujifilm INSTAX 70 is an instant photo camera. But unlike your mom's instant camera, this guy offers a handful of great features like multiple photo settings, selfie mode, and a tripod socket. It's lightweight design makes it easy to carry everywhere, which means you can snap the perfect pic on the go - anytime, anywhere. Plus it's easy to use, and easy on the eyes. Just look at that handsome little fella!
All we needed to make these sweet little keepsake ornaments was a handful of INSTAX photos, some twine, and a few mini clothespins (like these).
We loved last year's photo setup so much we decided to recreate it this year (with our newest addition included). We pulled out the cozy coupe and tractor, wrapped a couple empty boxes for gift props, grabbed our 3' Christmas tree, and bribed everyone with cookies. In no time we had a little stack of beautiful pics that are sure to become some of our favorite family heirlooms.
For each ornament we used a mini clothes pint and small piece of twine tied in a loop.
Clip the INSTAX photo on the twin and BOOM. Instant ornament. Tradition year #1 = complete.
We ended up with so. many. good shots. My original plan was to add one photo to the tree every year... but I could not pick a favorite. I narrowed it down to six (and even that was hard. I think I deserve a cookie, too). But this is one of the things I loved about using the INSTAX camera for this project - six favorite pictures aren't a big deal. They take almost no space to store, and every one of them will look beautiful on the tree without taking up too much Tree Estate (get it? Real Estate of Christmas trees? Yes?).
Besides our favorite set-up, we also did individual picture of the boys plus a classic by-the-tree shot.
These are so fast and easy to make. Just clip the photo on a loop and hang it on the tree. All the photos we took are a fun addition to mix in with our traditional ornaments...
...but they also look great flying solo on a separate INSTAX instant photo tree. I'm especially loving this look, but I think we're going to need a bigger tree!
If you have extra photos you want to display (these kids are just too cute. It's like photo-gold over here.) try running an extra piece of twine across the mantle for an instant photo garland!
I love that we'll be able to look back year after year to see how our boys have grown and our family has changed. And every Christmas as we decorate the tree we can revisit the sweet little smiles and squishy cheeks that are 2016. I'm already excited to pull these out and add to them next year!
Now hold on to your hats, friends: it's time for a GIVEAWAY! The folks behind the Fujifilm INSTAX 70 are hosting a $100 Visa gift card giveaway just for More Like Home readers! To enter, all you have to do is leave a blog comment answering this question:
Make sure you leave an email address so I can let you know if you win! Good Luck!
Entry Instructions:
No duplicate comments.
You may receive (2) total entries by selecting from the following entry methods:
1. Leave a comment in response to the sweepstakes prompt on this post
2. Tweet (public message) about this promotion; including exactly the following unique term in your tweet message: “#SweepstakesEntry”; and leave the URL to that tweet in a comment on this post
3. Blog about this promotion, including a disclosure that you are receiving a sweepstakes entry in exchange for writing the blog post, and leave the URL to that post in a comment on this post
4. For those with no Twitter or blog, read the official rules to learn about an alternate form of entry.
This giveaway is open to US Residents age 18 or older (or nineteen (19) years of age or older in Alabama and Nebraska). Winners will be selected via random draw, and will be notified by e-mail. The notification email will come directly from BlogHer via the sweeps@blogher email address. You will have 2 business days to respond; otherwise a new winner will be selected.
The Official Rules are available here.
This sweepstakes runs from 10/8/16 to 12/10/16
Be sure to visit the Fujifilm 2H on BlogHer.com where you can read other bloggers’ posts!
Tuesday, October 4
Fall "Thankful" Banner DIY
Enter Phase 1 Fall Decorating: The Mantle.
This is the first time I've ever had a mantle to decorate, and I have no idea what I'm doing. So I though a simple, cheap little banner might be a good starting point. A good no-commitment starting point. If I hated it, I could trash it guilt-free. This one was so easy to make, and cost almost nothing because I used things I already have. It's so quick you could make one up for every season and holiday in no time!
I'm planning to add a few pumpkins and fall foliage as soon as I get my hands on some, but for now this is a happy little start. And a good reminder that we really do have so much to be thankful for.
Here's how it went down. I started with three sheets of 12x12 brown cardstock. It's actually the backside of some patterned paper left over from another project. I was able to get three pennants out of each sheet (they're 6" wide and 7" long). Then I used a pencil and a ruler to hand-draw the letters on each banner. I just made sure they started and stopped at the same heights so they would be even, and went for it. I did the letters for THANKFUL but you could do anything you like! AUTUMN, GATHER, GRATEFUL, or HARVEST would also be cute for fall.
Wednesday, September 28
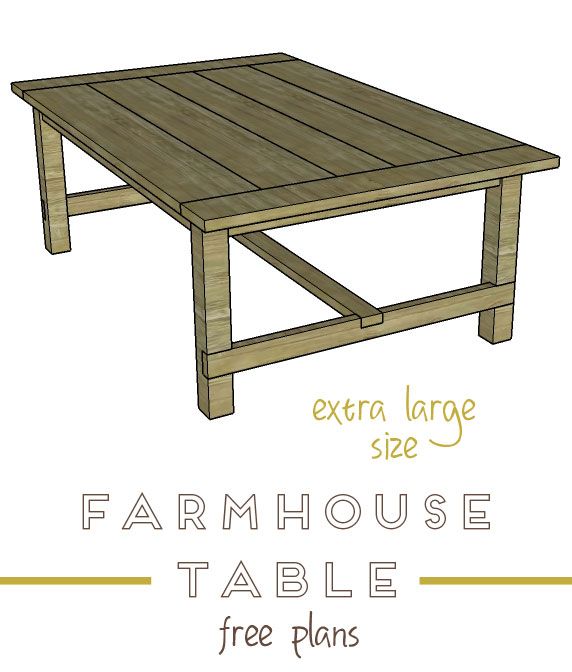
Farmhouse Dining Table - the BIG one
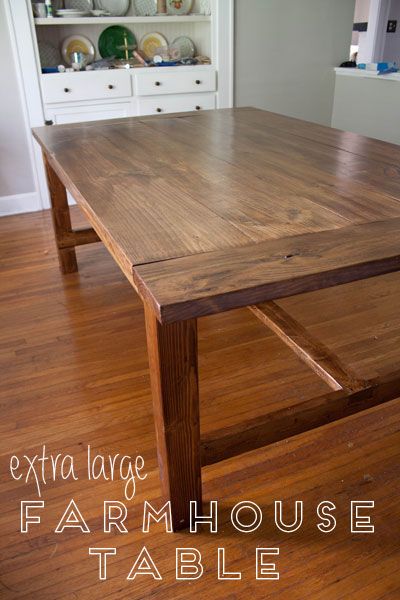
You guys have probably heard us mention that this is the first time in almost nine years of marriage that we've ever had a dining room. And on top of that, it's a huge dining room. So we found ourselves faced with a brand new opportunity - we got to build a table! A slightly mammoth sized table. We wanted a table with room to grow and plenty of space for guests, plus one that would make sense in the space. (see the matching bench plans here, and another fun farmhouse table plan here)
Our house is actually an old farmhouse that used to manage the 60 acres around us. The original owners left a packet of information and old photos with a pretty complete history of the house & property that's been passed down from owner-to-owner. It's pretty cool and we plan to add a few photos of our own! With our home's history, a traditional farmhouse style table seemed like a fitting choice.
After looking at dozens of table designs, I finally narrowed down my favorite features: I like it simple, I like stretchers, and I like wide planks for the top.
And that landed us with this design (based on Ana White's farmhouse table with the size modified). It's a little longer than most tables (7') but it's also over 4' wide, giving us plenty of space to fit serving dishes or spread out with art supplies.
Saturday, September 24
Organizing the Van with Kids (and our "backup box")
We have a Grand Caravan with "Stoe and Go" storage, which is wonderful for storing these extra items without sacrificing our trunk space! But if you have a car, you could totally do the same thing in a trunk with a couple small totes. Before we had our van we actually kept this first box on the floor below one our rear-facing carseats for easy access. This box was the first thing we ever packed for emergencies. We call it our "back-up box." Which is basically all the kids stuffs we might need in a emergency.
We use a small 5 gallon tote from Walmart, I think it was $6 but that was a few years ago. It's enough space to pack for our three kids without taking up too much room in the van.
What's in it? Let's take a look. A few books, a soft ball, and a few small toys (cars or animals) in a baggie. We always have something to entertain them if we end up having a long wait! We also kept a baby sling in the box while it was in our car, but now it's usually stuffed right in the Stow and Go so we can get it out quickly.
Tuesday, September 20
DIY Mini Van Stroller... Holster?
That's when I stumbled across a picture of a stroller hanging on the back of a van seat using an old belt. BOOM. That was the answer to our woes. Except without the belt, which actually seemed difficult to get the stroller into. So I bought a few simple supplies from the fabric store and got to work making our very own stroller holster. It only took about 20 minutes to make both straps! Here's what you need to make your own:
- four 1" D-rings
- two 1" slide buckles
- two 1" swivel snaphooks (or any similar kind of clip)
- three yards of 1" webbing you can probably get by with two yards, but I bought three to be safe (they had several colors, but I chose with white because I didn't want to risk color bleeding onto the seat upholstery)
Start by cutting your webbing in half to make two straps. Thread the end of one strap through a D-ring so about 1.5" is through. Fold under the raw edge, then sew along the folded edge to lock in the D-ring. I did a second line of stitching to reinforce it:
Friday, September 16
Friendly Family Farmhouse Table - Friday Hack
I'm calling it the Friendly Family table because the finish of the original is so bright and friendly. It's the kind of table that will welcome your guests in and invite them to stay. It's relaxed and comfortable so everyone can feel right at home. And what a perfect table for the center of life with your own family! The big work surface is great for homework, crafts, coloring, and of course dinner together. But enough chit chat, let's get started!
Read all the steps before beginning (and the notes on making the tabletop). Work on a level surface. Cut your pieces as you go, double checking measurements before each cut. Pre-drill and countersink your holes, and always use glue. Use necessary safety precautions, and don't forget to have fun!
Shopping List:
1 - 4x4 @ 8'
1 - 2x6 @ 6'
2 - 2x4 @ 10'
4 - 2x10 @ 6'
wood glue
2.5" Kreg Jig screws and a Kreg Jig (OR regular 4.5" wood screws)
2.5" wood screws
4 - 3" large bolts with washers (optional)
Finished dimensions are 60" long x 37" wide x 30" tall. You can easily adjust the length by changing the length of your table top & stretcher.
Wednesday, September 14
Organizing the Boys' Room + Free Printable Toy Labels!
Next to the bed we keep our basket of board books (these are books the baby can pull out, too!) and a box of wooden blocks (also baby-friendly).

