
But first, a disclaimer. I've had a couple people ask me how I find time to do these things because, through the wonder of the internet, projects pop up all done and written about in a nice a concise way. But this is not how they go down. This is a perfect example. A timeline of my curtain hanging endeavor:
Early November: buy curtain rods from Ikea
Late November: buy drop cloths from Lowe's
December: trip over curtain rods laying in front of windows waiting to be put up
Early January: put up curtain rods
Mid January: wash drop cloths
End of January: cut up drop cloths to make curtains
February: hem sides of curtains
End of February: hang curtains, hem curtains, rehang curtains, DONE.
And there you have it. The cold hard truth of a "simple" curtain hanging project 4 months in the making. For the record, I could have easily had this all done in one day... if I didn't have a baby and take naps and play on pinterest and work on other projects and change diapers and watch the entire series of Psych on Netflix and whatever else occupies my days. And just so you know - this is typical. Most of my projects are drawn out over months because I work on them so sporadically (um, kitchen progress? anyone?....no). And I generally have about 5 things going on at any given time so I hop around from one to the other instead of finishing what I start. It's just how I am. And it's okay.
So, if you are up to month 3 of hanging your curtains, here's the run down of how we do it. This is just the way that has been easiest for us (and there is a fair amount of "close enough" and very little exactness) so if you know a better way please let me know! :) Also keep in mind this method works if you are planning to hem your curtains later. If you curtains are a fixed length (or too short to hang high) you need to measure up from the floor instead to get the right height.
1. Measure and mark how far out from the frame you want your rod to reach. I like to have mine out far enough that when I open the curtains they don't block any of the window or glorious sunlight. The curtains in this room are narrow & lightweight so they bunch up pretty tightly (plus I'll be using ring clips to hang them. curtains that use a pocket won't bunch up as compact.) so I marked out 8" from the frame, which was more than enough. (My living room curtains are much bulkier so I went out a whole foot in there. If in doubt, go ahead and scrunch the top of your curtain together to get an idea of how much space you'll need.)

2. Measure down from the ceiling how far you want the rod to sit. (I like to hang them well above the window to make the room seem taller and the window seem bigger. I usually hang them about 2" down, but this time I decided to give 4" a try to see how I like it with a little more breathing room above. I like it.)

Repeat steps 1 & 2 for the other side of the window. If you have a center bracket, find the center of the window and mark 4" down from the ceiling as well. Check these marks with a level and adjust as necessary.

3. Line your brackets up with your measurements and mark the screw holes.

4. Drill holes where you marked. I like to use anchors when I hang curtains. You can find packs of anchors and screws at Lowe's or Walmart or just about anywhere. It will say on the package what size of drill bit to use.


5. Use the screws to put up the brackets.

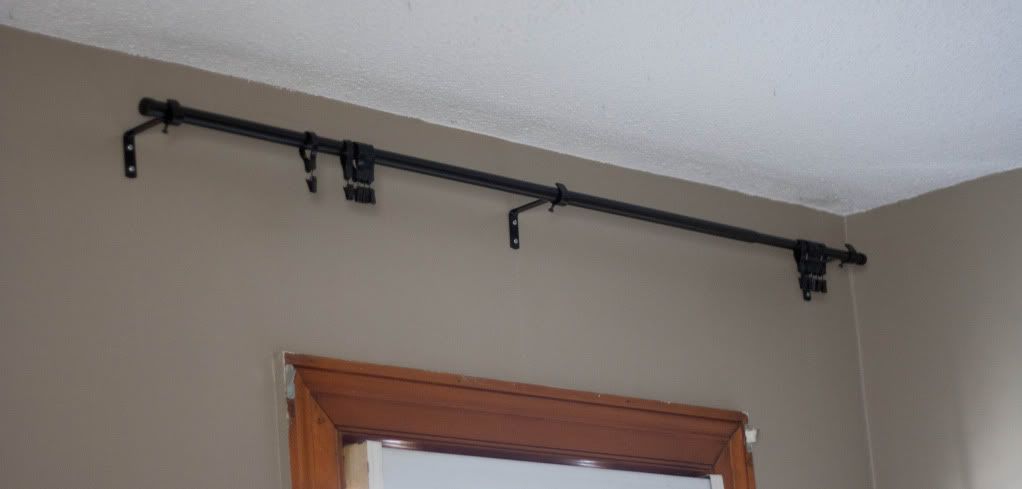
6. Set the rod in the brackets, and you're done!

Unless you have more windows. Then you have to do it all over again. ;) If you're using ring clips, you can go ahead and put those on too.
Now go take a nap to recover from your strenuous endeavors.

Later this week we'll look at making and hemming curtains, so stay tuned! We're well on our way to getting our windows dressed up. Do you have any rooms that could use a curtain facelift?
No comments:
Post a Comment