Friday, May 31

The Master Bath

Did you know we have a half bath upstairs? I don't know if I've even mentioned it since we first moved in. It's been one of our more neglected room thus far, but we've finally spruced it up a bit. This is how it looked when we first toured the house. Lots of pink and lots of brown!


Until now the only worked we had done in there was painting the paneling and trim when we painted the rest of the master suite (read about that here). And I don't even have a picture of that! Oops. But last weekend with a few babysitters in town I managed to throw things together in there.


It's an improvement, right?  I just re-painted the shelves, hung a picture and added some baskets and glass jars. Just those little things made a pretty big difference! The picture is from Ikea - they don't have it anymore, but they have these in the same style. We had it in the bathroom at our last house.


The shelves were also from Ikea, and also discontinued. Boo. I love the metal brackets. We had these painted black in our old kitchen and when we first moved in I put one up in the bathroom to make up for the lack of counter space. As you can probably imagine, the black looked horrible with the pale yellow walls and pink sink. I brought up the second shelf to add more storage and repainted both with leftover white paint from our kitchen cabinets.


I also brought in a large basket to hold toilet paper, a small mason jar to hold toothbrushes (instead of laying them on the counter, which we've done for over 2 years), and brought in the glass jars of q-tips and cotton balls that had been living on my nightstand right outside the bathroom door. And just like that it's starting to look presentable. And I did it all with things that were sitting around the house! Does that mean I have too many things? Maybe. And while I'm still not crazy about a pink sink, I feel like it kind of fits in now. Or at least doesn't totally stand out like a glaring beacon of the 50's. Maybe it's starting to grow on me.

So that's our little bathroom update. How do you feel about pink sinks? Kind of cool? Or is that just wishful thinking? 

I'll leave you with this pic of our copy cat, reading a bedtime story with aunt Beffy. He picked out hop on pop, got out his "tiny pop pop pop" book to read along, and crossed his little legs. I don't know what we would do without him!

Tuesday, May 28

Branching Out

I feel like my style is always changing. And I think it's for the better. So lately I've been trying to branch out. For some reason I tend to decorate with things that are simple with clean lines but I've realized that the spaces I really enjoy, that really catch my eye, are the ones that have a more eclectic style. Spaces that feel more comfortable and relaxed. And that's what I want.

One of my favorite inspirations for this is InSideways. I love how she can make a space feel so inviting and unique, but still totally liveable. And it still looks clean and simple - I think because she chooses pieces carefully and doesn't let anything extra in. I think one thing I don't like about my home right now is that it just feels so full. We need some clean, open spaces, so I need to learn to get rid of the extras so the important things have room to shine. I'm working on that.

I'm sure it will be a long process to get to wherever I'm headed. :) But for now I'm taking some baby steps toward a more eclectic style, starting with collecting some unique pieces (and ditching the cookie-cutter pieces they replace). So I bought this end table the other day.


It was $12. And it's something I never would have bought a year ago. When I saw it I just thought, "wow, that's different." So I decided to give it a shot. It's probably going to need some love. The finish is pretty rough.


But it has these great details on the top that I'll probably lose if I try to strip it down and refinish it.


My normal response for something like this would be to sand it down and paint it but, remember, I'm trying to branch out! And isn't the aged look half the charm? I don't know! I never let anything stay that way! So I'm just going to leave it alone until I decide.


In the mean time, B has realized this table is just his size and the perfect place to eat lunch. So it's still sitting by our dining table to be he own special little spot.


Just watch out for watermelon thieves!


He still loves his aunt Beffy, in spite of her thievery.


What would you do with this? Leave it? Sand it down and refinish it? Paint it?

Wednesday, May 22

A Room for a Bigger Boy

Well guys, I think it's time to admit it. B is growing up. For reals. He's gone from our tiny, squishy newborn to running jumping blur of a toddler. Not to mention the fact he'll be a big brother before we know it! So we think it's time to upgrade to a big boy room. We converted his crib to a toddler bed a couple months ago (and want to get him out of it before Baby #2 moves in and needs the crib) and has done great with it, so he should be good to go with a twin bed! And of course switching out the bed leads to a whole room makeover. :) But let's start at the beginning.


We started with a nice light, neutral nursery since B's gender was a surprise (baby #2 will be a surprise as well). We've done a few small things since then to try to make things more BOY, but I think the time has come for a new, more boyish, more grown-up kind of color scheme. Something that can work for him now, but that he can also grow into. I came across this color card at Lowe's and I think it might be just the thing for a big boy room. And no, there is nothing wrong with using pre-selected color cards. :)


We don't necessarily want to repaint the walls since the neutrals are so easy to work with (and we might be adding a baby girl at some point!) so we're planning to use the colors on things like furniture, curtains and bedding. So there will definitely be some furniture painting involved, and maybe a little sewing too...


Moving up to a twin bed is going to affect the layout a bit too. Here's the current room:

Friday, May 17

Easy Breezy... ish

I don't know about you guys, but we're getting some beautiful spring weather around here. And after a winter of hunkering down indoors, it feels SO good to finally get out and tackle some things around the house! This past week we've been fortunate to have lots of family visiting - which means lots of help and free babysitting! We've been checking several things off our to-do list while we have the chance, including switching out a couple ceiling fans before the summer heat hits.

One we replaced was in the kitchen. This may be the only picture I have of the old one. I generally tried to crop it out. :) It had a 60's vibe and wasn't very functional for the kitchen. Two of the four lights didn't work so only half our kitchen was lit up at night!


Thanks to some help from my momma and my mister, things are looking much brighter now. And prettier to boot.


Thursday, May 9

Metal Basket Resuscitation

I love using wire baskets for storage. But they can be a little on the pricey side, so I've only bought new once (and I had a gift card. I'm cheap.). But I've collected a few nice, sturdy baskets for $1-2 each at yard sales over the past year or so. The only problem with these cheaper alternatives is that they all seem to have something in common... they are crazy rusty. So they haven't actually been very useful because I don't want them to ruin any of my stuff. And then I had the big "duh" moment a few weeks ago (why does it always take me a few years to get to the "duh?") and realized I could just paint them!


The one nice basket I have is an ORB finish and I wanted to match the finish with my rust buckets, so I pulled out my new favorite spray paint.


I started using a stiff brush to remove any loose rust (I'm not sure if it made a difference or not) and wiped it with a wet rag to remove any dust. Then I just gave it a few coats of paint until it was all covered. And don't forget to flip it over and do the bottom!


Then I just left them outside to cure for a few hours before bringing them back in and loading them up with fabric. I LOVE storing my fabric like this because it looks so pretty and I can always see what I have.


And I'm so happy with how the finish turned out. I was a little sad

Tuesday, May 7

Plaid Shoulder Bag - Giveaway #2!

** This giveaway is not closed - the winner is Beth T.! Keep an eye out for an email from me! **

Good news! I decided to throw in another giveaway for giveaway day week! Better late than never, right?


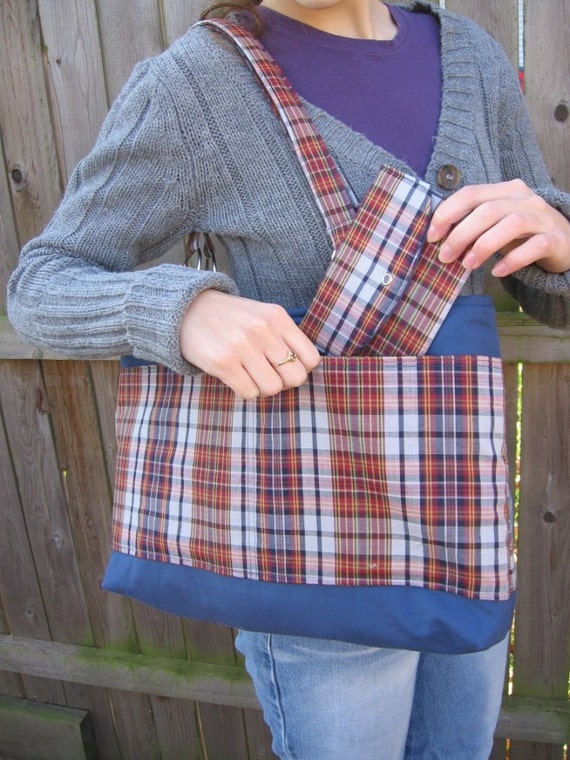
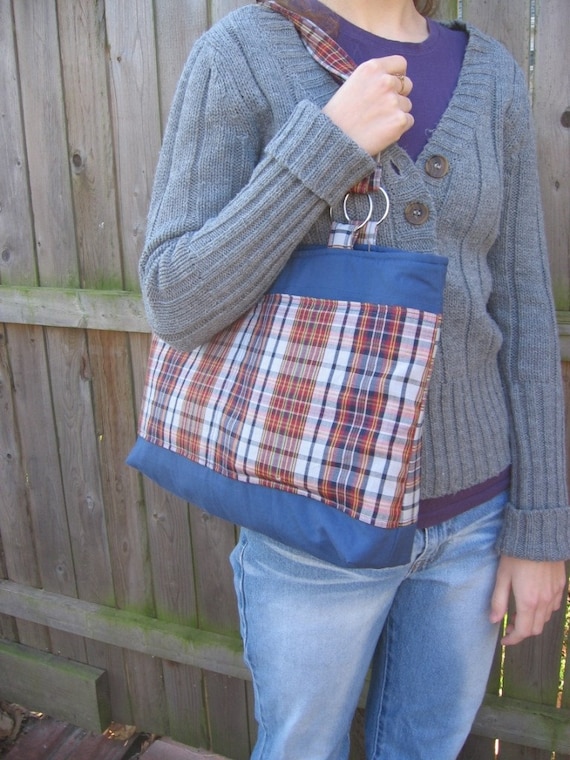
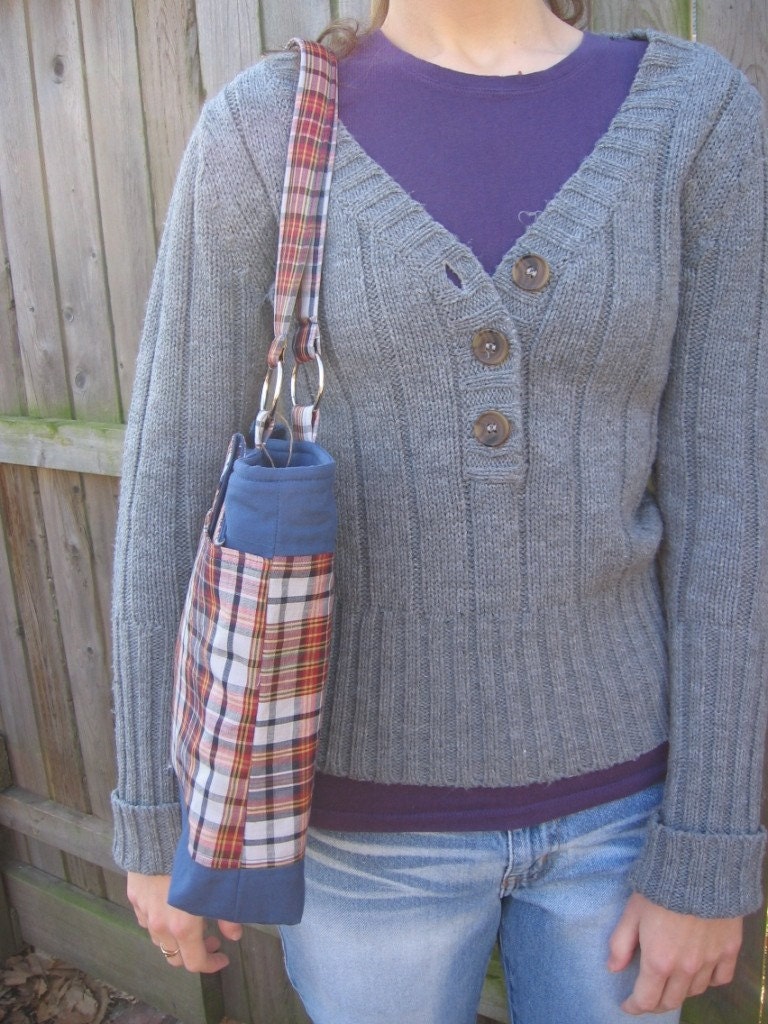
This time it's a handmade goodie of my favorite kind - a bag!!! Woot woot! For anyone who doesn't know, my sister and I have a little shop on Hyenacart called Twice is Nice where we sell some of our favorite things. Today I'm giving away a blue & red plaid shoulder bag (it's actually one of our discontinued styles, so this is your last chance to get your hands on one!).


This bag is perfect for everyday!


It has plenty of space for your daily necessities with enough extra room to throw in a book, magazine, snack for the kids, or whatever else you need to have at hand.


It has two exterior pockets and four interior pockets to keep your belongings organized and accessible, and includes a small wallet. The bag is fastened with a magnetic snap closure.


Check out our shop for more bags & purses, and be sure to visit the clearance section for a great bargain!

So, want to win this one? It's easy! Here are the details:

Monday, May 6

Big Little Felt Universe - It's Giveaway Day!

** This giveaway is now closed. The winner is Jess! Look out for an email from me! :) **

Guess what, friends? It's giveaway day again!


Let's join the fun, shall we? This week I'm giving away a copy of Big Little Felt Universe! It's full of patterns for making felt toys for your favorite littles.


I used the book to make the fire from the camping set for B's first birthday (you can get a peek at it here). The instructions were great and I love how it turned out... but I learned that I do not have the patience or commitment for hand sewing and I haven't touched the book since. So I figured I would pass it on to someone who would actually put it to good use!


You could make a grill set just in time for summer!


One of my favorite things about this book is that it has so many ideas for little boys!


How to Enter:

Wednesday, May 1

May the 4th be with you...

Star Wars day is Saturday! Let's celebrate with a fun little sewing project. If you're like me and not a big Star Wars buff (to be fair, I have actually watched all the movies... once) it's still a fun way to put a smile on a slightly nerdy husband's face. :) But when he came up to me and said "Star Wars day is coming up, you should make a Boba Fett!" I was all "Make a what-now?" Thanks to a little Google image searching, I got all my ducks in a row and ended up with this guy:


It's a little Boba Fett plushie pillow! It's made of felt (you can spring for the fancy wool stuff for a nicer pillow, but if you're like me a few $0.25 sheets from Hobby Lobby do the trick) and it's actually really fast and easy to make. I did the whole thing in under two hours with a potty training 2 year old on my lap the whole time. I'm not sure how that translates to no-one-on-my-lap time because I haven't done that in a very, very long time. :) Here's what you need to get started:
  • 2 sheets green felt (8.5" x 11")
  • 1 sheet red felt
  • 1 sheet black felt
  • 1 sheet yellow felt
  • coordinating threads
  • stuffing
  • Boba Fett pattern (print it here)

Step 1 = rally your helper. Which shouldn't be a problem since he can't resist an empty lap. And if that's not enough, scissors really seal the deal. He wouldn't leave for ice cream and ponies.


Now the real step 1 - print my Boba Fett Pattern and cut out the pattern pieces (the directions are included with the pattern, too). Trace the pattern pieces onto the felt. You can use a washable fabric marker, or if you've made it this far in life without owning one *ahem* you can get by with a sharpie. Just be sure to flip your pattern pieces over and trace the backside so no stray marks show up on your finished pillow.


Cut out the felt pieces.


Thank your helper. This must be his concentration face. Or possibly his "cheese!" face. They're pretty similar.


Once the pieces are cut out you can lay them out to make sure they look good and fancy. Nice.


Now we're ready to put it together. Start by laying down one green piece face up. Line up the black piece, face up, on top of it like this.
Subscribe