Thursday, November 27

Sew Georgia & Barr Prints {plus a black Friday sale!}

I've spent a good part of my life crafting with my sister. And through those years we've gone to many craft shows and shared a few Etsy stores. But we've put off one big change for a couple years after moving a few hours apart. And we finally had to do it. The logistics of getting orders together when we aren't together ourselves just didn't make sense, and so at long last... our Etsy store has become two. You can find me at Sew Georgia, and my sister at Barr Prints.

We both still love to craft and share a booth at craft shows whenever we can. But this has actually allowed us to each fine-tune our products and narrow our scope, resulting in better, more unique products. Wondering what we're up to? Let's take a quick shop tour, starting with my shop Sew Georgia.


So far my shop is all about moms & babies (though some of my bags would be great for anyone!) and is stocked full of handmade goodies. Most of my offerings so far are based on patterns I created for the blog! See something you love but don't have time to make it? Swing by my shop! Here are a few of my favorite listings:

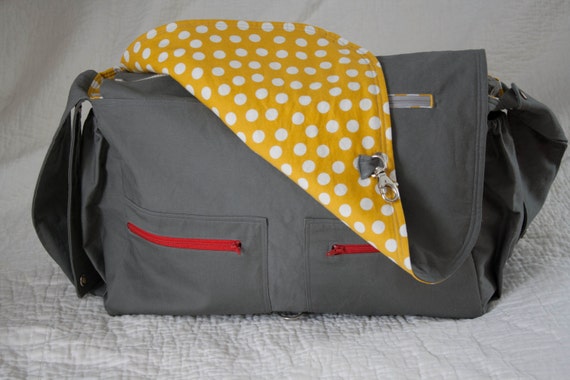
I offer stroller friendly diaper bags (tutorial here, buy one here) either premade or custom ordered. They convert from a messenger bag to a stroller bag with just a few snaps and are large enough to hold anything you may need! Twelve pockets keep you organized even on the go.

https://www.etsy.com/listing/206296442/black-friday-cyber-monday-stroller?ref=shop_home_feat_1

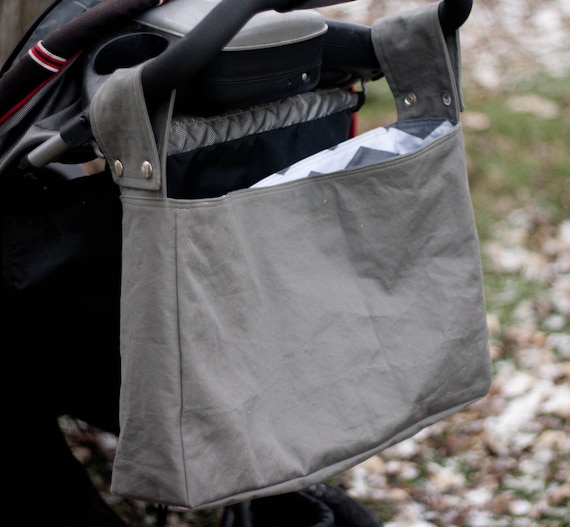
My Stroller Totes offer the convenience of a stroller bag in a simpler design and lower price. These are great if you already have a diaper bag you love. Just snap on a stroller tote and tuck your favorite bag inside. Or use it to stash jackets and snacks for the kids! I also take custom orders and can add water bottle pockets to the sides!

https://www.etsy.com/listing/212877413/black-friday-cyber-monday-stroller-tote?ref=shop_home_active_4

Also brand new to the shop is the Boston Diaper Bag (based on the pattern from Little One Yard Wonders). With its modern style and simple exterior, you'll want to carry it even when the kids are at home! It's the perfect size and boasts plenty of storage & pockets without being too bulky. It also makes a great overnight or weekender bag!

https://www.etsy.com/listing/211401609/black-friday-cyber-monday-boston-diaper?ref=shop_home_feat_3

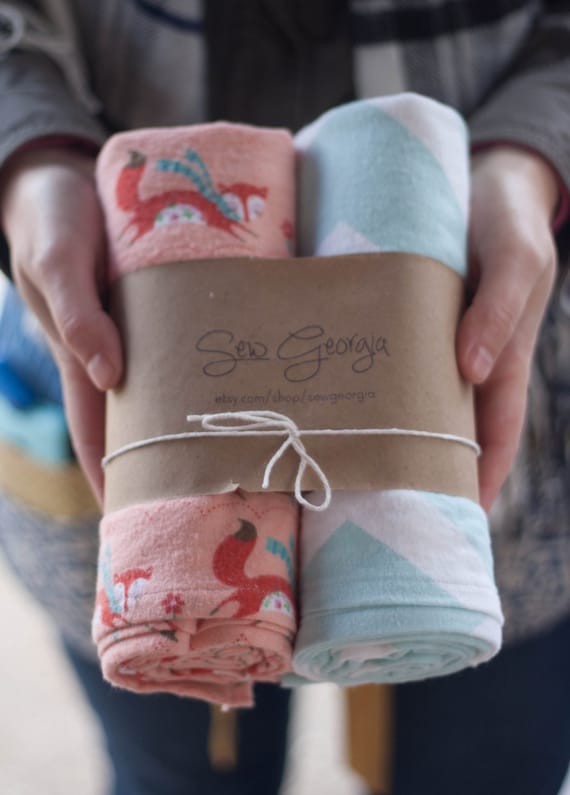
My oversize flannel receiving blankets make the perfect baby shower gift! They are snuggly soft and great for swaddling. They measure 33 x 39" to last through toddlerhood. 

https://www.etsy.com/shop/SewGeorgia?section_id=16398073&ref=shopsection_leftnav_8


And I offer much more! And this is the perfect time to try them out or do some Christmas shopping because I'm offering a Black Friday/Cyber Monday sale! November 28 - December 1 I'm offering 10% off any purchase with the code BLACK14, plus with any diaper bag purchase (or diaper bag custom order) I'll include a coordinating changing pad for FREE! All the details are posted in my shop.


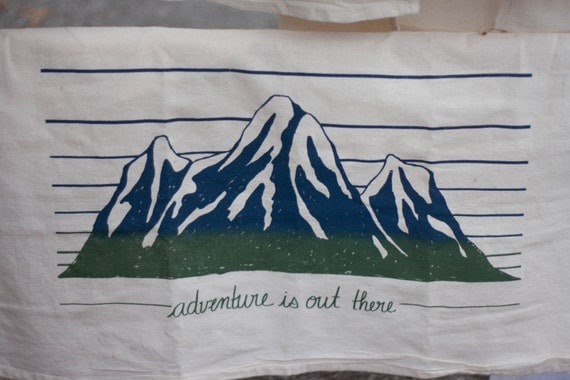
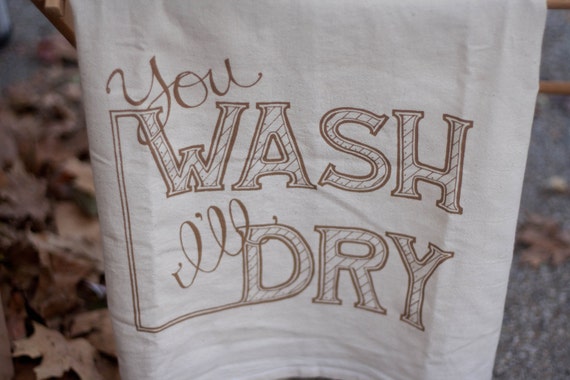
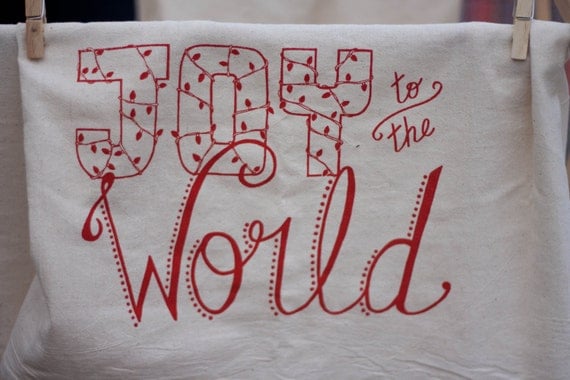
My sister has taken up silkscreen printing and you guys... she is really good at it. Her shop motto is that art should be for everyone and she's offers unique items at affordable prices! She hand draws and hand letters all of her designs, then transfers them to screens for printing. Her most popular items are her silkscreened cotton dish towels. They are 100% cotton and lint free, and are a perfect way to add a little style to your kitchen. Plus they are super absorbent! I use these towels 90% of the time and LOVE them. They make great Christmas gifts too!

https://www.etsy.com/shop/BarrPrints?section_id=15928672&ref=shopsection_leftnav_1

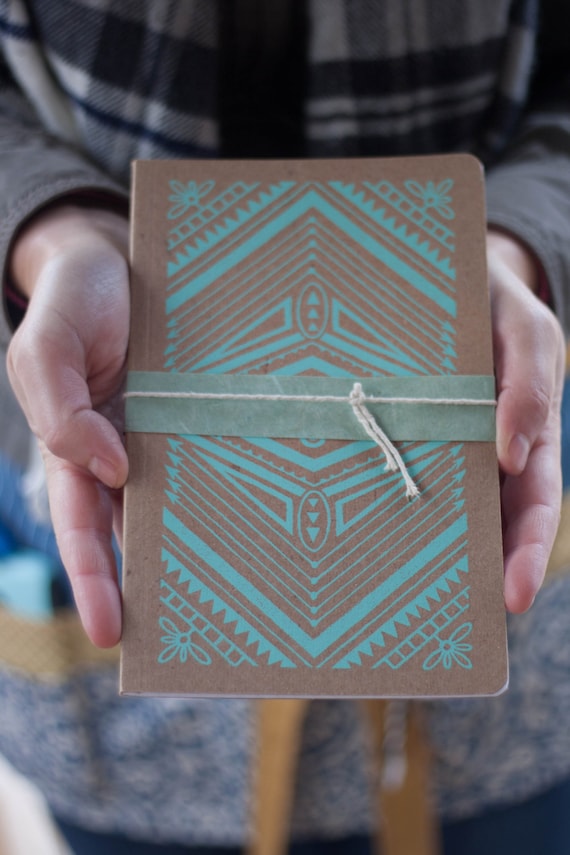
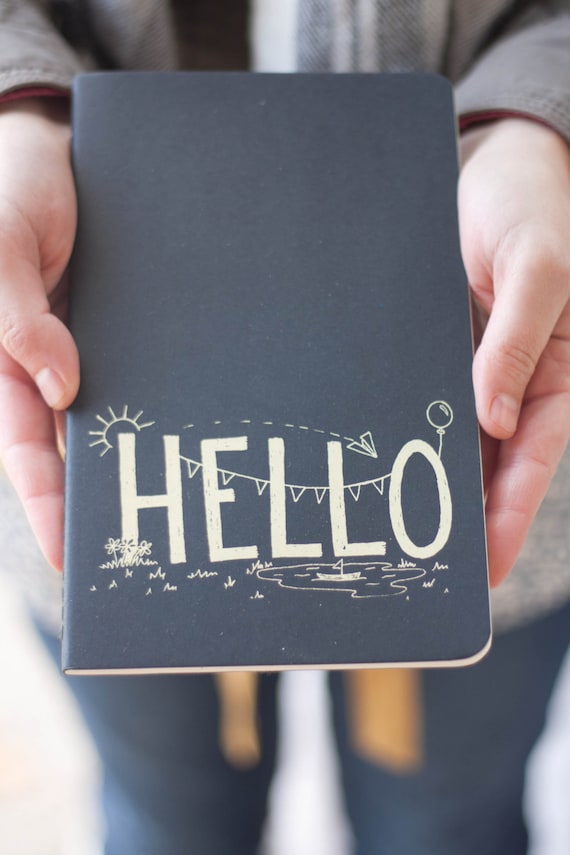
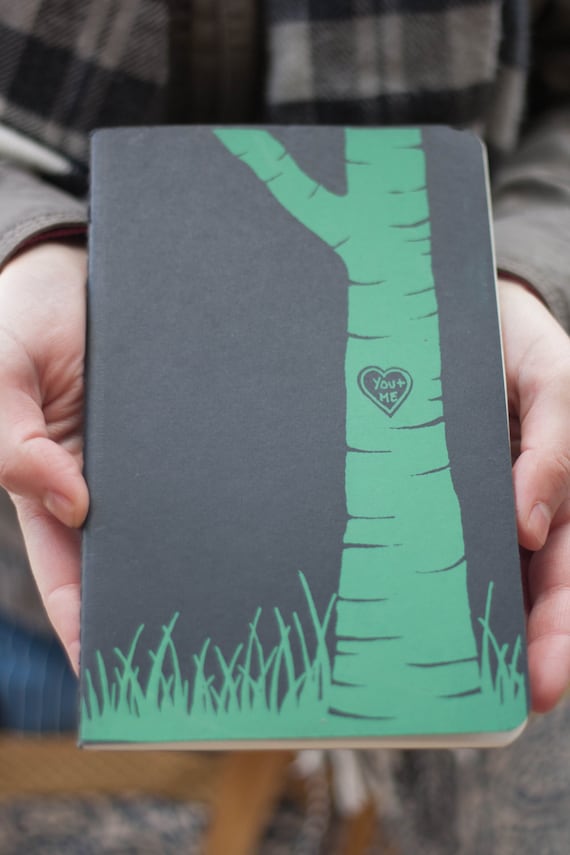
She also sells silkscreen printed notebooks, both paperback and moleskine. They make great stocking stuffers and are perfect for any list-makers like myself!

https://www.etsy.com/shop/BarrPrints?section_id=16167237&ref=shopsection_leftnav_2

She is offering a Christmas deal through the end of the year where you can buy any three towels for just $25! All the details are posted in her shop!

Happy Thanksgiving!

Wednesday, November 26

GOOT - natural remedy for colds and more!

We've fallen behind the last couple weeks because our fellas have been under the weather. But thankfully they are finally on the mend. It's never fun when kids are sick, and it's especially not fun trying to decide when it's time to get out the medicine or go to the doctor. Fortunately this time we were able to avoid both, and today I'm sharing one of our favorite home remedies that has helped us through many such sicknesses (you can see our list of remedies and make some immune-boosting elderberry syrup here).


GOOT is the name of the game. A simple mix of garlic, coconut oil, and olive oil, it boasts some great healing properties! Garlic is a natural antibiotic that doesn't carry the bad flora associated with conventional antibiotics and applying this salve to your skin allows the garlic to tranfer to your bloodstream. This makes it great for treating all kinds of sickness and infections! You can read more about the benefits here. But of course, always consult your doctor!


GOOT is so easy to make! In fact usually whip it up in the middle of the night when someone is suddenly sick. It takes just a few minutes in a blender. Here's what you need:
  • 1/4 c. peeled garlic
  • 1/4 c. olive oil
  • 1/4 c. coconut oil, melted
Combine the ingredients in a small blender (I use the mini blender attachment that came with my immersion blender) for a couple minutes until it's well combined. Then strain the mixture through a fine sieve or some cheesecloth to remove any chunks of garlic. Straining is important especially for kids because the chunks can burn their sensitive skin. Then just pour the mixture into an airtight container and put it in the fridge to harden into a firm salve. That's it!


We like to keep a batch of goot in the fridge anytime someone starts acting under the weather. Whenever someone is sick we apply the salve to their feet and put on warm socks. We've also put it on chests to treat congestion and croup and around ears to ward off ear infections. GOOT should be stored in the fridge and will last 2-3 weeks.


And of course be sure to get plenty of rest when you're sick! And you'll be back on your feet, wearing a cape in no time.


Why is he so much funnier with a cape on?!


To make it even better, he kept running around throwing a bouncy ball, then striking this post to see if it went under the table:


And let's not forget the Big Brother, who seems to have grown 6" and an entire vocabulary.


What are your favorite home remedies? Have you every used GOOT?

Monday, November 24

Reclaimed Window Stocking Holder

We run into a problem every year around Christmas time. The problem is that we don't have a fireplace. No fireplace = no mantle = nowhere to hang the stockings! We spent a few years using stocking holders on top of the entertainment center. Then last year we moved the entertainment center into the office to use as storage so we used command hooks to just hang the stockings on the wall. But this year we're stepping up our game a bit! A few weeks ago we were visiting Husband's grandpa and he gave us an old window from his barn. With a good washing and a few tweaks, we had our new stocking holder!


Our plan is to leave the window up year-round and just hang stockings on it at Christmas. We're still trying to figure out the spacing of our pictures around it, which is why we have newspaper cutouts all over the wall.


To get our window stocking-ready we started by giving it a good scrub. Then I drilled holes along one edge. I started with a hole right in the middle and put two more on each side 6" apart.


Then I attached a knob in each hole. I used plain wooden knobs from Lowe's. They were about $0.85 each. I put 5 for now, but left plenty of room for adding more later if we need to.


I thought about painting the knobs white, but ended up liking the plain wood finish. This way when I don't have stockings the knobs don't stand out too much. I also originally planned to put family photos in each window pane, but once I got it on the wall I realized it would look too cluttered. So for now it's staying empty.


Except of course for the stockings!


And next week I'll be sharing how I made our stockings last year, so stayed tuned! Plus you can see our list of stocking stuffer ideas for boys here.


And speaking of things from grandpa, he also sent home this old metal rack thing that ended up being the perfect end table for our living room!


I still haven't figured out what to put in the top section since it's divided up into vertical sections. Maybe some books? For now it usually is full of stuffed animals "in them cages."


Where do you hang your stockings? Do you have a mantle or do you freestyle?

Friday, November 21

Stocking Stuffers for Boys

Earlier this week we shared our favorite gift ideas for the boys this year (along with our tips for trying to keep things simple). Today we sharing a few of our favorite stocking stuffer ideas! Since we only do four bigger presents for each boy (want, need, wear, read) we tend to stretch it with the stockings to pack in a few fun smaller gifts. Here are our top runners for this year:


1. Twistable Crayons - easy to color with and harder to break! Any small art supply is a great addition to your stockings.

2. A Watch - Big Brother has asked to wear a watch like daddy, and he's always asking what time it is. We already ordered this watch for him from zulily a few weeks ago and I'm not sure where to buy them now, but Amazon has several options for boys.

3. Wallet - this also falls into the "I want to be like daddy" category with Big Brother asking if he can have a wallet too. I'm' thinking about making something like this for his stocking.

4. Dinosaur Slipper - I found this on pinterest but haven't been able to find where to buy them, so I might trying making a pair for Baby Brother.

5. Toothbrush - we put a new toothbrush in every year. Last year we found Spiderman toothbrushes with travel caps at Dollar Tree!

6. Wooden Car Launcher - perfect size for a stocking and tons of fun! You can get the launcher here and a car here. (We ordered the launcher through zulily and just realized now that there is probably no car in the box. Oops.)

7. Small Wooden Toys - something like this bus would be perfect for Baby Brother's stocking (they also have other vehicles like this adorable pickup truck). Etsy is a great place to shop for things like this that are unique and handmade by crafters!

8. Harmonica - will it get annoying? Probably. But Big Brother got one at a party this summer and fell absolutely in love with it, even though he had to blow with all his might to get sound out of it. So a nicer one like this might make it into his stocking this year.

So that's our list! We'll probably add some kind of treat or snack along with a couple of these for each of our fellas (do we need bigger stockings? maybe.). What are you stuffing in your stockings this year? Do you have a tradition you make sure to include every year?

Monday, November 17

Hot Chocolate Mix {and free printable labels}

We haven't bought hot chocolate mix in over year since we started making it ourselves. It's great because you can adjust the amounts and add different things to find what you like and you know exactly what is going into it. Last year we shared our favorite recipe and included a printable recipe card but with Christmas right around the corner I wanted to share a printable label that's a little more giftable.


Just print out the tags on paper or cardstock, cut them out, and attach them to jars of hot chocolate mix some twine or string. You can punch a hole in the tags and tie them on like the pic above, or tape them right onto the jar like the pic below.

Download and Print the tags here.


This hot chocolate mix is so easy to make! Just combine the ingredients in a large bowl until thoroughly mixed, then divvy it up into smaller jars.
  • 2 c. powdered sugar
  • 1 c. unsweetened cocoa powder
  • 1 tsp. salt
  • 2 tsp. cornstarch
  • pinch cayenne pepper
  • 3 cups dry milk powder
  • 1 c. mini semi-sweet chocolate chips


You'll probably want to make a jar for yourself while you're at it. There's nothing like a toasty mug of hot chocolate on a snowy day!


Individual jars like this make a great, easy gift for friends, co-workers, neighbors, even your Sunday school class!


For more homemade gift ideas check out my 31 Handmade Gifts series. Do you like to give food gifts? Share your favorite recipes in the comments!

Saturday, November 15

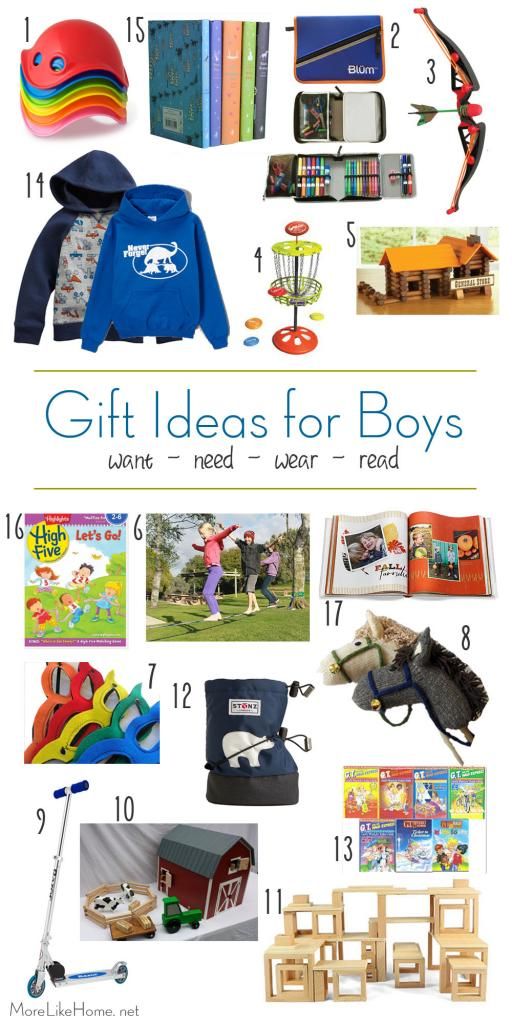
Our Favorite Christmas Gift Ideas for Boys

November is half over and we are well into the Christmas planning for our boys (check out our stocking stuffers)! It's my favorite season of the year and I love making it as fun and special as I can. And, of course, presents are definitely a part of that. But we've made a few decisions about Christmas (like keeping it Jesus centered, focusing on giving, and trying to reduce the amount of stuff we bring in) that have led to us cutting way back on how many gifts we give each year. I've heard of some families doing three gifts (like Jesus' three gifts from the wisemen), but this year we are going with four gifts. One gift from each of these categories:

Something they want,
Something they need,
Something to wear,
Something to read.

It is so hard to pick just a few things when we want them to have it all, so we'll see which things we finally settle on. But for now here are a few of our top contenders for the little fellas (ages 1 and 3).


Tuesday, November 11

Putting the Closet to Work

You may have forgotten we have a funky walk-in crawl-in closet in our master bedroom. Yeah, we kind of forgot about it too. And so it turned into the cluttered dumping grounds of everything that is in the way. Behold.


We at least kept this convenient walking crawling path that allowed us to climb into the back recesses of space below the sloped ceiling. I should have taken a picture that showed the back better, it reached back pretty far until the the ceiling meets the floor.


Oh, and all the dump-stuff didn't fit around the crawling path so we spread the dump-zone out into the landing. Oops.


So obviously some serious organizing was in order, but first we needed some storage space! My original idea was to use the same adjustable shelving we put up in the garage, but the detail & leveling needed to navigate that sharp ceiling slope was more than I was up for. So I went with my next best (basically free) option. I took a few of the wooden shelves from that adjustable system and screwed them together into a moveable bookcase thing like. I didn't have to buy any new wood and I used up more of the shelves that were stacked in my garage! This is what I ended up with:


We dragged it upstairs and after a couple hours of sorting & decluttering we were left with this... not so monstrous sight. Huzzah!

Monday, November 3

DIY Oversize Ruler {great as a height chart}

We've had a lot of fun keeping track of our boys' growth by measuring their height. I think the boys have even more fun than we do! I know a lot of people mark right on the door frame, but we wanted something that would be easy to take with us if we ever move. A simple board seemed like a good solution, but a little on the plain side. So I just painted on a few numbers to make it look like an over-sized ruler and BOOM - a height chart & fun art piece all in one!


And the best part is it SO easy to make. All you need is a little black acrylic paint and a board! We used a 1x8 (but you can use whatever width you like) cut to the height you want. If you buy a 6' long board you wouldn't have to cut it at all. We used a board from the garage and planned to cut it to 6' 6" so we would have room to paint a "6" on it, but had a mis-measure and ended up at 5' 6". Oops. Measure twice, cut once guys. My bad. It still worked out fine, though!


Then I just had to spend a few minutes painting it. I started by using my tape measure and a pencil to mark each inch along the side of the ruler. For the numbers I picked a font that looked old-ruler-ish and printed the numbers I needed in a large size. Then I did that deal where you color on the back of the page with pencil, lay it on the board, and trace around the numbers to leave their outline on the board. I used my black paint to fill in numbers and mark each inch along the ruler.

You can download my number template here

Of course you could do the same thing with any font you like if you want a different look!


We decided to mount ours 1' off the floor because that would be easy remember and replicate if we ever need to hang it somewhere else. Plus it looked pretty good and was low enough to mark newborn height and high enough that I'm pretty sure our boys will never outgrow it (tall genes? I think not.). We used a drywall screw in each corner to attach the ruler to the wall.


It fit perfectly in this little corner of the hallway that can't be used for anything else!


Do you (or did you) keep a height chart for your kids? Isn't it fun to look back and remember how tiny they used to be? I'd love to hear about your height chart!
Subscribe