
P.S. Check out the rest of our free DIY Desk Plan Series here!
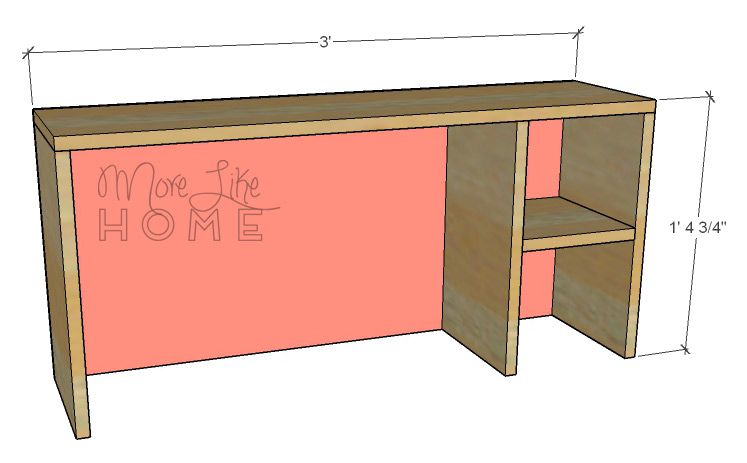
inspiration photo source
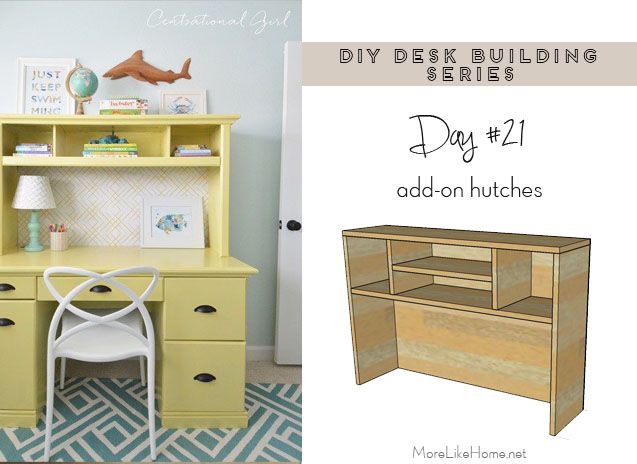
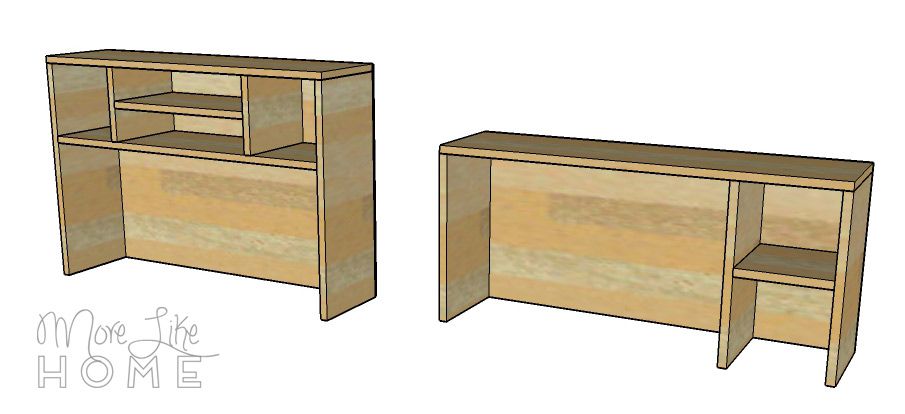
We'll be building a taller hutch with shelves at the top, and a shorter hutch with the shelves on the side.
Here are a few more hutch inspirations to get your wheels turning:
Want a little drama? Make your hutch extra tall and add trim around the top.
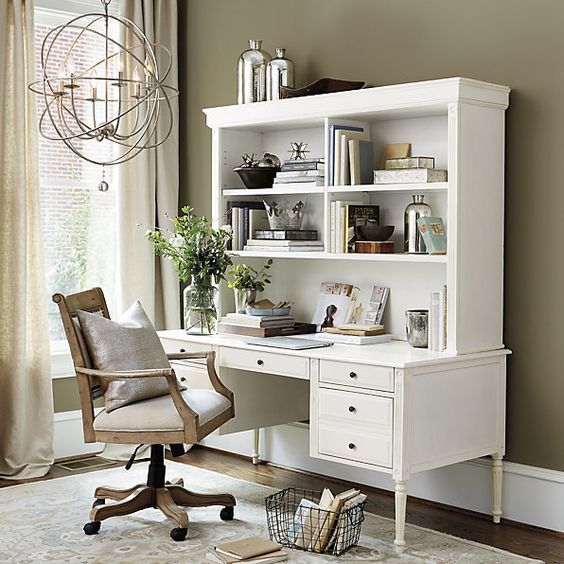
image source
Try shelves on both sides for even more book storage.
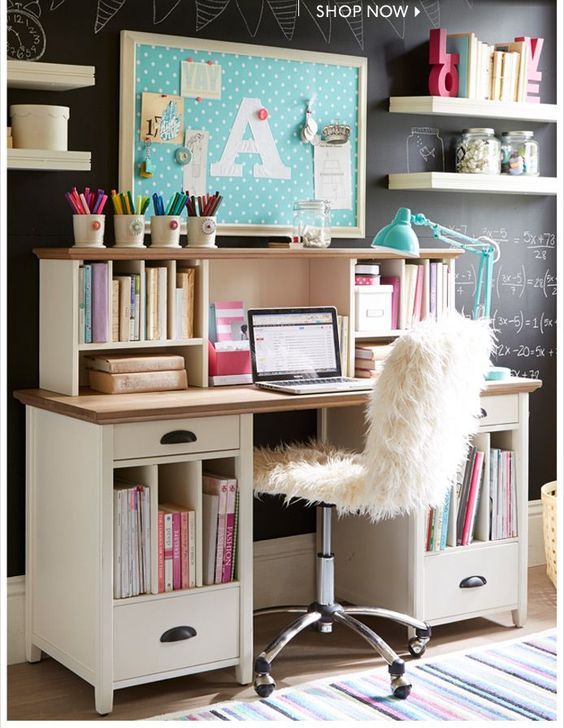
image source
Or an extra short hutch for a different look.
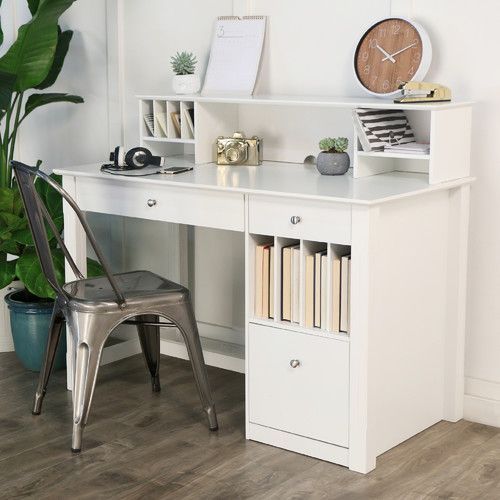
image source
But enough chit-chat. Let's get started! Here are shopping lists for the tall hutch as-is, but keep in mind you'll likely need to change the width of the hutch to fit your desk, so you'll need a different amount of 1x10s. Scroll down for instructions for the shorter hutch.
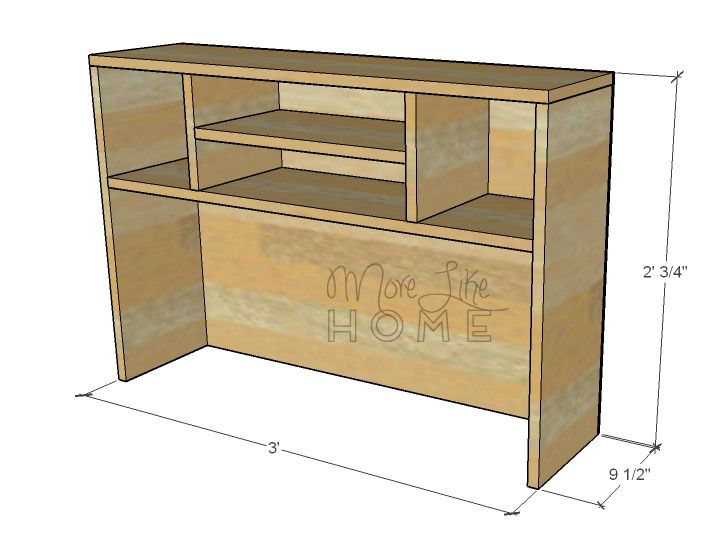
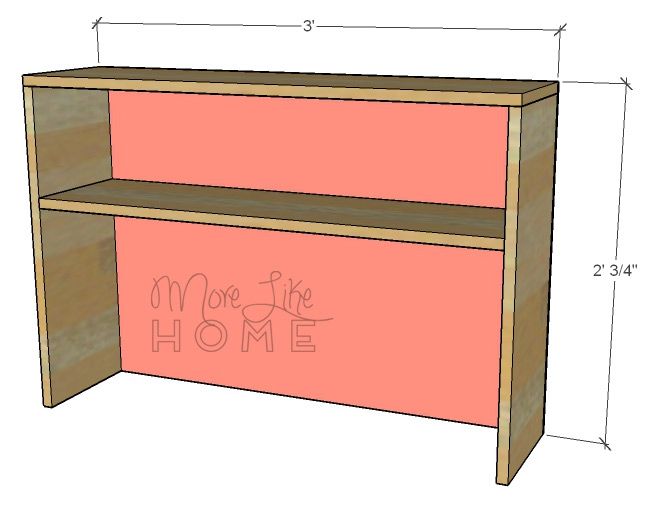
Tall Hutch
Shopping List:
- 1 - 1x10 @ 8'
- 1 - 1x10 @ 6'
- 1/2 sheet 1/4" plywood (or any scrap plywood that is 36 x 24 3/4")
- Kreg Jig and 1 1/4" pocket hole screws (optional, but it will be a whole lot easier to attach the hutch to your desk if you have one!)
- 1 1/4" wood screws
- finishing nails
- wood glue
- wood filler
- sandpaper and finishing supplies
Dimensions: 36" wide x 9 1/2" deep x 24 3/4" high
Measure twice, cut once (seriously, though). Use glue in every step (be careful to clean up any drip, because they will mess up your finish at the end!). Read through all the instructions before you begin. Use 1 1/4" screws unless otherwise indicated. Pre-drill and countersink all your screws. Be safe, have fun, and let me know if you have any questions! Please note I have not built from these plans myself (you might be the first!), so double check everything as you go.
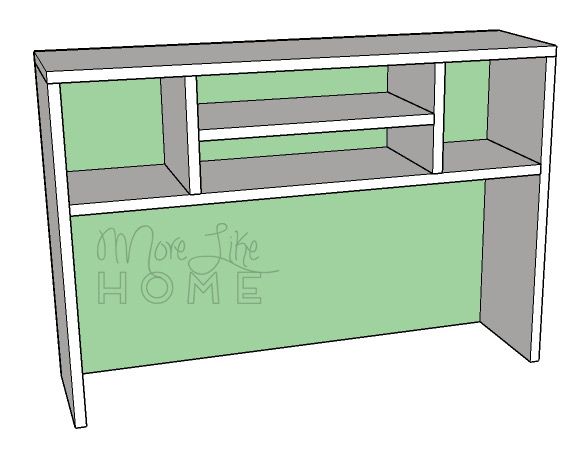
Cut List:
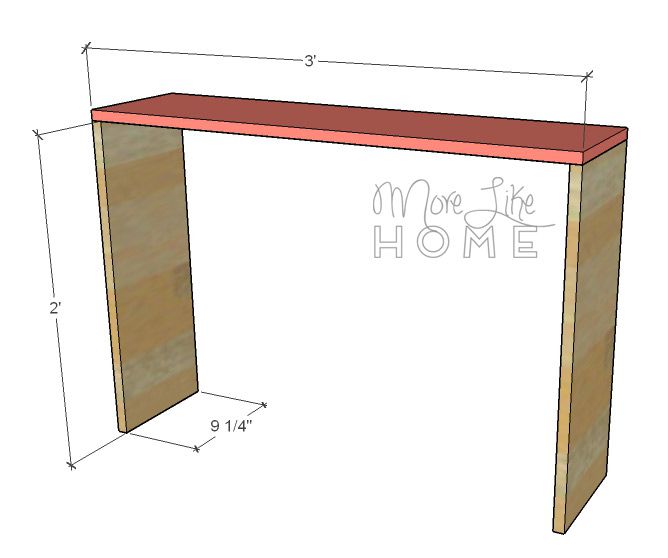
(A) 2 - 1x10 @ 24" (sides)
(B) 1 - 1x10 @ 36" (top)
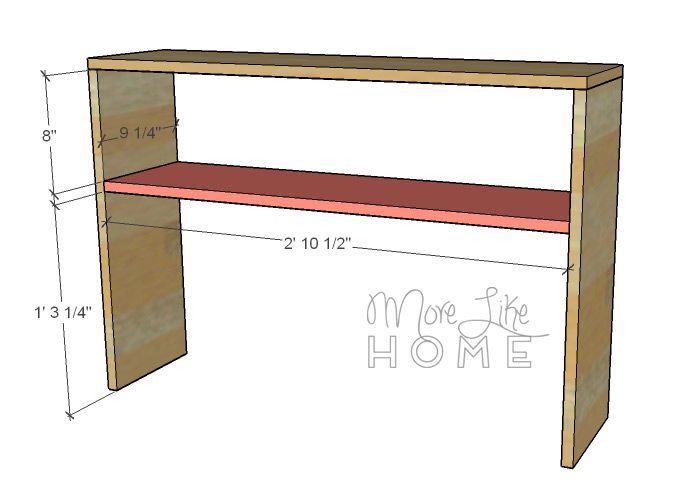
(C) 1 - 1x10 @ 34 1/2" (shelf)
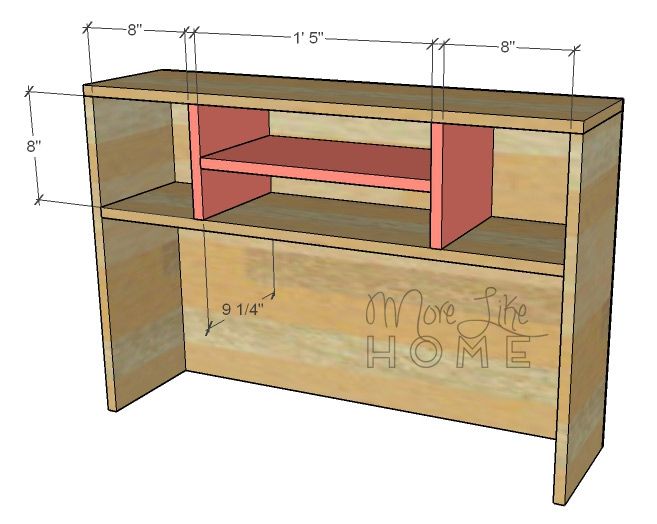
(D) 2 - 1x10 @ 8" (dividers)
(E) 1 - 1x10 @ 17" (small shelf)
(F) 1 - plywood @ 36 x 24 3/4" (back)
Drill pocket holes in the top and bottom of the sides (A) and attach them to the top board (B) with the pocket hole screws. Or without a Kreg Jig drill through the top into the ends of the side boards. (The pocket holes in the bottom of the legs will be used to secure it to the desk later)
Drill pocket holes in both ends of the shelf (C) and attach it between the side boards with the pocket hole screws. It should be 8" from the top, and make sure it is level. Or drill through the sides into the ends of the shelf.
Attach the back (F) by drilling through the back into the top, sides, and shelf with 1 1/4" wood screws.
Assemble the divider unit by drilling pocket holes in both ends of the small shelf (E) and attaching it to the dividers (D) with pocket hole screws. Or drill through the sides of the dividers into the ends of the shlef. It will make the "H" shaped unit shown in pink below. Make sure it is level. Slip that onto the shelf and center it with 8" on either side. Attach it by drilling through the top and shelf into the ends of the dividers, or use finishing nails if you don't want holes to fill.
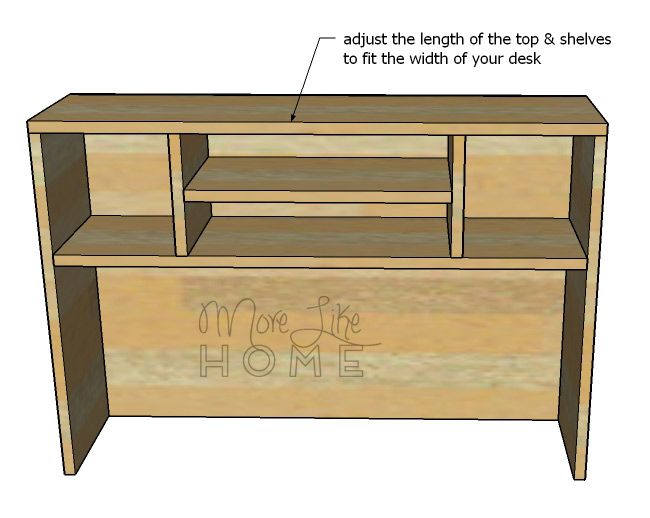
Adjusting the width of this hutch is easy! Just equally add (or subtract) length from the following boards:
- top
- shelf
- back
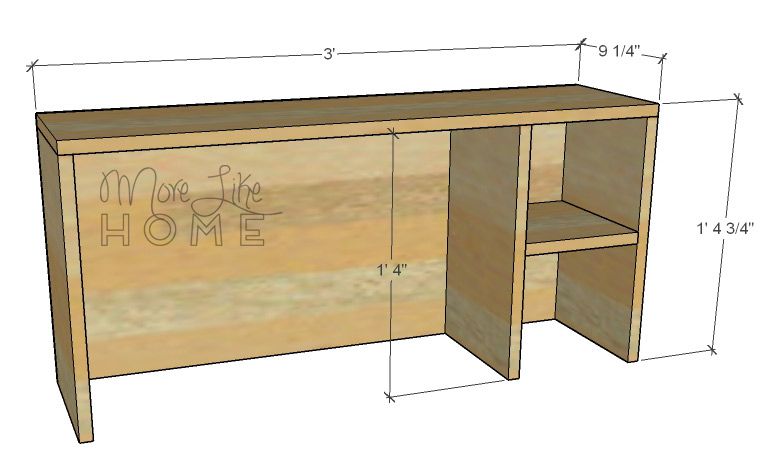
Short Hutch
Shopping List:
- 1 - 1x10 @ 8'
- 1 - 1x10 @ 6'
- 1/2 sheet 1/4" plywood (or any scrap plywood that is 36 x 16 3/4")
- Kreg Jig and 1 1/4" pocket hole screws (optional, but it will be a whole lot easier to attach the hutch to your desk if you have one!))
- 1 1/4" wood screws
- finishing nails
- wood glue
- wood filler
- sandpaper and finishing supplies
Measure twice, cut once (seriously, though). Use glue in every step
(be careful to clean up any drip, because they will mess up your finish
at the end!). Read through all the instructions before you begin. Use 1
1/4" screws unless otherwise indicated. Pre-drill and countersink all
your screws. Be safe, have fun, and let me know if you have any
questions! Please note I have not built from these plans myself (you
might be the first!), so double check everything as you go.
Cut List:
(A) 3 - 1x10 @ 16" (sides)
(B) 1 - 1x10 @ 36" (top)
(C) 1 - 1x10 @ 8" (shelf)
(D) 1 - plywood @ 36 x 16 3/4" (back)
Drill pocket holes in the top and bottom of the side boards (A). Attach them to the top board (B) with the pocket hole screws. One should be flush at each end, and one should be spaced in 8" from the side (whichever side you want the shelf on). The pocket holes at the bottom will be used to secure the hutch to your desk later. Or drill through the top into the ends of each side board.

Attach the shelf (C) between the side boards and whatever height you like. Just make sure it is level. You can drill through the sides into the ends of the shelf, or use finishing nails if you don't want holes to fill. Feel free to add more shelves, or skip it altogether.

Attach the back by drilling through the back board (D) into the sides and top of the hutch.
Finishing
To finish, fill any holes with wood filler then sand everything down really well. This is the most important step for a professional finish! Start with a rough sand paper, then go over everything with a medium paper, then again with a fine paper. Once it's super smooth, finish it with whatever paint or stain and sealer you like. A hutch is a great place to get creative with a fun color (or wallpaper or fabric!) across the back. Also consider mounting a bulletin board, dry erase board, or magnetic board inside the hutch.
Use the pocket holes around the base of the cabinet to attach it to your desk. If you don't have a kreg jig, you can still attach it by angling wood screws along the bottom of the side boards so they catch both the sides of the hutch and the desktop. Depending on your desk and the width of your hutch, you may also be able to drill up through the desktop into the sides of the hutch.
That's it! Tomorrow we're wrapping up the series, so come back for our final plan and don't forget to check out the rest of the series here!
)
And now I love hutches. :D
ReplyDeleteI always knew you did... ;)
Delete