Tuesday, August 27

Painted Chairs

I've been planning to paint our dining room chairs since the day I bought them. Working on my typical timeline, it took me over a year to actually get it done. Seriously, guys, home improvement is a marathon around here. Nothing gets done in a hurry. :)


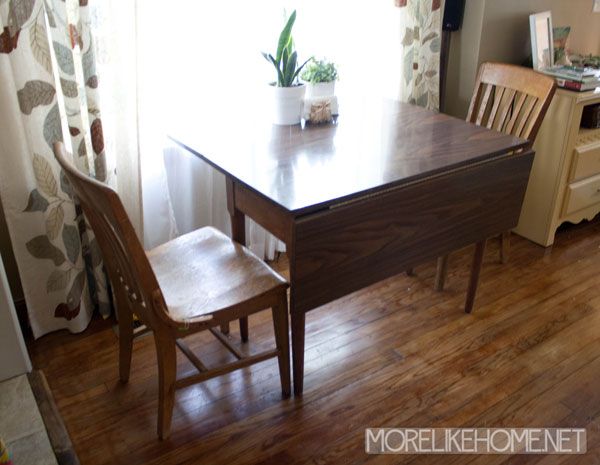
But back to my chairs.... I found these guys at a yard sale last year for just $5 each.


They golden yellowish color didn't do much for me, but I loved the shape right away and knew they had the potential to be great.


Once I got them home I didn't hate the color as much as I thought at first, but the finish was in pretty rough shape (that may be why they were so cheap) and after living with them for a year I was ready for something fresh.


I didn't get any painting pics - oops - but it was pretty simple. I started by roughing them up a bit with some sandpaper so the paint can get a good grip. Then I did two coats of primer (left over from our kitchen painting). I started with one but the wood was still bleeding through yellow so I did another to be safe. Then I followed that up with two coats of white paint (semi-gloss left over from our kitchen). Then I let them sit in the garage for several days to dry and cure before I brought them back in....


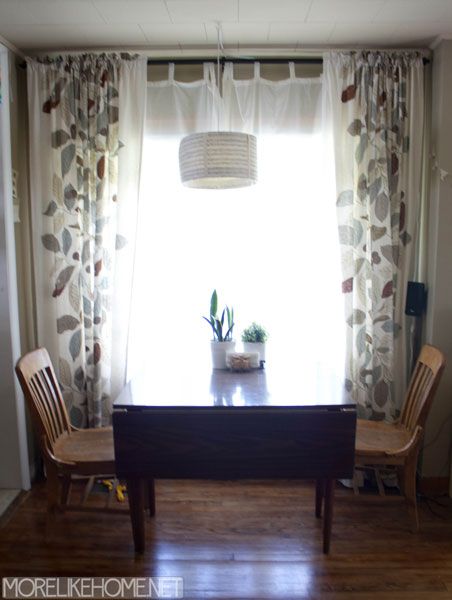
Not a bad looking pair, huh? I still love the shape, but they look so much more modern and bright now. Pay no attention to the legos on the floor. Boy's gotta play.

Friday, August 23

Narrow Entry Table Plans

If you've been waiting for the narrower version of the plans I posted a couple weeks ago, your wait is finally over! (you can check out the wider version here) Like I mentioned before, we don't have a formal entryway so we're making the most of a small corner by the door. This little table is perfect for the space!


It has baskets to corral our shoes, a wide drawer for the diaper bag & shopping bags, and the table top is a great place to drop keys and mail when we come in. Not to mention it also serves as an end table by the couch. For a little guy, he sure is a hard worker!


Don't need an entry table? This guy would also be great as a console or buffet table. Stash some toys in the baskets or stack throw blankets on the shelf. It's small enough to tuck out of the way but still offers some nice storage.


Want to build your own? Well you're in luck! Full plans are below!

Tuesday, August 20

Flannel Wipes {tutorial}

Well guys, the good news is I was in a nesting frenzy before Baby A was born and pulled off quite a few projects in my last few weeks as a pregnancy tornado. Including some things I've been planning to do for the past two years... like make some flannel wipes! I used baby washcloths for B (a great option if you don't sew), but I never had enough and always ended up using disposable wipes half the time. Which doesn't make a lot of sense when you're cloth diapering and cloth wipes can be thrown right in with the diapers. So I finally put some of my flannel stash to work and whipped up these bad boys:


Supplies:
  • flannel (you need two 8 1/2" squares for each wipe. I've also seen wipes that are flannel on one side and cotton terry on the other!)
  • matching thread

Friday, August 16

A Tiny Little Announcement

Well, not so tiny. More like a solid 8 pounds of announcement...


Wednesday, August 14

Entry Table

We're still looking for a good solution for our little corner "entry way" (you can see it in this post) so I've been toying with a few ideas to make it more functional and tidy. My favorite idea so far is something like this entry table. The two big drawers would be great for hats & gloves, shopping bags, or extra jackets. The big shelf underneath can hold 3 big baskets to keep all our shoes corralled instead of spread across the floor. One little problem - this guy won't actually fit in our space. Oops. I made it wide enough to hold 3 baskets (thinking a basket for each of us) but it's too wide for our space. So I'll be posting plans later this week for a narrow version that we can actually use. But I liked how this one turned out so much that I want to share plans for it too!


Want to build one of your own? Here's what you need:

Monday, August 12

3T on a Budget

Nesting can be a wonderful thing. If you ignore the crazy that comes with it of course. Part of my nesting this time is trying to be super/over prepared for anything that might happen in the next 6 months. Which I why I spent all my yard sale efforts hunting for 3t clothes for B! He's still in 24m/2t but I'm sure he'll move up before next summer and I don't want to be stuck paying more for clothes later when I can get them for a steal now!


Over the summer I've built up a nice little stash! I was surprised how hard it was to find 3T stuff - well, stuff that was cheap enough for my tight wallet. I skipped right over anything that was more than a dollar, and really held out for things that were $0.50 a piece. So I slowly just found a couple pieces at a time here and there.


But my patience paid off! I have a tote full of clothes that were mostly $0.50 each and just a few that were up to $1! It turns out I may have over prepared a little... when I washed it all and sorted through it I realized that it's probably more clothes than he would ever need. Oops! But it's better than not enough, right? ;) Here's the run down of what I ended up with....


14 long sleeve tees


10 short sleeve tees


7 dress shirts (4 short sleeve, 3 long sleeve)


11 winter jammies


10 shorts (5 regular, 5 athletic)


12 pants (7 jeans, 5 sweats)


swim trunks & 4 undershirts


4 jackets


I also have a pair of snow pants (that were $0.50!) and a pair of boots ($2). I'm still hoping to over-prepare a little more and find a winter coat and some summer jammies. You know, over over prepare. But if I'm going to do it, I guess yard sales are the way to go! So far I've spent about $45, which still sounds like a lot to me when I add it all up! But then I think about how much buying all new clothes would cost if I waited until after yard sale season (and the fact that I can hopefully resell them down the line). So I think we're doing okay.


Anyone else dress your kids on a budget? What are your favorite tips or tricks?

Friday, August 9

It's About Time... for New Basement Curtains

There are quite a few things in the basement that we still haven't touched since we moved in almost 3 years ago. But we finally checked curtains off that list! And let me tell you, it was time. Not only were they outdated, but they were pretty gross and just kind of thrown up there. Take this guy for example. The curtains are hanging on a piece of elastic that's tied to a few nails. Nice. Not to mention some of the curtains were shorter and only covered half the window so people could totally see in when I did laundry in my underwear. No. I was not deterred. But I'm glad to have full coverage now.


The rest were hung on springs! Seriously, long springs stretched across the window. They at least hung straighter. But still they weren't too pretty and I'm not sure if these had even been touched since the house was built. They were pretty nasty. They came down and went straight to the garbage. Then after a good sill-vacuuming and window-washing, I was ready to get some new curtains up there!


I finally got motivated to check it off our list when I stumbled across a pretty set of sheets in the Wal-Mart clearance for only $5. Yeah, I can work with that.

Wednesday, August 7

DIY Planter Boxes

I know I've been posting about our front porch a lot... I think my pregnant brain wanted it all pretty before the baby came and we had new baby visitors. But I think this is my last update for now! We knocked out one last project to finish off the space and give it some interest and life. Planter boxes!


I was inspired by some planters I saw on Ana-White.com, but I have a seriously tiny porch so I made up my own plans for a (much) smaller version. And you can build some too! They super to make, and cheap to boot!


To build one planter box you'll need:
  • 1  -  1x8 @ 8' long
  • 1  -  2x2 @ 8' long
  • 1  -  1x2 @ 8' long
  • 1 1/4" pocket hole screws or 2" screws
  • 8" flower pot (or landscaping fabric)
  • 2" screws
  • 1 1/4" finishing nails
  • glue
  • sandpaper
  • finishing supplies (wood filler/paint/stain/poly/etc.)
Cut List:
(A)  4  -  1x8  @  23 1/2" (sides)
(B)  4  -  2x2  @  23 1/2"  (corners)
(C)  4  -  1x2  @  11" with mitered corners  (trim)
(D)  2  -  1x2  @  8"  (supports)

Monday, August 5

Butterflies in the Guest Room

We made a quick little update in the guest room. You've probably noticed my constant struggle to find some collection of pillows and blankets that would work in our guest room. Well, I finally accepted that nothing I already own seems to be fitting the bill. So when I found a new duvet set at a yard sale for $10 a couple weeks ago, I was all "hey, why not? It's can't get worse!" No, really. It can't.


It's at least an improvement, right?


I'm still a little on the fence about it, but I think I like it. It seems to play well with the striped curtains and the butterflies are kind of fun and different than what I usually go for.

Friday, August 2

ORB Hardware

Earlier this week I shared how we updated our front door with a little paint and some vinyl letters. Today I'm going to show you how we used spray paint  to spiff up the the hardware & complete the makeover!


I started this first thing in the morning (right after I painted the door) so the hardware had all day to dry and cure before it had to do any work. I removed all the hardware pieces and put them on a piece of cardboard. I could poke any long pieces through the cardboard so they would stand upright.


Subscribe