
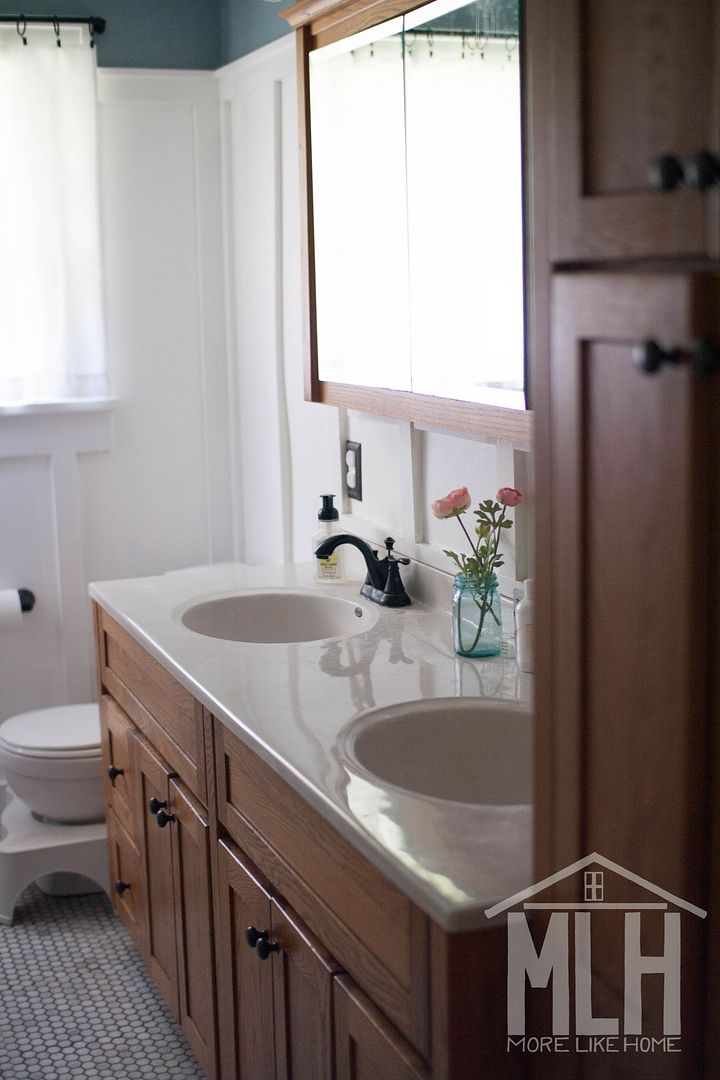

But first you need to know: the one big sacrifice we made when we bought this house was a master bathroom. *gasp* And yes, we lived to tell the tale of a shared bathroom. It's fine, guys. But that means this bathroom has a big job since it's the main bathroom for our entire family. All six of us.
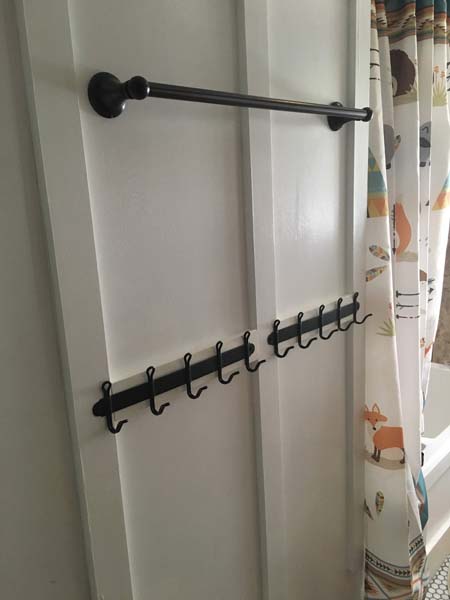
The first thing we needed to address was towel space. We have six towels to hang along with a hand towel and many, many drippy washcloths. Here's the space we had to hang it all:

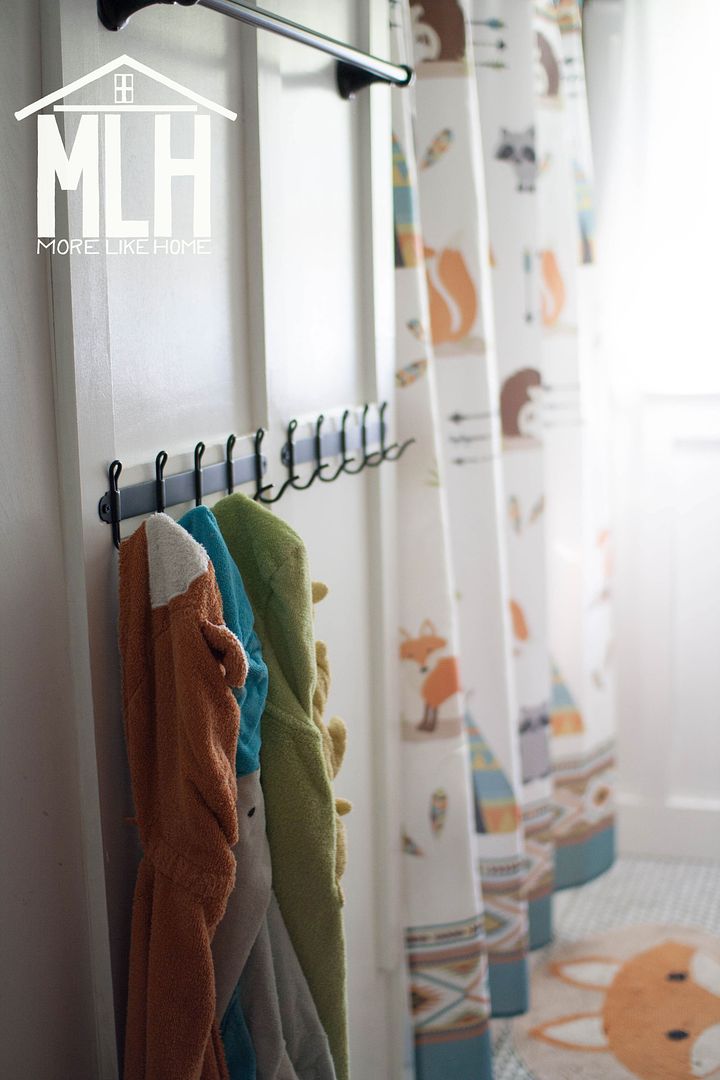
There just weren't enough hooks (especially when we have guests) and they were too high for the kids. We ended up with things piled on the floor and left in bedrooms. So I did a super easy fix and put two of these Ikea towel racks on the wall:
I was even able to work with our bathroom's design to make them look like a seamless addition! The bathroom walls have 1x3 trim running vertically so I cut pieces of 1x3 that would fit between the trim board and painted them with matching white paint.
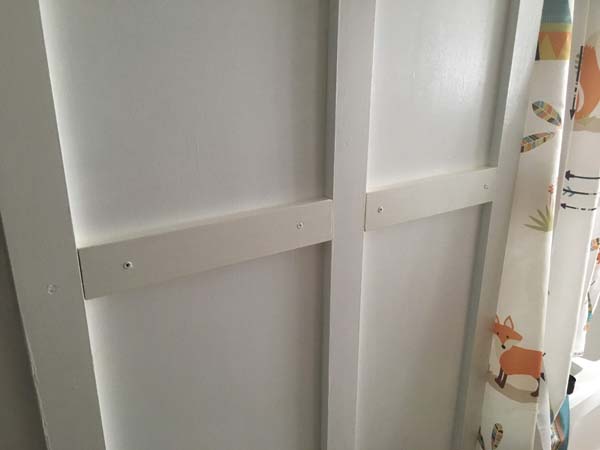
Then I installed the strips of towel hooks over top of the new boards. It was a super easy upgrade that I up off waaay to long. As is my custom.
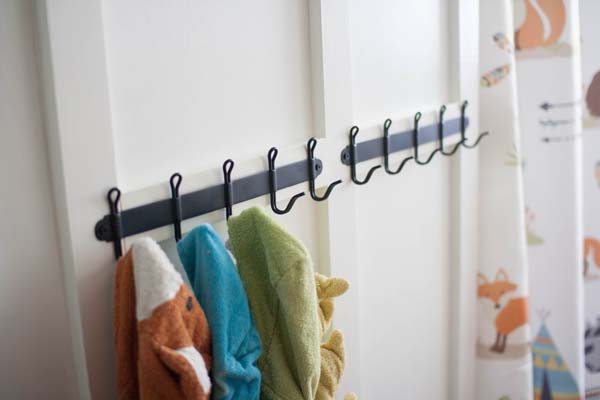
Now here's the kicker that really made these hooks work well: I put them down where the kids can reach them. Let me tell you, kids hanging up their own towels is a beautiful thing. When I was determining the height, I just took one of the kids hooded towels and one of our regular towels and held them just high enough to clear the floor (to be sure the hooks would work for all of us).
They also work great for washcloths, hand towels, and axes.

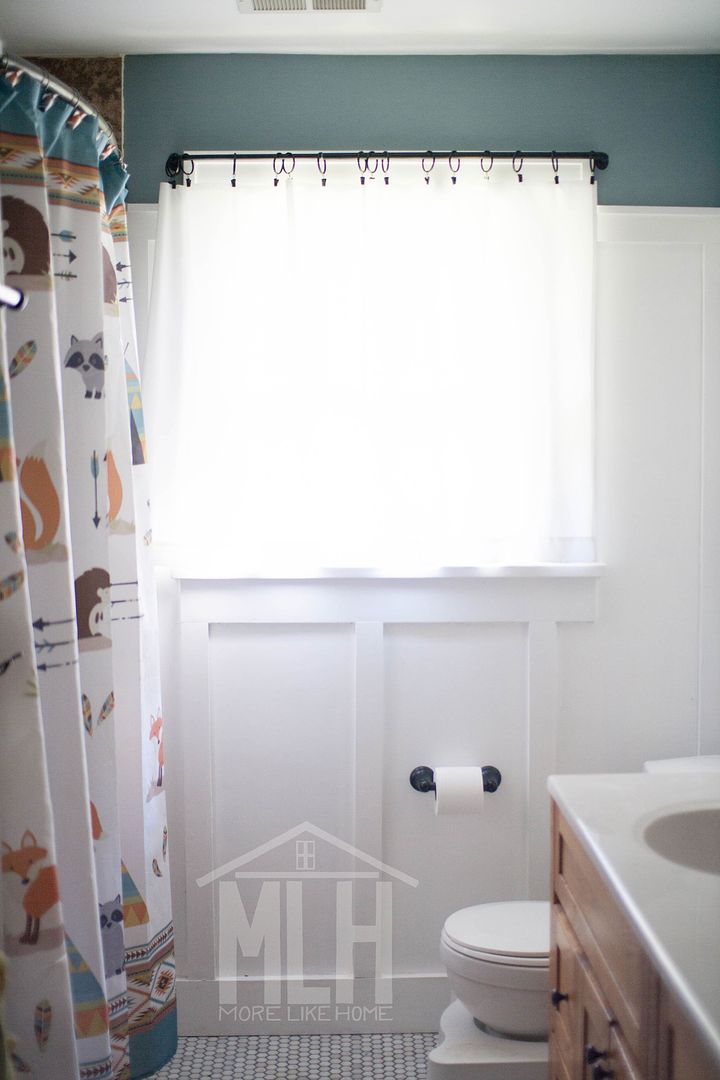
Needless to say, it was time for a curtain. I went back and forth trying to decided if I should use a patterned fabric that would feel more "fun" but I wasn't sold. So at last, just a day before family was heading to town, I went with my gut and grabbed a plain white bed sheet from my sewing stash (sheets are a great way to get a large piece of solid color fabric for low cost!) and whipped up a simple pair of curtains. Turns out white was exactly what we needed. It looks so seamless with the walls and lets in plenty of beautiful daylight.

The lightweight fabric and curtain clips both help with pushing curtains out the way when you want them wide open:

You can read more about how to make sheet curtains here and here, but it's so simple you might not even need to. Just cut the curtain to size, leaving a few extra inches of length. Hem the top and sides with a simple rolled hem. Clip them up with curtain ring clips and mark the length. Fold up the bottom hem to the mark and sew it in place.
I can't say enough good things about curtain ring clips. It's never been so easy to make your own curtains! And for larger windows (not near toilets) you can even use full curtain panels without any sewing! A twin flat sheet is usually around $5, so you can dress a window for $10! Which doesn't totally relate to this post, but I get distract buy amazing DIY decor deals.
The only other thing I need you to know is that the curtain rod was already there when we bought the house. All I had to do was put a curtain on it. And it still took me this long. This is real life.

Our final bathroom trick is getting rid of stuff. I know that's the anthem of 2019, but bear with me. Having a place for everything out of sight instantly makes the whole bathroom lighter and my mood happier. But we didn't get there overnight. We've spent years training for this and minimizing our bathroom out of necessity. Because we had tiny bathrooms. And now it's paying off even more in our new space because this insane amount of storage space? It isn't even full. And we can keep our countertop totally clear. Except flowers. They don't count.
I know not everyone has this kind of storage, and we totally feel your pain. This is by far the biggest bathroom we've ever owned. I mean, this is where we're coming from:


But those tiny bathrooms prepared us to make the most of this space because we already cut back wherever we could in these spaces. We don't use a ton of products, we share products as much as possible, and we don't have a ton of bath toys. And it pays off in a less-cluttered, more useful space. This is the perfect place to start some spring cleaning! Go through every cupboard, cabinet and drawer. Get rid of anything expired, almost empty, and that don't need or will never use (be honest). See just how much space you can gain by getting rid of what you don't need.

With those three simple changes, our bathroom is working better than ever! And it all cost under $30 to from scratch, but I actually only spent $12 thanks to scraps and leftovers I had on hand:
- $12 - two Ikea towel hooks
- $0 - scrap wood and leftover paint
- $11 - curtain clips (set of 40, we actually had these left over from another room)
- $5 - flat bed sheet (I had a big enough piece left over from another project)
- $0 - getting rid of junk
No comments:
Post a Comment