
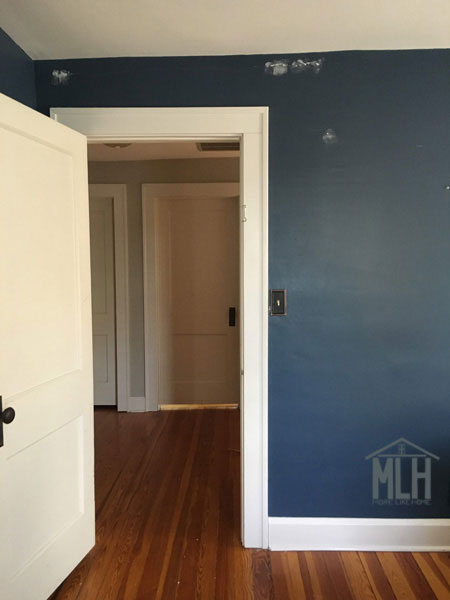
From the day we moved in, I was never crazy about the blue walls in our guest room. For some reason I have never liked blue. Which I realize is ironic since I painted our entire house dark blue and love it with all my heart. I guess I only like a very specific blue? But for whatever reason, these blue walls just rubbed me the wrong way. I'd spent quite a bit of time over the last couple years scheming their demise, but always ran into the age old debate of the MLH household:
How much color do we need on the walls?
Me: "Less."
Husband: "More."

Which left us at a color standstill. But in the meantime I started putting the rest of the room together:
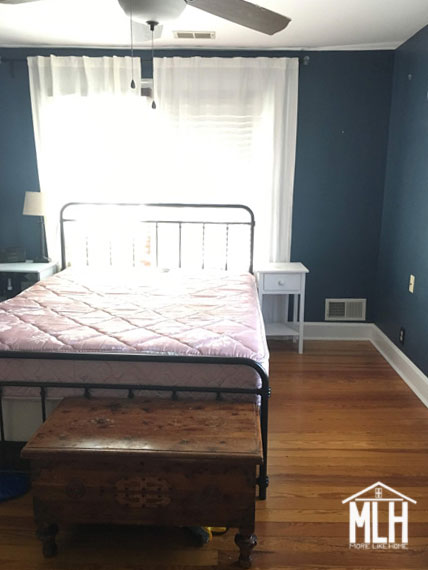
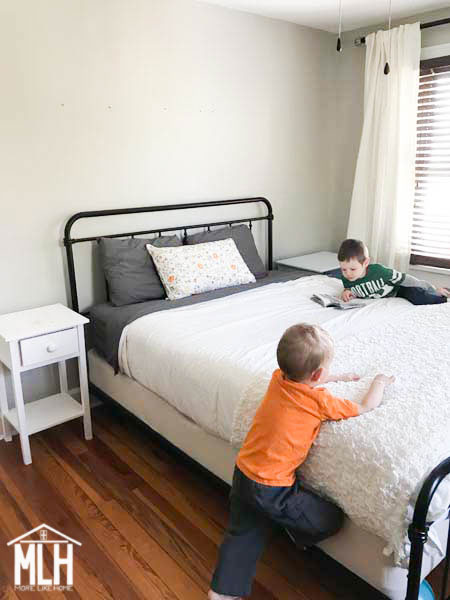
- I ordered a new bed frame on Amazon (We got this bed frame for $150 a couple years ago, but it's currently out of stock. Here's another great option!). It was our only big purchase for this space.
- I hung my DIY floor plans in beautiful wood frames. The frames didn't really work with the blue walls, but large frames are kind of an investment so I crossed my fingers and bought the ones I thought I would love later. Is this a good decorating strategy? Probably not. But it worked out this time.
- I brought in a hand-me-down dresser and chest, along with some old nightstands.
- I hung curtains we brought from our last house - plain white on the large windows and a cute DIY floral curtain on the solo window (it totally clashed with the blue but it worked for privacy).
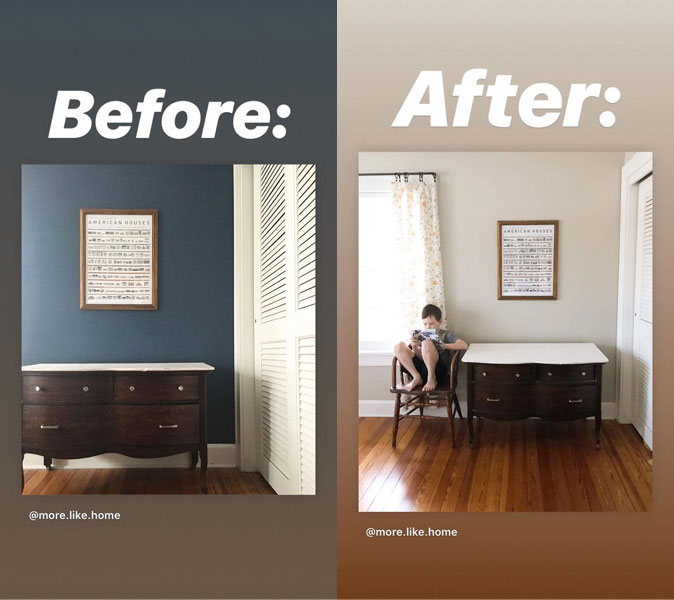
Then one day I stumbled across this before/after on Instagram and stared at the amazing difference a lighter paint made. I spent an entire day going back to look at it again. And the next morning I started patching holes in the walls.
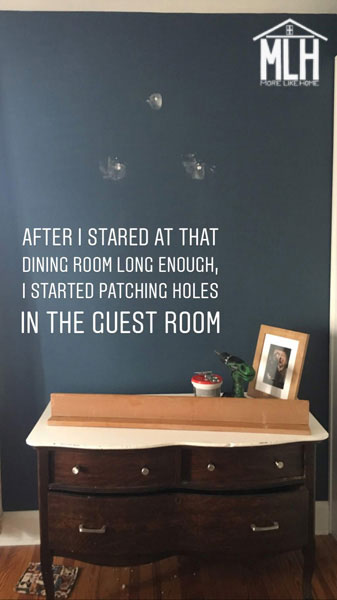
Now bear in mind, by this point the spending freeze had hit. The budget had frosted over and there was no room for new paint or accessories. I could just work with what I had. And what I had was the five gallon bucket of paint we had used for our dining room, living room, and hallways.
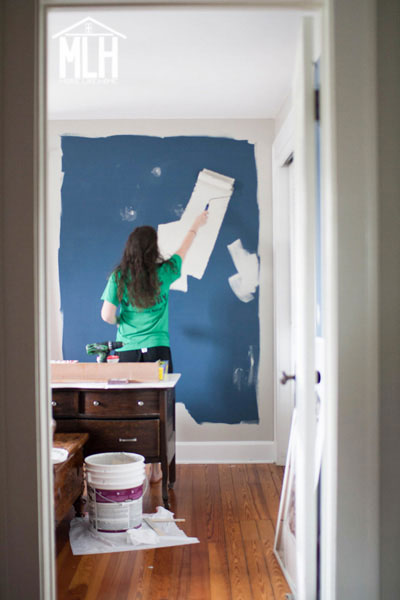
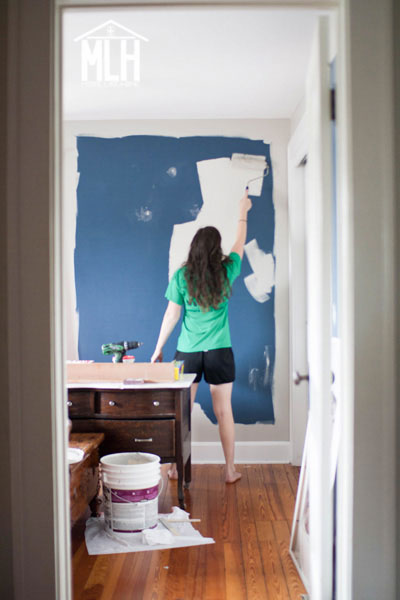
So I painted.
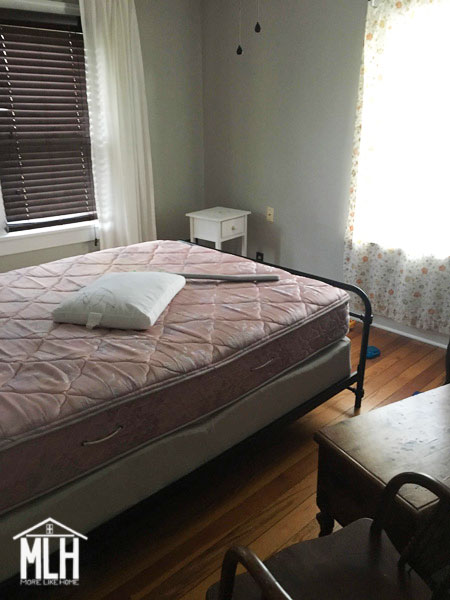
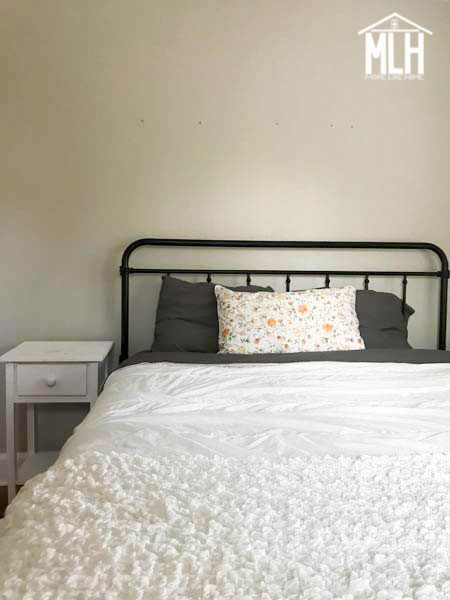
And it turns out paint was all I needed.
I had spent years slowly working toward my vision (I didn't even realize it because everything still felt so disjointed against that blue), and when this last puzzle piece came into place everything just clicked together. The wood frames stood out beautifully, the floral curtain was perfect, the mismatched antiques seemed to belong, and we could actually see the beautiful iron bed frame.What a difference leftover paint can make!
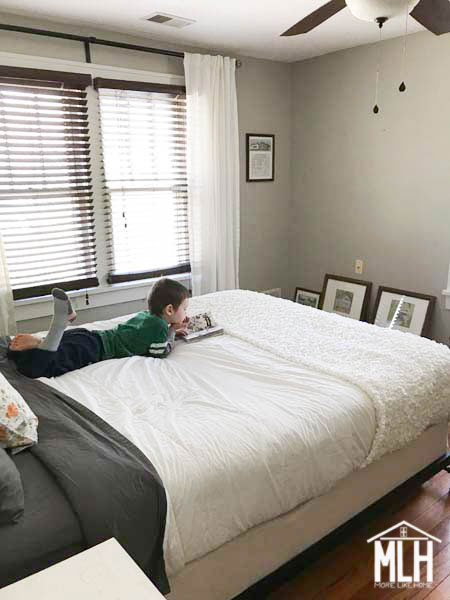
Here are a few more before-ish photos after I patched holes and cleared some things out of the way:
When I'm painting, I always like to cut in with a brush first (around all the trim, baseboards, outlets, ceiling, etc.) then go back and use a roller on the larger areas. And here's my biggest painting secret: I do it all without an inch of painter's tape. Because ain't nobody got time for taping. Want to see how?
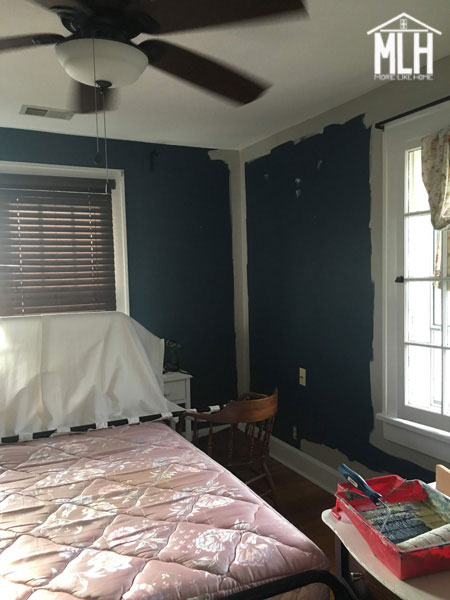
My first-ever youtube video has you covered! Full disclosure: I filmed this over two years ago and was too embarrassed to ever share it. But photos just don't seem to do the trick, so here we are. It shows exactly how I cut-in with a brush when I painted our laundry room. I use the same technique around the ceiling and baseboards, too.
You're welcome, interwebs.
After the paint dried, I had one more big (and free!) trick up my sleeve. I rearranged the furniture.
You saw what a difference paint made in how the room looks? Rearranging made just as much difference in how the room works. I thought a bed in front of the windows be cute, but it ended up being terrible for the flow and floor space. Like just the worst. So I flipped it back to the bare wall and I'm pretty sure angels actually started singing. It just works betters. And the bed frame looks so beautiful against the gray!

You wish you had a pink mattress.
I also hung our architecture themed artwork - a Pop Chart Lab poster and my DIY floor plan art.


I'll show you how to make your own DIY floor plan art here, and you can even make a watercolor picture of your own house!

Our only new expense for this low-budget revamp was a set of sheets for the bed. But it was a budget-approved expense we had needed for a while. So no sweat! The accent pillow is recovered with a vintage pillow case I found at a yard sale years ago that matches the curtain on the opposite window (I made the curtain out of sheets from the same yard sale). I think those vintage floral prints are my favorite detail in the room! And I know, I'm not great at making a pinterest-worthy bed. We all have different skills. And I happen to be an expert knot-untangler. It is what it is.
We got this bed frame for $150 a couple years ago, but it's currently out of stock. Here's another great option!
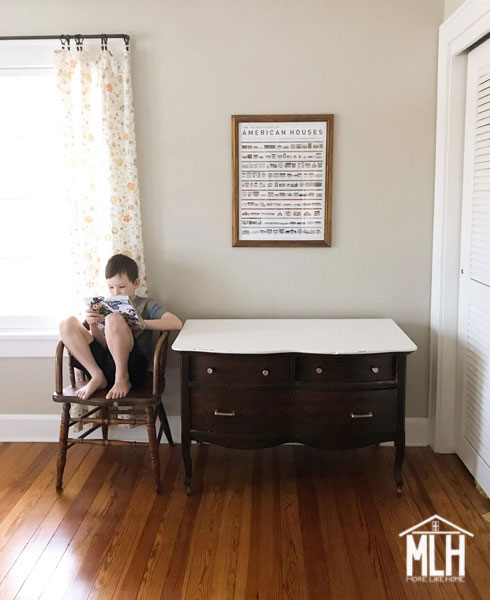
Pop Chart Lab poster over an antique dresser.
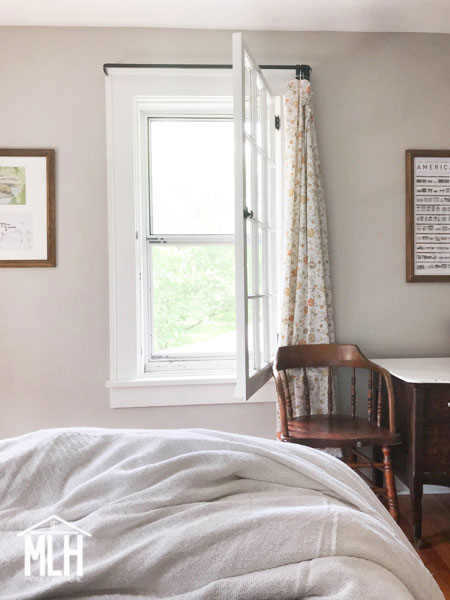
This window is my forever favorite.

NOT MY PHOTO: Task lighting inspiration from Farmhouse on Boone.
I'd love to see your sconce recommendations and hear about your best low-budget room revamp!!
No comments:
Post a Comment