

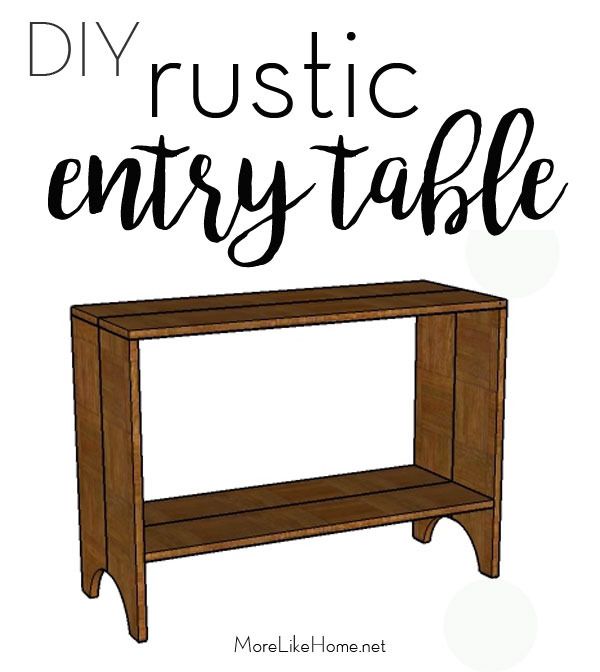
We'll start with the plans for a Rustic Entry Table, but keep reading because we'll also show you how to complete the look with a few key accessories!
Shopping list:
3 - 1x8 @ 8'
1 - 1x3 @ 4'
1 1/4" kreg jig screws (and a Kreg Jig)
glue (use glue in each step!)
If you don't have a Kreg Jig get regular 1 1/4" screws and a 6' 1x2 board
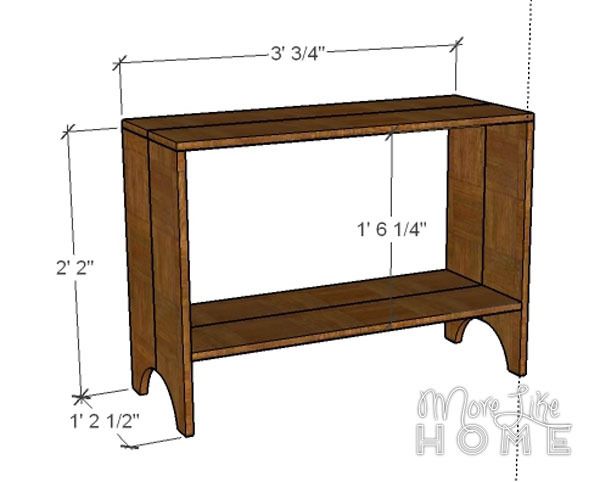
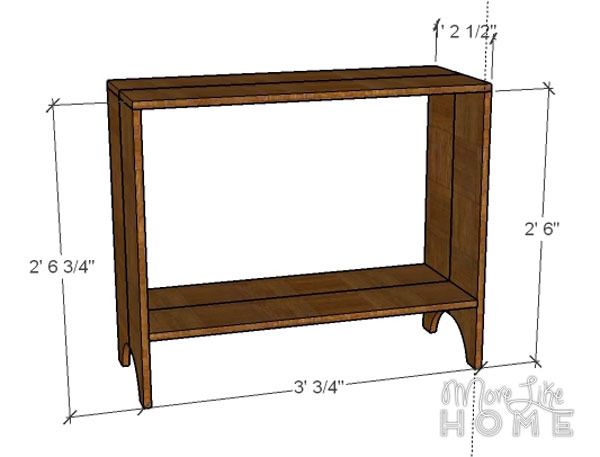
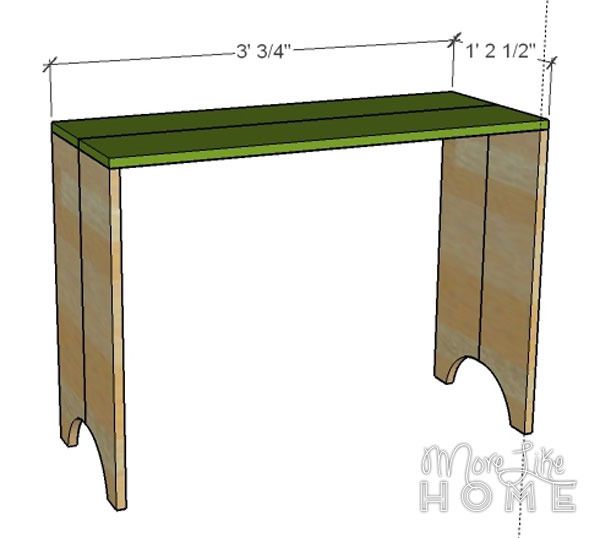
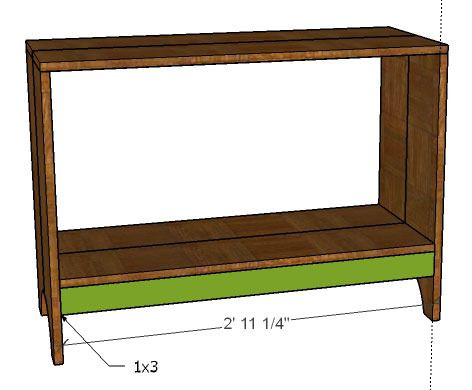
Finished Dimensions:
26" legs will give you a shorter table with the same proportions as the original photo, with finished dimensions of 36.75" wide x 26.75" tall x 14.5" deep
30" legs will give an average height table but the proportions will look slightly different (there's plenty of room for a second shelf!) with finished dimensions of 36.75" wide x 30.75" tall x 14.5" deep
Cut List:
A - 4 1x8 @ 26" OR 30" (sides)
B - 2 1x8 @ 36 3/4" (top)
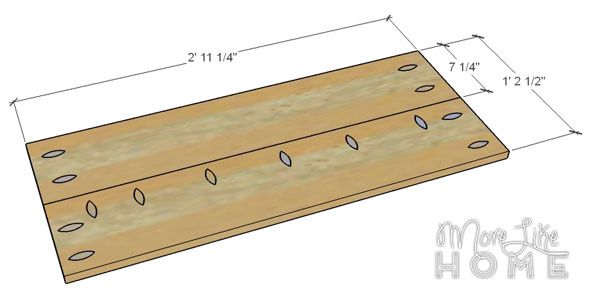
C - 2 1x8 @ 35 1/4" (shelf) cut two more for an extra shelf, you'll need an extra 6' board
D - 1 1x3 @ 35 1/4" (brace)
E - 4 1x2 @ 14 1/2" (if you don't have a Kreg Jig)
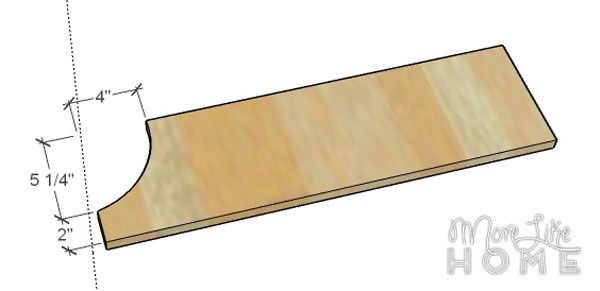
Start by cutting a rounded notch out of the bottom corner of each side piece (A). Measure up 4" from the corner and make a mark, then measure in 5 1/4" from the corner and make a mark. Draw a curved line connecting the two marks (or use a large bowl as a guide) and cut along the line with a jigsaw or reciprocal saw. Use the board as a template to trace a matching curve on the remaining three boards and cut them out.
Attach two side boards together using a Kreg Jig, matching up the top edge and the curved sections. Repeat with the other two side boards. (you'll also need pocket holes along the top the side boards)
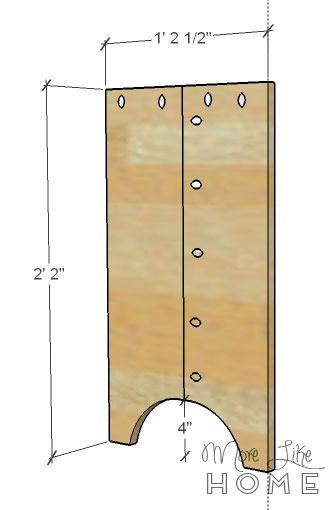
If you don't have a Kreg Jig, don't worry! You can still do this project! Just lay two side pieces side-by-side and lay two 1x2s across it (E). One should be flush with the top, the other should be set up 5 1/2" from the bottom. Attach them using 1 1/4" screws and glue (always pre-drill holes for your screws). Repeat with the remaining two side pieces.

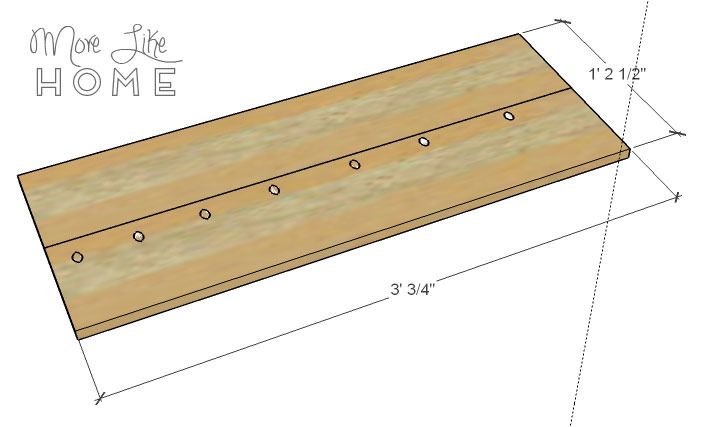
Attach the top to the sides using the Kreg holes at the top of the sides. If you want a more rustic look, you can drill down through the top instead, leaving the screws visible. Black screws are great for this look. If you don't have Kreg Jig, just drill down through the top into the sides with regular screws.
Attach the two shelf boards (C) side-by-side with the Kreg Jig, and make pocket holes in the ends for installing the shelf.
Install the shelf using the pocket holes. It should be set up 7" from the bottom of the sides. Again, you can drill through the outside and leave the screws visible for a more rustic look. If you don't have a Kreg Jig, the shelf should sit on the 1x2 boards. You can drill down through the shelf into the boards, or drill through the sides into the ends of the shelf, depending on if you want the screws visible from the outside or not.
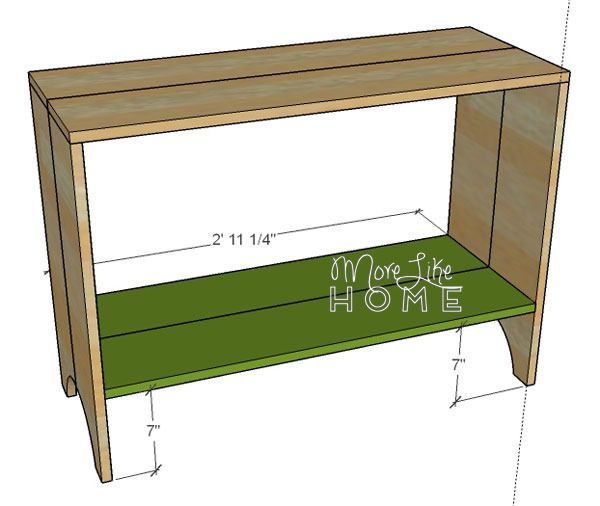
The brace (D) will help keep your table from leaning.Stand it vertically, flush with the back edge. You can attach it with Kreg screws, or by drilling through the sides and shelf into the brace. You can install it below the shelf out of sight, or above the shelf to serve as a backstop to keep things from falling off the back of the shelf.
Sand the whole table down and finish it however you like. Try a rustic finish to get the look of the inspiration photo by lightly sanding the finish before sealing with a polyurethane (matte looks more rustic than gloss).

With your table done, you just need a few more finishing touches to finish off this look!
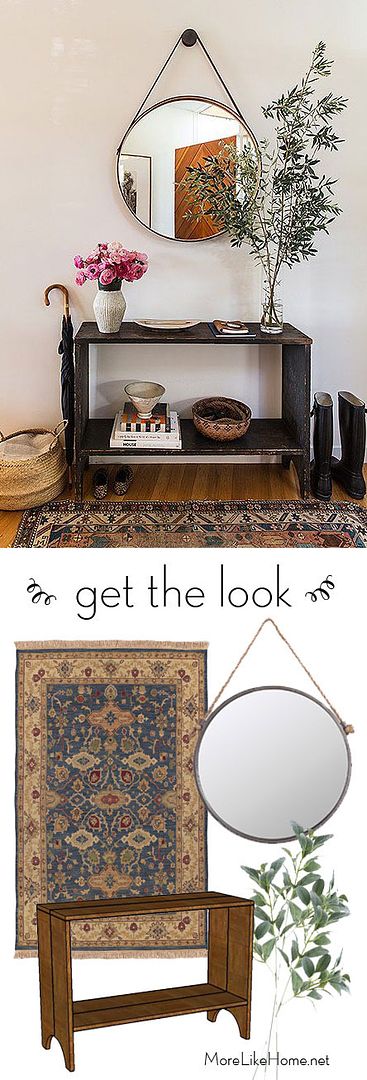
Start by anchoring the table with a large mirror. You can go with an eye-catching rope-hung mirror like the original photo, or hit a few yard sales for a bargain find. I have a large oval mirror I picked up for $3, and a large round mirror that was free! Besides making a big impact in the space, a mirror is also functional! I love having one in the entryway so I can check myself on the way out the door.


Finally, add a little greenery. This is a key element to keep the space fresh and inviting! You can use branch clippings from the yard or, if your thumb isn't quite green, you can use nice fake plants. My favorite place to get them is Hobby Lobby when they are on sale 50% off. The lambs ear will give you a more neutral green like the original photo, or you can go a little more vibrant with a eucalyptus branch. Try switching them out for pine branches in winter.

And there you have it! A fresh, welcoming entryway with a smack of rustic charm. The table is a great weekend project that can be done by Monday, and if you shop the house you can have the whole space looking good by then (without taking a bite out of your wallet).
How would you dress this table up? What are your favorite designs and features for an entryway? (I love a bowl on the entry table to catch everything when we come in without looking too cluttered)

No comments:
Post a Comment