Friday, October 24

Faucet Overhaul {and how to install your own}

This story starts with a lesson we learned the hard way - don't buy a faucet from Ikea. At least not the cheap one. To make a long story short, the hot water started leaking non-stop and the only way to stop it was to turn off the water below the sink. We lived with it for a few weeks. But let's face it, I have a limited amount of sanity per day and I can't spend it crawling under the sink to get to the hot water. So we swapped our faucet for this guy.


One thing we learned through our faucet hunt was that they can be a little pricey. Even at Ikea most of the faucets are $150-250. So when Husband's search turned up this $105 version on Amazon with great reviews, we decided to give it a try. It had the single-hole design we needed and we loved the modern style. Plus after living without a sprayer we were glad to add one into the mix. Once it arrived Husband had our new faucet up and running in just a couple hours. If you're looking to get your feet wet (ha?) with DIY home improvement a new faucet could be a great place to start! So here's the simple guide to how we did it.


The first step is always turning off the water.

Wednesday, October 22

Cooking for New Moms {the easy way}

Being a new mom is hard. So much to learn, so many tiny snuggles, so little sleep... those first few weeks can be a doozy. And on top of it all, your body has some major recovery to do! I have become a firm believer that moms need six weeks of REST (more about that here and here) after birth, but how are you supposed to do that (especially if you have older kids) when there are floors to mop and mouths to feed??? One of the most thoughtful things my friends did for me after the brothers were born was bringing hot, ready-to-eat meals right to my door. It was a life saver. One less thing to think about so I could enjoy my newborn and get some much-needed rest. I never realized before what a gift a meal can be. And so I've made a decision. I'm going to make a meal for every new mom I know. Every time. Even when it's hard or I'm busy or the kids are crabby (which basically happens every time I do it. thanks kids.). But I believe this is important and it's not something I want to brush off. So today I'm sharing my favorite new-mom meal that is fast, super easy, and even very affordable. We're talking 15 minutes of prep, an hour in the oven, and you're done! We've all got time for that, right?


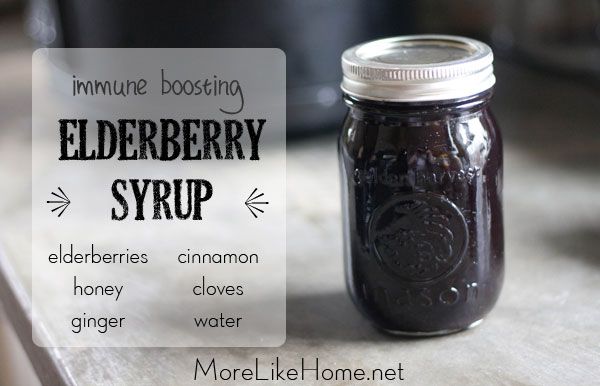
I get all my ingredients at Aldi because I know the main dish is pretty cheap, then I add in whatever fruit or vegetable is on sale that week. Here's what you need (I double it for a larger family, like in the picture above):
  • 1 package frozen cheese ravioli ($2.50)
  • 1 can spaghetti sauce ($1.00)
  • 1/2 bag shredded mozarella (optional, $3.00)
  • 1 box grapes ($2.50)
  • 1 package broccoli ($1.50)
So the total for a single meal is just $10.50, and even less if you skip the extra cheese or get a cheaper fruit! And you can totally make the night easier for yourself by making a second batch of everything for your family to have for dinner tonight!

To make the dinner start by preheating the oven to 375 degrees. Then combine the ravioli and sauce in a baking dish (I buy a big pack of foil pans at Costco so no one has to worry about getting dishes back to me). Top it with shredded cheese and cover it with foil


I always pick an easy-bake vegetable for the side. Something I can just wash, cut up, and throw on a cookie sheet by the ravioli. Whichever vegetable I choose, I like to toss them with olive oil, salt & pepper, and sometimes parmesan cheese before baking. The cooking times vary a little but here are a few of my favorites:

Broccoli or Cauliflower - 45 - 55 minues
Green Beans - 20 - 30 minutes


Got that all ready? Put both pans in the preheated oven for 45 minutes (if you're doing green beans remember to pull them out sooner or add them toward the end instead). When the timer beeps, remove the foil from the pan and let it cook 10 more minutes. Check the vegetables to see if they are ready to come out or need the extra 10 minutes (I usually just leave mine in the whole time).


While it's cooking go ahead and wash your fruit and cut it up if you need to. Some of my favorites to do are grapes, watermelon, and apples. I try to keep it pretty kid friendly if there are older siblings at home.

When everything is ready I package it up (using disposable containers for everything so there is nothing to return) and pile it in a cardboard box so it's easier to transport. When I can I put in some disposable plates, too, so they don't have to do dishes. 


If I'm feeling super ambitious I'll make a taggie teething ring for the baby too. Which I've done exactly once. ;)


And no matter what you make, the important thing is being there for your friend in such a big, life changing moment. So please, make a meal for the new mom you know. And when you drop it off, offer to do the dishes, or vacuum, or play with the kids while she takes a nap. Anything you can do to make life a little easier for her tired-self. And no, I am absolutely not talking about offering to hold the baby so she can do those things. Please, please don't do that. Let the momma rest. Take some of the burden. Maybe she'll do the same for you some day? And maybe not. Let's not let that be our reason, friends. Let's just remember to always be kind. Always be generous. Always be the best we can be.

So, what is your favorite, easy meal for a new mom?

Friday, October 17

Dinosaur Curtains {two pairs of curtains from one set of sheets}

We finished the big boy room makeover way back in the spring, but today we're finally going to take a closer look at those dinosaur curtains! We used a sheet set to make light, airy curtains with an accent strip across the bottom. This is the story of how I squeezed two full sets of curtains out of one twin-size sheet set.


I had a terrible time finding the perfect thing. Big Brother loves dinos, but so many dino fabrics are babyish or crazy colorful. I really wanted something light, clean, and not cartoony. A thorough fabric search both in-store and online turned up nothing like what I was looking for (except one single fabric that was $30/yard. *faint*). So I broadened my search - duvets, sheets, shower curtains. Nothing was safe. And finally. Finally. I found something. It was a sheet set at Pottery Barn Kids that would just fit the bill. Except... where the actual bill was involved. Ideally you would want flat sheets for making curtains, and I like to plan on one curtain per window which would mean two flat sheets for this room. But PB only sells their sheets in sets. And a twin sheet set was $59 (but they have lots of great boy prints and most are on sale at the moment for $47). There was no way we had the budget to double that, so I just ordered one set and vowed to make it work! Another note - shipping was OUTRAGEOUS and we could not find a way to get it cheaper. Almost $20 between shipping & taxes. Definitely recommend buying in-store at PB Kids if you can.


When my sheets arrived I started by washing & drying them. Then I set to work on the fitted sheet first (since it was smaller and I could cut the flat to match whatever the final size would be).  I started by cutting right along the corner seams so the corners opened up flat like this:

Tuesday, October 14

DIY Swinging Baby Gate

Babies are tiny little Houdinis. Before they're big enough to crawl they can cross the room in a blink. Add their signature stealth-waddle and they'll be up the stairs, in the bathroom, splashing in the toilet before you even know they're gone. One of the trickiest things to do as a parent is find ways to contain the children (and their respective havoc) to keep them safe and save your sanity.


One of the baby-problem-areas in our home is our master suite. It's upstairs and the staircase is wide open. I can't do anything up there (make the bed, put laundry away, clean the bathroom...) without the brothers making a break for the stairs. The other problem is that our babies sleep in our room for quite a while - until they are at least mostly sleeping through the night. Baby Brother is still there at 14 months old, but he is definitely outgrowing the pack-n-play that he's been sleeping in. Our best solution for this is to put the crib mattress on the floor, but we don't want him sneaking toward the stairs when we are asleep. The obvious solution would be a baby gate, but all the openings upstairs are just a little too wide for a standard gate, and the larger sizes are pretty pricey. So we made our own with scraps of wood from the garage!


The great thing about a DIY gate is that you can make it just the size you need for any space. We made it perfectly fit our hallway upstairs. It's also really nice having a swinging gate because we don't have to fuss with putting a gate up and taking it down each time. Plus it's pretty affordable to make! We spend about $15 on hardware and all the wood was leftover pieces we already had (if you need to buy new wood you're probably looking at $10-15, depending on what board sizes you get).


Saturday, October 11

Elderberry Syrup {and our natural medicine cabinet}

You guys know we try to stay pretty chemical-free around here, especially when it comes to our little fellas. A while ago I talked about how we ditched our conventional personal care products in favor of some safer alternatives, and then did the same with our cleaning products. But there's another big area we've also been addressing, and that's the actual medicine part of our medicine cabinet.


Not that we think medicine is all bad. It definitely has it's place and we use it when we have to. But before we go running to chemical products that suppress symptoms, we want to give our immune systems the best chance to fight off illness. So immune-boosting foods and supplements have been our first step. One of our very favorites is this homemade elderberry syrup. Elderberries are high in vitamins A & C, stimulate the immune system, are high in antioxidants and are anti-inflammatory and antiviral. This syrup tastes pretty good so we have no trouble convincing Big Brother to have some, it packs an immune-boosting punch, and it costs a fraction of the commercially available stuff. Plus it's super easy to make!


Ready to make your own? Here's all you need:

2/3 cup  elderberries (available here)
3 1/2 cups  water
2 Tbs  ginger root (grated fresh or dried)
1 tsp  cinnamon
1/2 tsp  cloves (whole or ground)
1 cup  raw honey

We bought 1/2 lb of elderberries  and I think we will get four pints of syrup from it. Extra berries can be stored in the freezer to keep them fresh.


Subscribe