Sunday, June 24

Baby B's Fan Club

Have you ever seen a close up of the fan in Baby B's room? Well, this picture doesn't do it justice. It's bad. You can see one of the lights is broken off and hanging by a wire, but what you can't tell is that one of the fan blades is super crooked. This apparently throws off the balance of the fan and causes it to wobble so much that it threatens to rip itself from the ceiling, even on the lowest setting. In summary, fan = useless and light = dangerous. Time for it to go.


We've known since we moved in a year and a half ago that we would need to replace the fixture, but it wasn't until a couple 90 degree days hit this year that we realized how badly we really needed to get a working fan in there! So we headed out to Lowe's and picked out one of the cheapest light/fan combos available. There were no great deals or clearance sales this time, so we ended up paying a full $70 for this guy. Kind of a bummer. I think the lesson here is don't wait until you can't wait any longer! We bought it in a moment of desperation, but if we'd been on the lookout earlier this year we probably could have gotten one on sale.


For the record, the "five minute fan" part is how long it takes to put the blades on. Now how long it takes to get things all unwired and rewired. Anyway, we (meaning mostly my mom, the electrician extraordinaire) just followed the instructions in the box to install the new fan. We TURNED THE POWER OFF, which was the single most important step. Then we unscrewed the old fan from the ceiling and disconnected all the wires.


 Which left us this nice little hole. We were super relieved to find a properly installed electrical box behind that hole (we were not so lucky with the sink light in the kitchen).


 Then we screwed the included plate into the electrical box.


 Then we connected the new wires (and used some electrical tape to make sure things stay connected!) and secured the fan base to the plate (which you can see in the next pic).


 Next up were the fan blades and while they pop in really easily, they do not pop out easily. Did you notice anything a little off in the picture below? It turns out most fans come with double sided blades so you can choose which color you want to show. Oops. Fortunately N was able to pry the reddish colored ones off and flip them over to the dark walnut side, but next time we plan to save ourselves a little trouble and pay attention when we put them on the first time.


 Next up was wiring in the light kit. How's that for a mess of wires? My mom took care of this, but the box did include directions and I think they design these so most people can do it themselves. So don't be intimidated!


 Here is the light kit all wired up.


Then we just secured the light kit to the fan, installed the glass, and screwed in the bulbs. Ta-da! Much better. And besides looking much better (I'm loving the dark metal & wood!), it also FEELS so much better! It's amazing how much difference a fan can make in the summer. I've even read that using ceiling fans allows you to turn up the thermostat several degrees higher and save some $$$ on your cooling bill!


But so far the BEST thing about this fan has been Baby B's reaction to it. He LOVES it! Every time he walks into or past his room he stops and points at the fan. And sometimes stays to stare at it for a while. And if we let him flip the switch or pull the cord... oh my goodness, we are the best parents EVER! We knew he would like it because Sunday during church he has fun pointing out all the fans in the sanctuary. And now he has one of his own and couldn't be more thrilled. He even lays still 
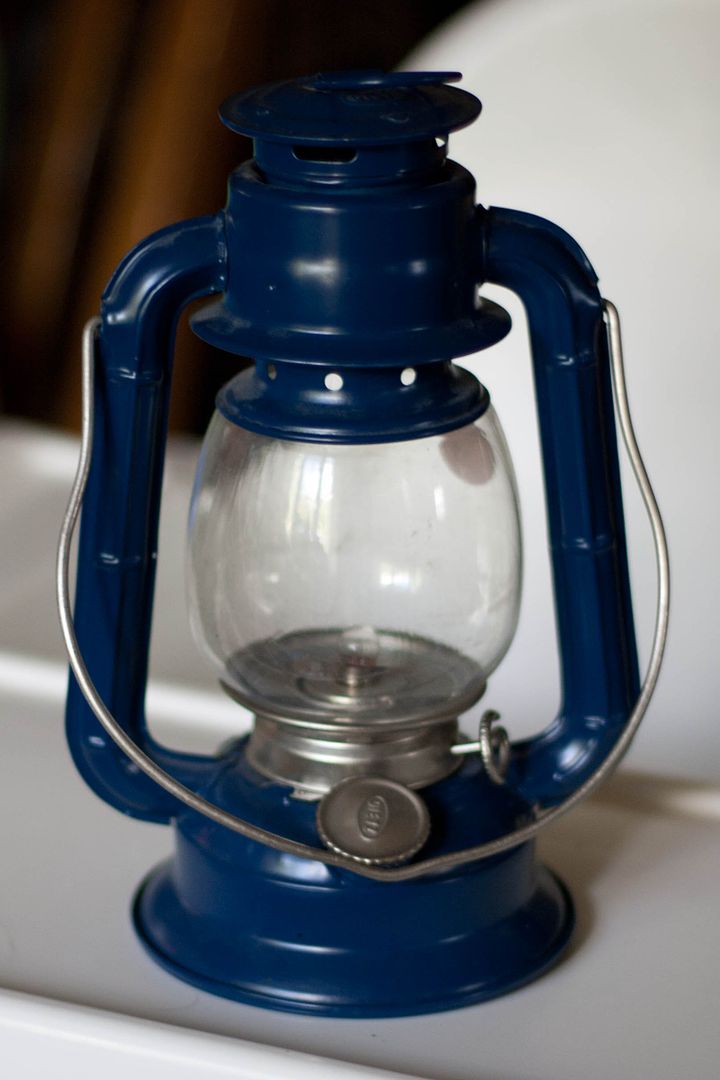
for a diaper change because he is so mesmerized by it. Maybe because it looks more like this to him?


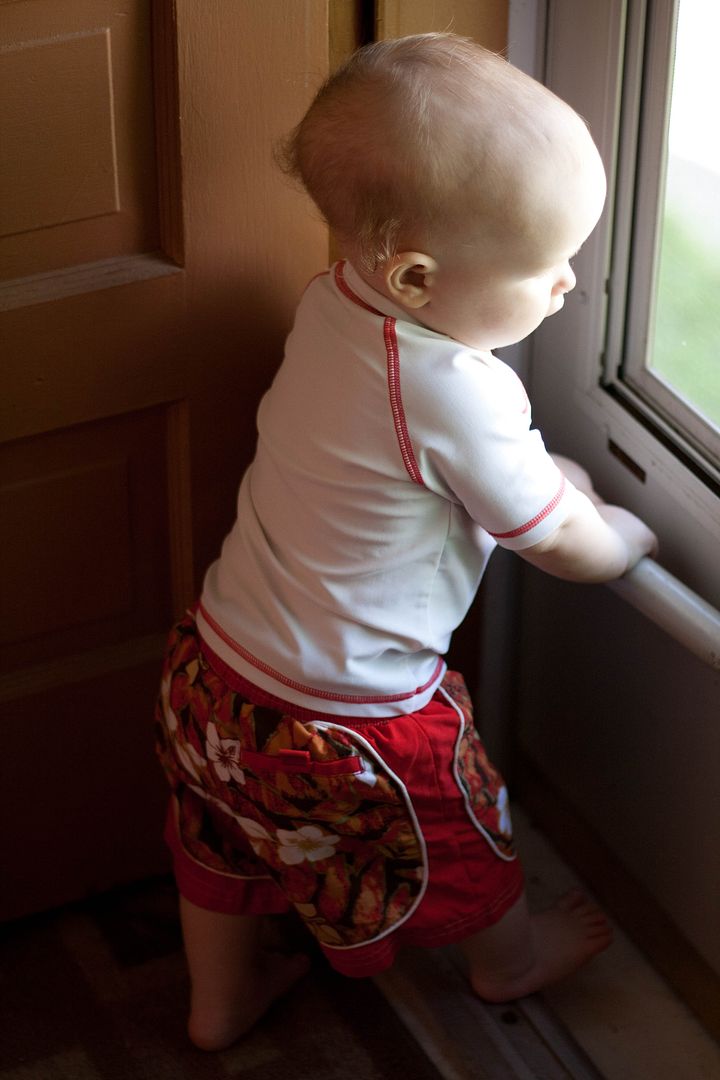
 Speaking of Baby B, here is is sporting his Sunday best. And a very serious face.


 But then he saw two of his favorite things - momma & her camera - and things brightened up. He cannot resist me.


And that's the story of a boy and his fan. Although, really, it's more like he's a fan of the fan. :)


Have you done any fan work lately? How do you stay cool in the summer?

Tuesday, June 19

$17.60

Last weekend I only went to one yard sale, but I went twice! It was our church's big fundraiser rummage sale for the sr. high kids class. It runs Thursday - Saturday every year and I like to go Thursday to make sure I see all the good stuff, then go back on Saturday for $1 a bag day for anything that's left! And this year did not disappoint. It was the biggest, busiest, craziest sale I've been to! Here's what I found on my first run:

$4.50 - a big pot for home-canning. Hopefully this will get a lot of use from my garden. :)

 $1.00 - lantern. I need to get batteries to see if it works, but hopefully it will be fun for Baby B when we go camping this summer (or play camping in the backyard!).

 $1.00 - big glass bottle. It's like a foot tall. I don't know the perfect place for it yet, but I WILL find it. :)

 $0.25 - muffin tin

$0.75 - three mason jars for my future canning endeavors.

 $1.50 - two white flower pots, maybe for the patio?

 $0.10 - jar cup. I've been saving glass jars to use as cups anyway, so I thought this one with a handle would be a fun addition!

 $2.00 - Set of Coke cups. N has been wanting some fun cups for our basement bar area, and as we don't drink alcohol, these seemed like a perfect fit! The set has five of the handled mugs and four of the cups.

 $0.50 - buckets and shovels for Baby B to use at the beach! Or in the backyard pool. Or digging up my garden. :)

 $6.00 - local honey? Okay, not your average yard sale purchase, but remember this was a fund raiser sale! A local honey farmer donated some jars for the kids to sell. :)

On Saturday we went back and, because there was SO MUCH STUFF this year, they were handing out GARBAGE BAGS to fill for $1.00. What?!? Two of my sisters and I shared a bag (and one of them offered to pay for the whole thing - thanks J!!) so we pretty much made out like bandits. My part of the loot included two Frank Peretti books, an Indian in the Cupboard book, and a few shirts. Not a bad day. :)

And if that wasn't enough yard sale for one weekend, we also had a sale of our own on Friday and Saturday! More details to come on that when I get the pictures loaded. :) Have you been to any good sales lately?

Thursday, June 14

Backyard Dreams

All that talk about the garden got me dreaming up some more plans for the backyard! We want it to be a fun place where we can all spend quite a bit of time this summer. Here are a few things we have in mind:


On the left side of the garage is the square foot garden. It's already built and mostly planted, and now we want to make it an easy to maintain area that flows into our outdoor living space.

Just below that is one of our biggest and most exciting plans! We want to extend the patio space out as far as the garden bed to create an outdoor dining space. We'll either buy or DIY some paving stones, but I'll let you know when we get there. I would love to build a pergola over the space to provide a little shade and a place for vines to grow. It would be sweet if I could get vines to grow up and fill in the roof for shade! And of course some strings of party lights to set the fun summer mood. It will make a nice place to pull the grill out for cooking, and I would love to build some kind of dining table if I can ever decide what style. I've narrowed it down (ha.) to the simple outdoor collection, the fancy x farmhouse table, the basic x picnic table, or the harriet outdoor table & chairs. And how about a spot for the kids?

http://pinterest.com/pin/242279654923965452/
a perfect summer pergola, via pinterest


Over on the right side, we want to make a rain barrel (here is a tutorial by Young House Love) for watering plants. We already have a compost bin (There are plans here and here if you want to DIY one) and we would like to build or buy some kind of storage shed for the lawn mower & bikes.

http://pinterest.com/pin/242279654924034488/
lawn mower shed idea, via pinterest

Then the only thing left on that side of the garage is to fill in the rest of the space with more shade plants, like hostas.  On the existing patio we want to build some kind of coffee tables to go with our outdoor sectional, but I'm still trying to decide if that would make things too crowded. I currently have another small table on the patio that just adds a little workspace for grilling and planting flowers. At the moment I'm planning to paint it a bright green, but I'm also keeping my eyes open for some kind of dresser or table that is a little bigger to replace it with that would add more storage and work space.


We would also LOVE to add a fire pit somewhere, but haven't decided if we have a good spot yet. If we can work it in, we want to try this plan for a $30 DIY fire pit. besides these more functional ideas, I also just want to have some fun decorating out there! I don't know what I'll do exactly, but I love party lights, grape vines, blooming vines, lanterns and candles to name a few! These are my top plans right now, but I have a whole pinterest board full of ideas I want to try!

http://pinterest.com/pin/242279654923401893/
decorating with burlap curtains, via pinterest

Do you enjoy outdoor living during the summer? What are your favorite backyard activities? What plans do you have for your backyard?

Tuesday, June 12

Square Foot Garden - Planting!

Now that my Square Foot Garden is built and filled, it is finally time to do some planting! So let's jump right in. Here is a look at what I've planted so far:


I have a couple melon plants peeking through. It's amazing how fast these little sprouts popped up! I used watermelon seeds from Gurney's and cantaloupe seeds from a yard sale (they were an already opened pack for free so I figured I would see if they grow... so far so good!)


 These are my pepper plants. I bought the plants from a grocery store down the street. They came in a 6-pack so I have 6 of the exact same thing. Ha. Not ideal, but if they are yummy it will be great. :)


 Next up are beans and peas. I planted several sugar snap peas (also from a yard sale free pile) and a variety of yellow, purple, and green beans (some from Gurney's and some from the yard sale). I had ordered snap peas and a few other things from Gurney's that I didn't end up using because when I got them they had labels on the packages saying they had been treated with pesticides or something like that. I don't know what it is exactly, but I didn't feel good about planting the seed varieties with that warning. That was a little disappointing, Gurney's. So consider yourself warned. I don't remember seeing anything about the seeds being treated when I ordered, but I will definitely pay closer attention next time!


 I have 6 tomato plants so far. Tomatoes are my favorite. :) I'm hoping to have enough to do some canning and make spaghetti sauce and stuff like that. But I don't know how much they (or any of my plants!) will produce, so we'll just have to see. Maybe next year I'll have a better idea of how many plants I need.


I also have green & yellow zucchini planted, and I just bought cucumber and eggplant to add in as well. And I still have space left! So now what should I plant? But wait, before you answer, I have a few more things planted around the yard.

Along the side of the garage I have my asparagus and strawberries (both purchased from Gurneys. I think it takes a few years to get any produce). Well, HAD them. When you plant (or replant) anything it's important to keep it watered! I had the bright idea to dig up my strawberries and spread them out down the bed. Unfortunately I decided to do this during heat wave and, that combined with my neglected my watering duties, has resulted in a fried, brown bunch of plants. At this point I'm just hoping they come back next year. (I'm working on  collecting bricks to finish off the bed. Then I'll do some leveling to tidy things up.)


I also built a small raised bed right outside our backdoor. This one is in a spot that is in shade part of the day so I thought it would be better for things like lettuce that aren't very heat-tolerant. In the back corner is some romaine plants (from the grocery store) and in front of that I planted seeds for butter-crunch lettuce (from Gurney's) and spinach (from a yard sale). Apparently squirrels like these seeds because that whole section has been dug up! I'm going to replant and sprinkle some cayenne around to deter our fuzzy friends.  The whole right side of the bed is a variety of herbs (all from the grocery store).


That's it for the veggies so far. I bought a lot of plants from the grocery store just because it was close and easy. We walk there most of the time! Last time we were there I picked up a few extra plants, just for pretty. I chose two packs of shade plants to mix in the planters on the patio. One pack had leafy coleus (I got lucky and found a pack that had both solid green & two-tone plants in it!) and another shade plant that will have little white flowers on it (I don't know the name).


I love the bright greens and can't wait for those flowers to show up! I do have to say, though, I am a novice at flower arranging/landscaping. I have no idea how to make planters look good. I can tell already I should have picked a taller or shorter plant to mix in because these are all just the same height. Oops. I'm hoping the flowers will add some variety and make things a little more interesting. :)

I also bought a pack of flowers that need full sun. I wedged all of those into one pot for by my front door. Again, not a flower arranger here. But it will work just fine. :) 


What else should I plant in my garden? What are some yummy things I haven't thought of, or something I should plant more of for canning or freezing?

Saturday, June 9

Square Foot Garden

It's finally time! We started our first garden! Baby B is almost as excited as me!

 "Come on mom! Let's go let's go let's go!"

 "I can see it from here!"

 "What do you mean there's no sweeping in the garden?! That can't be right...."

I started reading the book Square Foot Gardening (confession - I didn't finish it. I'm okay with that.) and I love the concept of growing more in less space! So we are giving it a whirl. The first step in the book is building a raised garden bed. It suggests an outdoor wood like cedar (nothing treated, you don't want those chemicals near your food!) but a friend who built a cedar bed said theirs is already starting to deteriorate and suggested building out of stone instead. We went to Lowe's to do a little price shopping before we made a final decision, and were not thrilled with what we found. Cedar was going to be about $60 to build our bed, and the cheapest concrete blocks available would be $30 and ugly to boot. So we decided to rethink our options looking for something cheaper. I took a shot in the dark and posted an add on our local freecycle site asking for any kind of bricks or stone blocks and, believe it or not, I got a response! A lady in town offered a us a pile of old bricks if we would haul them out of her yard! Um...yes. We will totally go for that. So we brought home a decent pile of bricks for free! It wasn't quite enough but my dad had enough extra bricks in his backyard to finish it off. So in the end we built our raised bed for free and saved a big chunk of change! It also turned out looking really cool with all the mismatched bricks.... but we'll get to that in a minute.


 My plan was to plant a bed along the side of our garage 2' deep (so we could easily reach stuff growing in the back) where I already have strawberries, asparagus, and rhubarb growing (if you can see the tiny bush way in the back it's a black raspberry bush I planted last summer). There are actually strawberries in there, hiding behind the weeds!


 But I started doubting that layout. So I took a swim break with Baby B to think about it.


 After some thought I decided it would make more sense to let the current plants grow where they are (especially since strawberries can really spread out. I'm hoping to let them fill in that whole space), leave some walking space, and then do a deeper bed set out from the garage. I wanted the bed out far enough to leave a few feet of growing space for my berries, and about 3' of walking space to make sure we could easily mow the pathway. Here is where we learn an important lesson. The book suggests putting landscape paper under the entire bed. When I moved my paper and bricks out to the area I wanted to use, I put the bricks on top of the paper. Bad move. Because I decided I wanted to move the bed out a little farther and had to move all the bricks off. Oops.


Once I got the bricks moved back off of my paper, I slid the paper out where I wanted it. I measured out 5' from the garage to keep things parallel and put a few bricks on the paper to keep it in place while I arranged the rest of the bricks. My bed is 3' wide (the book suggest 4', but my paper was 3' wide and I didn't want to push my boundaries on the property line) and about 20' long. If I decided I need more room next year I can extend it out toward the alley even more. :)


 I lined up bricks all around my paper, over lapping the paper edge a little so it would be held in place. I wanted these to be as even as possible, so any time I ran into a bump or hole that made a brick sit unevenly I dug up or added a little dirt to get everything sitting flat.


 All my bricks were different sizes and thicknesses, so I had to sort through them and find the ones that were roughly the same height. By using similarly sized bricks, and doing a little digging to make up the difference, I eventually ended up with a pretty even base layer.


 After that the second layer didn't matter as much since nothing would need to sit on top this time. I overlapped the bricks to make them a little sturdier, but didn't worry about the varying heights.


That was it for building the bed. I love the mix-match, eclectic look of all the different bricks. I'm trying to hunt down some more bricks to enclose the berry area too so it will look tidier. And because I love the way these look. :)


Next up was filling my garden with "Mel's Mix" of compost, peat moss, and vermiculite. I found most of the supplies at Lowe's, the only problem was that they only had one kind of compost and I was supposed to do a mix of 5 different kinds. I originally bought all the kind they had, but I ended up taking some back and shopping around to get more variety. I also was lucky enough to have some friends donate a bunch of Mel's Mix from their garden which cut down my costs even more! This is the part of this project that could really get pricey, even more so than the wood/stone/bricks. Here's a cost breakdown for filling my garden:
  • Compost   $2-4/bag (1 bag covers 1-1.5 cubic feet)
  • Peat Moss   $10/bag (1 bag covers 3 cubic feet)
  • Vermiculite   $12/bag (1 bag covers 1.5 cubic feet)
That vermiculite stuff is crazy expensive! So it better give me a bounty of delicious vegetables. The amount you need of each depends on the size of your garden and the book has charts and such for finding out how much you will need. I didn't follow the directions exactly because I skimped out a little on the vermiculite. To fill my whole garden (the right way) would have cost around $120, but thanks to my generous friends and general skimpyness I ended up spending around $75. It still seems like a lot for dirt (ha!) but I'm hoping it will pay off in the long run. And then you will learn from my success/failure and know if this whole deal is legit. :)


I used my mix to fill up my raised bed. And then it was time to plant!


But I think this is long enough already, so I will tackle the planting next time! Have you ever used a Square Foot Garden or other raised bed? Do you have a veggie garden?
Subscribe