Thursday, August 29

How to Cut Your Own Photo Mats

Have you ever had trouble matting a photo? I love how clean and professional frames look with a mat, but it's hard to find mats for large frames or odd-size photos and artwork. And when standard sizes don't fit you're stuck looking at pricey custom mats.

But there's a better way! You can cut your own photo mats right at home, in just a few minutes, for a fraction of the cost. Today I'll show you how!


Thursday, August 22

Packing + Organizing a Camper Van for a Family of 6

I've mentioned a few things about how we pack our DIY Camper Van, but I wanted to try to give you a better idea of how we actually make it work. What we pack, how we pack it, and where it all fits. So this is the post with all the nitty gritty (but probably not-super-interesting) packing details. Hold onto your hats, folks, and let's start at the beginning:

The first step in packing our camper van is to remove the back two rows of seats and the jump seat right by the door. This leaves room for Nathan and I in the front, followed by a three-seat row with two carseats (I left a seat between them open so I could sit by the baby sometimes), followed by a two-seat row with two more carseats. We've found removing the jump seat makes a world of difference when we're getting in and out of the beds! It's a little extra work to get it out, but totally worth it!

Not to scale. That leg room is false.

With the seats out, we can install the bunk system (it's removable when we're not camping and the foundation of making this van work for our family of six!). Once the bunk is installed, I put in both mattresses in place and go ahead and make them up with sheets, blankets, and pillows. Then I roll up the bottom bed toward the left side of the van like this:


Thursday, August 15

Felt Unicorn Altoid Tin Playset

You guys know I love a good DIY toy, right? (you can see our full list of toys here) Today I'm adding another installation to my DIY felt toy collection with this sweet little unicorn playset!

You can see all the other felt toy goodies here:
Today's toy is another little pocket-size set that fits in an altoid tin. It's great for on-the-go play and makes a perfect stocking stuffer!


The little unicorn lives in a little tree and has a little blanket to tuck in with.


There's also a basket that holds a tiny cupcake, carrot, and lettuce.


And it all fits into the tin when you're done playing! I mean, *ahem* when the kids are done playing. But no one will judge you if you need to play with it just a little.


Thursday, August 8

The Stack-a-Bed (converts from twin to king!)

To quote my three-year-old:

"THIS IS MY BEST MOMENT."
 
Because it's a clever design?
No.
Because it's super easy to build?
No.
Because it's affordable?
Also no.
I mean, sure, it is all those things. But here's the deal: all on my own, with no help from my lead advisor (a.k.a. husband), I, Georgia of the More Like Home, came up with the name "stack-a-bed". This is my best moment.


And now it can be your best moment when you build your own stack-a-bed. 
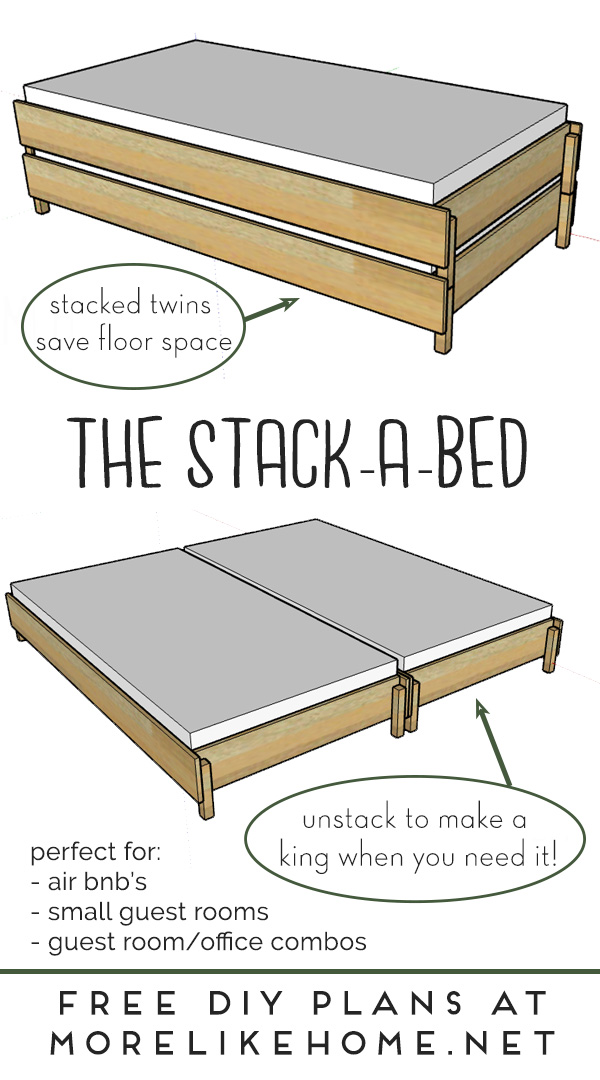
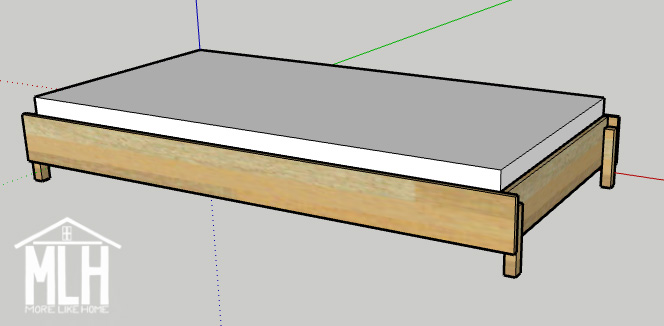
Why is it called the stack-a-bed, you ask? Well I'll tell you. The whole system is based on two of these super simple (and easy to build) bed frames:


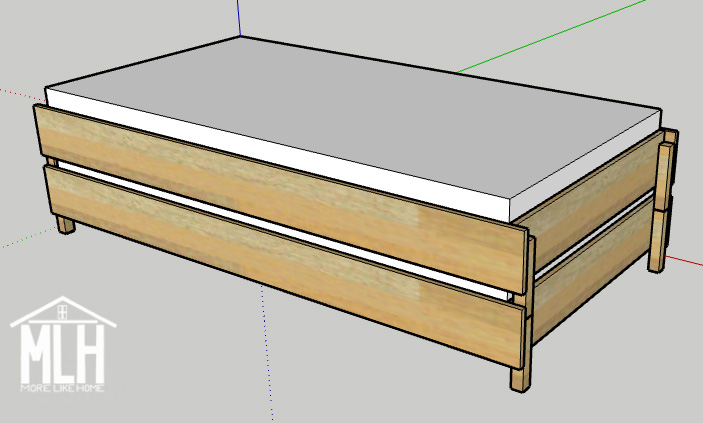
When you just need a twin bed, you can stack the two bed frames (with their mattresses) to save floor space! This makes it great for a small guest room, a guest room/office combo, playroom/office combo, a kids room for sleepovers, or even an air bnb where you need a flexible sleeping area:


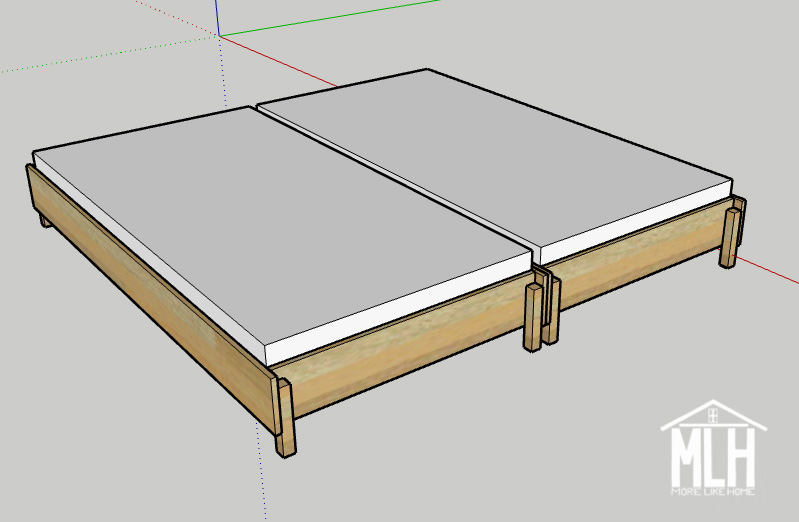
Then when you have guests and need a bigger bed, the beds unstack and sit side-by-side to make a king size bed! Just like that, you have a real, comfortable bed with room for your guests to stretch out:

Don't worry about the gap between the mattresses! Amazon sells a converter kit that fills it in to make a seamless bed!

Then when the guests leave? Stack it back up and regain your floor space! Ikea just came out with a stacking bed and it's genius, but I thought you guys might like a DIY version that's:
  • super easy to build and doesn't require any special tools (just a saw and a drill!)
  • affordable (all the lumber at my local Home Depot would be under $100 for two bed frames, or even under $80 if you use 1x6s instead of 1x8s for the sides!)
  • accessible for anyone who doesn't live near an Ikea
Ready to build your own?

Thursday, August 1

Guest Room Revamp (during our spending freeze!)

I gave a little teaser of this space when I shared my DIY floor plan art (you can turn your own home into a work of art!) and today I wanted to share the super simple and affordable way I totally refreshed this space... without spending a dime during our spending freeze!


From the day we moved in, I was never crazy about the blue walls in our guest room. For some reason I have never liked blue. Which I realize is ironic since I painted our entire house dark blue and love it with all my heart. I guess I only like a very specific blue? But for whatever reason, these blue walls just rubbed me the wrong way. I'd spent quite a bit of time over the last couple years scheming their demise, but always ran into the age old debate of the MLH household:

How much color do we need on the walls?
Me: "Less."
Husband: "More."


Subscribe