In the fastest turnaround this house has ever seen, the nursery is officially a big boy room! In our brainstorming post we talked a bit about the Sherwin-Williams color
selection tools, and how we used the
Color Visualizer to decide on paint colors for the room (you can read all about it
here). Now today we're going to share the big-boy after pics AND Sherwin-Williams has yet another $50 gift card giveaway just for you guys! But first the big reveal! We headed down the street and picked up a couple gallons of
Emerald™ paint, which is paint and primer in one with advanced stain blocking technology and exceptional washability (for a little boy room? I think yes.). Then just a few days later we were here:
And here's a little before/after action. From boring-blah to little-boy-tastic.
Pay no attention to the bird on the fan. A certain auntie left it for Big Brother.
Our first step was getting some color on those walls. We started by clearing everything out, taking down the curtain rods and brackets, removing outlet covers, and filling any extra holes in the wall (like where we took the spice rack bookshelves down. They wouldn't work there with the bed flipped over).
Then we were ready to get painting!
We started with our light gray (almost white) paint in SW 7010 White Duck. Since
Emerald™ is a paint and primer in one we just jumped right in with it on three walls (not the back wall since it would be solid blue). I started by cutting in around the woodwork and ceiling with an angled brush. I've found if you have a steady hand, painting slowly and carefully is actually faster than taking the time to tape it off.
Then we used a roller to fill in the rest. Thank goodness for very willing helpers. And paper towels.
But a word of warning, if you turn your back for even a second the little fellas will paint wherever their heart desires. Which, fortunately, was just the back wall, not the floor or woodwork. Whew.
We let the first coat dry overnight (the minimum recoat time is 4 hours), and we were really impressed with how well it covered and how even it looked. We could still faintly see the darker color around the bottom of the room and opted to do a second coat all around, just to be safe.
After the second coat... cue Olaf voice... "Now it's perfect!"
Now it was time to get stripey. After lots of measuring and searching Pinterest and staring at the wall, we finally settled on a plan. We decided to go big with 16" stripes and to center the blue stripes with about 4" of white space above and below. The big stripes seemed really bold and fun, and the white spaces helped it feel less heavy and also meant we didn't have to cut in along the ceiling or baseboard. So double win!
This is the fastest, easiest way I know to mark stripes on the wall, and all you need is a tape measure, pencil, and a nice long level. We're going to mark all the lines in pencil, and then we can follow the lines to get perfectly level tape. Since we wanted white space around our stripes, we started from the baseboard and measure up 4" and made a pencil mark.

Then every 16" above that we made another mark. This was actually an easy measurement to work with because every 16" is marked in red on our tape measure, so we just went four above each red mark. Which I guess sounds confusing but it was actually much easier to do as we went along. We work our way down the wall making a set of marks every five feet or so, just to make sure we would stay on track with our lines... and SURPRISE! We marked a second wall, too! I was on the fence about striping two walls, but then I realized that one of the biggest problems with our original room is that it was too safe. So we just went for it. And I am SO glad.
Then lined up our level with the marks (make sure it's level!) and used it like a big ruler to draw lines across the wall. Having marks at multiple distances along the wall let us double check that we weren't getting off track.
After the lines were drawn we taped them off. We sprung for Frog Tape, which is suposed to be the bomb-diggity for stripe painting, and we did NOT want to have to re-paint. The Frog Tape recommended letting the paint dry four days before taping, but our antsy selves could only wait two, and it worked great except for two little spots where we taped over holes we had just patched. Those spots needed a little touch up.
We taped right along the pencil lines, making sure the tape was outside the the blue stripes and inside the white. So it ended up like this:
The blue stripes are a full 16" between the tape lines. The white stripes are 16" including the tape.
We also taped off the ends of the white stripes where they would meet the blue wall.
And the ends of the blue stripes where they would meet the white wall.
Then we cracked open our SW 6221 Moody Blue. This time the boys were asleep and we were able to double up on it - I cut in and Husband worked the roller. Thanks to the stripes, there wasn't too much cutting in this time. Does that make me the winner?
Darker colors usually take more coats to get good coverage, so we expected to have to do at least two. Here's a comparison of the first coat:
And the second:
You may have noticed the tape is down... because the second coat did the job!
Emerald™ paint advertises exceptional coverage for stunning color, a beautiful finish, and an even appearance. And it did not disappoint. We pulled the tape off while the second coat was still wet, per the Frog Tape's suggestion.
Once the painting was done we moved things back in and added a few more DIY updates, courtesy of Sherwin-Williams (thanks guys!). Our first big move was flipping over our
Ikea bed to make a low loft. Big Brother thinks it's the coolest thing ever... hopefully he still feels that way when he sleeps there. :)
When Baby Brother moves in we'll put a mattress on the floor underneath, but for now it's a great play/reading area with some comfy floor cushions and a basket of books. And a toolbox. Because things always need fixing.
Big Brother is having a grand old time with it.
He's very proud of this new one-eye-opened-one-eye-closed trick. Be still my heart.
Big Brother was a little nervous about the ladder so Husband grabbed a couple handles from the hardware store and he is much more comfortable now.
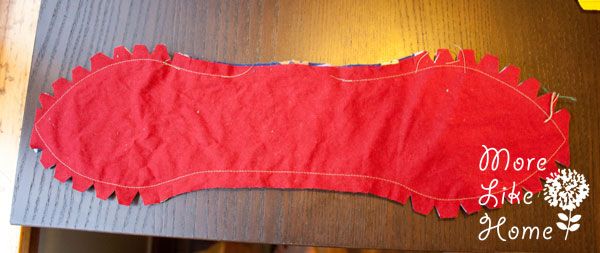
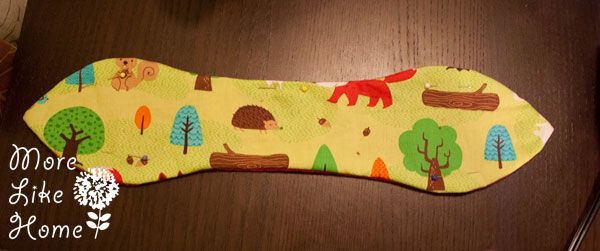
I also updated the
bed tent by making a new cover with red fabric (tutorial
here soon so you can do it too!).
To make it extra cozy for Big Brother we added one of the
spice rack bookshelves under the tent.
It's perfect for a couple books and a sippy cup, and we clipped on an LED light (LEDs don't get as hot so it's perfect for a little guy and being near fabric). We'll do the same by Baby Brother's bed when he is a bit older.
With the bed done we turned our attention to the windows. I knew I wanted to do dinosaur curtains because our boy loves dinos, but after searching high and low I just couldn't find any curtains or fabric that fit our plan for the room for a reasonable price. So I broadened my search looking for anything from sheets to tablecloths and finally found some dinosaur sheets from pottery barn kids fit the bill. You can see a tutorial to make your own
here.
I had two windows to cover (and didn't want to pay for two sheet sets) so I used both the flat and the fitted sheets, plus a little extra green fabric and was able to pull off two full pairs of curtains from just one sheet set! I'll share the details in another post so you guys can get the most bang for your buck, too (see it
here!).
The main thing I looked for was dinosaurs that looked more realistic instead of cartoony, which was pretty hard to find. It actually ended up being great that they were sheets because it made the curtains so light and airy.
Our last big change was adding some better storage where we used to have a mish-mashed mess. Here's the before/after for that side of the room:
One thing that helped a lot was just paring down how much stuff was in there. The slide is moved out for now (but it may come back in next winter. Boys gotta play and mommas gotta stay warm). We also cut down the amount of toys in there at one time (which makes for faster pick-up, hooray!) and moved the old bookcase out to the living room where it will actually hold most of the books, so that's one less thing to store in this tiny room. For the toys we did bring back in, we built this spiffy new big boy bookcase to hold all the stuffs.
Complete with a bin at the bottom for wrangling stuffed animals. Oh, the stuffed animals.
And there is plenty of room for our fancy set of children's books from
Juniper Books.
We still have some space to fill on the wall, I'll keep you posted on that.
Much tidier. Plans coming soon so you can build your own!
The only other thing we purchased for the room was this basket from Target to hold all the balls, bats, golf clubs, and hockey sticks a little boy collects.
That's about it for the big room makeover, but I know we all want to know how much it cost right? First I want to say thanks again to Sherwin-Williams for sponsoring our room makeover, we are so happy with it!!!
And here's the breakdown of how we stretched our dollars for a totally sweet big boy room:
- $105 - paint & supplies from Sherwin-Williams (definitely check out their website! We found a 30% off paint and 15% off supplies coupon, and when we registered they sent us another coupon for $10 off!)
- $85 - curtains (sheet set from pottery barn kids and fabric from Joann fabric with 40% off coupon)
- $100 - bookcase (cost for lumber & supplies, DIY plans coming soon!)
- $18 - new bed tent (fabric from Joann fabric with 40% off coupon)
- $20 - ball bin (from Target)
- $15 - LED lamp (from Ikea)
- $6 - bunk bed handles (from Lowe's)
Total - $349
And I have to tell you guys, for as much as I like the
Emerald™ paint, what sold me even more was the service at our local store. They were very knowledgeable and helpful (which can be hard to find at a big box store) and on top of that they were just. so. friendly. We made two trips in to first get some sample cards and then buy paint, and they remembered us and asked about what we were doing and were so kind to our little fellas. After our purchase we filled out an online survey about our experience, which was followed up by an email from the store manager thanking us for completing it. I assumed it was one of those automated things... until I got to the end and he said he hoped our little boy enjoyed his new blue room. I didn't know real, personal service existed any more. But boy oh boy, I like it.
And now it's your chance to have some fun! Sherwin-Williams is giving one of you lucky readers a $50 gift card! Perfect for getting you started on your own room makeover. If you need ideas you could check out their
color selection tools to help create your perfect room, and for even more tips you can visit Sherwin-Williams on
Pinterest,
Facebook,
Twitter,
YouTube and
Instagram.
And entering is super easy! All you have to do is leave a comment answering this question (and make sure I have a way to contact you if you win!):
What room would you make over with Sherwin-Williams?
Good luck and happy painting!

This giveaway is now closed. Thanks for entering!
This sweepstakes runs from 6/2/2014-6/22/2014.
Be sure to visit the Sherwin-Williams brand page on BlogHer.com where you can read other bloggers’ posts!