Showing posts with label tutorial. Show all posts

Friday, January 12

Installing Can Lights in our DIY Kitchen Reno

Lighting is so important to a functional kitchen. I'll admit I'm no lighting expert, but I did plan all the lighting for our DIY kitchen remodel myself and I know that you can do it, too! So today I'll share the lighting choices we made for our kitchen (and why we made them) which should at least be a good starting point for you to jump into your own kitchen lighting project!

Friday, December 15

Foraged Stick Stars

This Christmas project is almost too easy to post. But it's a fun one that's super simple and cheap, plus collecting the sticks can be a lot of fun with the kids!

Tuesday, December 7

DIY Modern Farmhouse Christmas Stockings

New year, new stockings... again.... How often is it normal to get replace your stockings? Growing up we had the same stockings my whole life (my parents still use them!) and I feel like that's the normal thing to do. It's all part of the nostalgia of Christmas, right? But here I am replacing my stockings for the... fifth time? I've started from scratch every time we added a baby (since we needed to add a new stocking) but almost every time I breathed a sigh of relief that I could finally ditch stockings I didn't love and try again. Here's what I've tried so far (you can read the full saga in this post):

  1. Failed Sweater Stockings
  2. DIY Flannel Stockings - I ended up hating these. I was on a tight ($0) budget and made them out of leftover flannel from other projects that didn't match my Christmas style. I won't totally knock this idea though - I think a cute plaid set would feel wonderfully cozy!
  3. Cheap Hobby Lobby Stockings
  4. $5 Christmas Stocking Hack - I actually really liked these ones! And I honestly don't have a good reason why I didn't just make a seventh one to match for our newest addition - it was just so much red when so many of them were up there together, and! So this time I'm trying something that feels a little more organic - like a collection we can add to over time.

And now I'd like to introduce you to my newest stocking love: mix-and-match modern farmhouse stockings!

Monday, September 20

Macrame Rainbow Tutorial

My sister and I put together some fun little macrame rainbow kits for a local craft fair, and I thought I'd share the instructional video with you guys, too, so you can make your own! 

You may not have a kit, but you only need a few simple supplies to make your own at home - and you can make it any size you want, with as many colors as you want! Get creative and have fun!

Here's all you need to make your own:

  • soft rope that frays easily (I love the "nautical rope" from Dollar Tree)
  • 3 colors of yarn (or more if you want more bands on your rainbow!)
  • a wooden bead (optional)
  • hot glue gun
  • scissors
  • ruler
  • fork
And here's the video instructions:


If you follow the instructions exactly, you'll end up with the cutest little ornament-sized rainbows that will make sweet little Christmas gifts! Yep, I said it. #itsnevertooearlyforchristmas 

Have fun, and let me know if you give it a try! :)

Saturday, March 14

DIY Macrame Hanging Planter (30 minute project!)

We've been talking about plants quite a bit lately, so today I'm going to share one of my favorite ways to display my little plant babies - in a sweet macrame plant hanger! And I'll even teach you how to make your own in 30 minutes for just a few dollars.

Check out my favorite (easy) houseplants here.
And how I propagate those plants to get more plants for free here.


Check out more DIY decor ideas here!

Macrame is making a comeback, and it just shines in hanging planters. And it turns out macrame is a super-fun craft! There's something peaceful and therapeutic about the steady repetition of tying knots. And that's basically all macrame is. If you can measure and tie knots, you can make this planter! It's an easy hobby to pick up and creates a beautiful end results (you might just end up making them for all your friends this Christmas!).


Today we'll be making a basic macrame plant hanger, and I'll give you a couple easy options to customize the style. You can stick with spiral knots like the one above, or use square knots like the planter below. I even added wood beads to this one and I love how it turned out!


Thursday, March 5

How to Propagate Houseplants (more plants for free!)

You guys know I love low-budget home decor, and what's more low-budget than free? So today we're talking free houseplants! I'm going to show you how I propogate a few of my favorite houseplants to start brand new baby plants without paying a dime!

Did you catch my post last week about my top 6 favorite houseplants? It's a great place to start if you're looking for plants that are low maintenance and hard to kill. And this is a perfect follow up because guess what? All of my favorite plants can be propogated!

The best time to propogate is in the spring when plants are ready naturally ready to grow quickly... so get those pots ready, folks! It's almost time!


All these plants can be propogated with one of two methods: dividing or rooting. Both happen to be super simple, they just take a little time (you're growing new plants, after all!). If you're looking to get a big plant quickly then propogating probably isn't the best option for you, but if you're looking to slowly grow your collection (or sprout a few plants for friends) using what you already have? Then read on, friends! Here are the plants we'll be looking at today (although you can use these methods for many houseplants):
  1. Succulents
  2. Snake Plants
  3. Aloe
  4. Pothos
  5. Spider Plants

Thursday, November 14

Easiest DIY Pillow Covers

Today we're going to look at a super quick and easy way to refresh a space... that also happens to be a great way to increase your holiday cheer factor. I'm talking about swapping out your pillow covers! And today I'll even show you the easiest way to make your own.


Pillow covers are one of my favorite ways to refresh a room, but did you know they're also one of the best secret weapons in seasonal decor?
  • They take minimal effort to switch out, but make a huge impact.
  • They take almost no space to store in the off-season.
  • They are easy and affordable to make!

Monday, December 24

2018 Christmas Tour

Or should I call it the 2018 Christmas EVE tour? I know. Every year I have these big plans for Christmas projects and Christmas posts to share, but then the season comes and we just... do Christmas instead. I highly recommend this method.

But I do have a few super easy and budget friendly decor tips that are too good to miss for another year! So here we are with a quick Christmas Eve tour!


We'll cut right to the chase with our cheery kitchen window. Easily one of the most cheerful little corners of our home, and it also happens to be one of the easiest and cheapest to decorate! That merry Christmas sign above the sink? It's our sneaky reversible "farmer's market" sign. It only costs a few dollars to make (get the tutorial here) and when Christmas comes you just flip it around to the Christmas side. The window wreathes are from Dollar Tree (so just $1 each!) and I hung them with scraps of red ribbon. Most of our house has the original wood windows, but these ones were updated to double-hung windows which make hanging wreaths so easy. Just loop ribbon through a wreath, slide the top of the window open a crack, and pinch the ends of the ribbon in the window. No nails, no hooks, just easy peasy wreaths.

Sunday, December 9

$5 Christmas Stocking Hack

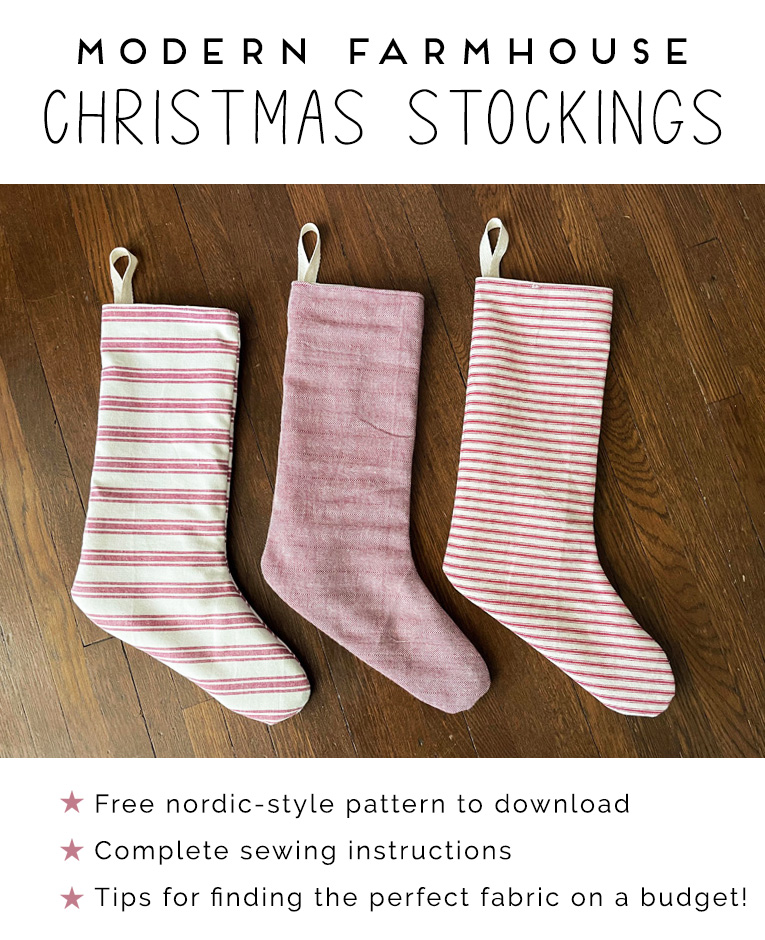
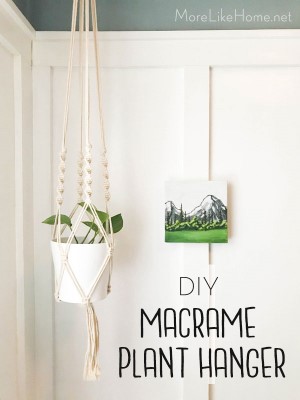
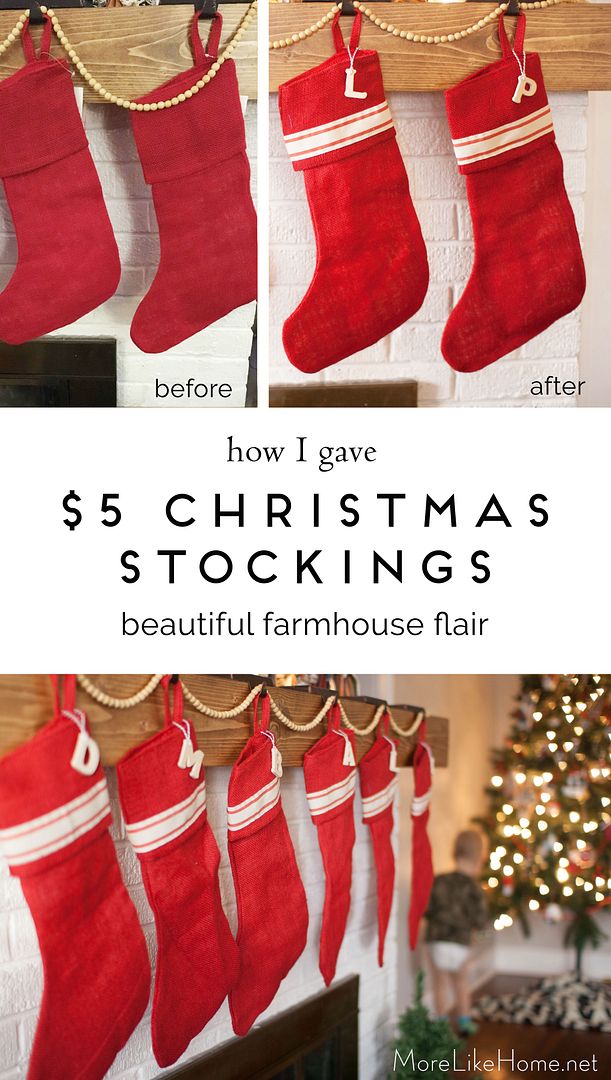
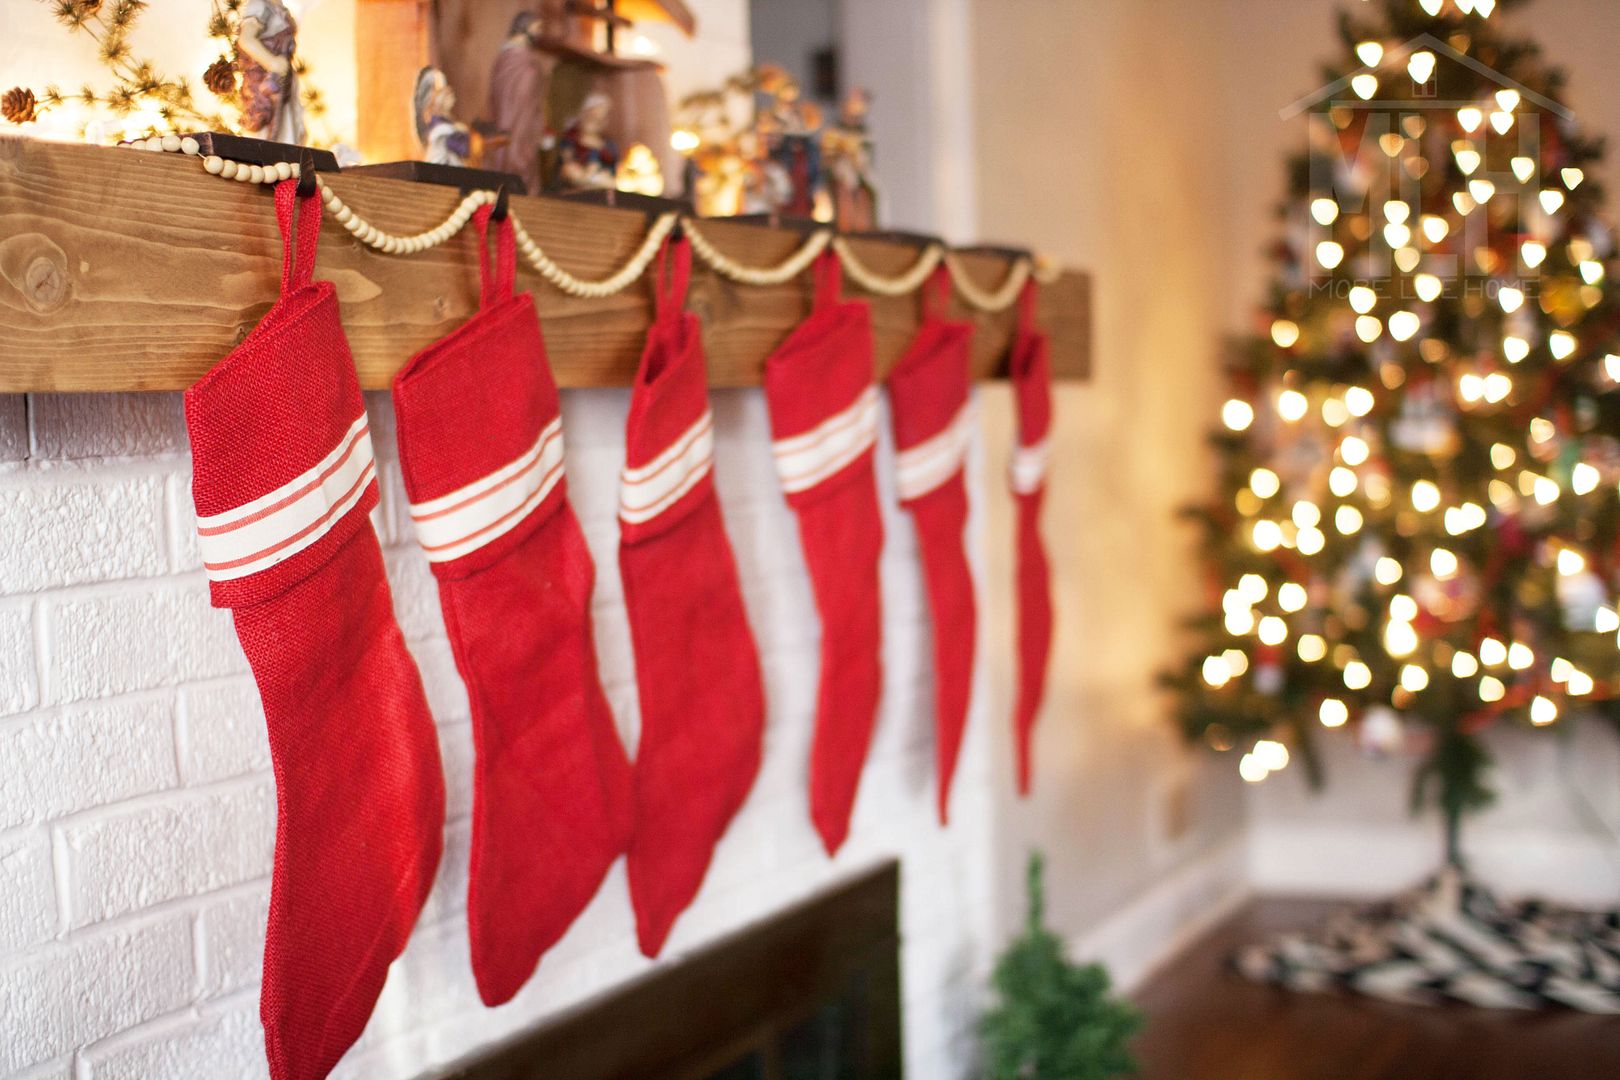
Our mantle decor got a major upgrade this Christmas with a beautiful new set of stockings! 
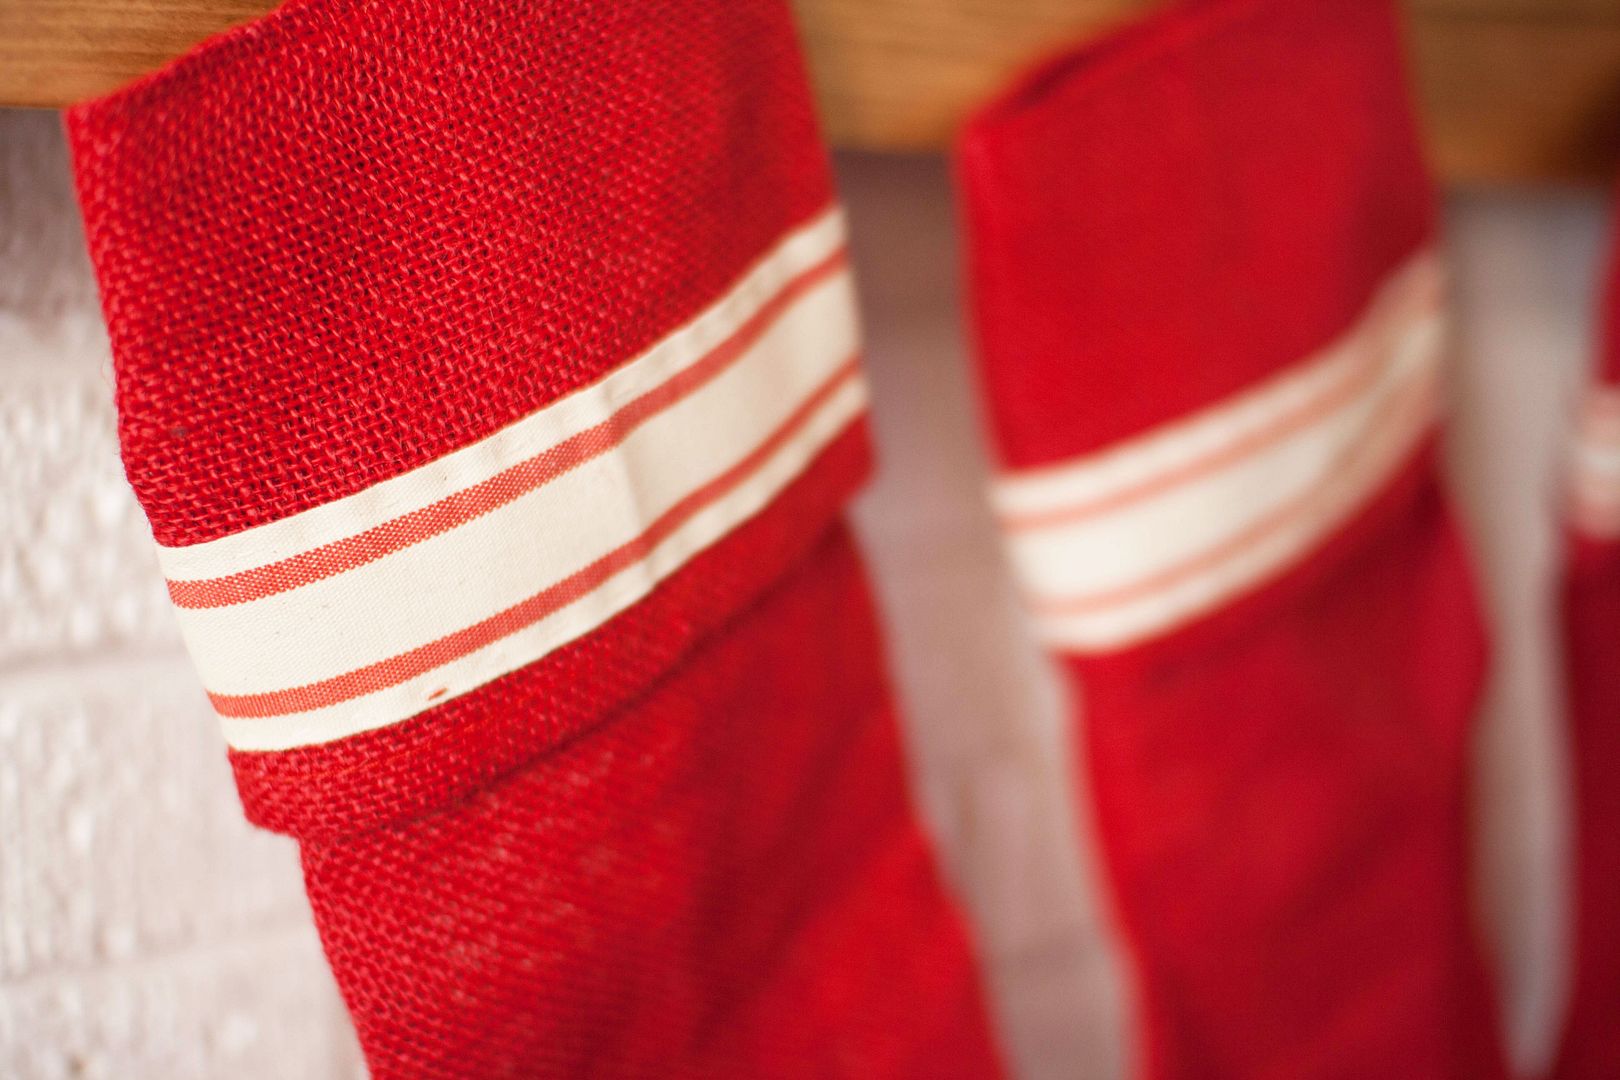
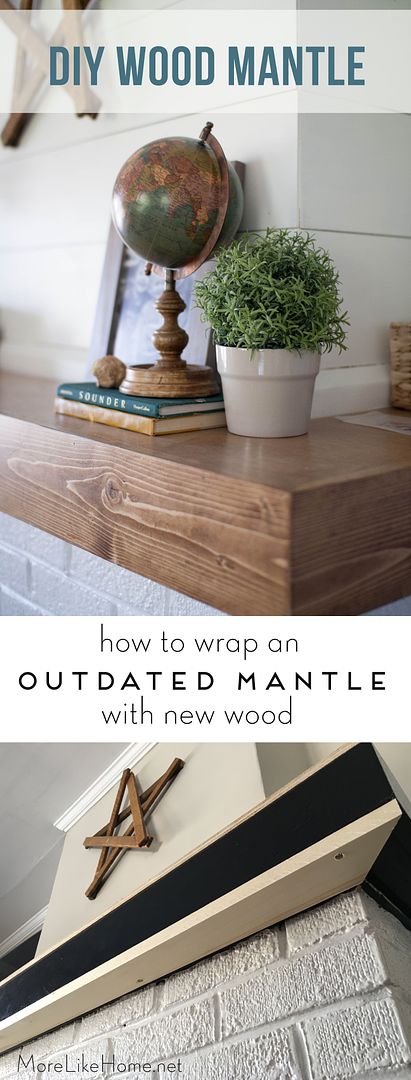
(we also updated the actual mantle earlier this year when we wrapped it with wood and added shiplap) But this big upgrade didn't have a big price tag. Believe it or not, these beautiful, classic stockings started with a set of plain red Amazon stockings that were only $5 each. They just needed a little MLH farmhouse flair!


I like to think I know a thing or two about stockings. I've spent a good amount of time looking at them over the last ten years, because every. single. year. I search again for our perfect fit.

I've found plenty of beautiful stockings over the years, but all the ones I loved failed to fit one important requirement. Budget. As much as I dreamed of perfect stockings, I just didn't feel like I found the right ones for a price I was willing (or able) to pay. I began my stocking saga after baby #2 joined the family. Our budget was strapped pretty tight, so I made handmade stockings with leftover flannel (you can see how I made them here). They were totally free, but I didn't love the fabric (I wont' totally knock that idea, though. I seriously considered making a matching plaid set this year before I found these red ones, and I think that would feel wonderfully cozy!).

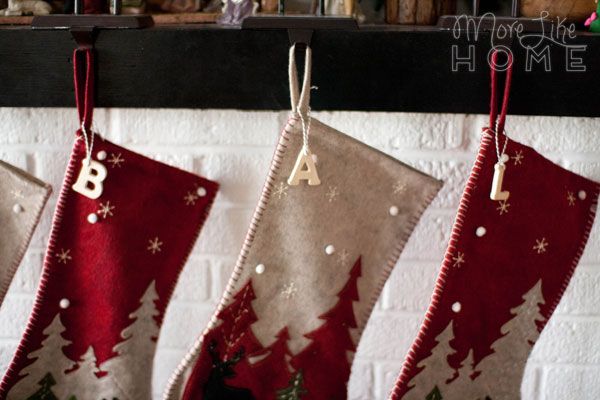
A couple years later when we needed to add a fifth stocking, I decided to scrap those guys and start fresh. But wouldn't you know it, I was pregnant and tired and just needed something before the baby got here... so I just got the best Hobby Lobby had to offer for $5 each (you can see them in this post). It did feel like an improvement, but it also felt like a wasted opportunity because deep down I knew I didn't love those moosey stockings. They weren't my style, and for the next couple Christmases I cringed with regret every time I pulled them out. But I couldn't justify replacing them - they were brand new!


Then, earlier this year, we added baby #4. Even last Christmas before he was born I knew - we would need a sixth stocking. I knew this was my chance to get a new set, and this time I was ready. This time I knew what I wanted, and this time I was ready to hunt. it. down.


Sunday, December 2

DIY Wooden Stocking Tags

Christmas decorating is in full swing at the big blue house, and today I wanted to share one of my favorite projects for adding a cute and personal touch to any stockings. And the best part? It's sooo easy and super cheap!

Update: Check out how sweet these tags look with our new stockings (and my $5 stocking hack)!

I love DIY Christmas decor, and a project that's just as useful as it is beautiful? Well that just takes the Christmas cake! These little wooden stocking tags are a perfect way to differentiate matching stockings, add a personal touch without springing for embroidery, or just add a cute wooden accent to your Christmas decor.

Ever since we bought these off-the-shelf stockings a few years ago, I've been craving a personal touch. A way for all the little fellas to know which one is theirs and run right to it Christmas morning. Something to make them unique and ours. And these simple little tags have been the perfect touch!


Here's all you need to make your own:

Wednesday, November 21

Reversible Farmer's Market/Christmas Sign

I know Thanksgiving is tomorrow, but have no fear. This Christmas project has a secret identity that can be used all year! You may know by now that wooden signs are some of my favorite Christmas decor (my DIY Christmas tree farm sign, hand painted signs, and Christmas photo signs are just the tip of the iceberg!) but every year I encounter two problems with my sign collections:
  1. finding wall space to hang them that doesn't feel awkward or like an afterthought (and that doesn't put holes where I don't usually them)
  2. storage space when I take them back down
Well today we're solving both of those problems with handy reversible sign!


Most of the year it's just chilling in the kitchen as an unassuming Farmer's Market sign. Adding a little rustic charm and perfectly filling the space above my sink.


But come Christmas time, I just flip it around and BOOM. Instant Christmas cheer. No hunting for a spot,and no digging it out of storage.

Monday, November 5

Updating Second-Hand Chairs with Spray Paint

I finally did it. I finally picked a color and painted our dining chairs.

There's nothing like impending winter to kick me into gear, and this was one project I knew I needed to get done before the cold! So this is the story of how I painted them, and the silly, indecisive journey that made the process take so long. But after 30 years, I know indecisive is the way I work so I'm just rolling with the (very slow) punches over here.

Whether you're indecisive or not, painting is always a great way to freshen things up on a low budget, and dining chairs are no exception! This is a perfect project for spray paint because you don't have to worry about streaks, drips, or getting a brush around all those spindles and nooks. 

But before can paint, you need some chairs. Obviously *said in my best Prof. Snape voice*. For me, that meant starting with a hunt for a new set of chairs. We had a set of DIY industrial chairs from our last house, but they just weren't fitting my style any more. Ever since we moved in and built our extra-wide farmhouse table, I'd been dreaming of a set that better fit the style of our new table and new house.

For more chair-painting goodness, check out my $3 yard sale chairs and my industrial chair makeover!

I did a little poking around sites like wayfair and overstock, but deep down I knew that my thrifty roots couldn't abide new chairs when there were so many second-hand options out there for a fraction of the price. You know what they say: "Buy used and save the difference!" So I put most of my efforts into Craigslist and fb marketplace. I knew I wanted something simple, not too formal, with a classic style. And I didn't want to spend a fortune. During my long search for chairs, I also looked at tons of dining room inspirations on pinterest (part of the reason my search was so long was because I couldn't lock down quite exactly what I wanted) and, at long last, I started to hope for a classic Windsor-style chair. The one day, these guys popped up:


Sunday, August 19

DIY Pinata - Our Birthday Tradition

If you read our post last week about how we do birthdays, you know that we love a good pinata in this house. And by that I mean a free, amazing, whatever they come up with pinata. So today I just wanted to give you a basic idea of how we make them, so you can go forth and make whatever your kids dream up.


Did you guys do paper mache growing up? Because that's all this is! All you need are balloons (or thin cardboard from a cereal box if you need square shapes), newspaper, flour, and water. Plus any paints and decorations you want.

Start by making your pinata form with balloons or cereal boxes. Don't use anything thicker than that or you won't be able to break the pinata when you are finished! Just do your best to make the basic shape of your item. Here are some examples:
  • Death Star - one large punching balloon (easy!)
  • Ninja - two regular balloons taped together with one blown up slightly less for the head (construction paper arms and legs added at the end)
  • Long Neck Dino - two regular balloons taped side by side for a long body, a small balloon for the head, and a paper towel roll for the neck (we added construction paper legs when it was done)
Tape a loop of string to the form that you can use for hanging it when you are done. If you can loop it all the way around to the bottom that will give you the best hold.

Wednesday, July 11

DIY Mantle Revamp (how to wrap an outdated mantle with new wood)

Part 1 of my nesting-driven fireplace makeover was adding a shiplap accent around the top, but it still looked a little sad with a glossy black painted mantle. Not my jam, and not working with our farmhouse vibe. So part 2 of the process was returning the mantle to a beautiful wood finish!

You can find all the "before" photos and the rest of our nesting plans here


I would have loved to restore it back to the original wood, but that just didn't turn out to be a feasible option for us. There was nick in the corner of the mantle where we could see at least four layers of paint - black, green, brown, and beige - and we still couldn't see the wood!


Whether we sanded it or stripped it, we would be looking at a huge mess. So we decided to start with a clean slate and wrap the entire mantle with new wood. It worked out great!


I love how it plays with the new shiplap for a more casual farmhouse vibe. And you can do it, too! This is also a great option if you want to cover a concrete or brick mantle to add a little contrast to you fireplace. Want to give it a try?


Tuesday, June 19

DIY Shiplap Fireplace

Sometimes I just need a little kick in the pants to get a project done. Or a little bun in the oven. I've wanted to update our fireplace ever since we moved in (two years ago) but it wasn't until this spring when I was in full pregnancy nesting mode that I finally decided "I AM DOING THIS. RIGHT NOW." Naturally the "I" translated to "husband" because we were in the late-pregnancy stage of nesting. And he isn't one to let his round wife balance on a chair with a nail gun. He's a keeper.

And so, with a little help, we managed to check it off my nesting to-do list just in time before our newest guy was born. (you can see my entire living room nesting to-do list here, and how we wrapped the mantle here) One of my favorite details is the faux shiplap we installed above the fireplace.


I love the texture and charm it adds to the living room. I've always dreamed of a casual, cozy space for our family to gather, and I feel like this was a step in the right direction.


Here's a little "before" action. Just drywall painted the same gray as our walls.


Now it's even lighter, brighter, and totally beautiful. And I really need a full-fireplace photo. Not gonna lie, I probably shot close up because the floor was a hot mess. But I don't really remember. Because newborns don't sleep. It's all a blur.


The best part is the whole project only cost about $15 for wood! We also had to buy nails for our nail gun (I lost that price in the newborn-blur). But we saved a few dollars on paint by using the leftover from our cabinets... which doesn't quite match exactly, but that's a problem for another pregnancy.

Tuesday, June 5

DIY Travel Map Pinboard

This little project is almost too simple to even mention. But it's also so easy and so fun that I don't want guys to miss it! It's a little framed map pinboard to mark all your travels. It's easy dress it up or down to match your decor by switching out the frame or changing the map style, plus it's a great family keepsake!


We only have a handful of pins so far. My first thought was to only mark the places we'd all been together, as a family of five. But now that already doesn't make sense because we just added a new baby who hasn't been any of these places! So we might as well go back and add everywhere we've been since we were married. Maybe we'll use a different color pin to show how big our family was for each trip.


This map was a great fit for the new adventure gallery in our dining room. You can see it up on the far left above the mountain painting.


Thursday, May 31

DIY House Painting Tips {how we painted our huge house and saved thousands}

Last fall we took on our biggest project to date. It was a doozy. But a very necessary doozy that would have cost thousands of dollars to hire out. We painted our house! It was an enormous job but we're here to tell you that it is actually totally doable, and it can save you a big chunk of change.


We knew when we bought our old yellow farmhouse that it came with 90-year-old wood siding. Which was pretty cool. But in our new house excitement we maybe overlooked just what condition that siding was in. After our first winter, we started to notice that it was looking a little worse for the wear. Then we found out from a neighbor that it hadn't been painted it about 15 years. And it showed.


We spent the summer trying to decide if we should paint it now or hold off until next year. And then we had a hail storm that knocked off huge amounts of paint (so I guess it did some of the work for us!). Now it was painfully obvious that we needed to do something before things got any worse.


Fortunately I had spent those summer months thinking about what color paint to buy. Which is good because I used every minute right up until my husband called and said "I'm on my way home and we are buying paint tonight. You have to decide." Seriously, it took me months. (You can see all the top contenders here. Including the one Husband hated the most. Just do me a favor and don't tell me if I was wrong. M'kay? We are not repainting.)

It was so pretty in the fall!

Tuesday, April 10

2x4 Simple Outdoor Table with Benches {two styles!}

I've always liked the look of Ana White's simple outdoor table & benches. With the popularity of our 2x4 building series, I thought I'd just make a quick twist on her original design to make a 2x4 version!  I dream of eating outdoors on summer evenings, and I feel like this set-up with a roomy table and long benches would be the perfect place for the family to gather. Plus it would be a great compliment to a 2x4 outdoor sectional!


I made two simple variations for the table top - one with the top boards running length-wise:


And one with the top boards running across the width:


The dimensions will be the same for either table: 67 1/4" long x 33 1/2" deep x 30" high


I'm also including plans for matching 2x4 benches to tuck under the table.  Perfect for some backyard summer fun! Ready to get started?


Thursday, March 15

DIY Constellation Wall Hanging

One of the best ways to make your house feel like home is to decorate with unique pieces you love. But what happens when you can't find that perfect piece you're searching for?

Well... guys... that's where a little DIY magic in order. You probably already know that, because you guys are amazing, but today I'm going to show you some of the easiest DIY magic ever that you can use to make your own sweet constellation wall hanging (or just about any other wall hanging you can come up with!)


When we were finishing up our gallery wall in the dining room, I knew I needed a large piece on the right end for balance. And I had a vision of this amazing constellation map that would fill the space perfectly. But, search as I might, nothing I turned up felt right. For one main reason: I wanted a fabric wall hanging. Something a little more casual. Something that didn't need to be framed and that would add a more texture to the grouping. Turns out those are... hard to come by.


But then out of the blue, completely by accident, I stumbled across the perfect thing. It was at a cute little home decor shop I love to visit when I go see my sister. And on this fateful day, they had a set of tea towels. With constellation maps. Bingo. I grabbed the set for $10, and with just a couple more supplies I made my own wall hanging!


Tuesday, January 9

DIY Forest Mural (great for a boy's room!)

I've spent most of my adult life in the no-murals-ever camp. I didn't want anything too themed because I knew I'd get tired of it and want to change it, so what's the point? But then... we started collecting all these little boys and one day I was like "THEY WOULD LOVE A CAMPING ROOM." Then it took me all of five minutes longer to come up with a forest wall mural and throw my mural-morals to the wind. And I totally l.o.v.e. it.


If you follow me on instagram, you've probably seen a few peeks of the surprise we put in the boys room for Christmas. Their camping theme room (or maybe more of a wilderness theme, there aren't actually any tents) is complete with a mountain peak climbing wall, monkey bars, and swings. A real winter adventure zone for all these little fellas! We'll be sharing the plans for all that soon, but today we're staring with how we painted the mural wall (which is easier than you might think).


Our first step was painting that wall. Their room is the same blue-ish gray that it was when we bought the house (we've barely touched the upstairs at all), and I knew it needed to be lighter for our forest wall to pop.

You can see the original color to the left of the door.

Subscribe