

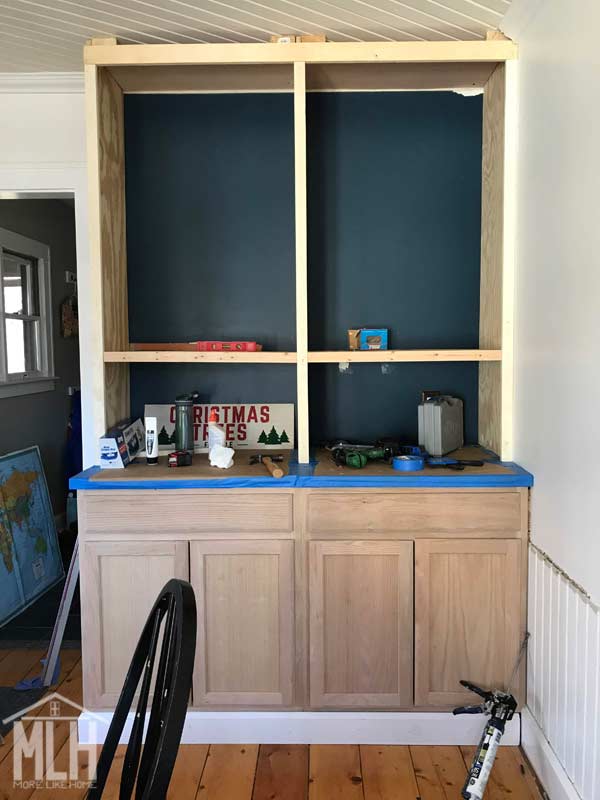
This project started much like every other project we've ever done: with me saying "It will be easy! We'll be done in like two weeks!" And just like every other project... I underestimated. Like, a lot. It took us nearly two to complete these built-ins. Not because this process is difficult - it's actually pretty simple - but because we were exceptionally slow at setting aside time to work on it, and because the walls in this old farmhouse are crazy crooked. I mean, DIY always takes longer than I hope (you'd think I would learn - but no) but this project was even worse because we spent so much extra time cutting and recutting each board to fit tightly against walls that just aren't straight. But as usual, that slow and steady work has finally paid off in a big way.
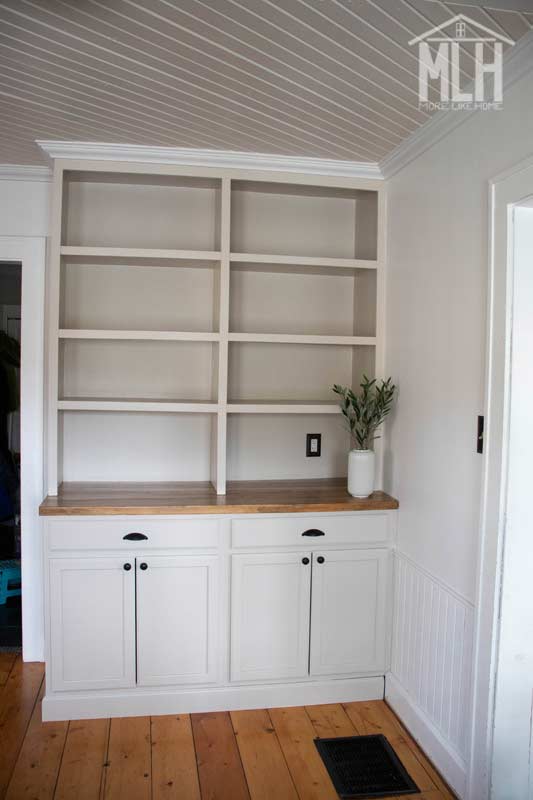
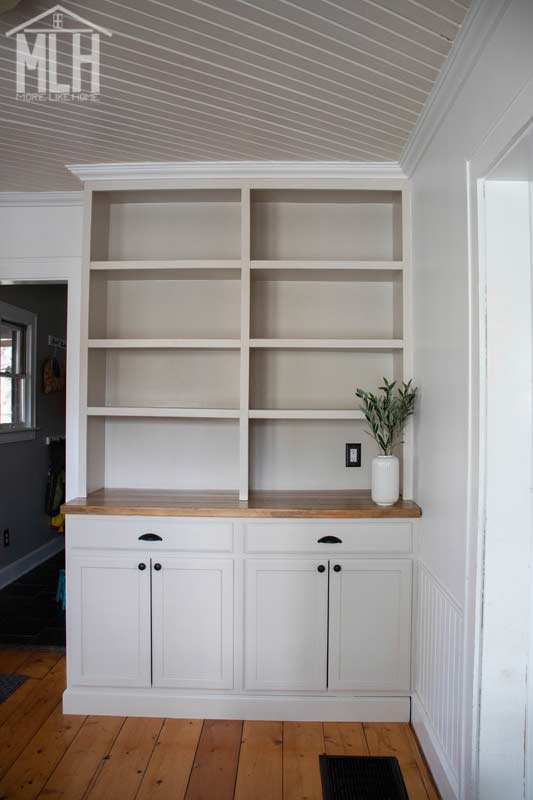
It's hard to believe this is the same corner:
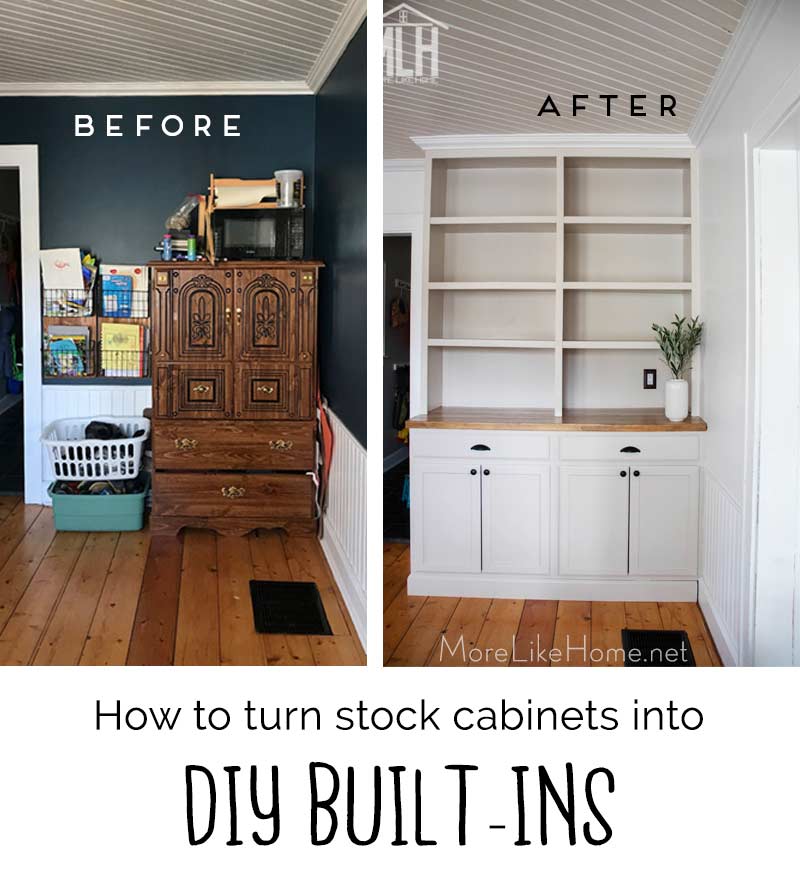
This little room didn't have a real purpose for us (I wonder if it was supposed to be like a breakfast room?) and over the last couple years it became a dumping ground for kids' projects and art supplies. So we decided to embrace it's future as an art/mess space for the kids! At least for know. But if it changes to something more like a breakfast or homeschool room later, we still have plenty of space for a small table. And I don't think we'll ever regret adding some big, beautiful storage to this awkward corner!
This is actually a great project for any awkward corner in your home, or anywhere you want to squeeze in a little extra storage. You could flank a window or fireplace or use it as a hutch in a dining room. So many possibilities, and so. much. storage.
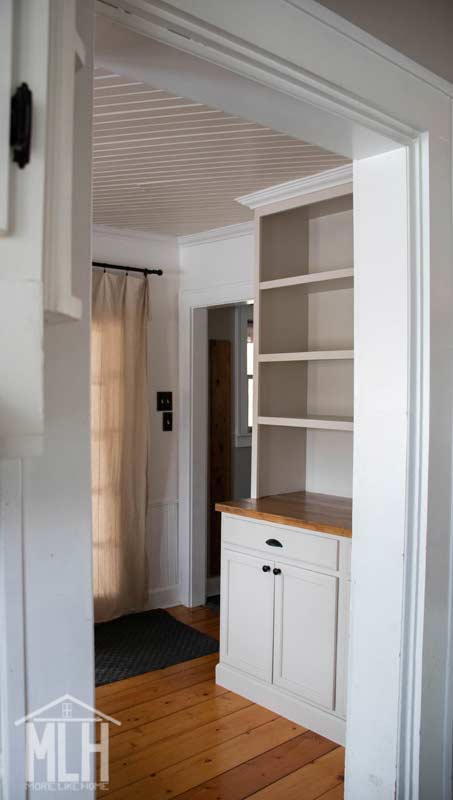
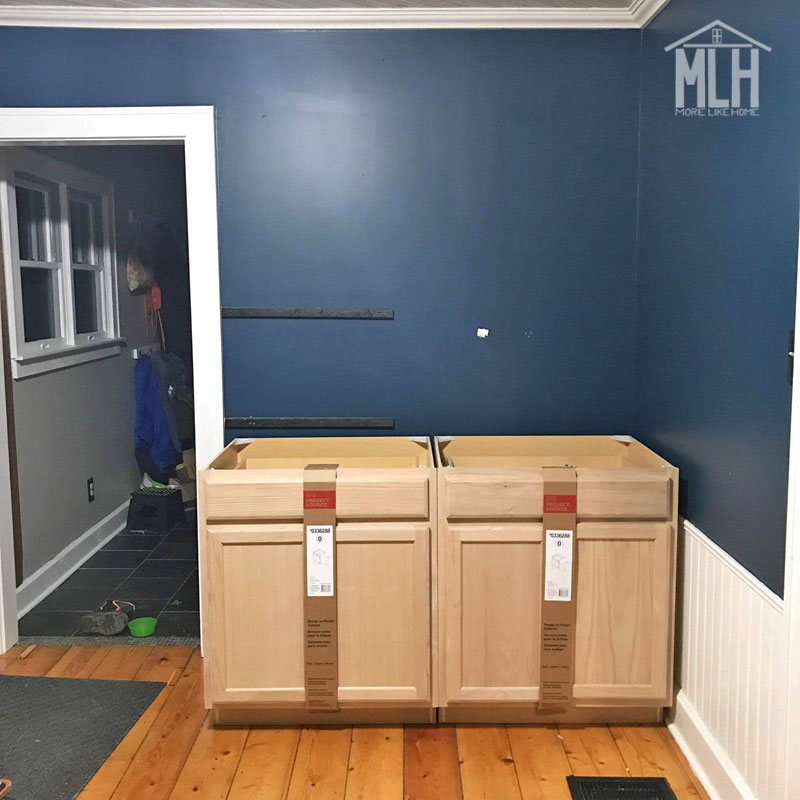
But guys, it's so important to think about how you truly use a space and what you need from that space before you begin any large project like this - especially something as permanent as a built-in. Tape if off on the floor before you start and live with it a few days if you're worried about traffic flow! (You can even tape it out on the wall to help determine the width you want!). For us, this corner is awkward because we have a major walkway right here. The photo below is a view from the kitchen. The hallway you see just past the new built-ins leads to our only bathroom on this level. So we walk that path many times a day. The pathway is important. This built-in was the perfect option for use because it really maximized the storage space without getting in the way of a four-year-old running to the bathroom at full-speed.
We started with stock cabinets for the base to try and keep this project as quick and easy as possible. We're not at a point in our lives where we can pour a ton of time into projects like this (at least we weren't a few weeks ago) and having that base to build on helped out immensely! I will say, in hindsight, that I wonder if we should have done drawers on the right side instead of doors. So think about that if you're doing your own built-ins. You're welcome.
Here's a rough list of what you need for your own DIY built-ins, but it will vary depending on your space and what size your built-ins need to be:
- stock base cabinets (we used two 30" base cabinet from Lowe's)
- thin plywood to finish the cabinet ends
- countertop (we used 2x12 boards)
- 1/2 - 3/4" thick plywood for the upper shelving (we used about two sheets)
- 1x2 boards for trimming out the shelving
- other trim - baseboard, crown molding, and quarter round as needed
- wood filler
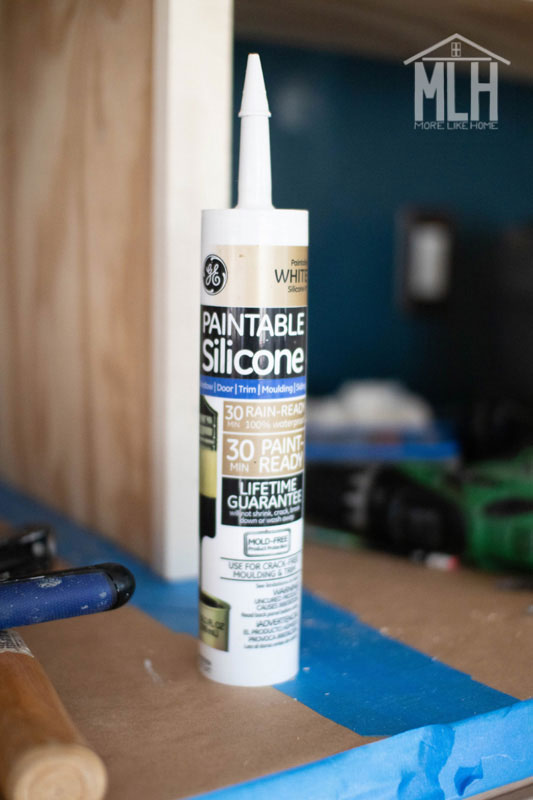
- paintable silicone caulk
- sandpaper
- paint and primer (and stain + polycrylic for the countertop)
- cabinet door/drawer hardware
- screws/nails/washers
- Kreg Jig + 2 1/2" pocket hole screws + 1 1/4" pocket hole screws
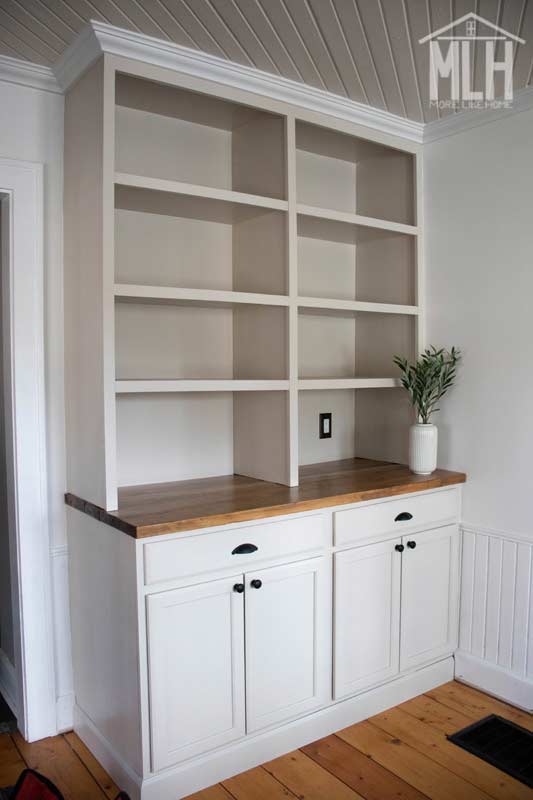
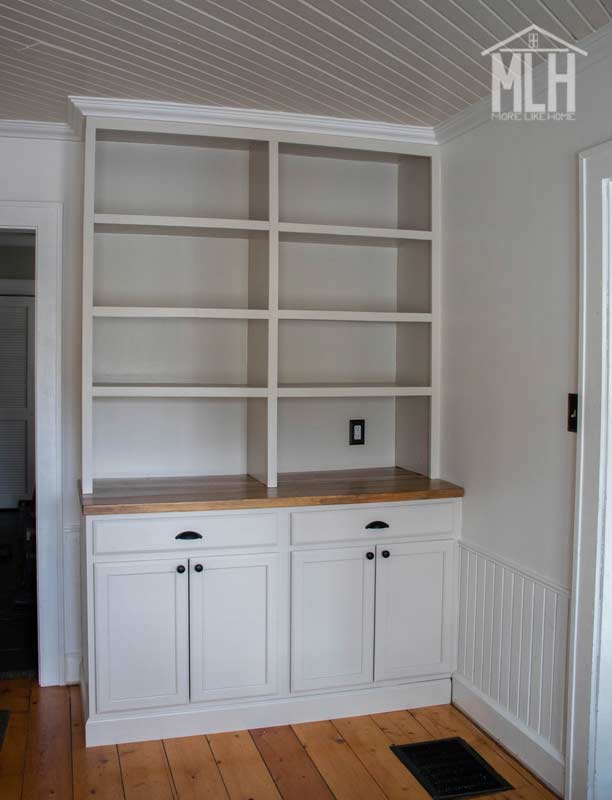
Here's one more look at the finished product before we get started:
Step 1: Make a Plan
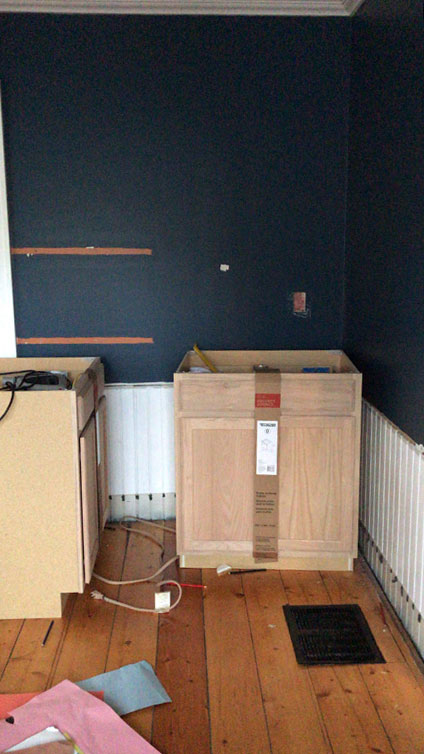
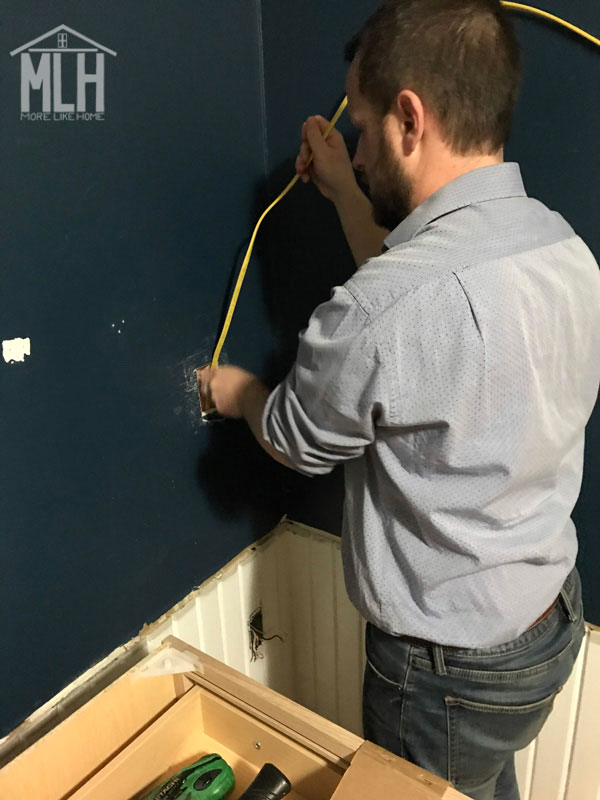
We started by measuring the space to see what size we wanted the built-ins to be. But then the first thing we did was run out and buy the two base cabinets. Remember what I said about the walkway running through here? I wanted to make sure these cabinets wouldn't block the flow so we set them in place for a dry run before we did anything else. They fit perfectly, so we moved on.
Step 2: Prep the Space
Before you install your cabinets, you need to get your space ready. We removed the baseboard and quarter round, along with the chair rail trim from this corner. We pulled down the crown molding. We removed the nails from all the trim and cleaned it up to be re-used. And we also patched any holes in the wall.
We were going to remove the paneling, but when we pulled off the chair rail we realized there wasn't any drywall behind the paneling. It just stops right above it. So we left the paneling.
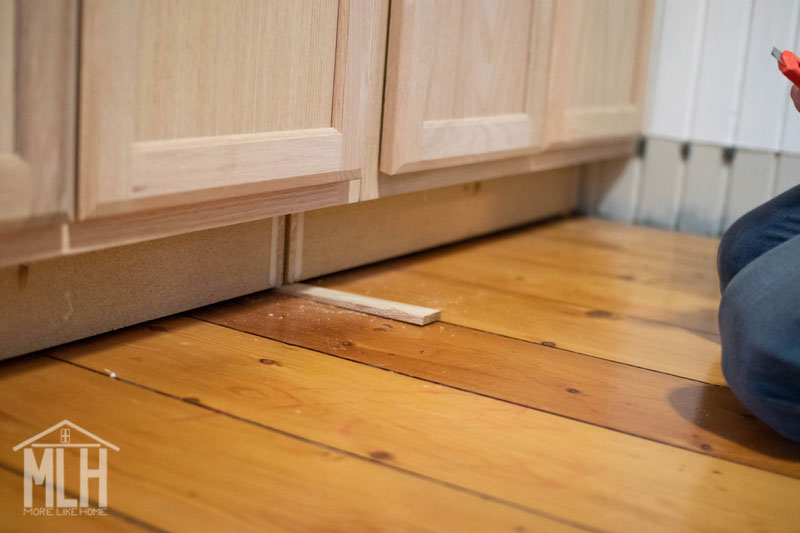
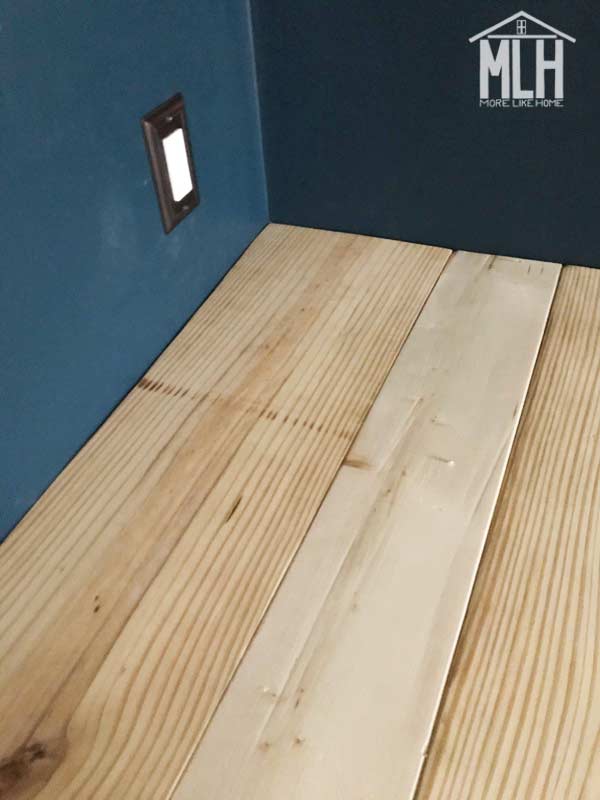
We also learned that the back wall is crazy crooked. You can get an idea of just how crooked when you see the little wood scraps they used to fill in the gaps in the flooring:

They also filled all the cracks along the baseboard with steel wool.
Nathan also did a little wiring to move the outlet in the corner up to countertop height. *We do not recommend attempting any wiring on your own. Hire a professional and stay safe.*
3. Install the Base Cabinets
Once your space is ready, you can install the base cabinets. First you need to make sure they are level. Use shims beneath the cabinets and against the walls until the cabinets are totally level and they line up flush with each other. Make sure you check both front-to-back and side-to-side.
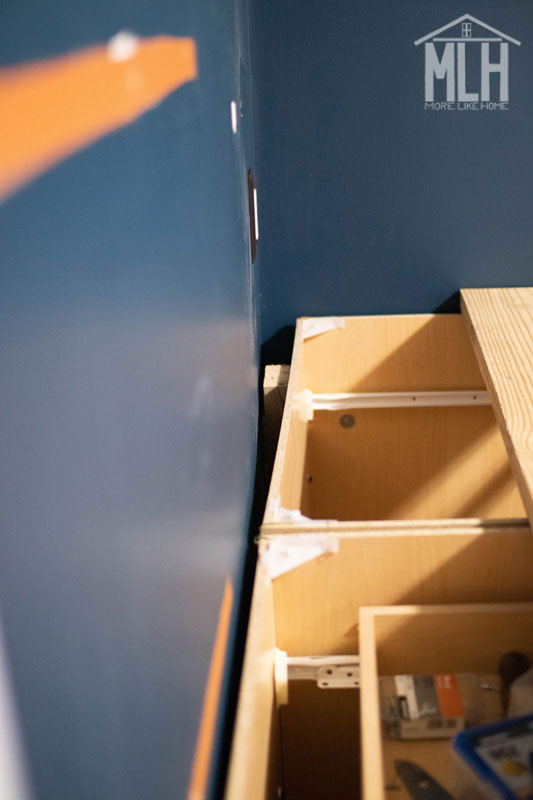
I keep mentioning how wonky the back wall is. You can get an idea of that in the photo below (see how much bigger the gap is at the far end?). We decided the best way to mask that (without a major project like rebuilding the wall - no thanks!) was to keep the front of the cabinets straight instead of following the slant of the wall. We lined them up so the fronts matched the straight lines of the wood flooring and let all the wonky-ness be hidden behind the cabinets. Like this:
We used scrap 2x4's and plywood to as braces in the gap to keep the cabinets from sliding back.
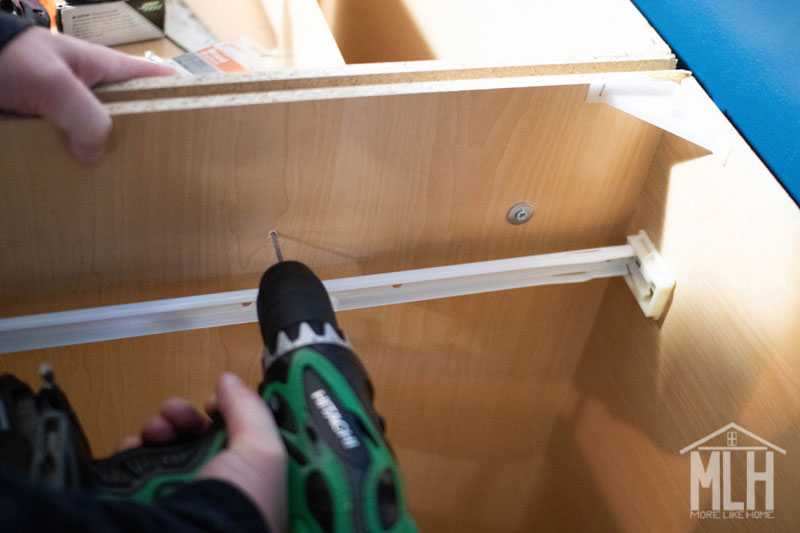
We slid some scrap plywood into the gap between the cabinet boxes to keep them from pulling together. (the front trim is sits flush together, but the cabinet box is slightly narrower which leaves a narrow gap that you can see in the photo below.) Use screws to attach the cabinets to each other. I think we used 1.5" screws here. You want something long enough to reach through to the second cabinet without poking all the way through. Nathan used a washer with each screw to make sure they don't pull through the wood.
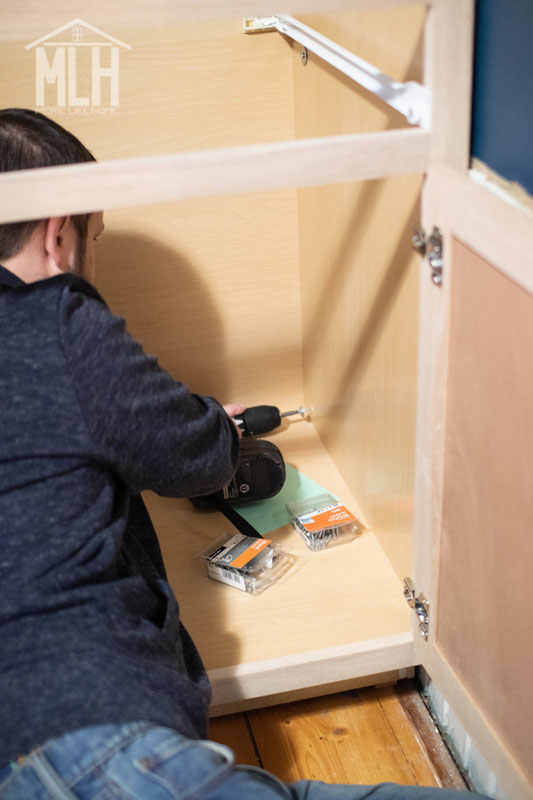
Attach the cabinets to the walls. Use shims or scrap wood to maintain any gaps between the cabinet boxes and walls, and use washers with your screws. I think we used 3" screws for this step. You need something long enough to go through the cabinet, gap, drywall, and all the way into the studs. P.S. use a stud finder and make sure you're anchoring the cabinets into studs. Anchor it into both the side and back walls.
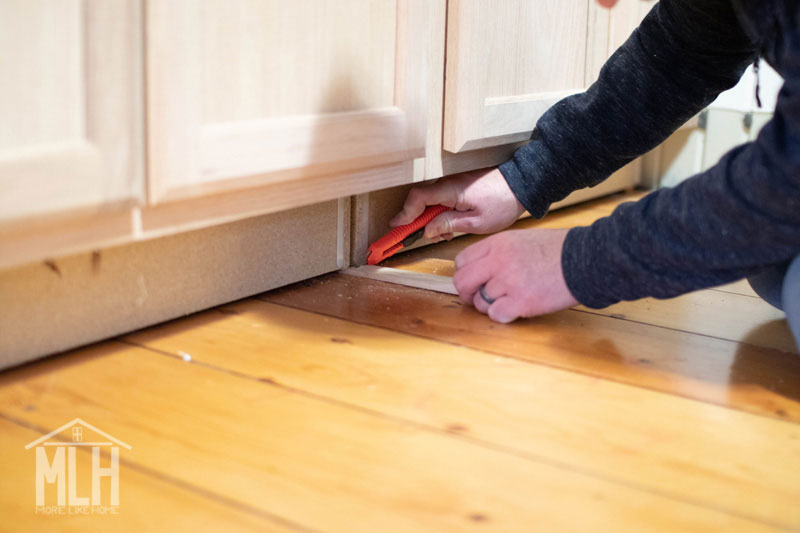
Trim the shims with a razor or small handsaw.
Now you need to finish off any exposed ends on your cabinetry. Most stock cabinets are made with particle board and that will show on the exposed ends. It doesn't take paint well and just doesn't look very nice, so we used a 1/4" plywood panel (you can buy a 2' x 4' panel that's perfect for the job!) and trimmed it down to cover the particle board end. Attach it with glue and finishing nails.
4. Base Trim
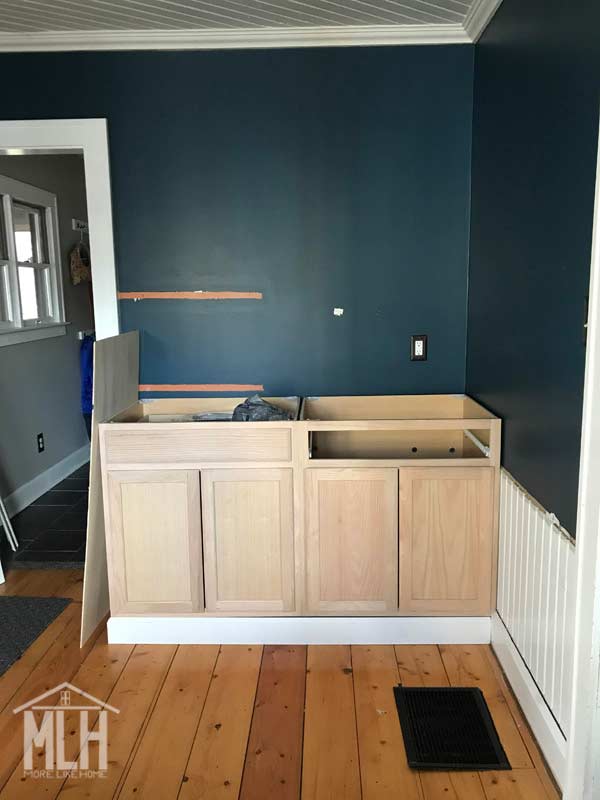
Install the base trim. We saved the baseboard we pulled out in step 2 and cut pieces from that to fit the wall space around the cabinets (you can see it in the right wall in the photo below). To make our cabinets look more built-in, we also added baseboard around the bottom of the cabinet instead of keeping the recessed toe-kick that is more traditional in a kitchen. We bought a basic 4 1/2" baseboard at Lowe's that fit perfectly around the bottom of the cabinet (the old baseboard was too tall and would block the cabinet doors. We could have trimmed it down shorter but decided to just save the extra pieces in case we ever need them to patch in anywhere). The cabinetry baseboard just butts into the taller molding along the wall:
Pieces cut from old baseboard for the walls.
The baseboard along the side of the cabinet could just nail into the side panel, but the front baseboard was just sitting in front of the toe-kick space with nothing to grab so we installed a 2x4 support (you can see it peeking out in the photo below). We cut a 2x4 to the length of the cabinet and used the Kreg Jig to make pocket holes along the bottom edge, lined it up flush with the face of the cabinet, then used pocket hole screws to attach the 2x4 to the floor. It's nice and solid and gave us something to nail the front baseboard onto.
.jpg)
New baseboard attached to 2x4 at the base of the cabinet.
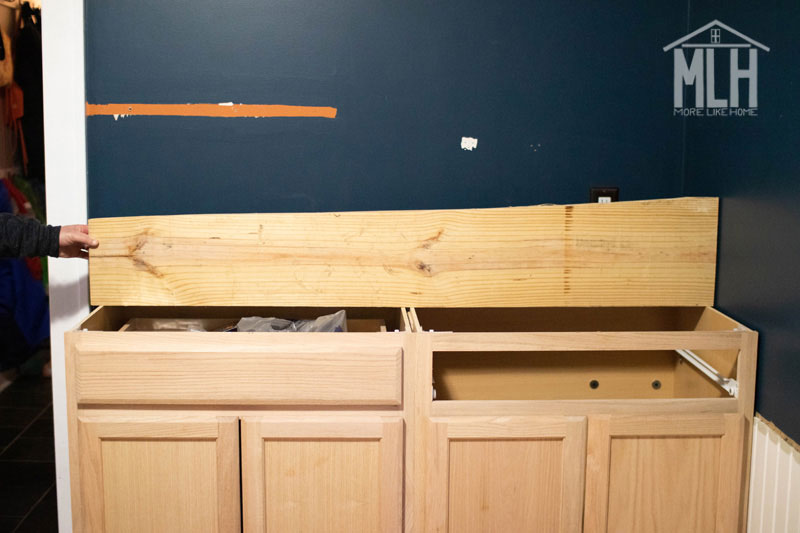
5. Countertop
Once the cabinets are secure, add your countertop. We used two 2x12 boards and one 1x8 board to piece together a wooden top. You can use any 2x boards, but I had a 2x12 and 2x8 scrap that were long enough, so I only needed to buy one more 2x12 board to finish it off. And that's how I decided what boards to use.
If you, however, don't have a scrap pile yet and are starting from scratch for the top, just get three 2x10 boards that are a smidge longer than your cabinetry. You'd ideally leave 1/2 - 1" of overhang on either end of the cabinet (or run all the way to the wall at the end like we did on the right side). So for our 60" of cabinetry, we used a 61.5" long countertop (measured from the wall to the end of the cabinets and added 1"). For the depth of your countertop, you'll want to leave about 1" of overhang over the front of your cabinets. For standard 24" deep cabinet you'll want a 25" deep top. Using three 2x10 boards gives you enough extra width to trim down both sides of the boards to removed the rounded edges and get nice crisp sides that will fit snuggly together. If you have a super wonky wall like us, you'll need to plan a little extra for the wonky end and go with the 1x12 boards instead of 1x10.
So our first step was cutting a piece to fit that wonky wall. Ideally when you try this project, you'll have straighter walls and can skip this step. We wanted the front of the countertop to be straight along the front of the cabinets (obviously) so we needed to cut the back edge of the countertop to fit along the wall. We used a big piece of paper laid across the cabinets to trace the shape of the wall, then copied that outline onto our board and cut along the line. Look at how much deeper the right side of the top is vs. the left side:
And it fits like a glove. By some miracle we got that fit on the first try. That would be the last time in this project that we would be so lucky. *facepalm*

So then we trimmed down the rest of the edges with a circular saw (I've found that I actually prefer using a circular saw guide instead of a table saw for most of our projects. And a guide is also so much cheaper and easier to store! I want to try the Kreg Jig version - anyone tried it yet?). Like I said before, the edges of the boards are slightly rounded and trimming those edges off makes them fit really nicely together without leaving any grooves where the boards meet. Just make sure your total finished width is 25" (or whatever width you're going for).
Once they are all cut down to size, you can attach them together side-by-side with a Kreg Jig and 2 1/2" pocket hole screws. We used the same technique to make the tabletop for our DIY Farmhouse Table.
Install the top on your cabinets (most cabinets will have little brackets inside you use for attaching the top).
.jpg)
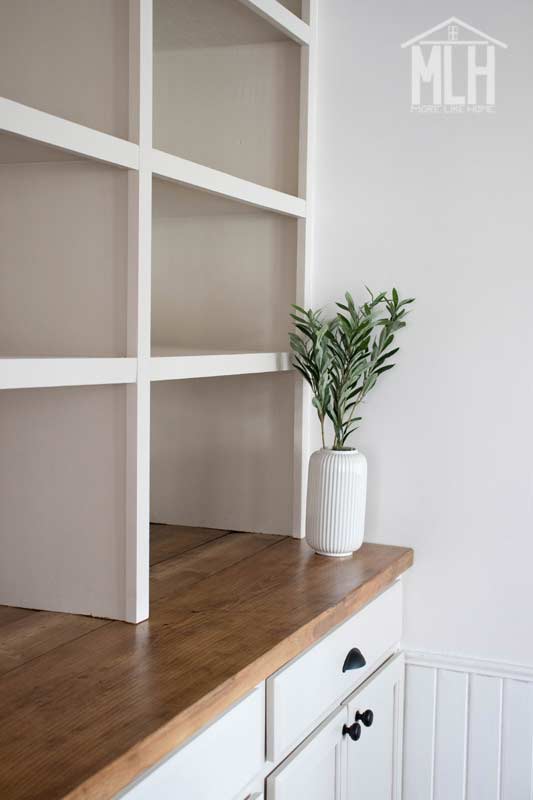
If you are staining your countertop you can go ahead and do it now. We waited until the end because I hadn't decided for sure on a finish yet. If you're painting the top to match the cabinets, just wait until you're painting everything.

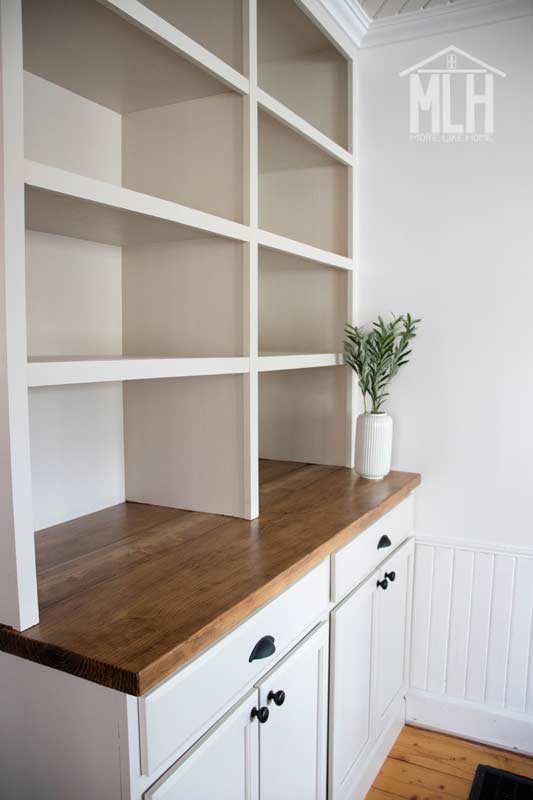
Finished countertop!
This
is the point in the project when I got tired of
waiting and painted over the blue walls with a color I never thought
I would use - white! It's Valspar Swiss Coffee from Lowe's and I'm
never looking back! Our trim is all painted regular old white in a
gloss finish - like the white that's in the can before you even get it
tinted - so I went with something a little less stark in an eggshell
finish for the walls. Once I painted the walls, the crown molding looked
super dingy so I just painted it Swiss Coffee as well and I love it!
But now the ceiling looks dingy (go figure) so that's on my new to-do
list.

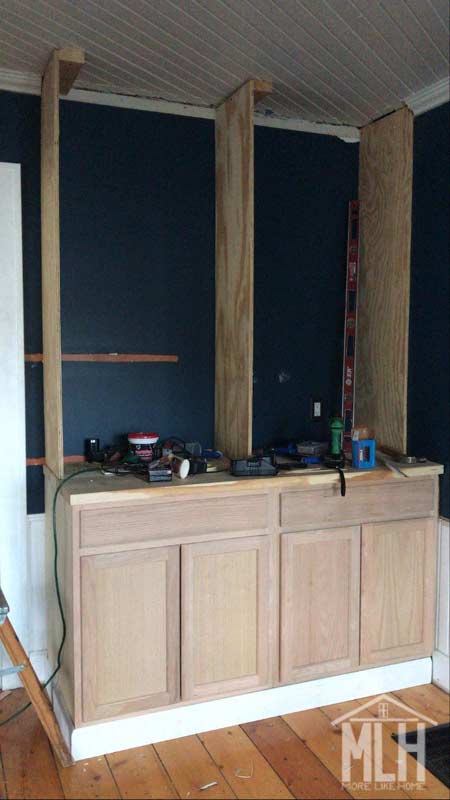
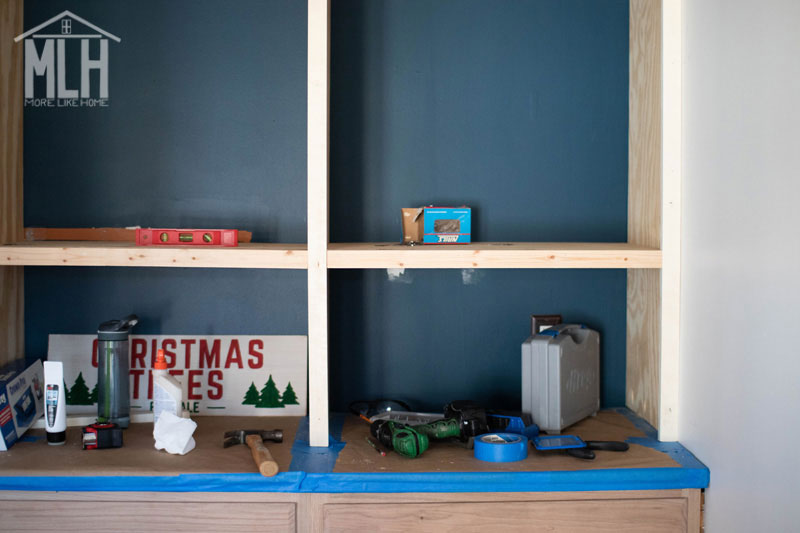
6. Build the Upper Shelving Frame
You have a lot of flexibility when you plan your upper shelving, so I'll just walk you through what we landed on really quick. I wanted a pretty classic built-in/hutch style so I knew I wanted a center divider that came all the way down to the countertop. My original plan was to build the shelving 12" deep (I was thinking like a bookshelf) but thank goodness Nathan was there to point out that a deeper top would feel much more substantial and intentional, plus be a more authentic vibe. So we went 15" deep instead and that 3" made all the difference. Before you begin installing your shelving, you need to do a little more planning/soul searching and decide how deep you want your shelving to be and how many dividers you want to have, if any (remember that the longer a shelf gets the weaker it gets, so I would definitely use a divider for extra support in a wide space!).
Got a plan? Okay, here's how to install the upper shelving:
Start by cutting three panels from 3/4" plywood that are 15" deep and tall enough to reach your ceiling. Note that our left divider is 15" but the right side is more like 18" due to Mr. Wonky Wall. If you find yourself in the same boat, just measure back 10" from the front of your cabinet, then measure from that mark to the wall where each panel will go to see how deep each panel needs to be. Use the Kreg Jig to make pocket holes along the bottom of each panel.
The right panel is installed directly against the wall, so we just slid it into place, used the Kreg Jig to attach the bottom edge to the countertop with 1 1/4" pocket hole screws, then drilled directly through the panel into studs in the side wall to help anchor everything securely.
The left panel is lined up flush with the edge of the cabinet, which means we left a small lip of countertop sticking out at the side. We used the pocket holes to attach it to the countertop, then measured the distance between the bottom of both panels. We used that measurement to mark where the top edge of this panel should hit the ceiling. We installed a piece of scrap 2x4 right next to the mark by drilling up through the 2x4 into the ceiling (you'll want to hit a ceiling joist if possible!). Then we drilled through the plywood panel into the side of the 2x4 to anchor the top edge of the panel into place.
The center panel was installed the same way as the left panel, but centered between those two panels.
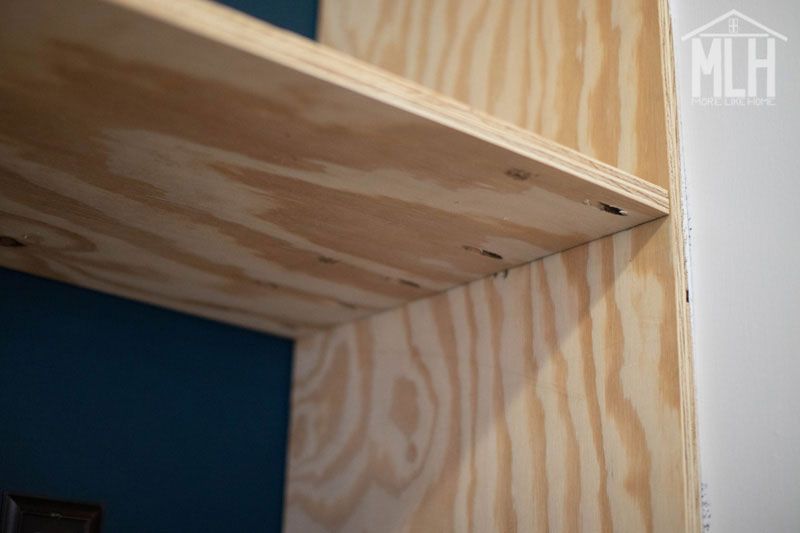
Once the panels were all in place, we added another 2x4 on the other side of the center panel, and one against the right panel. Then we cut thin plywood to size and attached it across the 2x4's to make a "ceiling" for our built-ins. I didn't like the idea of seeing the actual ceiling up there and this feels a lot more finished, plus it hides the 2x4s.

Plywood "ceiling" installed on the right side.
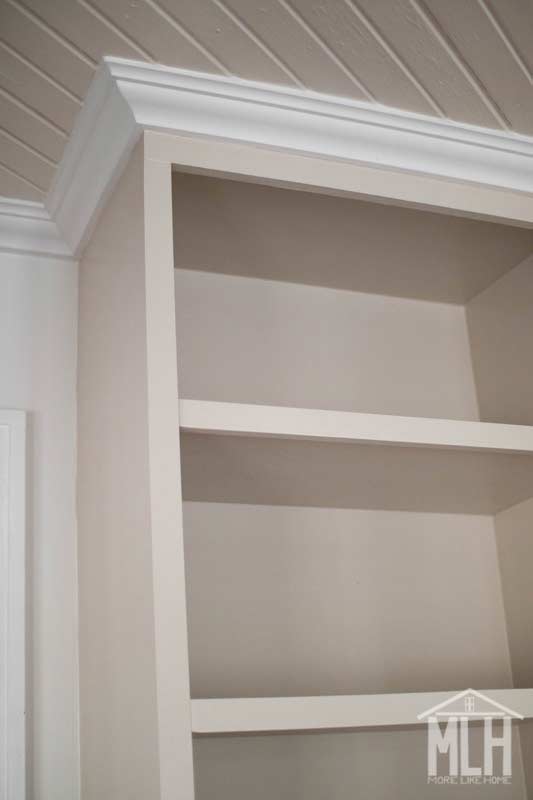
Then I added a 1x3 board to trim out the top of the frame. It gives the crown molding something to grab onto later, and give the built-in a really nice finished look! I installed it so that about 2" would show below the edge of the crown molding.
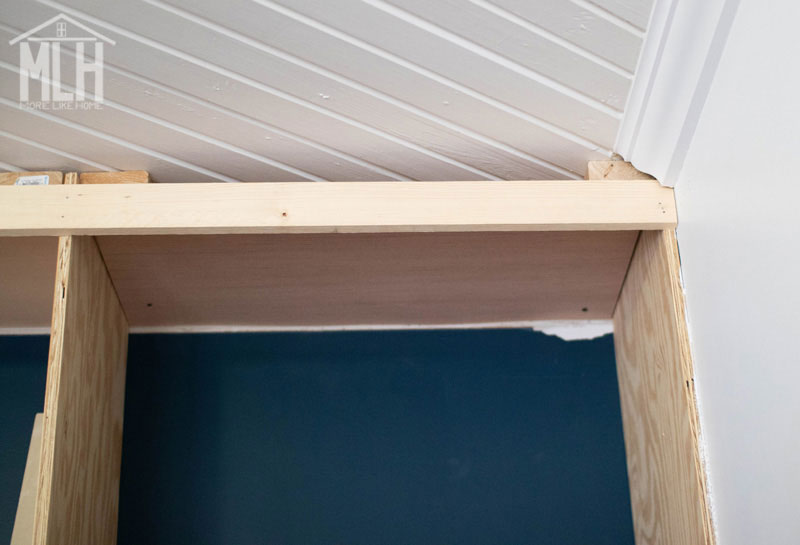
Later when the molding was installed, we were able to paint that 1x3 trim to match the cabinet while leaving the crown white to match the rest of the room. See the nice finish that trim gives it?
Honestly still not sure if white crown was the right call here. I still might go back and paint it taupe around the built-in.
If you don't have crown molding in the rest of the room, you can just add some around the top of the built-in and let it butt into the wall, or use a second 1x3 around the top that goes all the way to the ceiling (that will still give you a nice finished look with a simpler style).
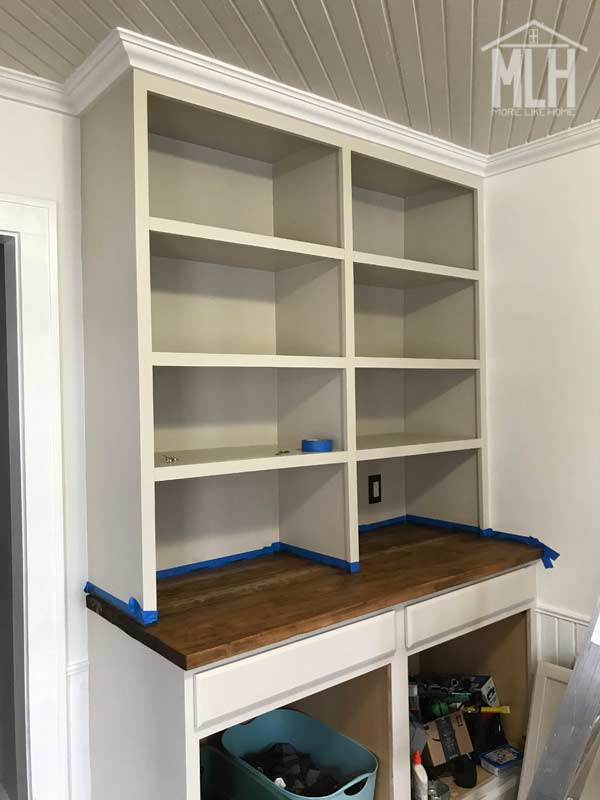
7. Install the Shelves
If there is anything you know you want to fit on these shelves, grab it now. We knew we wanted our microwave in here, so we brought it in a chose the height of our first shelves based on that.
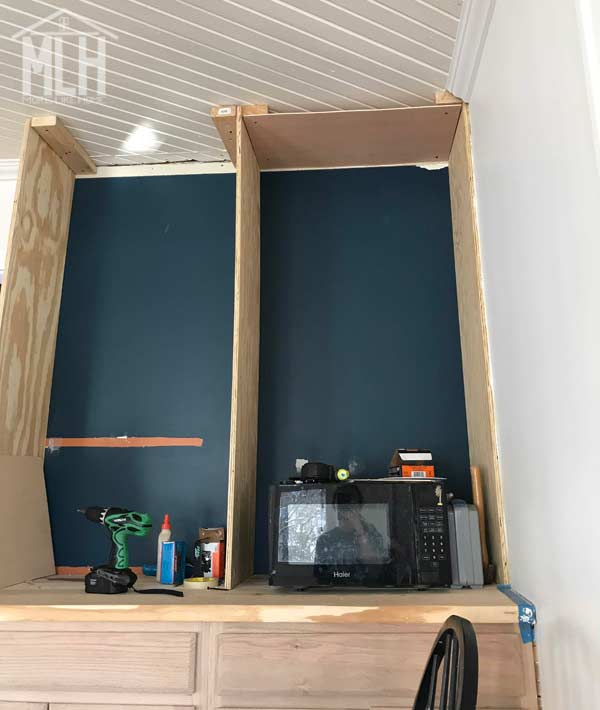
Microwave that has been demoted from the Kitchen next door.
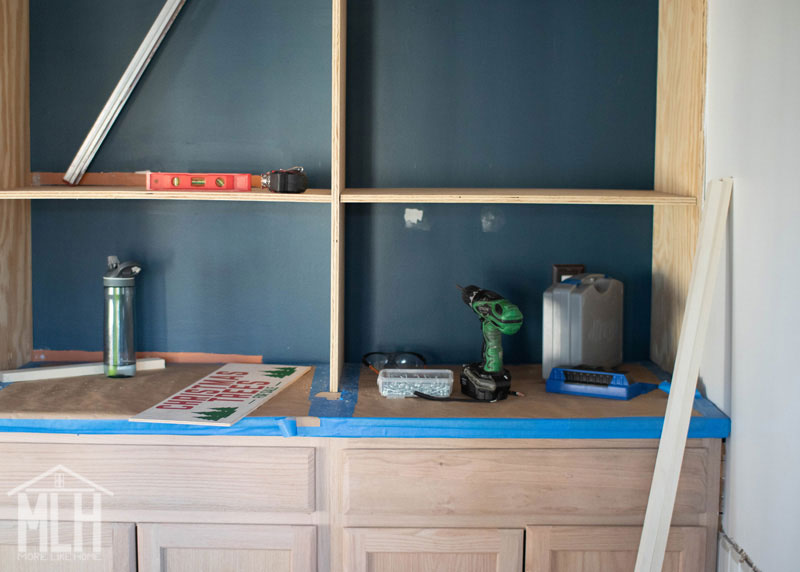
Measure the space at the base of each panel to determine the size of your shelf (our plywood panels were a little warped and measuring at the base meant we were able to correct that as we went up and keep the space between the panels even). Cut the shelves from your thicker plywood (1/2 or 3/4", whichever you are using) and use the Kreg Jig to drill pocket holes along both sides of each shelf.
Use 1 1/4" pocket hole screws to install the shelves, making sure each one is level. Once you decide how high you want your shelf, you can cut some scrap boards to that length and let them hold your shelves in place while you install them.

Scrappy little guy holding up the corner while I install the shelf.
I originally planned to make the rest of the shelving adjustable after the first level, but then I decided not to. The end. If you want adjustable shelving I have used the Kreg Shelf Pin Jig on other projects and love it!
8. Trim-out the Shelves
Now we add trim and this built-in really starts to feel fancy! Cut a strip of 1x2 to cover the exposed edge of each plywood panel. It should run from the countertop all the way up to the 1x3 trim piece at the top. Attach the trim with wood glue and finishing nails. For the two outside panels, the trim should be flush with the outsides edges. For the center panel I roughly centered the trim so there was a small lip on both sides.
Only the bottom shelves are install here because I was still thinking of making the rest adjustable.
Then measure the exposed edges of the plywood shelving between your vertical trim and cut more 1x2's to fit. Nail this trim to the front edge of each shelf (don't forget the glue). For the shelf trim, you'll want the top edge of the trim to be flush with the top of the shelf so things can slide on and off the shelf easily.
9. Top Trim
Time for the last bit of molding! If you have crown molding already, now's the time to piece it in around the top of your built-in. We bought the Kreg Crown Molding Jig to help cut the pieces since we have no idea what we're doing, and here's what I can tell you: If you read the instructions it works great. Kreg has never let me down yet. If you don't read the instructions, you will waste a bunch of time and a bunch of trim. Read the instructions.
We re-used the molding we pulled down in step 2, but still had to buy another stick to get all the cuts we needed to fit around the built-in.
Like I said before, if you don't have crown molding already you can just add some in around the built in to finish it off, or use another 1x2 or 1x3 to finish trimming out the top in place of the crown molding for a really nice finish that's a simpler style (this post is a good example).

10. Caulk, Fill Holes, and Sand
You're almost done! Time to caulk those cracks for a super high-end finish. I'll tell you now, caulking is a pain, but it's also super affordable and makes a HUGE difference in your finished product. I like to use a paintable silicone caulk because it has a good amount of flexibility once it's dry. Wood will shrink and expand with the seasons, and you don't want your caulk cracking when it does.
I covered the countertop with paper before I started any caulk or paint!
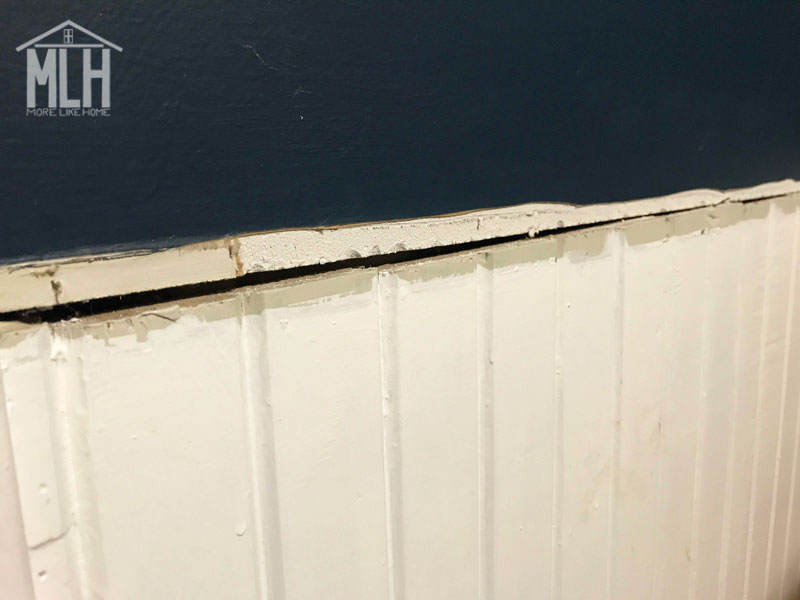
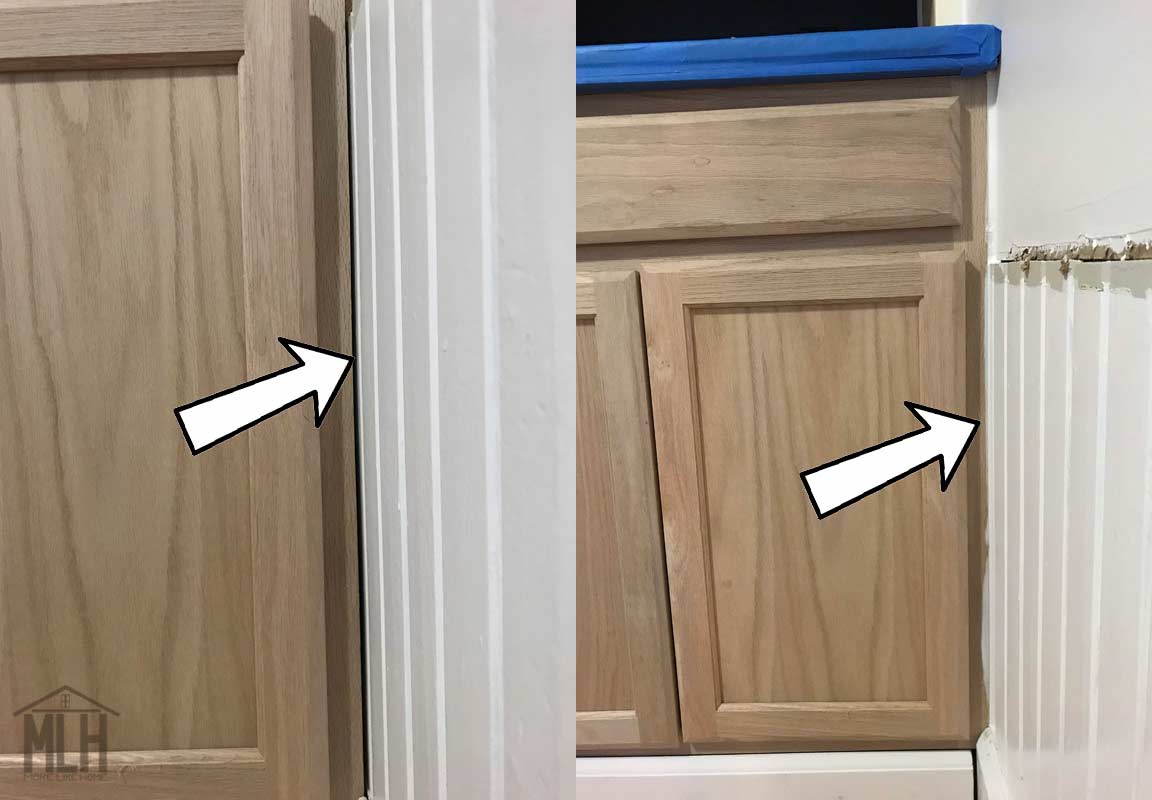
Here's a great example of the difference caulk can make. See this crown molding? The right arm isn't caulked yet, but the left arm is:

I also caulked pretty much everywhere the built-in met the wall: around the cabinets, around the shelves, around the toe kick. Just use a caulk gun to run a bead of caulk along a crack, smooth it with your fingertip, and wipe the excess on a paper towel. Repeat until you hate caulk.
Then I went through and filled all the pocket holes and screw holes with wood filler, then sanded it smooth. And then I actually ran over the whole thing with our sander before I started painting. Guys, I can't stress enough how important sanding is to get a good finish!
11. Paint
Homestretch here, guys! I knew I wanted to do white walls with a light built-in. Most of my house is gray, but I realized I've been really drawn to warmer spaces online that lean more toward taupe, so I decided to go for it with these built-ins. I picked Moth Gray from Menards. Make sure you cover the countertop painters tape and paper before you start painting! Unless you're painting the countertop instead of staining it. Then it doesn't matter. I just used wrapping paper.
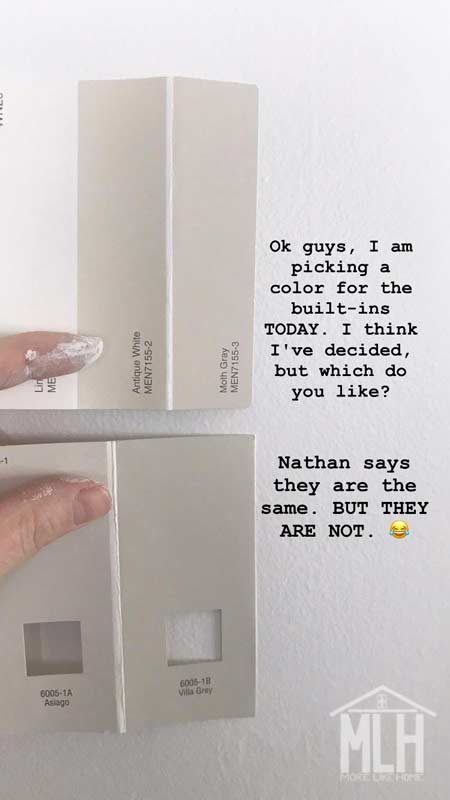
I picked the more taupe Moth Gray on top.
I've never been a primer fan, but they talked me into this time because it's so much cheaper than paint and I knew that it was going to take several coats to cover dark blue walls and raw wood shelving. So I primed everything. I still had to do three coats of white on the walls (Valspar Swiss Coffee) and two coats of taupe on the built-ins (Menards Moth Gray).

It's much easier if you remove the cabinet doors and drawers while you paint, then reinstall them when you are done.
12. Stain the Countertop
Remove the paper from the countertop. Tape all around the countertop to protect the cabinets and wall from the stain. Stain the countertop. I used Minwax Early American that was leftover from our farmhouse table (I also used it on our mantle). Then I sealed the countertop with three coats of Polycrylic matte finish. Note that we are not using this built-in for any kind of food prep, and if you are you may want to look into food-safe sealant options. I can tell you from my experience with butcherblock in the kitchen, that I HAVE NO IDEA HOW TO DO THIS.
Finished countertop:
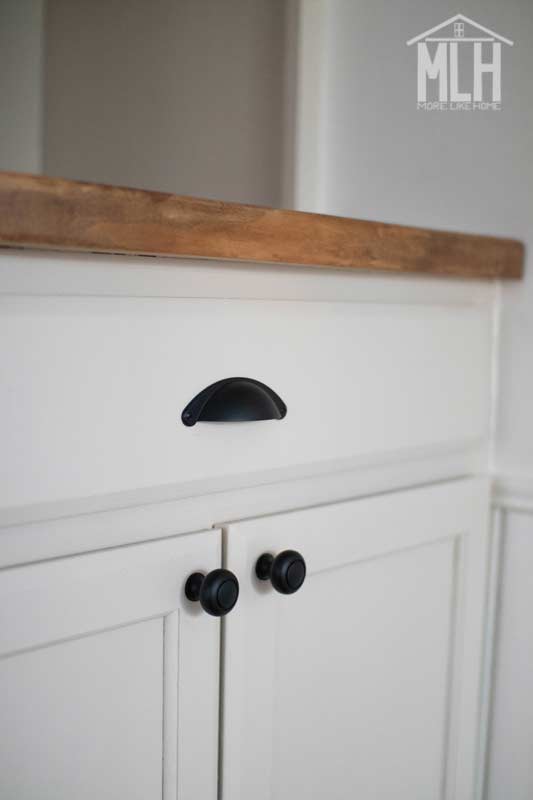
13. Hardware
I chose classic cup pulls for the drawers and knobs for the cabinets.
Guess what? You're done! Give yourself a big pat on the back! And I'll send you a virtual high-five if you pulled it off in less that three months.
I have a terrible time photographing this room. Sorry, peeps.
At least, you're done with the easy part. If you're like me, you'll have a small mountain of craft supplies to sort through and purge and organize so you can fill up your amazing new storage space. You'll probably put that off for another week or two. But who's counting?
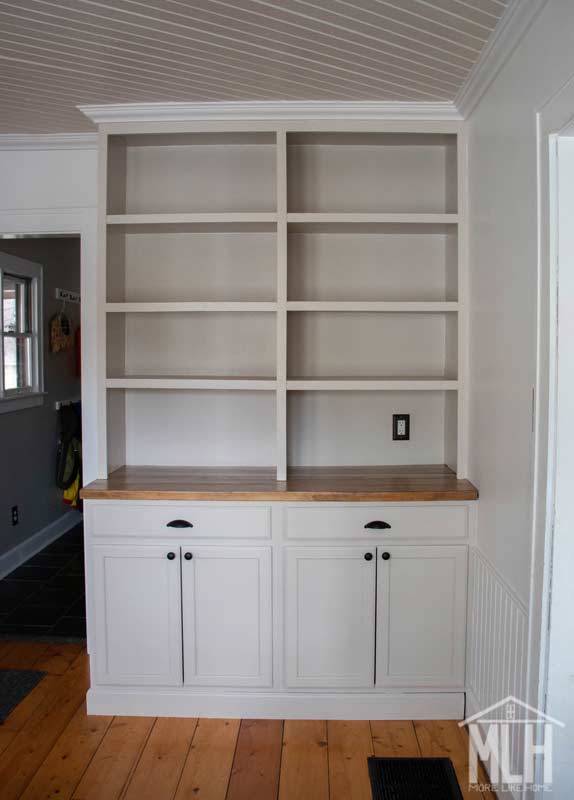
At least you have this to look at while you procrastinate the organizing:
Now for the question we all want to know the answer to: How much did it cost?
Answer: I'm not totally sure because I'm not great about saving my receipts and we also had a bunch of scraps and leftovers we were able to use. But here's the best ballpark I can give you and the things I actually know prices for:
COST:
- $200 - two 30" base cabinets
- $20 - hardware ($3 knobs + $4 cup pulls)
- $10 - baseboard
- $14 - 2x12 for countertop (added two remnant pieces from our stash to complete it)
- $7 washers (we already had all the screws/nails/etc.)
- $23 - sheet of plywood (plus a bunch of remnants from our stash. It probably would have taken at least two sheets if we didn't have scraps to use.)
- $8 - 1/4" plywood end panel
- $18 - primer
- $70 - paint (walls: Valspar Swiss Coffee; cabinets: Menards Moth Gray)
- 1x2 trim
- baseboard trim
- crown molding
- I don't remember what else
And guys, I realize that is not chump change. I'm so thankful we were able to do this, and I almost feel bad posting things like this because I know that for a lot of us that's just too much. A few years ago, walking in and dropping $200 on base cabinets would have been out of the question. And if that's where you're at, there is no shame in that, friends. I hope that wherever you are, you're just doing the best you can with what you have and creating a home for your family. That's always what I'm aiming for.
Let me know if you make your own DIY built-ins! And what team are you on: taupe or gray?
Thank you so much for this tutorial! My husband and I just bought our first house in the fall and I'm determined to fix up my tiny art studio ASAP (I run a creative business and really need a usable space). I'd love to build built in cabinets like these along my wall, and you documented this so well, it'll be a great jumping off point! I feel you about wonky walls- our house was built in 1929 and has original lath/plaster walls, some of which have experienced what I now know is called "key failure" (the plaster is totally separated from the lath). So step number one will be learning how to repair plaster walls! And then I've got a few more steps (paint the walls, replace the flooring, add a beadboard ceiling) before I can get to the cabinets, but you know. One thing at a time. Anywho, thanks again for this! It's super helpful and easy to follow.
ReplyDeleteSo glad this was helpful to you! Sounds like you've got a big job ahead of you. Have fun making the space your own! :)
DeleteI am so excited to have found your post! Thank you so much for sharing an amazing tutorial and build! I really appreciate your insights on dealing with wonky walls! You have alleviated a lot of my concerns about tackling such a project! I love the finished product and your color choices! Thank you
ReplyDeleteThank you! And so glad it was helpful for you. I'm glad I'm not alone with my wonky walls. :)
DeleteThis looks great! Did you attach plywood to the exposed side of the baseboard before you painted it? I'm also wondering if you used anything to join the planks of your counterop to each other (like a biscuit joiner)? Thanks so much for posting this - it was exactly what I was looking for!
ReplyDeleteHi, I'm not sure which baseboard you're referring to, but I don't think I attached plywood to any of the baseboards. Sorry if that's not helpful, maybe you can point me to a specific photo you're asking about?
DeleteAnd yes! I did join the countertop planks together with a Kreg Jig before installing them.
Hope that helps! Let me know if you have any other questions! :)
This turned out so gorgeous! And at around $400 for the whole project?! That's a steal, great job!
ReplyDeleteThanks so much! And yes, that was the cost for use but we did have quite a few things on hand already that saved us some money (like scrap wood, stain, and screws). :)
DeleteNice post.
ReplyDeleteThank you so much for this super detailed, informative post. This is exactly what I needed to make my built ins around our gas fireplace. I would upload a picture but I'm not sure how to. And yes it definitely took me longer than I thought it would!
ReplyDeleteReally appreciate this post! Using this as a guide as we speak :)
ReplyDelete