

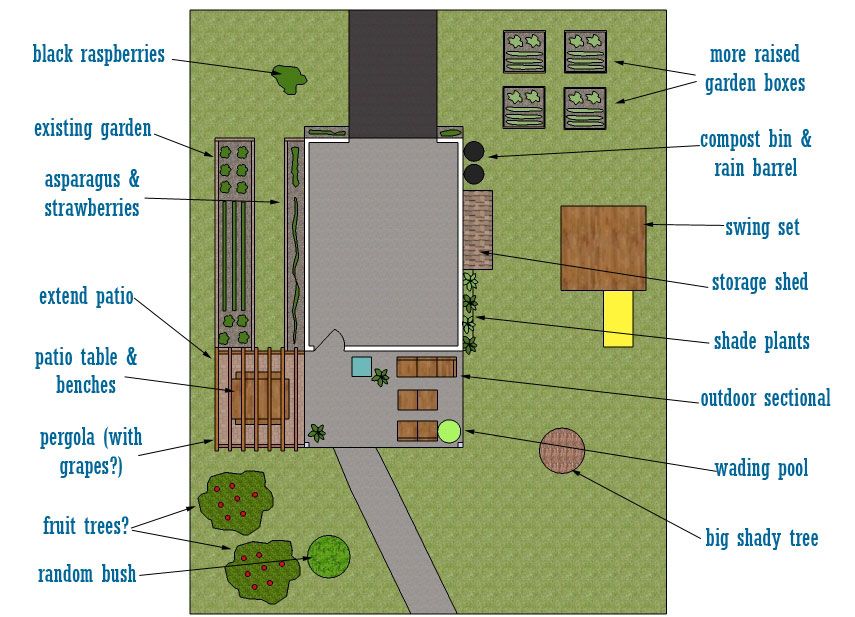
We built a comfy sectional and added a garden, but a patio was still on a long list of dreams for our little piece of the outdoors (you can see our dream list here).
The patio was pretty far down the list because, as it turns out, patios can be expensive. And we had at least a chunk of patio already. But last fall we stumbled across an opportunity too good to pass up - Husband's workplace was re-doing some pavement and dumped a pile of old pavers in the back of the parking lot. For free. First come, first served.
We spent four hours that evening making as many trips as we could back and forth with loads of pavers before they were gone (turns out lots of people show up for free bricks). With two kids in the back seat, we'd fill the trunks of our old lincoln and sunfire as full as we dared, drive home and unload, then repeat. And thank goodness with our last load, as the final bricks disappeared, we ended up with enough for a full patio.

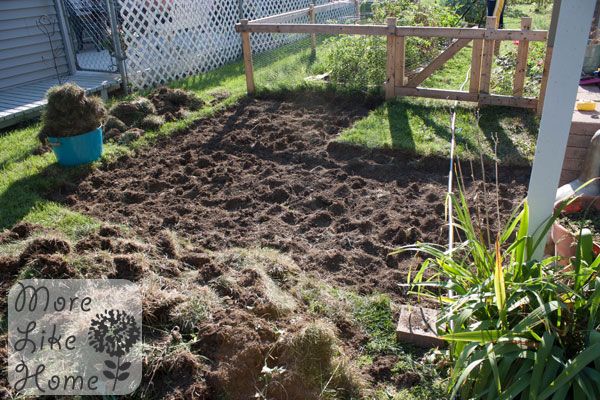
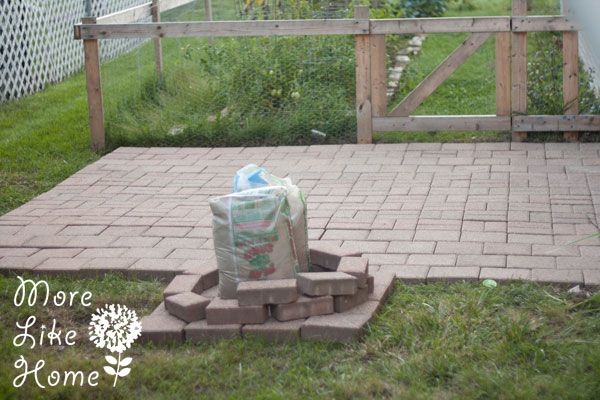
And then the real work began! Lesson #2 = patios are a hard work. Husband spent a few hours digging up a layer of sod in the backyard. We knew we wanted the front edge to line up with our existing patio and the left side to line up with the garden fence, so he just dug up everything inside that square. Digging it up made a more level surface for us to work with, plus we should have to worry about grass sneaking in too much! We were able to haul all the sod back to the alley and have it picked up. We used a rake to level it out a bit more before starting the next step.
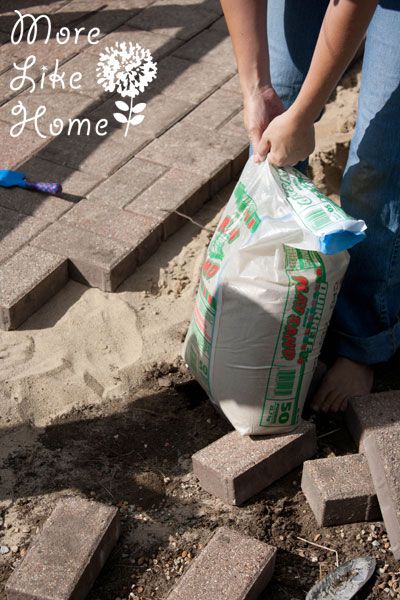
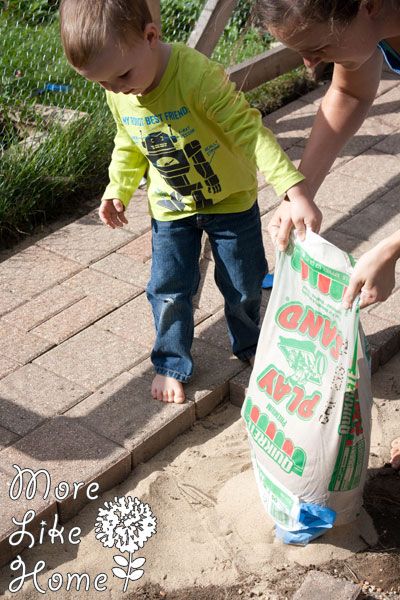
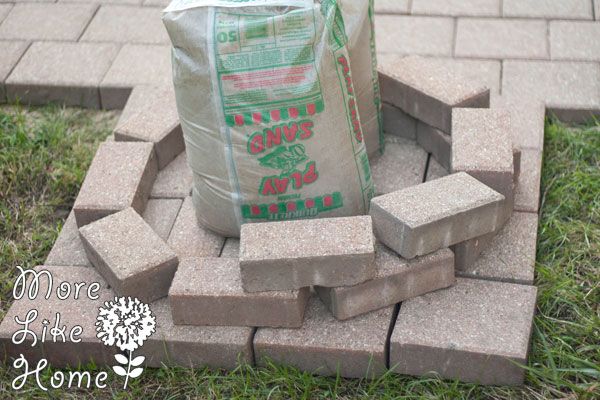
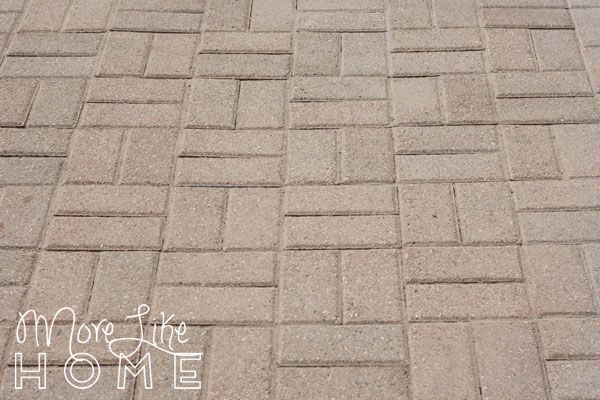
Next came sand. Lots and lots of sand. I didn't keep track of how many bags (oops) but we had to go back for more twice. Here's one of the places we cheated a little bit... and it may come back to bite us later. But it's a risk we decided to take! We shopped around and found that "play sand" was about half the price of "paving sand." From what we've read you're supposed to start with a coarser paving sand layer, then a finer layer, then your bricks. And I'll tell you now, I'm not totally sure what the difference is between all these sands other than grain size. But we didn't have a ton of money to put into it and decided to go with the cheaper option. *fingers crossed* So we started in the back corner with a layer of sand (it was probably 1-2" thick across the whole space), then started laying out our bricks.
Little boys love to help with sand!
It was a long process of row-by-row layering sand, then laying bricks. As I worked down each row I would smooth that sand with my hand, lay a brick, and adjust it until it was level. Then move to the next brick. We kept a level handy to make sure everything turned out pretty flat. I'm sure there's a more professional, accurate way to this than just sliding a level along, but it worked out pretty well for us. It's not perfect, but with free bricks and play sand we are thrilled with how it turned out!
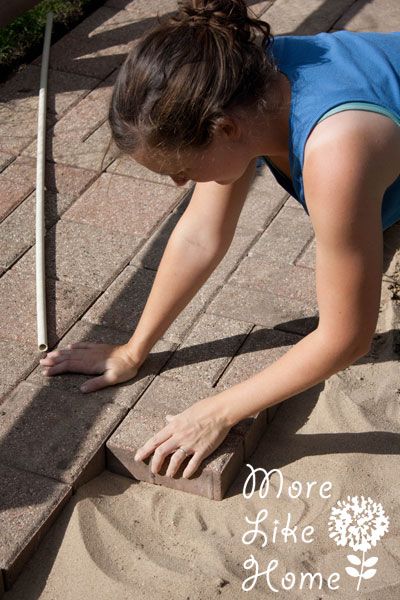
We ended up with a variety of bricks (some square and some rectangles) so I just made up a pattern as I went and fit them together the best I could. You can see some of the imperfections in my laying skillz here, but we aren't sweating it.
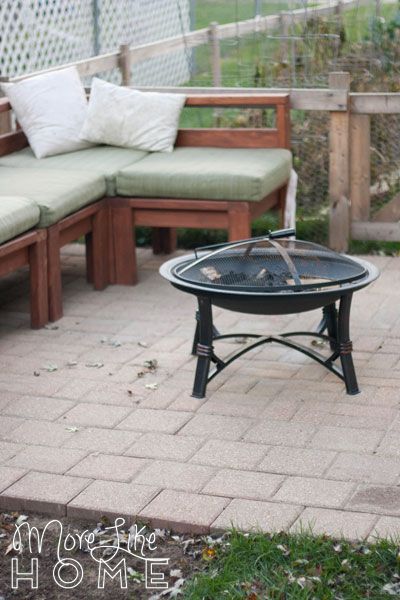
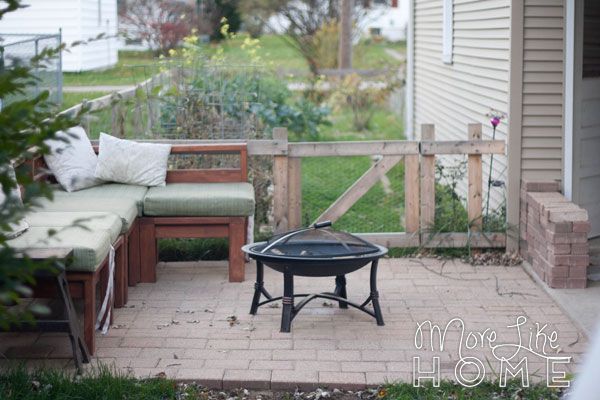
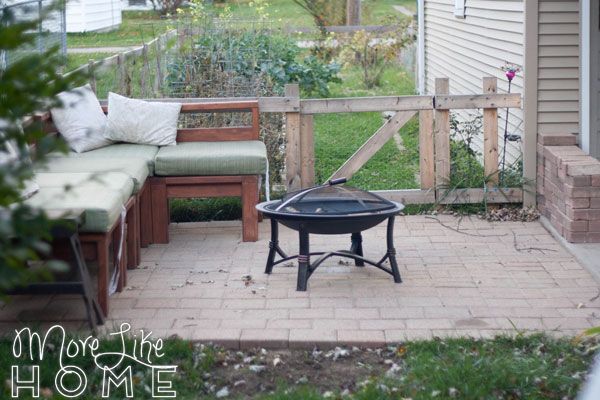
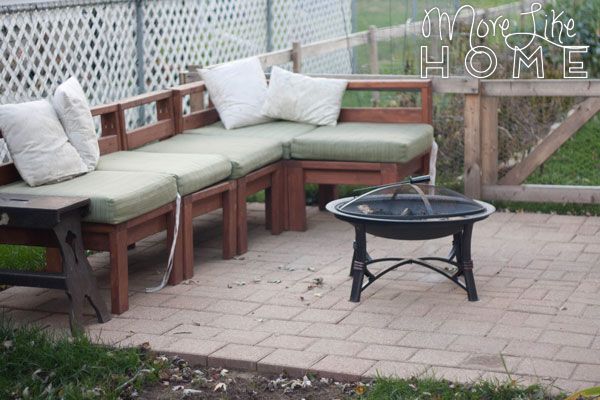
We thought about adding a little section on the side for a fire pit, but couldn't quite commit to something so permanent, so we ended up ditching it.
The last step was filling the cracks between the bricks. After reading up we decided a polymeric sand would be our best bet. When it gets wet it basically cements in the cracks preventing weeds and keeping the sand from washing away. We had to buy two buckets to finish the whole patio.

It was easy to use, but like all patio steps pretty time consuming. We used a broom to sweep it all over the patio, but when you think it looks good you tap all the bricks and it falls down in to the cracks and you do the whole thing again. And again. Until the cracks are full. Then we sprayed it lightly with the hose and let it dry.
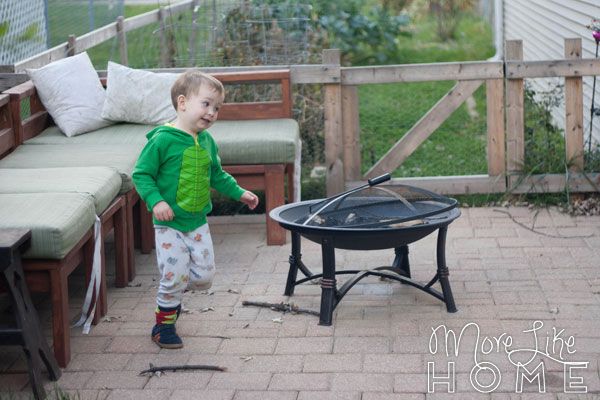
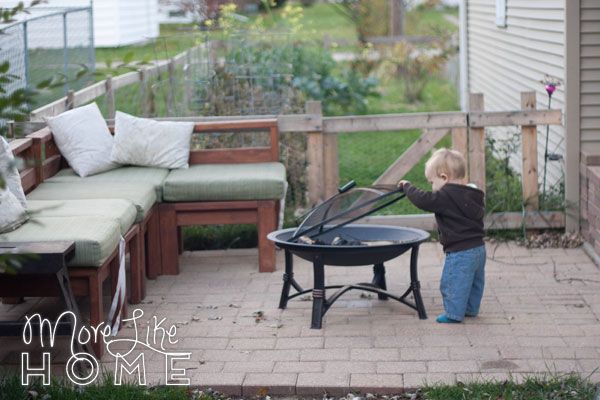
All done! We got a portable fire pit (since we couldn't commit to the more permanent option) and move the sectional out there for now so we have somewhere to sit while we enjoy the fire.
And for a quick reminder, here's where we were at three years ago:

It's feeling more like our home than ever.
The next big items on the agenda are a pergola over this patio (to add some shade and a place to grow grapes!) and a picnic table so we can eat outside. Although the boys probably think a playset with lots of places to climb should be our next project. And there's a pretty good chance they'll win that argument.
Speaking of the boys, Big Brother's favorite part of the patio is running circles around the fire pit. Please, not when there's a fire. Please.
And Baby Brother just wants to collect the burned sticks.
Have you ever put in a patio, or are you planning to? What's your next dream for your backyard?
Don't forget to enter the $100 Visa gift card giveaway in our Kitchens Across America post!
No comments:
Post a Comment