

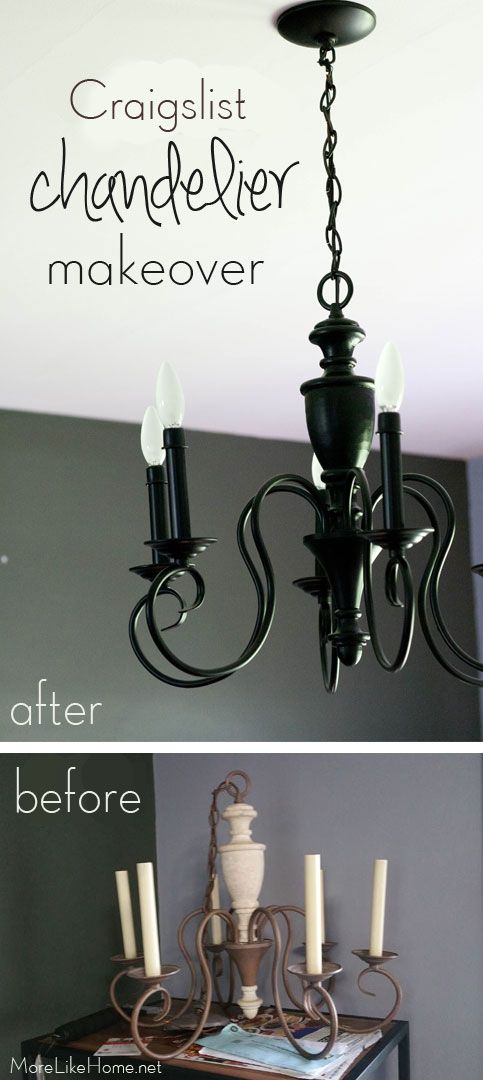
Ever since we moved in I've been thinking about hanging a chandelier there and even spent some time shopping around online. I finally found a few I liked at World Market. I went to see the wooden one in-store and it ended up being huge. No way it could work with our 8' ceilings. And the black one was only slightly smaller. Add that to the fact they are listed at $250 and $170 (yikes!), and we were back to square one.


After that sticker shock, I started wondering if I should just wait it out and hope I got lucky at a yard sale. But finding a chandelier at all (let alone one I like) seemed like a long shot. That's when I finally arrived at the solution I probably should have started with. Craigslist. The year-round online yard sale. And within 24 hours I had this guy sitting in my dining room.
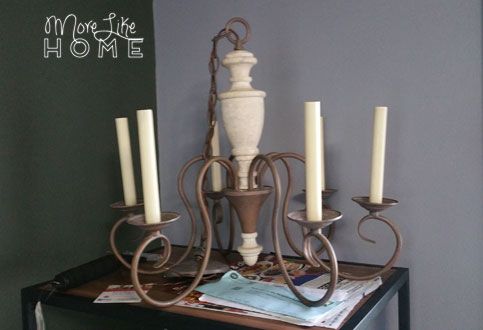
The best tip I can give you when shopping second-hand chandeliers is find is ignore the color. It can be the ugliest old brass you've ever seen (you'll probably pay even less if it is) but if it's a good shape, you can make it beautiful. Which brings us to step one of our chandelier makeover: spray paint. We went with Rustoleum Universal because we've had such good success using it in the past, specifically for painting metal. I wanted to match the finish of the lighting I liked at World Market so I went with satin black.
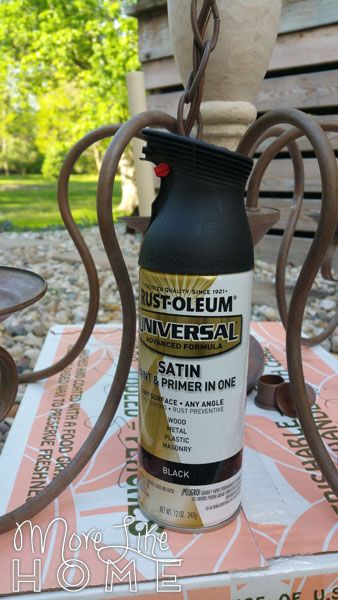
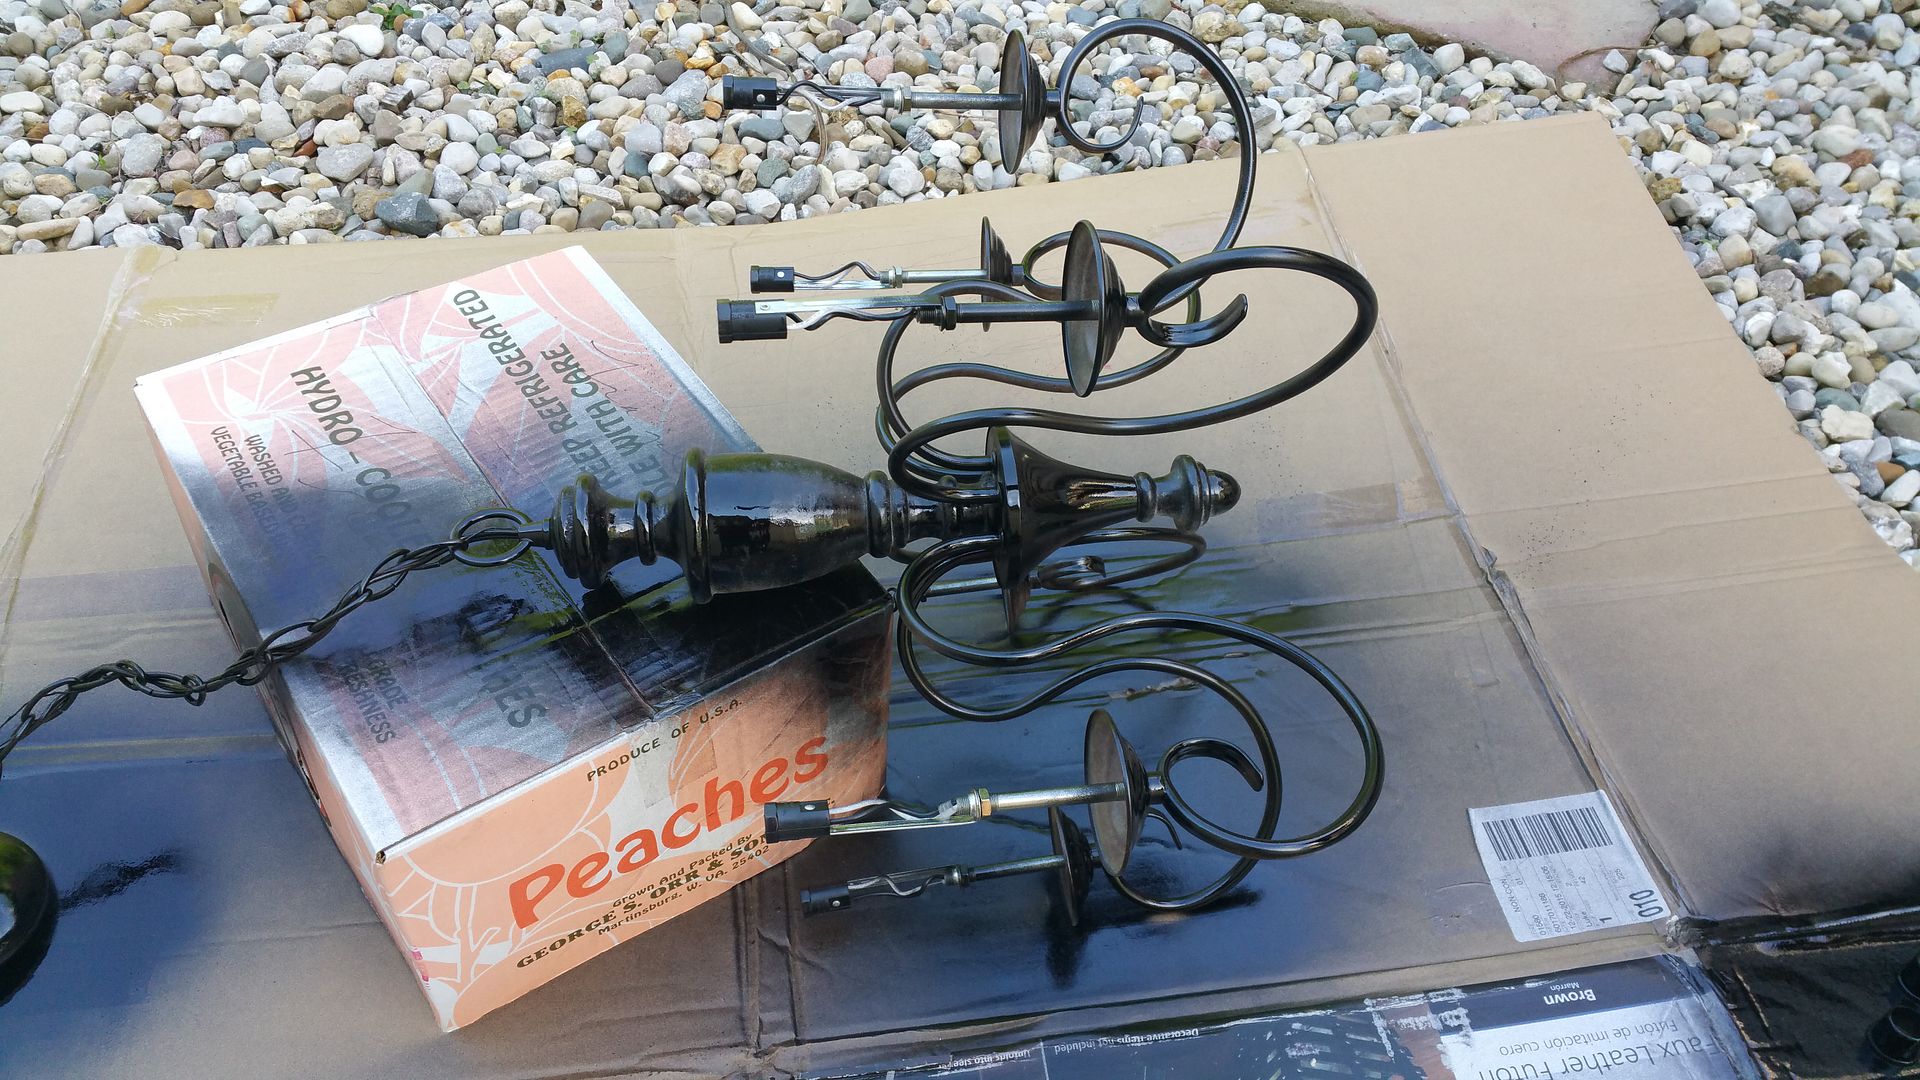
I removed the candlesticks (they had a cover that slid right off) so I could see if I wanted to keep them white once the rest was painted. I wiped the whole thing down with a damp rag to get off any dust. Then I laid the top of the chandelier on a box to keep weight off the candlesticks so they wouldn't bend, and gave it its first coat. I let is set several hours before flipping it over to do a coat on the other side to make sure I wouldn't scuff the paint. I ended up flipping it around a few more times to hit it from every angle and get good coverage of all the nooks and crannies.
If you'll be painting near the sockets, cover them with painters tape to keep the paint out!

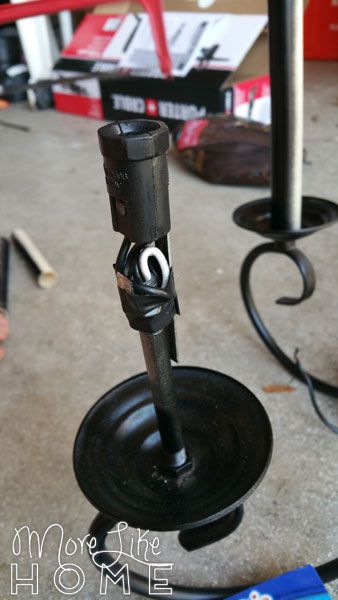
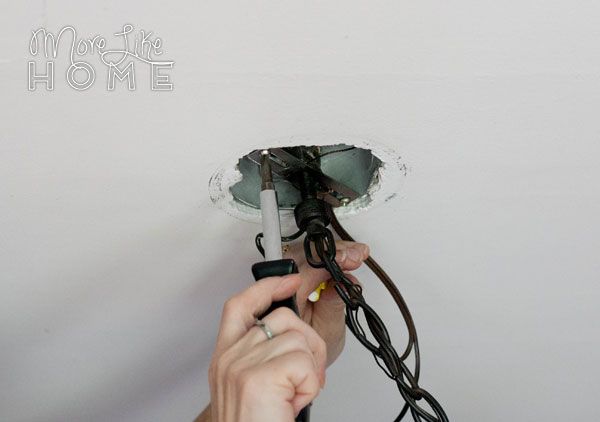
I moved it down lower with all the wires squeezed in the middle.
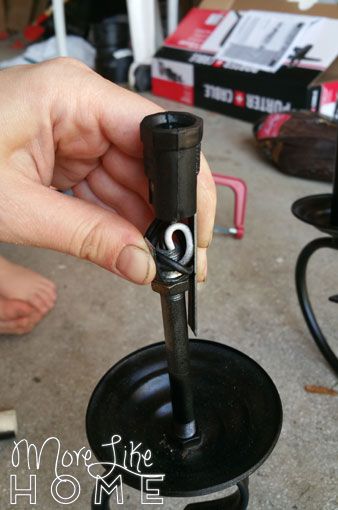
And taped it in place with some electrical tape.
I measured from the base to the top of the candlestick and cut the cover to match with a hack saw. I used this one as my guide to make sure the rest ended up the same size.
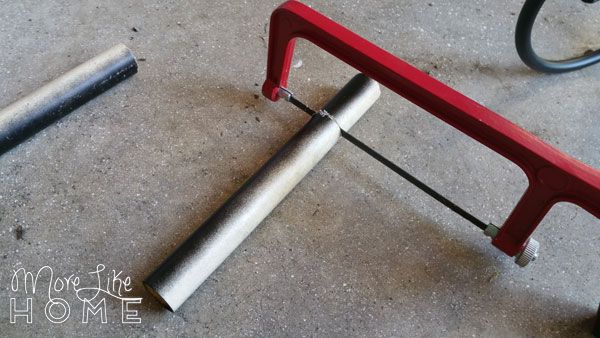
I only took 1.5" or so off each candlestick, but it made a pretty big difference overall. And it only took about 1/2 hour to do all six. Here you can see the last tall one compared to the ones I already cut.

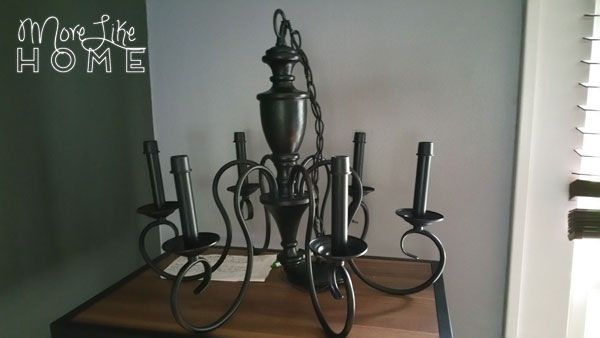
Then I finished painting it, including the candlesticks, and it was ready to hang!
My mom helped put it up when she was here for the weekend.
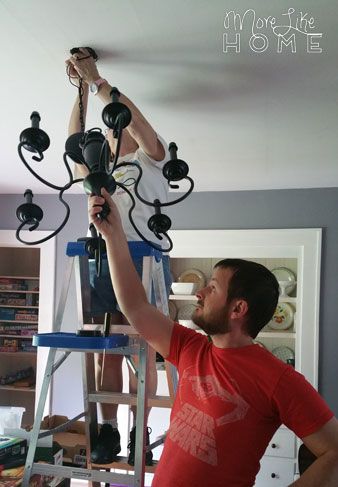
First things first, we made sure the electricity was off. That is the single most important step. Check and double check. Then we took down the old light and screwed the new one into place.
Then we lined up the black wire from the ceiling with one of the light wires side-by-side with the ends lining up and twisted them together clockwise. Then we put the cap over the ends and twisted it clockwise to keep them together.

We also add some electrical tape to make sure it's secure. Start by wrapping it clockwise around the wires at the base of the cap.
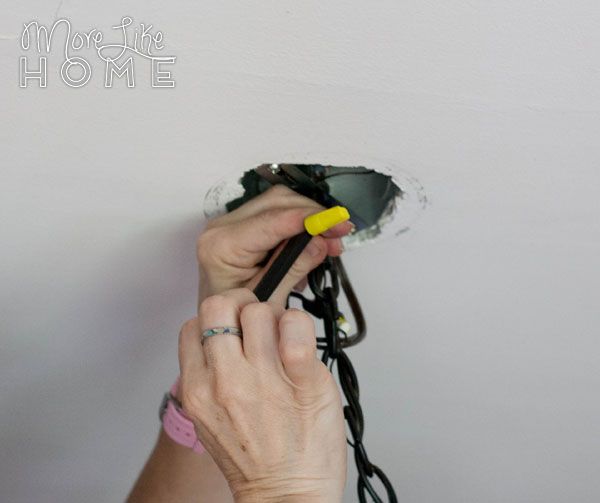
Then wrap up onto the cap. Repeat to attach the white wire to the other wire from the chandelier. Note: If you're doing a simple light like this it doesn't matter which wire you attach to black and white, but with other things like ceiling fans it does!

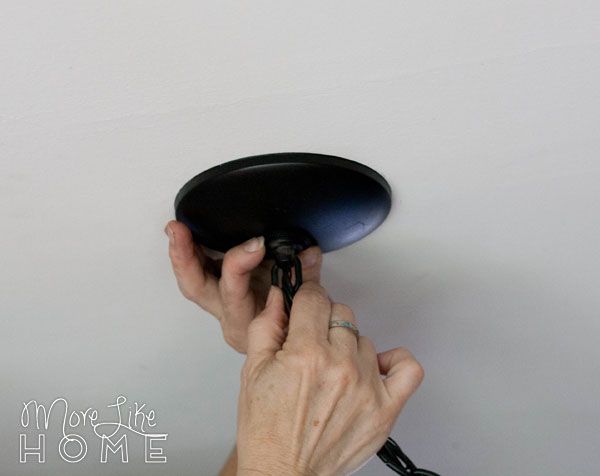
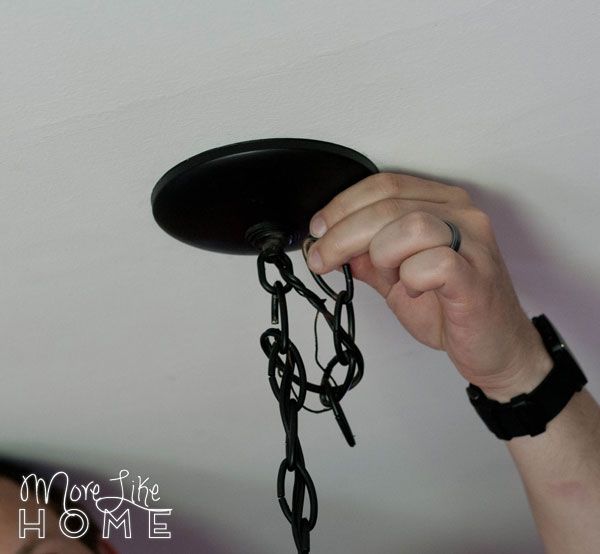
Move the plate up to the ceiling and screw it in place.
We found our chandelier hung a little low so we took a few links out of the chain and slid the extra wire up into the ceiling box.
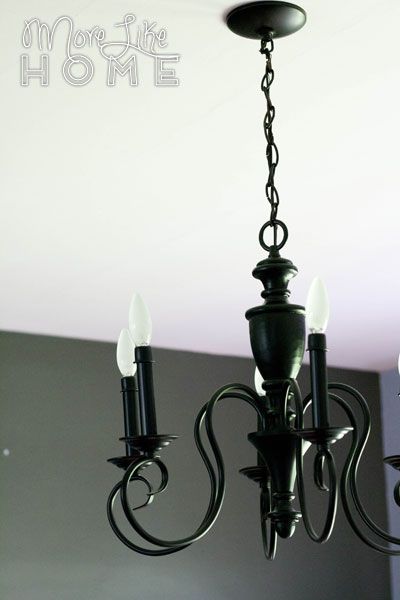
All done!
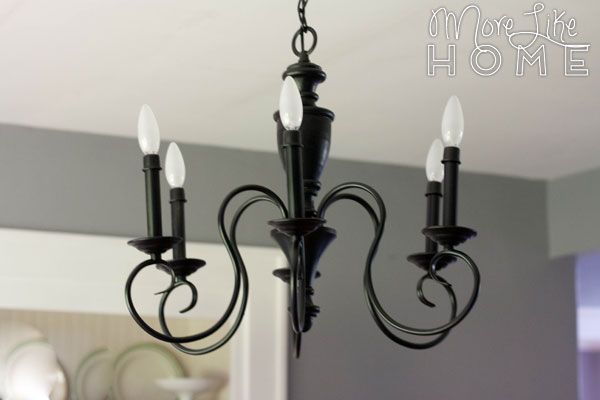
It's as bright as day in the evenings (six light bulbs make a big difference!), and it still looks good when it's off. All in we spent $25 for the light and $7 for the paint (with some leftover), and put in maybe an hour of work plus drying time in between. It was totally worth it and we saved at least $100!
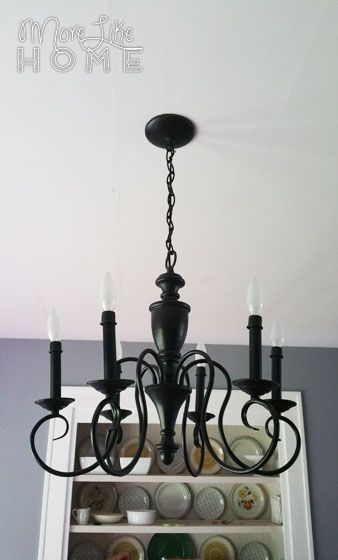
We're still working on the rest of the details in the room, like the perfect paint color and dining table (does unpacking count? we're still working on that), but in the meantime it's starting to feel a little more like ours.
Have you updated second-hand lighting? What is your favorite Craigslist makeover?
Nice job, looks great.
ReplyDeleteThank you! :)
Delete