When it comes to getting a house-full of little boys dressed up, I tend to fall back on my old favorite combo - a simple button up shirt with khaki shorts. It's easy, cute, perfect for summer, and it looks nice without being overly formal (we're not an overly formal bunch). Plus it's cheap - we already have those things in the closet (Dave Ramsey approved!).
But last summer I was putting together outfits for my sister's wedding and I wanted to add a special touch. Something to dress it up just a bit more than usual and add a little matching to the day
(I love when they match).
For little boys, that naturally led to matching ties and bow ties! I found a few ties on Amazon, but the ones I liked were almost $25 each. And the few I didn't totally hate (that would arrive in time) were still $10-15 each...
and I would need four. Not how I want to spend my $$ today,
thankyouverymuch. It just felt like a lot of money for a little accessory.
Then my sister was like "Duh. Make your own." And she sent me these two links:
And she was totally right. With DIY, I could make ties for all four boys
for less than buying one
pre-made tie. And I had a whole Hobby Lobby of prints and colors to
choose from.
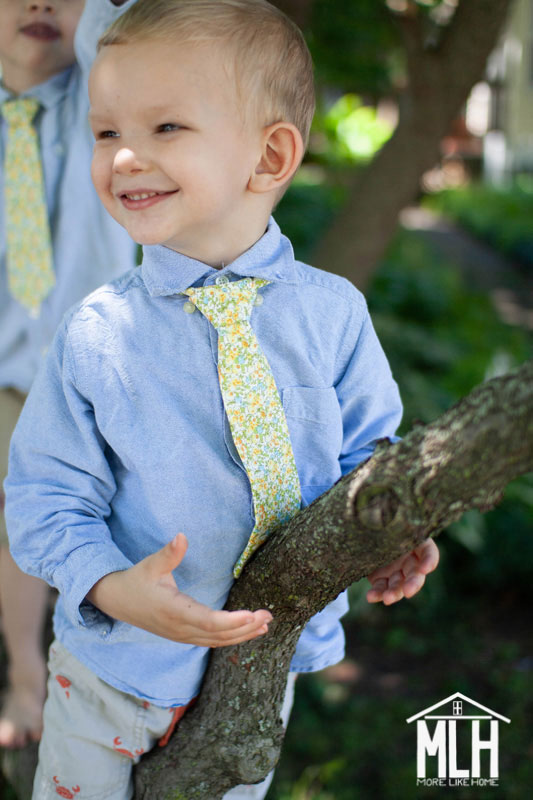
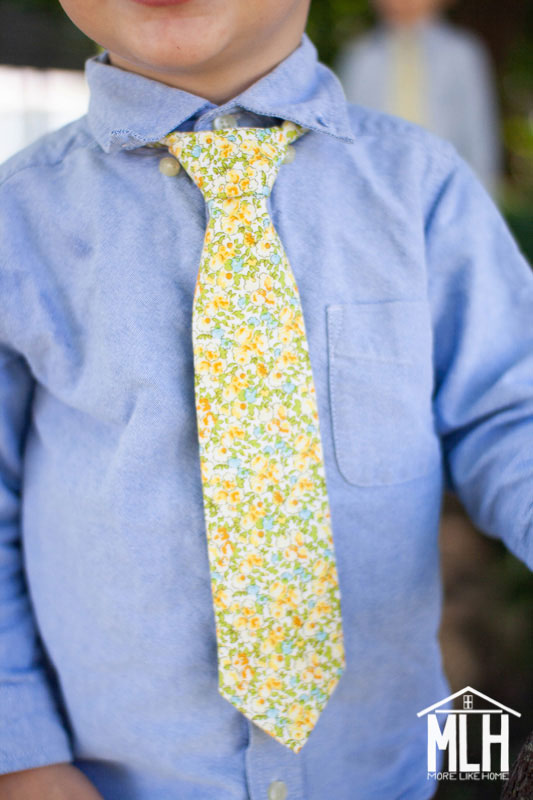
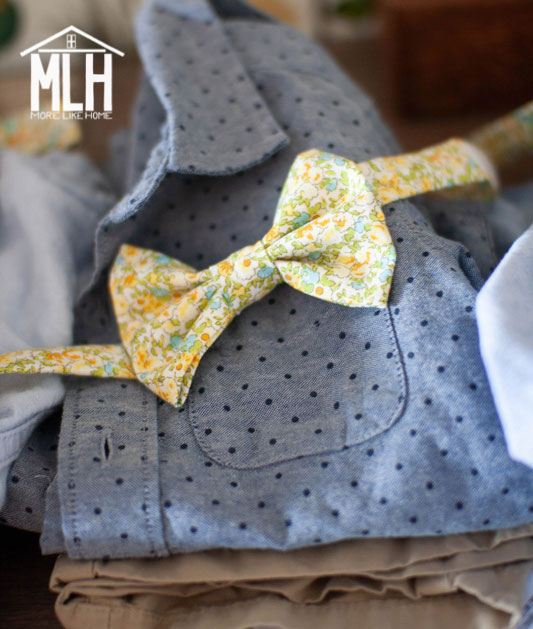
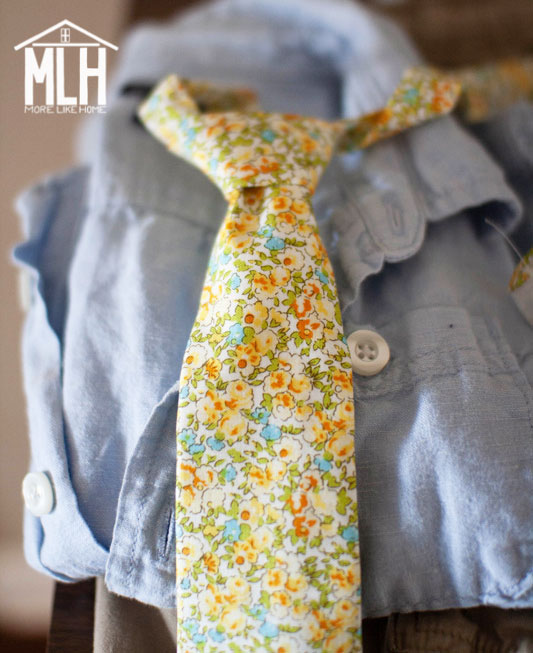
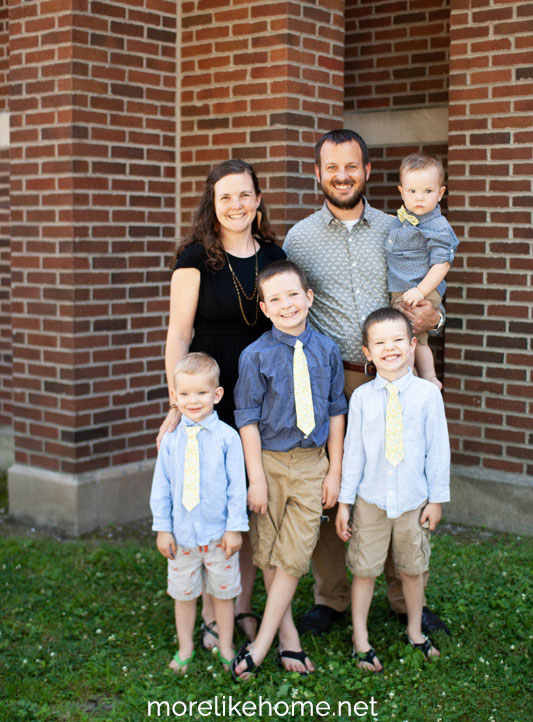
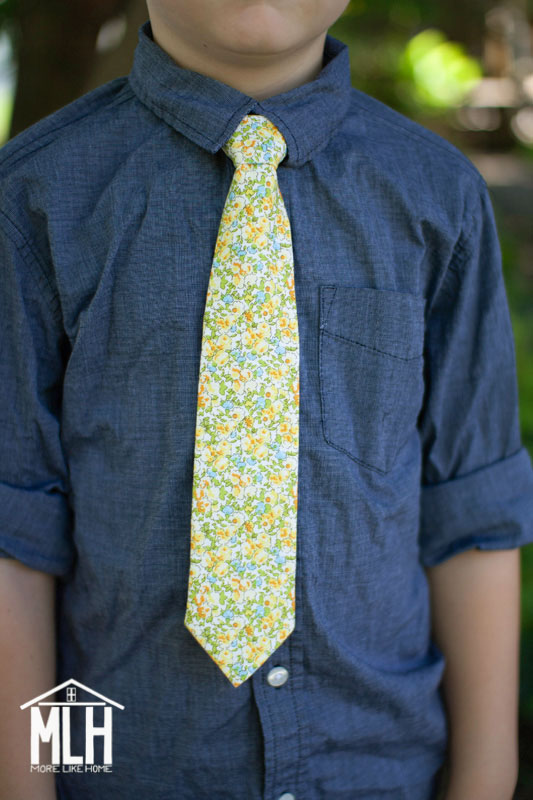
I decided on regular ties for the three bigger boys and a bow tie for little guy (so he wouldn't get tangled up while crawling around). For my 8-year-old, I added a few inches to the tie pattern to make it a little longer. My five- and three-year-olds are wearing it true to the pattern. Hopefully that gives you an idea for any adjustments you need to make for your own sizing! I also copied the velcro strap from the bow tie pattern and used it for the regular ties, too, instead of using the elastic it shows in that pattern.
Yes. I'm the mom that let them wear flip flops and didn't iron their shirts, but I did tuck them in... and you can see how long that lasted. I'm choosing different battles, folks.
My sister's wedding themes were
navy + wildflowers and the boys were all going to wear blue shirts
(all different shades, just working with what we have) and khaki shorts.
So I picked a yellow floral fabric with a vintage vibe that would work perfectly
with all their outfits and fit the wedding theme! It was so perfect, I could hardly believe it.
The fabric was from Hobby Lobby and cost $7/yard regular price, but their fabric is
always on sale so it ended up being only $5/yard. One yard was enough to make the set of four. I also bought one pack of 5/8" velcro for $2 and had plenty to split that between all four ties, bringing the grand total to just $7 for all four!
I couldn't believe how cute they turned out! I kept looking at them like "Did I really just make these??" So cute and so professional looking. And under two hours to make the whole set.
Just wanted to share since it's a great little project to tackle while you're cooped up at home (and perfect if you have scrap fabric to use up!). Seriously, I can't recommend these patterns (or little boys with matching ties) enough. What have you been making lately?