Showing posts with label Makeover. Show all posts

Wednesday, February 19

$100 Bathroom Makeover - Going Green!


Lest you think this is about "going green" in the trendy environmental way - no. 
As my husband likes to say: "Why do you paint everything green?" 
And, as Harriet the Spy says: "I can't help it if I know what I like."

So. If you want to watch me literally turn my bathroom green for almost $0? Keep reading. 

If you want tips on going environmentally green? I mean, we still make castile hand soap, we clean chemical-free with e-cloth, and... not showering everyday saves water? There you go. 

On to today's project. Here's the before:

Saturday, October 2

Boys' Closet Reveal (Low-Budget Makeover!)

Hey guys! It's time for the closet reveal! You saw a peek of it in the bunk room reveal (check that out here if you missed it), but the final details are done and this closet is already working hard for our boys. This was a 100% low-budget use-what-we-have project because seriously, guys, you don't have to spend a fortune to create a beautiful home for your family! Here's a reminder of where we started and where we left off during the bunk room reveal:


And here's their closet today: 


Thursday, July 1

Boys' Bunk Room Reveal

Ladies and Gents, this is the moment you've waited for....

The boys bunk room is DONE and I am so excited to share it with you! This room used to be our guest room, but we realized that we could make the space work for our family so much better if we turned this into a bunk room for all five boys and turned their old (bigger) room into a dedicated play room. I don't know about you, but there are a couple things I was tired of:

  1. Boys playing with toys when they should be going to sleep.
  2. Stepping on those toys when I go in to check on them at night. 
  3. Boys who couldn't nap while their brothers played. Or play while their brother napped.

So we decided to ditch the guest room and create a dedicated sleeping space that is only for their beds, their clothes, and a their favorite books. This allows their bigger room to house the toys along with plenty of open floor space to play and, of course, the monkey bars + rockwall play area we built for them a couple Christmases ago. 

Ready to see how we fit FIVE BOYS (and all their clothes) into one room? Let's check it out!

**Returning to this post more than 3 years later...we still use these bunk beds every day. They've held up great and love them as much as ever!**


Thursday, April 2

How to Turn Stock Cabinets into DIY Built-In's

Our first project of 2020 is (finally) finished! We tackled a totally neglected corner of our home (a little nook off our kitchen) and added a ton of functional storage with DIY built-ins. It's a pretty simple DIY that started with a couple stock cabinets from Lowe's, so today I want to share the process we followed so you can recreate it in any space and in any size!


This project started much like every other project we've ever done: with me saying "It will be easy! We'll be done in like two weeks!" And just like every other project... I underestimated. Like, a lot. It took us nearly two to complete these built-ins. Not because this process is difficult - it's actually pretty simple - but because we were exceptionally slow at setting aside time to work on it, and because the walls in this old farmhouse are crazy crooked. I mean, DIY always takes longer than I hope (you'd think I would learn - but no) but this project was even worse because we spent so much extra time cutting and recutting each board to fit tightly against walls that just aren't straight. But as usual, that slow and steady work has finally paid off in a big way.

It's hard to believe this is the same corner:

Tuesday, February 18

Easy $10 Fireplace Door Upgrade

One of the first things I loved about this house was the fireplace.  And now that we've given it a few updates? I love it even more. It's come a long way since move-in day, and we've done it all on a super small budget. I know I sound like a broken record, but you CAN create a home you love without spending a fortune. If you take one thing away today, let it be that.

If you take away a second thing, it can be this handy hack.

So let's check out the fireplace, because it's looking better than ever with it's snazzy new fireplace door! Except it's not actually a new fireplace door. It's the same old door with a fresh new look that cost under $10!


But before we jump into this latest update, let's throwback a few years. At this point we had painted the walls a light gray, but that was our only change so far:


Guys, small changes really do add up. It feels so much more cohesive and fitting to this old farmhouse now than it ever did back then. Partly because of the updates and partly due to my minimizing and learning to style the Cozy Minimalist way (so. much. stuff. on that old mantle). Here's a quick rundown of what we've done so far:

Thursday, October 24

$50 Master Bedroom Refresh (Our Fall Challenge Reveal!)

It's reveal day! Did you join the Budget Refresh Challenge?

Today I'm sharing how we totally refreshed our master bedroom and made it so much cozier for under $50! If you love a good before + after, hold on to your hats. This is your time.


Let's start with the before (you can read more about it here). This picture was take almost two years ago:


Thursday, October 10

Low-Budget Bathroom Update (during our spending freeze!)

Today I want to share a little inspiration for anyone taking on the Fall Budget Refresh Challenge - so I'm going to show you how we totally refreshed our second bathroom during our spending freeze and spent (almost) nothing. It's a tale of thrifty updates, leftover paint, and a broken toilet seat. You have been warned.

Are you joining the Budget Refresh Challenge this fall? There are still two weeks left to work all kinds of thrifty magic! Let us know in the comments or tag us on Instagram or Facebook!


Thursday, October 3

2019 Fall Budget-Refresh Challenge

When I feel that first hint of fall in the air, I get a craving.

And no, it's not pumpkin spice. I'm Team Apple Cider all the way! But that's not it, either.

I start to crave quiet. And coziness. And snuggling up. My introverted heart looks toward chilly days hunkered down at home. So as fall begins to creep in, I start to quiet the house and get it ready for winter. Not just shutting storm windows and draining hoses and all that other homeowner stuff, but I also start to ready the atmosphere of our home for this cozier half of the year. The home I want our kids to remember - a place that's warm and welcoming and ours.

And so Fall is always the perfect time for our Budget-Refresh Challenge. A last chance before winter to tackle that space or project we've been putting off! Last year was our first challenge and I'm super excited to host it again this year! Ready to join the fun and make your home the best it can be?


The Challenge:
Making space to weather the coming winter and enjoy time together. That's it. Is there a corner of your home that needs a little attention before you're cooped up with it all winter? A dark kitchen that needs painted? Living room that needs freshened up or rearranged? Need to simplify the play room? That's your challenge space! And guys, we're doing it all on a budget. Because a house doesn't have to be expensive to be a home.

Friday, February 8

Mountain Dresser Tutorial {Easy Dresser Update!}

This is the story of a dresser.

I don't know where or how long ago its story begins, but I can tell you how this dresser came to me. A free, broken-down, ugly little duckling. And I can tell you how it came to be one of my very favorites.

Along the way I'll show you how to create this subtle-but-stunning mountain silhouette pattern on your own favorite dresser! Perfect for any adventure or wanderlust fans out there. Spoiler: this is exactly how it became my favorite. And I'll even show you how to repair a dovetail drawer. So get ready for lots of DIY goodness!


Several years ago a friend called me up with an offer I couldn't refuse - she was moving and had an old tumble-down dresser that wasn't worth dragging along. The paint job was rough and one drawer was in pieces but she new I loved a good project piece. I could have it if I just got it out of the way.

 
 This is how it looked once the drawer was fixed... and for the next 5 years.

Let me tell you, it's so good to have friends who know you like that.

After I finally refinished the drawers.

Sunday, January 27

Homemade Wood Stain and Sealer

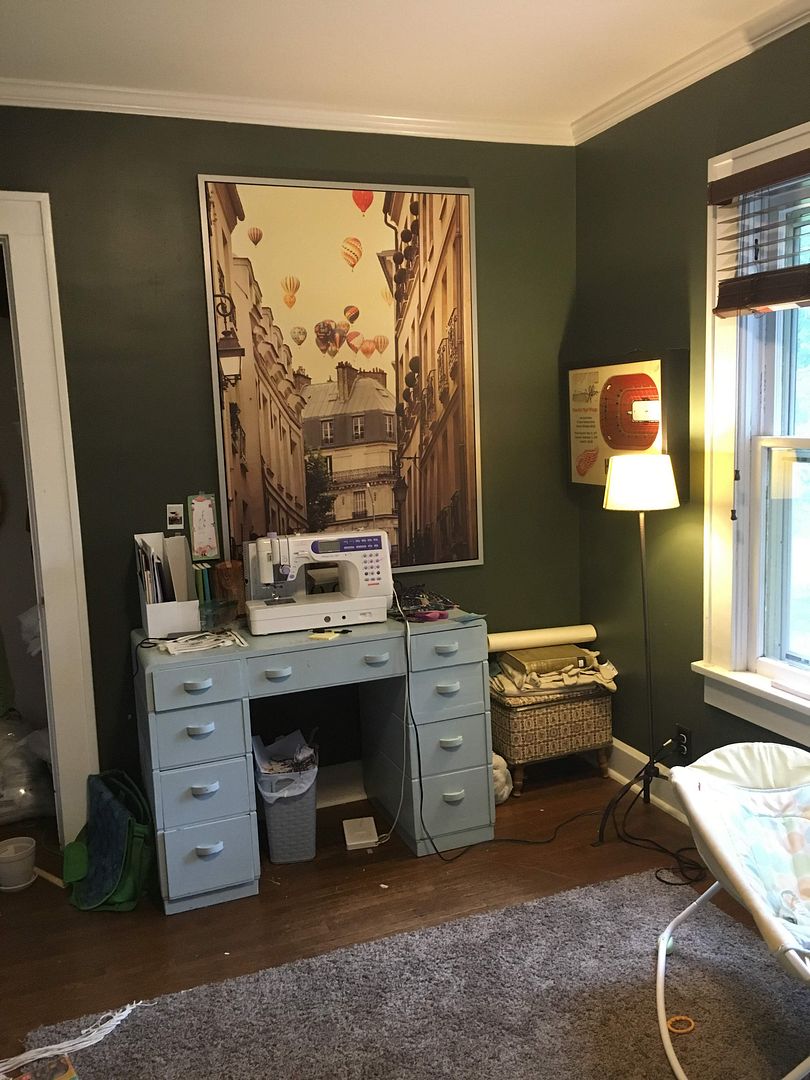
Remember this office space refresh I pulled off for just $35? It's one of my favorite corners of the house, and I still can't get over how little it cost to make this beautiful nook! One way I kept my budget low was by making my own wood stain and wood sealer with household items I already had on hand. So today I'm sharing how you can make your own - and it's easier than you might think!


I went back to my decorating roots for this one. And at my roots... I'm cheap. I come from a low budget use-what-you-have background and I wanted to update this space as inexpensively as possible, while still creating a beautiful space I love to work in. Because, guys, at my core I believe that any house can become not just a home, but a home you love, without spending a fortune. You can stick to a small budget and still do amazing, beautiful things!

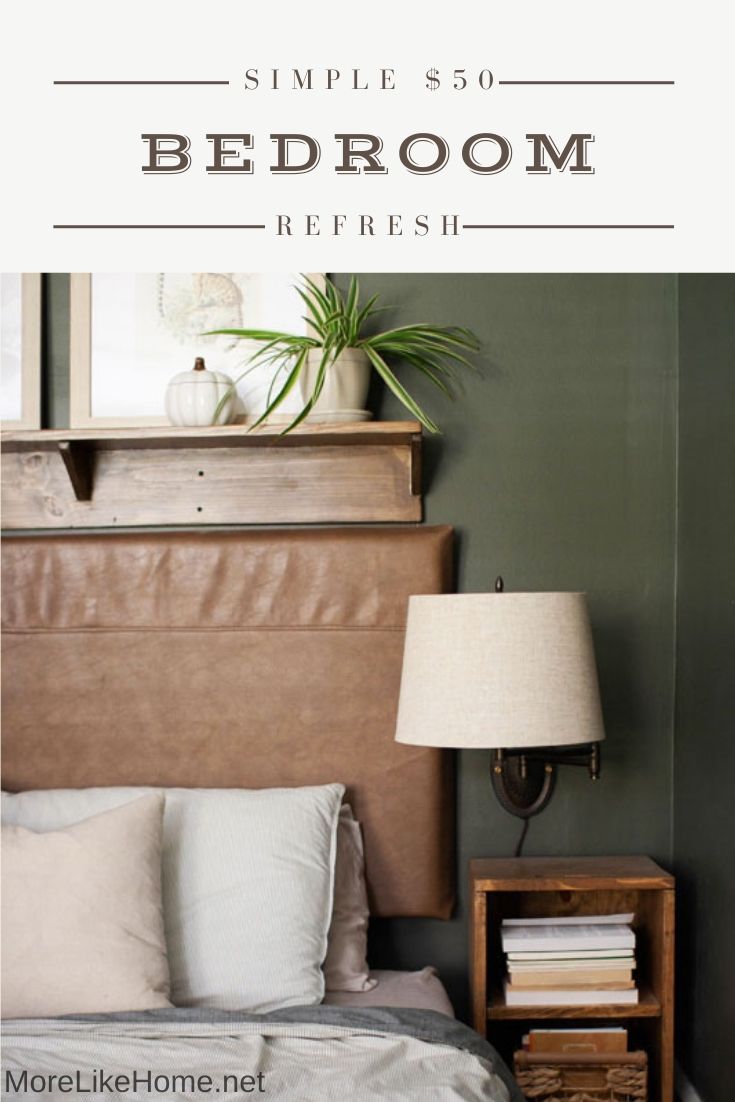
So I set my budget at $50 but wanted to stay as far under it as possible - literally not spend a dime more than I had to. I added some DIY budget shelving and a second-hand chair, but the real star of this makeover was a super budget-friendly desk! I started hunting for a desk first because I knew a large piece like that would make or break my budget. If I spend too much on that one item, I wouldn't have budget left for the other upgrades I wanted.

I ended up finding a perfectly-sized desk for a bargain (more on that in a minute) but the finish was in rough shape. That's probably why the price was so low. I wanted to try sprucing it up without spending $$ on new stain or poly, so I took to the interwebs and you know what? Turns out you can make your own wood finish products with everyday items you might already have around the house! I actually had everything I needed!


But let's start with the desk story.

This desk popped up on FB marketplace one day and it seemed like a good fit for this space. Just the right size, plenty of drawer space, and a perfect fit for my simple style (because I "like plain"). I saw it posted for $30, but it had already been listed for a week so I offered $20 (and offered to pick it up that night! - most people want to get rid of things quickly and will give you a deal for fast pick-up!) and they said yes!  


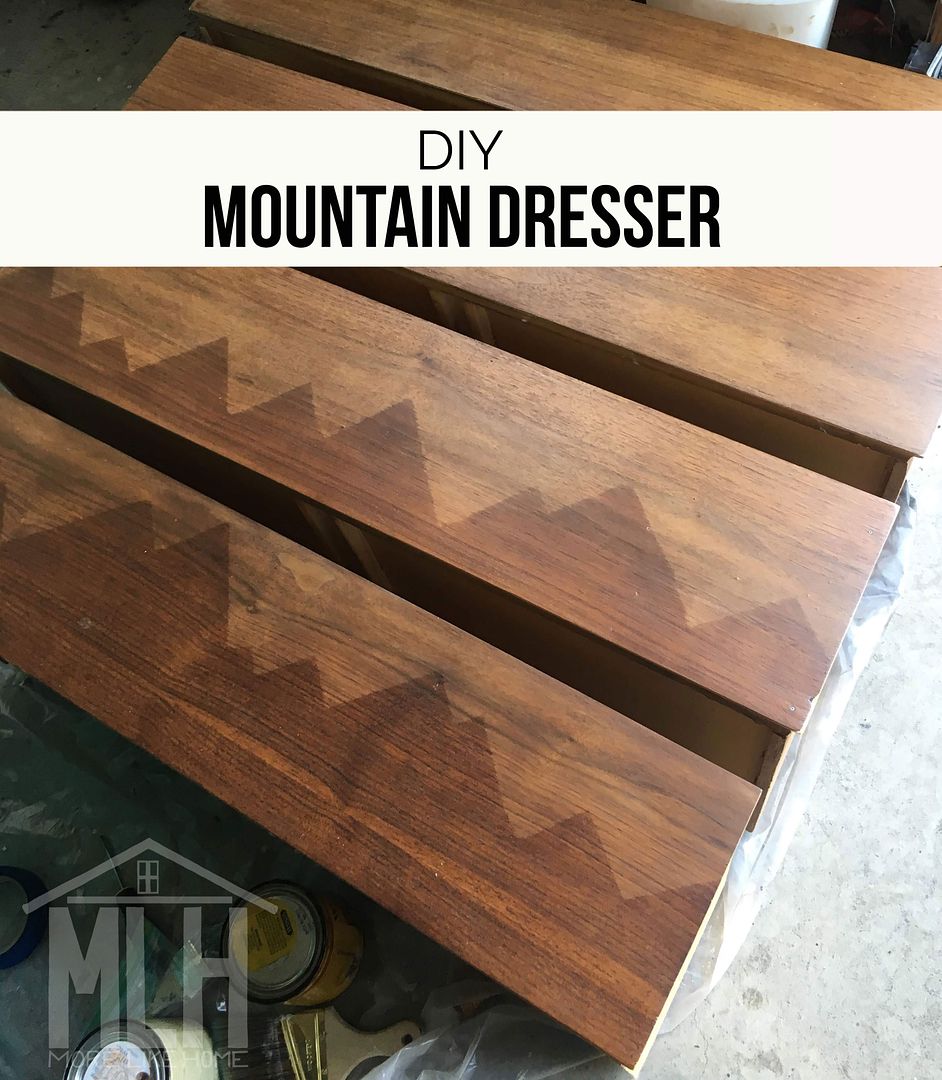
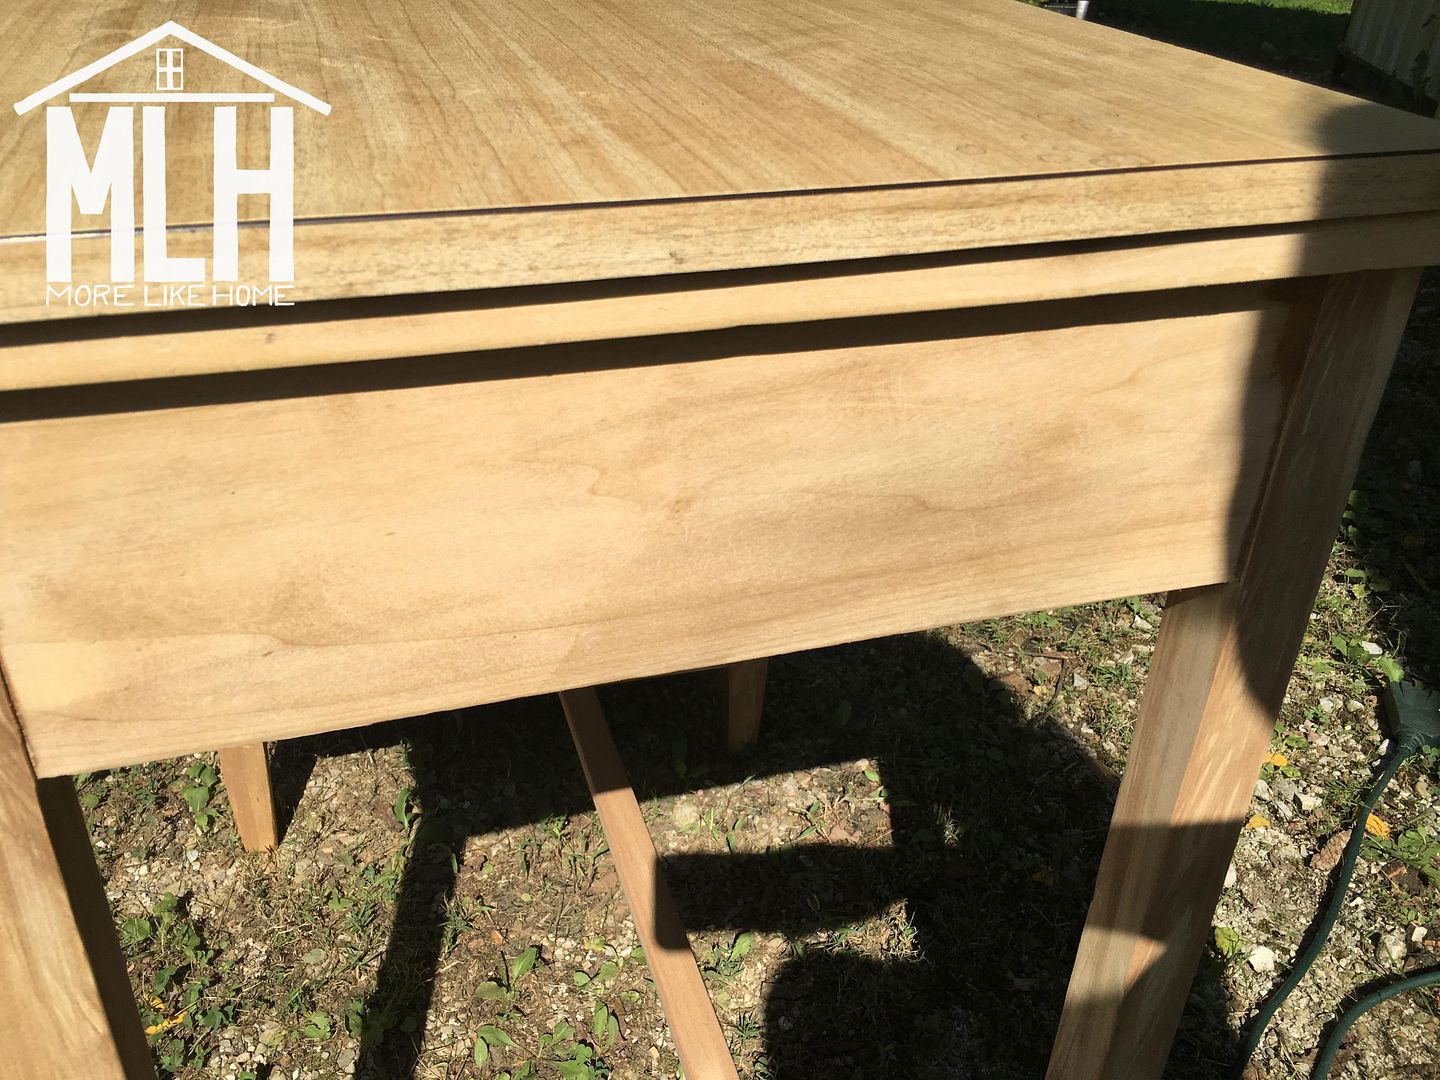
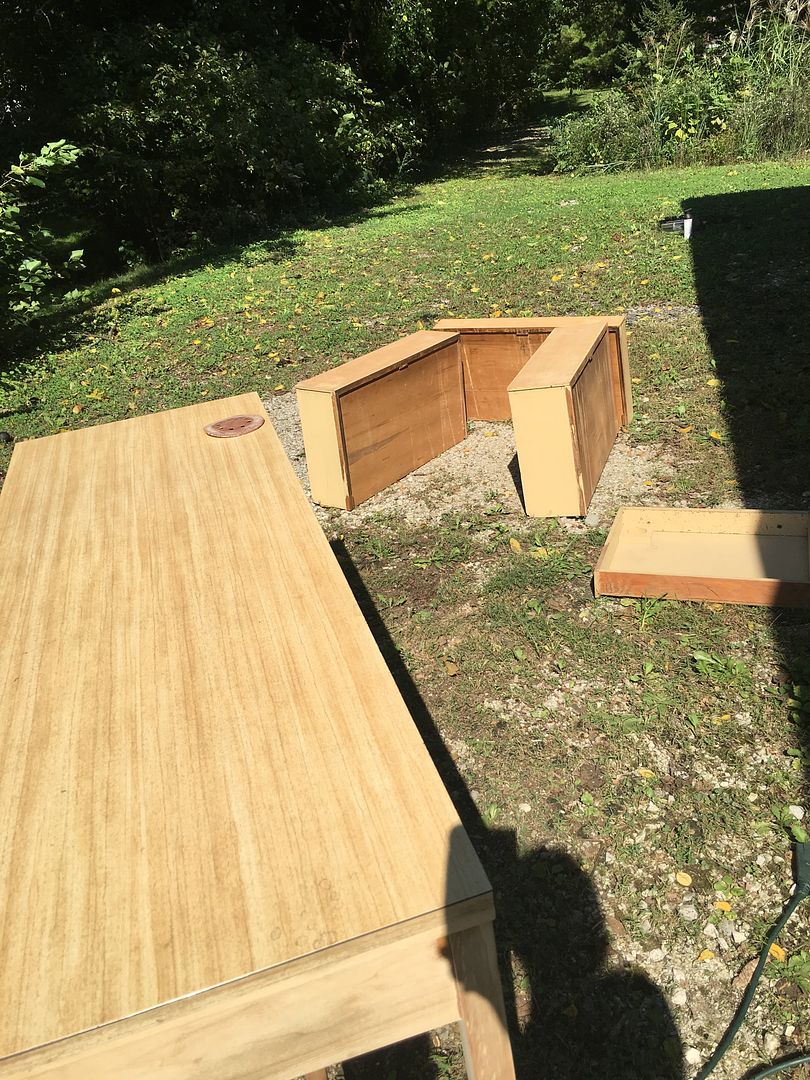
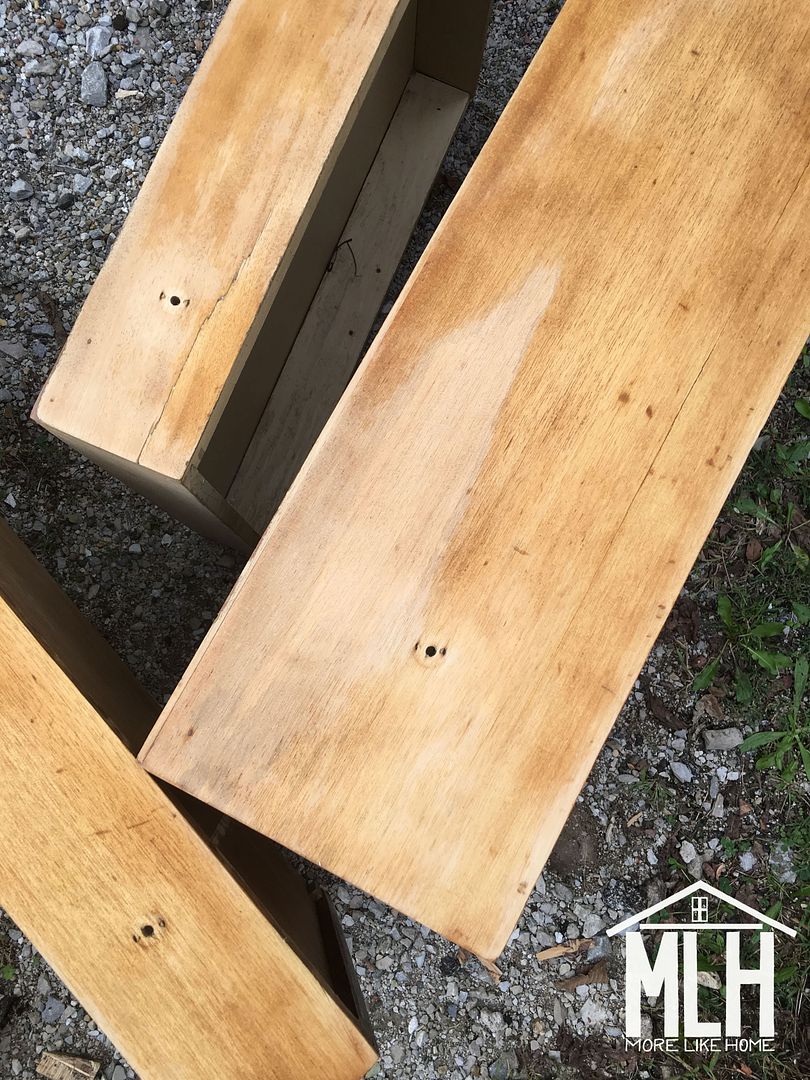
I brought it home and sanded off the old finish. I also tried to remove the laminate top that had been added at some point... and discovered a huge hole cut in the original top. Bummer. So for now it went back on.


The wood looked so pretty sanded down and I wanted to keep the desk light to contrast the dark walls, but I also wanted to warm it up just a bit. But... I didn't have a light enough stain on hand. And I didn't want to spend a good chunk of my budget on stain, so I started looking into DIY options on pinterest. I looked at several recipes and they all said basically the same thing: steel wool + vinegar. But I kept thinking "no, that can't be right." and looking for a different recipe. Why? I have no idea. Maybe it just seemed to simple. Or maybe I didn't want to wait a day for it to soak. But the internet totally agreed that this is the best method. Come on, Georgia. So here's the basic method, followed by a bunch of tips gathered from the interwebs for your convenience:

Homemade Wood Stain
  • very fine steel wool
  • vinegar
  • mason jar
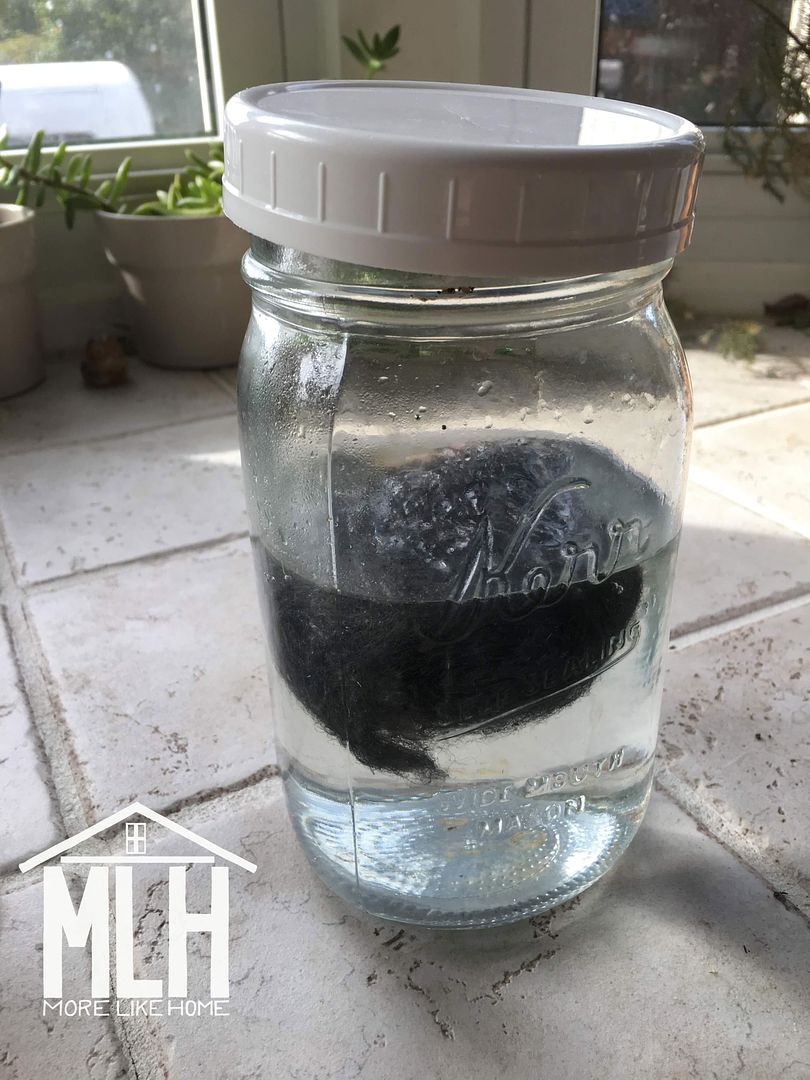
Short instructions: drop steel wool into a mason jar. Cover it with vinegar (make sure you use enough to for your whole project!). Let it sit in a quiet spot like under the sink with the lid vented for 24 hours, then remove the steel wool. BOOM. Stain. Apply it to your wood and let it dry.

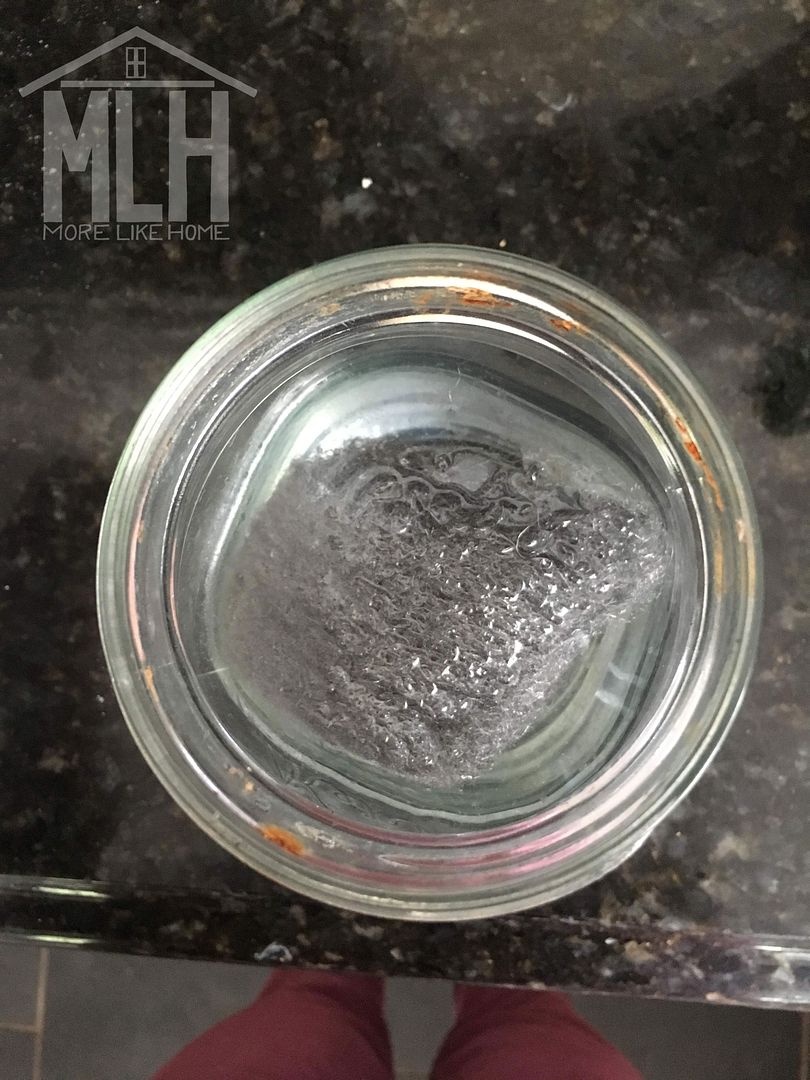
It looks almost unchanged, apart from a little rust on the steel wool. It gets more rust-tinged the longer it sits, but it will still stain your wood looking like this! It's crazy.

But there's always a catch:
  • the biggest downfall in this method is that it's unpredictable. You don't know for sure what color you will get until the stain dries. And you probably won't be able to recreate the exact same color twice, so make sure you make enough the first time! I made a first batch of stain and applied it to half of one drawer before m3 tripped on it and spilled the entire thing. I had to sand that whole drawer down because it didn't match my second batch.
  • you can use different vinegar to get slightly different colors (I found some great info in this post), but the biggest change seems to come from these factors:
  • more steel wool = darker color
  • longer soak time = darker color
  • finer grade of steel wool = darker color (you need to let coarser wool soak longer or it won't work)
  • when you first apply the stain you won't notice any change apart from the wood being wet, but as it sits it will begin to get darker. It actually reacts with the wood to change its color and that takes time! According to pinterest it can take up to an hour for it to reach its final color. So if it's not looking as dark as you hoped, be patient and see how it turns out when it's done reacting. 
  • since I wanted such a light color, I used a small piece of steel wool and let it sit for just 18 hours. This worked to make a nice light change for my first batch, but with my second I used a less-fine steel wool and it definitely wasn't long enough. Oops.

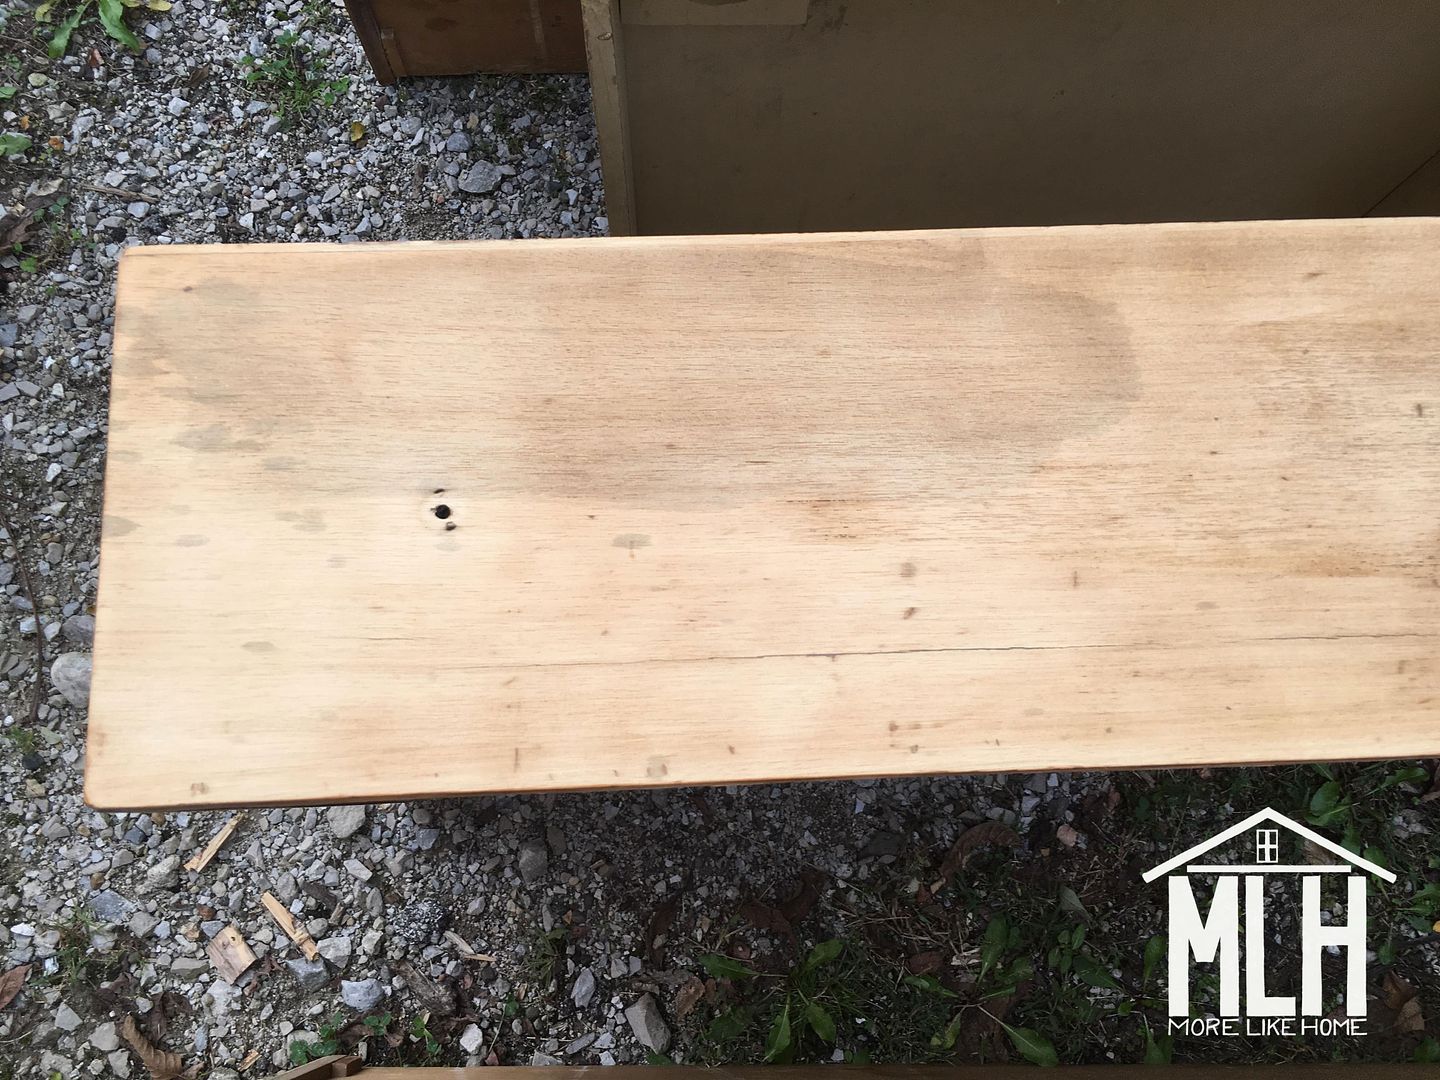
Stain applied, waiting for it to dry:


You can see my test spot in the photo below. Just a slightly darker, grayish patch. Plus some splatters from the first batch spill that I didn't realize splashed on this drawer.


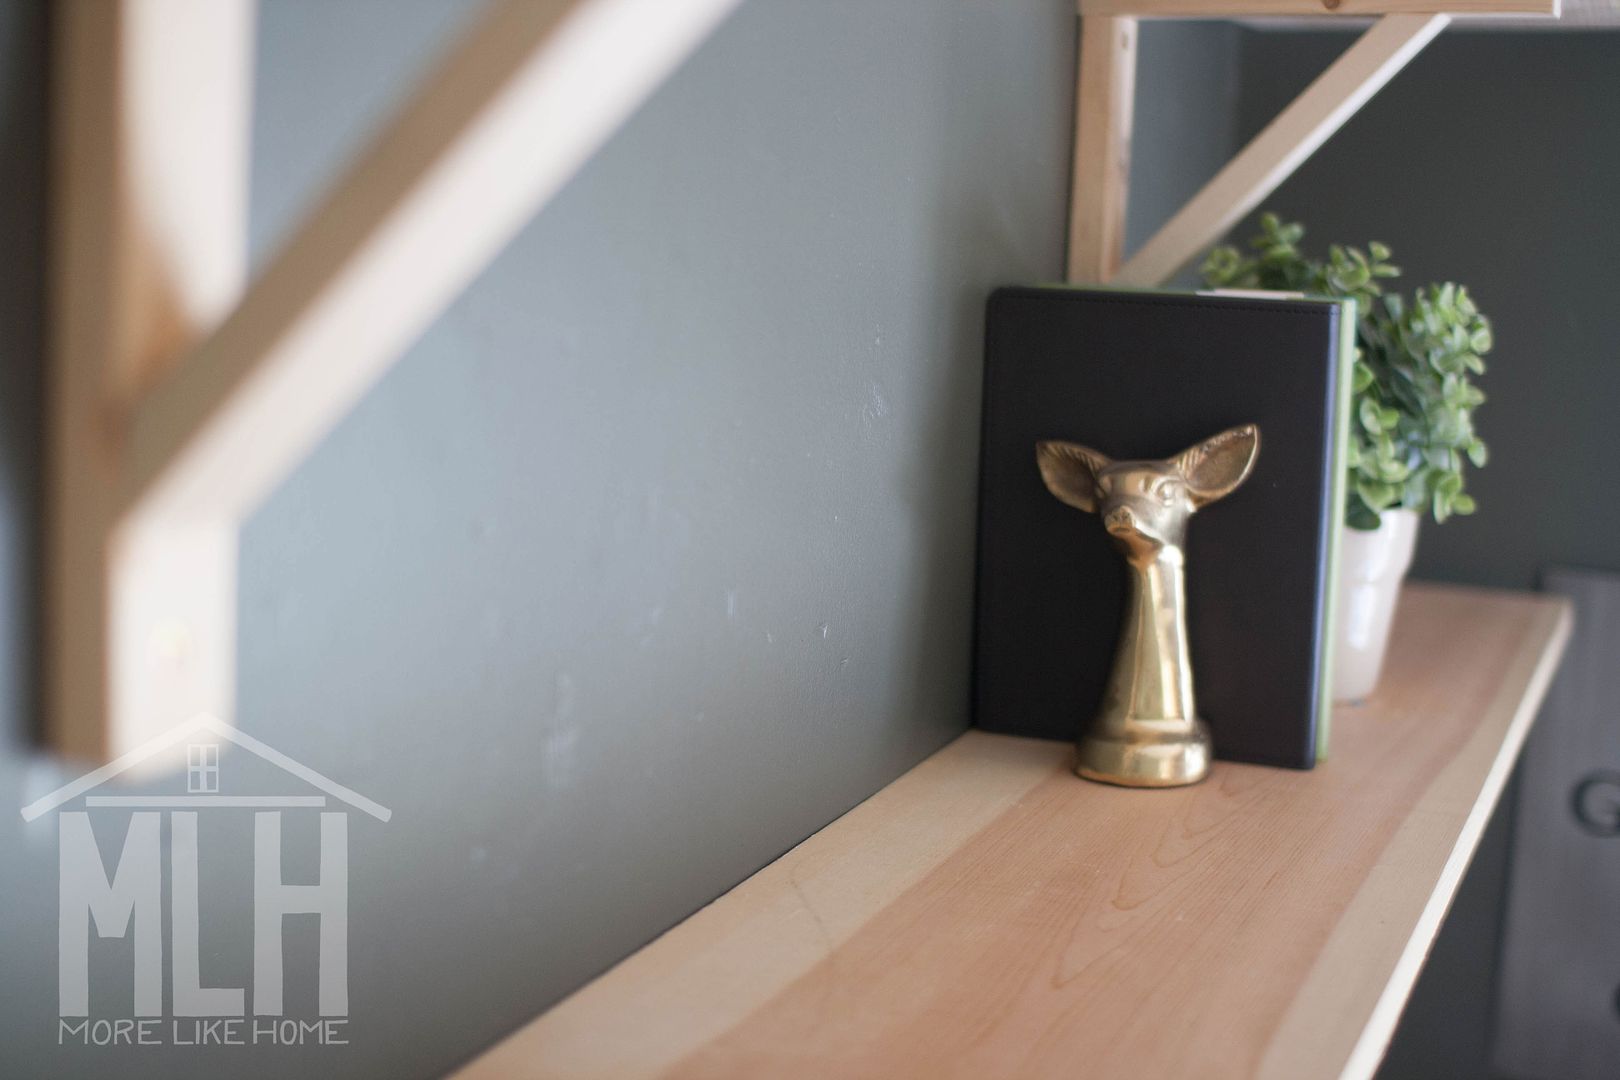
I loved the color once it was all stained. And if you want it to stay the color (or at least close to it) you should probably try sealing it with a regular polyurethane. But... I again took the cheap DIY route with a homemade beeswax + olive oil sealer. And it dramatically changed the color of the wood. I don't know how much difference the stain in the final color.

Beeswax + Olive Oil Wood Sealer
  • 1 part beeswax (1/4 cup)
  • 3 parts olive oil (3/4 cup)
Melt the two ingredients together in a double boiler (or glass bowl over a pot of simmering water) until combined. Let it cool slightly before pouring it into a container, then let it cool completely. Once it's cool you can apply it to your wood with a soft rag (or piece of an old tshirt). Fun fact: this is actually the same wood sealer recipe that I use to seal my wooden teething toys! You can read more about the process with photos in my teething ring post.

See how much darker?! And more yellow. I don't know how much of that is from the sealer and how much is the undertone of the wood. I should have done a test spot of poly to compare. My bad, guys.
Honestly, I was pretty disappointed when that beautiful gray tinge disappeared into this darker, more yellowish finish. Ugh. Fortunately once I moved the desk into its new home, the color grew on me pretty quickly. And at the moment I'm very happy not to mess with it anymore. Sometimes that's all we can ask for.

Apart from the color, I've been really happy with how the sealer actually worked and how it has help up so far. It smelled great, went on smoothly, and I haven't had any problems with it! I actually love having this finish in my wheelhouse, especially to use around the kids.

Oh, also keep in mind that I have a laminate top on here that I didn't need to seal. I do wonder if there would be any trouble with the sealer leaving oil stains on papers or fabric left laying on a sealed surface (similar to the problems with that frustrating butcherblock in the kitchen)

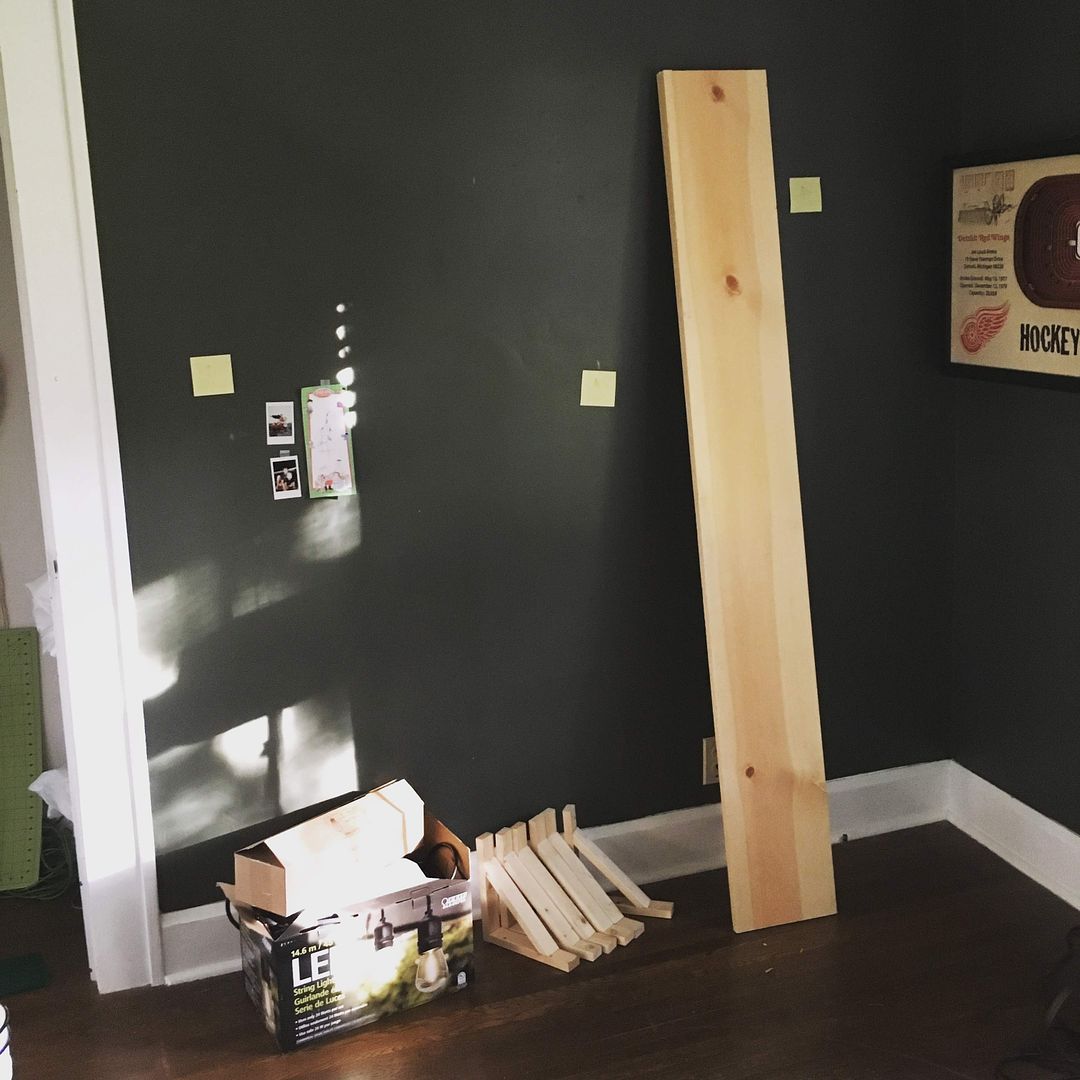
With the desk done, we were ready to start moving things into our home office/library.

Those sticky notes on the wall are my high-tech stud markers.

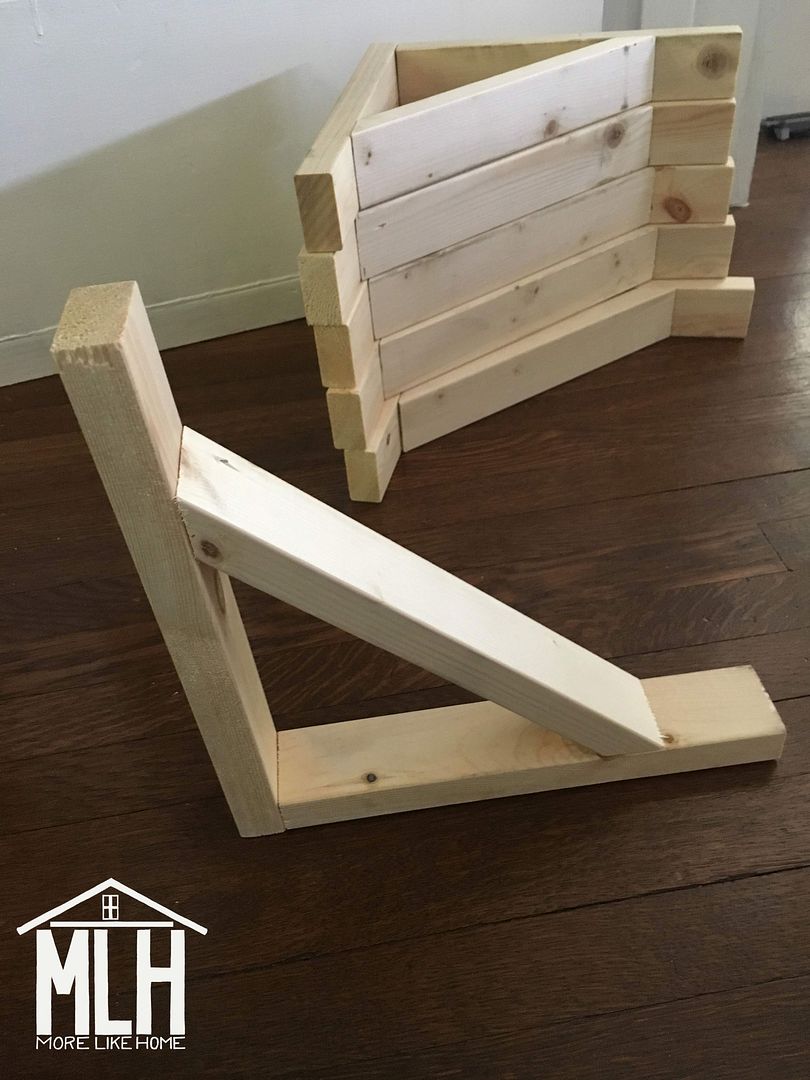
We hung simple shelves using these brackets I made for less than $1 each (more details on that here).


Then slid the desk into place along with an extra chair from our dining set (another FB Marketplace find that I updated with black spray paint).


And that's the rest of the story on our low-budget office refresh!


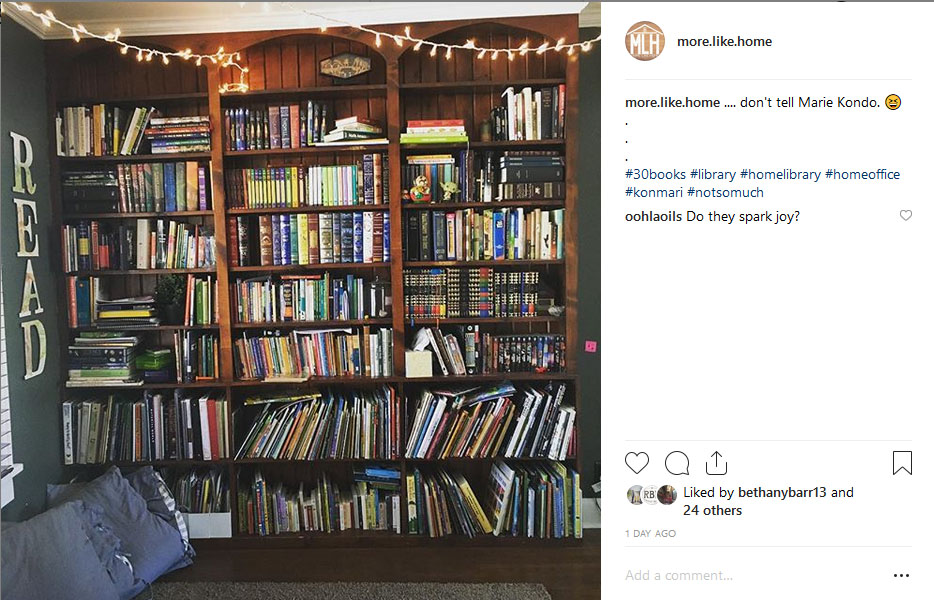
The only thing I've changed since the big reveal is adding a string of twinkle lights (that's what you call Christmas lights so you can leave them up year-round. you're welcome.) above the bookshelves on the opposite wall. This wall is why we call it a library instead of an office.


Feeling inspired to tackle your own space on a budget? Always remember the best place to start: rearrange and work with what you have first. Then you can see where you really need to spend money to make the space the best it can be. After that, see what you can get second hand for low cost (I'm working on a post with my best thrifty shopping tips to help you out with this step!).

https://www.instagram.com/erikabault/
Love this reminder from erkiabault!

For all the pictures and details of the full office update, check out this post:

http://www.morelikehome.net/2018/10/35-home-office-refresh-fall-budget-reno.html

What space would you love to tackle on a small budget?

Monday, November 5

Updating Second-Hand Chairs with Spray Paint

I finally did it. I finally picked a color and painted our dining chairs.

There's nothing like impending winter to kick me into gear, and this was one project I knew I needed to get done before the cold! So this is the story of how I painted them, and the silly, indecisive journey that made the process take so long. But after 30 years, I know indecisive is the way I work so I'm just rolling with the (very slow) punches over here.

Whether you're indecisive or not, painting is always a great way to freshen things up on a low budget, and dining chairs are no exception! This is a perfect project for spray paint because you don't have to worry about streaks, drips, or getting a brush around all those spindles and nooks. 

But before can paint, you need some chairs. Obviously *said in my best Prof. Snape voice*. For me, that meant starting with a hunt for a new set of chairs. We had a set of DIY industrial chairs from our last house, but they just weren't fitting my style any more. Ever since we moved in and built our extra-wide farmhouse table, I'd been dreaming of a set that better fit the style of our new table and new house.

For more chair-painting goodness, check out my $3 yard sale chairs and my industrial chair makeover!

I did a little poking around sites like wayfair and overstock, but deep down I knew that my thrifty roots couldn't abide new chairs when there were so many second-hand options out there for a fraction of the price. You know what they say: "Buy used and save the difference!" So I put most of my efforts into Craigslist and fb marketplace. I knew I wanted something simple, not too formal, with a classic style. And I didn't want to spend a fortune. During my long search for chairs, I also looked at tons of dining room inspirations on pinterest (part of the reason my search was so long was because I couldn't lock down quite exactly what I wanted) and, at long last, I started to hope for a classic Windsor-style chair. The one day, these guys popped up:


Monday, October 29

$35 Home Office Refresh {Fall Budget-Reno Challenge}

Guys, this was fun.

I mean, I always like DIY and design projects, but there's a whole different kind of thrill when you pull off a big-impact change with a small-budget price tag. Lately I've been struck with the realization that as much as I love HGTV, I can't help but feel that they've taken a far step from attainable DIY into a new realm of "low budget" that's... way outside my budget. What's the point of looking at these beautiful spaces if they make us want what we can't have and buy what we can't afford? I so badly want to bring us back to a place where we look into our own homes and our own resources and carefully create homes that our just what we need them to be in every way. But that's a rant for another day. It's also the main reason I was so excited for this budget challenge!


If you joined us in the challenge we'd love to see (or at least hear about) what you did! You can leave links in the comments, tag us on instagram (@more.like.home) or facebook (@morelikehome), or tag your posts #morelikehomeblog and we'll check out your work! 

The rules were super simple (full details are in this post):
- refresh or reno a space in your home before you're cooped up looking at it all winter
- set a budget (whatever works for you!) and stick to it
- make thrifty magic happen (we'd love to see some $0 spaces!)
- share it with the group! If you want to. No pressure, guys. 


Ready to see what we did with our $50 budget? Brace yourselves - here's a quick flashback to the sad place we started:

Monday, October 8

Fall Budget-Renovation Challenge

Ready for a challenge? I'm checking one more thing off my to-do list before the cold weather hits and I'd love for you to join me!

Let's stretch those creative muscles and get our homes ready for fall! And I'm not talking about pumpkins or scarecrows. I'm talking about getting our homes ready for our families to cozy up inside on a chilly day. Making space to weather the coming winter and enjoy time together. Is there a corner of your home that needs a little attention before you're cooped up with it all winter? A dark kitchen that needs painted? Living room that needs freshened up or rearranged? Need to simplify the play room? That's the space we're talking about! And guys, we're doing it all on a budget. Because a house doesn't have to be expensive to be a home.


So what's the budget? It's whatever works for you. The point of this budget isn't to tie you down to an impossible goal. It's to give you the freedom do what you can, where you're at right now. Whether that means spending $50 or $100, just buying a can of paint, or reusing what you already have (I would love to see some $0 makeovers!), I want to see what you can do with what you've got.

This is a use-what-you-have, DIY, Craigslist extravaganza. 

Leftover paint? Use it! Hand-me-down chair in the basement? Bring it up! Need a new table? Start second-hand hunting! Let's make it happen.

Of course this is going to look very different for everyone depending on what materials you have on hand, the skills at your disposal, and whether or not you're a furniture hoarder from way back. *ahem* But guess what? It doesn't matter. You don't need to worry about what anyone else is doing/making/spending because this challenge is all about you, what your family needs, and what your home needs.

Now let's talk details: I'm setting a deadline of three weeks. That way any weekend warriors will have three full weekends for their DIY feats, and you Craiglist ninjas have time for some serious hunting. So on Monday, October 29 I'll share what we've done and I love for you guys to show us what you've been working on!

Sound good? Are already thinking of the perfect space to tackle? Here's what I'll be working on:


The little desk corner of our home office/library. This little room is one of the most-loved in our home and between reading, homeschool, and crafting we spend a good amount of time in here most days. The other half of the room is ready to go with floor pillows and floor-to-ceiling bookshelves, but this side just isn't working for us as well as it could. Or as well as we need it to. We need space to roll out felt, storage for homeschool books, and more simplified/organized space on the whole. So here's my basic plan:
  • make the desk space more functional with a larger work surface
  • add shelving above the desk
  • organize and simplify the stuff (including that craft closet next to the desk)
Hopefully that's as simple as it sounds! And my budget to get it done is under $50.

https://www.instagram.com/more.like.home/

I'll share progress and sneak peeks on Instagram as we go if you'd like to follow along! And we'd love to see your work - just tag us @more.like.home!

https://www.instagram.com/more.like.home/


What would you love to tackle for your fall budget-reno??

Thursday, September 6

Living Room - Post Nesting

After all my talk about the living room while we were waiting on baby #4, the little squirt showed up early and I never got around to sharing all the updates we actually made! Turns out babies have no respect for my blogging time. None at all. Well, never fear, because today I'll show you just where we ended up (you can see full pics of where we started in this post).


Let's just go down the list:

Wednesday, July 11

DIY Mantle Revamp (how to wrap an outdated mantle with new wood)

Part 1 of my nesting-driven fireplace makeover was adding a shiplap accent around the top, but it still looked a little sad with a glossy black painted mantle. Not my jam, and not working with our farmhouse vibe. So part 2 of the process was returning the mantle to a beautiful wood finish!

You can find all the "before" photos and the rest of our nesting plans here


I would have loved to restore it back to the original wood, but that just didn't turn out to be a feasible option for us. There was nick in the corner of the mantle where we could see at least four layers of paint - black, green, brown, and beige - and we still couldn't see the wood!


Whether we sanded it or stripped it, we would be looking at a huge mess. So we decided to start with a clean slate and wrap the entire mantle with new wood. It worked out great!


I love how it plays with the new shiplap for a more casual farmhouse vibe. And you can do it, too! This is also a great option if you want to cover a concrete or brick mantle to add a little contrast to you fireplace. Want to give it a try?


Tuesday, January 9

DIY Forest Mural (great for a boy's room!)

I've spent most of my adult life in the no-murals-ever camp. I didn't want anything too themed because I knew I'd get tired of it and want to change it, so what's the point? But then... we started collecting all these little boys and one day I was like "THEY WOULD LOVE A CAMPING ROOM." Then it took me all of five minutes longer to come up with a forest wall mural and throw my mural-morals to the wind. And I totally l.o.v.e. it.


If you follow me on instagram, you've probably seen a few peeks of the surprise we put in the boys room for Christmas. Their camping theme room (or maybe more of a wilderness theme, there aren't actually any tents) is complete with a mountain peak climbing wall, monkey bars, and swings. A real winter adventure zone for all these little fellas! We'll be sharing the plans for all that soon, but today we're staring with how we painted the mural wall (which is easier than you might think).


Our first step was painting that wall. Their room is the same blue-ish gray that it was when we bought the house (we've barely touched the upstairs at all), and I knew it needed to be lighter for our forest wall to pop.

You can see the original color to the left of the door.

Sunday, October 4

So Blue Dresser Makeover

A few weeks ago we asked for help deciding on a finish for our latest furniture makeover project... and we're happy to report it's finished! The winning vote was for navy blue paint and, guys, it turned out so. pretty.


*flashback* We started with this $10 find:


The finish was pretty rough so we started by sanding it all down. We used a coarse sandpaper first and then went over it again once more with a fine paper. The dresser is built really well, but it had a wood veneer so we had to be careful not to sand too deep and go all the way through the thin veneer.


You can really see how rough it was in the next pic. The part on the left is sanded.


Subscribe