
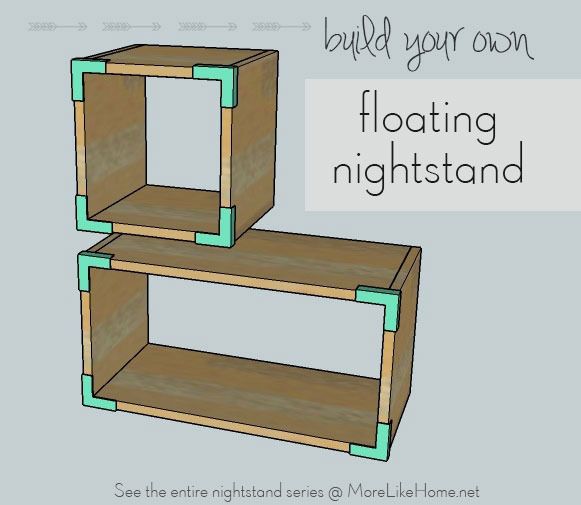
Ready for day three of our nightstand series? If you just joined us you can see the entire series here. Today's plans are a super-simple build with a minimalist style. And it's one of our easiest plans to customize!

These floating nightstands attach to the wall. No legs = plenty of space underneath for shoes or baskets. Or better yet, leave that space open to make your room feel more airy and uncluttered!

These plans are based on a page I pulled out of Better Homes & Gardens last year. Their pre-built boxes are sold by Soap Box and retail starting at $195 for the small box. You can build your own for a small fraction of the cost (you only need two boards)!!
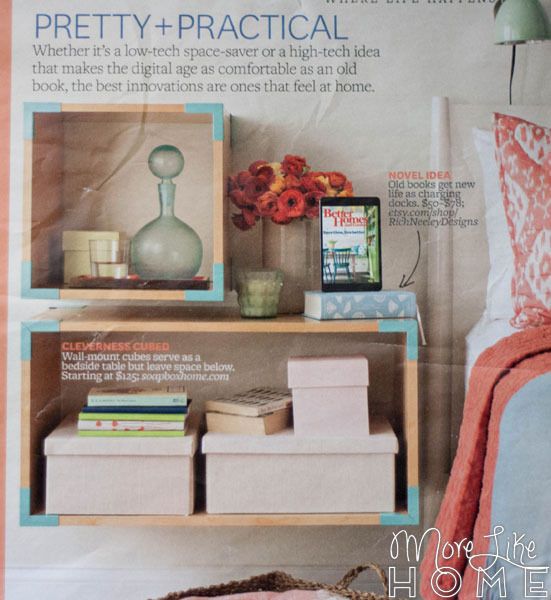
image via Better Homes & Gardens magazine
Shopping List:
1 - 1x12 @ 10'
1 - 1x4 @ 4'
wood filler
wood glue
1 1/4" screws
2 1/2" screws
Kreg Jig with 1 1/4" pocket screws (optional)

Remember to always double check your measurements before you cut. Use 1 1/4" screws unless otherwise indicated. Pre-drill your holes and countersink your screws. Always use glue before you screw the boards together (you don't have to let it dry first), I'm not going to list it in every step, but it's a good idea to glue everything! Be safe, and have fun!
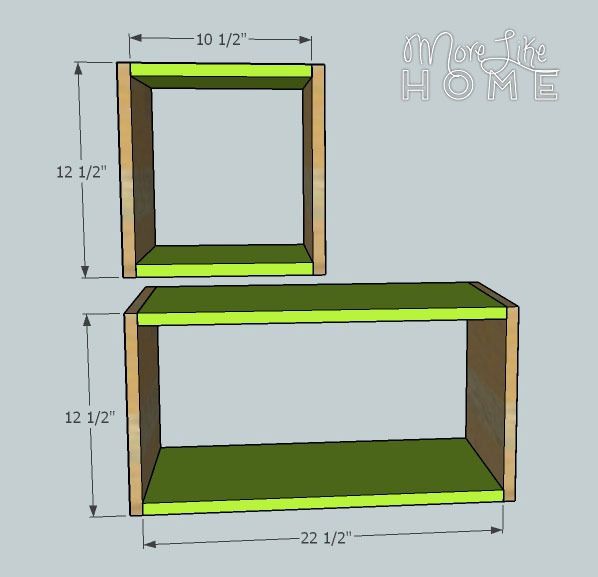
Cut List:
(A) 4 - 1x12 @ 12 1/2" (sides)
(B) 2 - 1x12 @ 10 1/2" (small box top & bottom)
(C) 2 - 1x12 @ 22 1/2" (large box top & bottom)
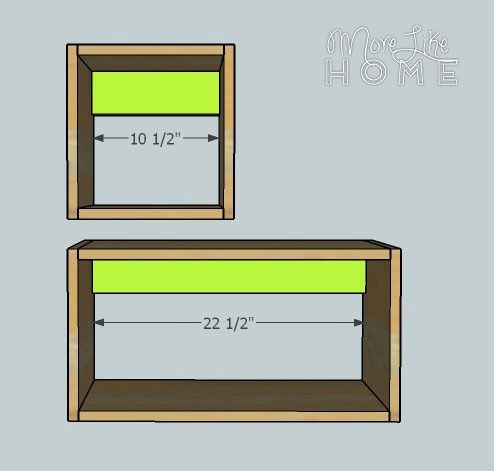
(D) 1 - 1x4 @ 10 1/2" (small box support)
(E) 1 - 1x4 @ 22 1/2" (large box support)
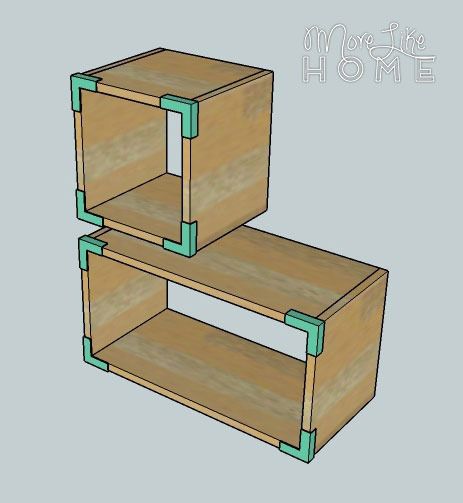
Let's build these boxes! Start by using two sides (A) to connect the small top & bottom (B). Keep all the edges flush and use glue. You can use a Kreg Jig or drill through the sides into the top & bottom boards. Do the same to build the large box, connecting two sides with the large top & bottom (C). These are super easy to customize! You can make any number and size of boxes you want. Cut the boards longer or shorter to try different sizes of boxes.
To mount the boxes to the wall (paint or stain before mounting) start by attaching the support boards (D & E) to the wall with 2 1/2" screws. Make sure they are level, and try to hit a stud! You're guaranteed at least one stud with the longer box, if the small box doesn't you'll need to anchor it with proper hardware for your wall type and how much weight you expect it to hold. Once the supports are in place, slip the boxes over them. Drill through the top & sides of the boxes to attach them to the supports (you can use a Kreg Jig if your box is big enough to fit a drill in. My small box is not.).
If you want your supports to be more "invisible" like the sample picture, try painting them the same color as your walls so they blend in. You could also choose mounting braces like the original boxes use. Just make sure you anchor since it will be harder to hit a stud with those (and you'll have to attach the top board, then install the braces before attaching the bottom board so you have more room to get the drill in.).
To finish your boxes, start by filling any holes with wood filler. Let it dry, then sand it smooth (repeat if necessary). Then sand the whole thing smooth for a great finished product (a good sanding can be the difference between looking professional vs. crafty). Then finish with any paint or stain and polyurethane you like.
To get the look of the original boxes, tape off the corners with painter's tape and paint them a bright color (or white would look great too!). Once the paint dries you can polyurethane the whole box for a durable, sealed finish. Be creative and have fun!
Stay tuned - we have 15 more days of DIY nightstands coming up!

No comments:
Post a Comment