
You can see all the other felt toy goodies here:
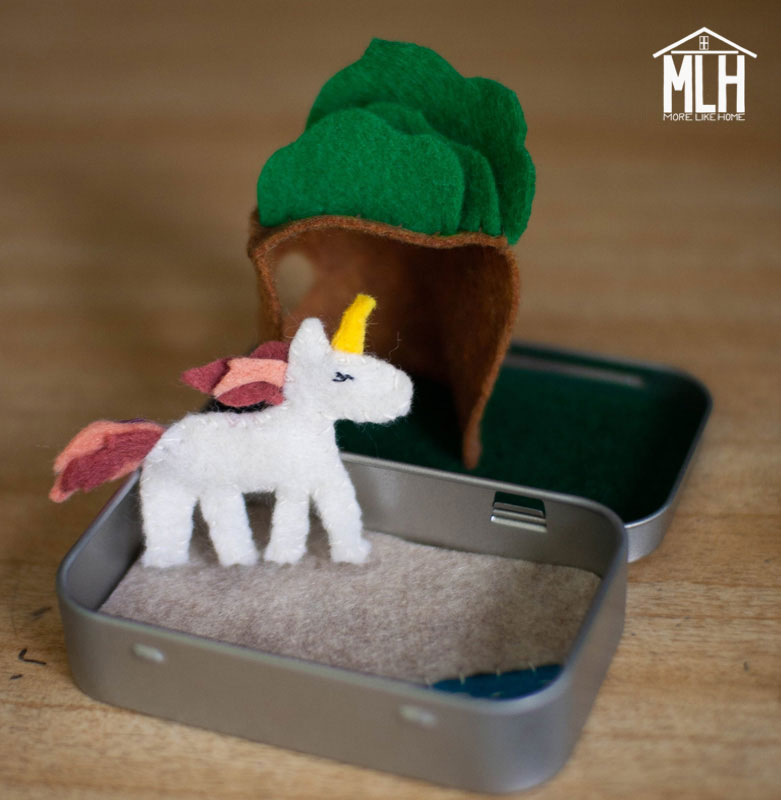
Today's toy is another little pocket-size set that fits in an altoid tin. It's great for on-the-go play and makes a perfect stocking stuffer!
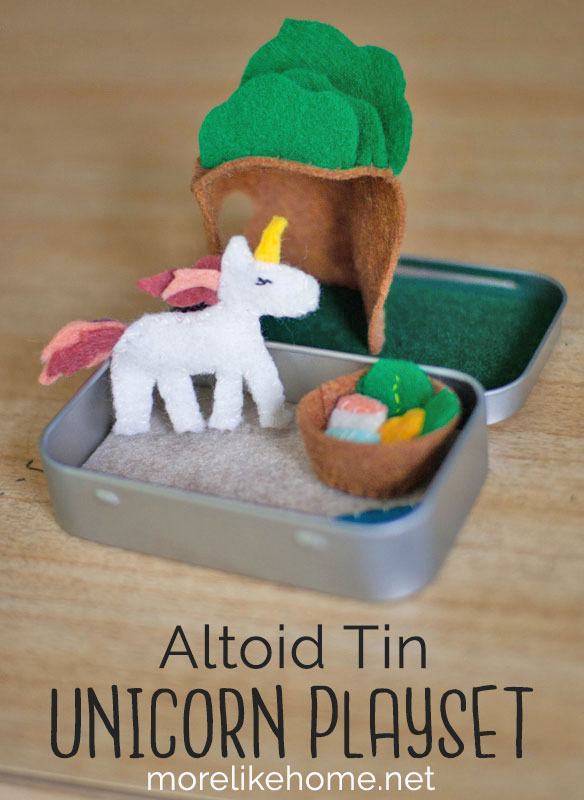
The little unicorn lives in a little tree and has a little blanket to tuck in with.

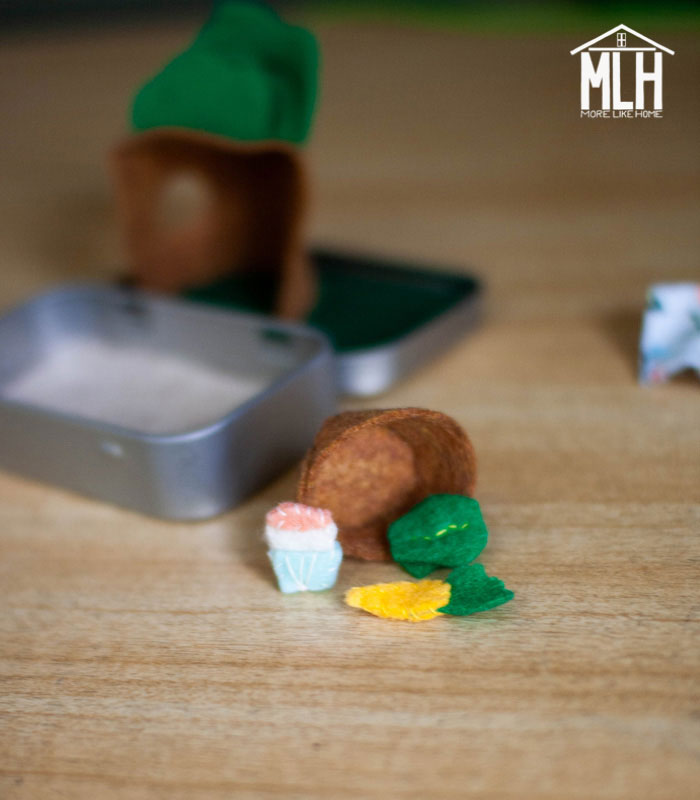
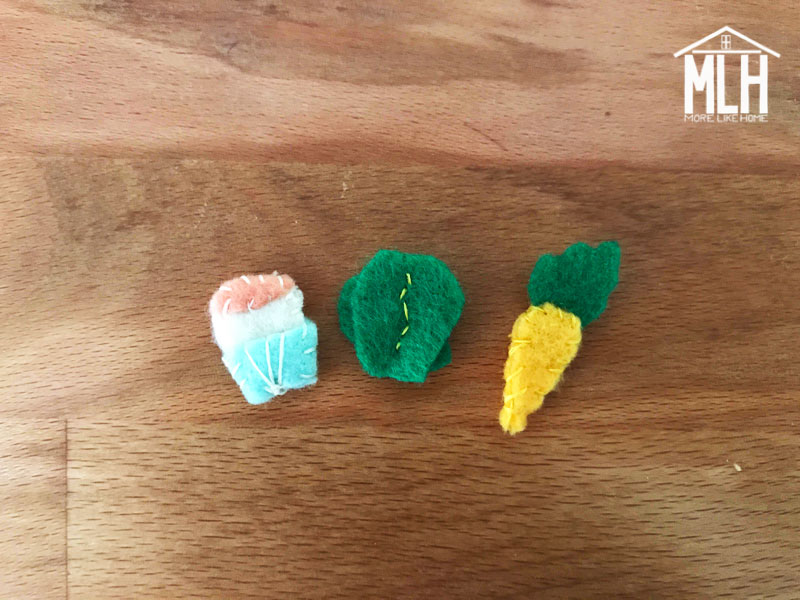
There's also a basket that holds a tiny cupcake, carrot, and lettuce.
And it all fits into the tin when you're done playing! I mean, *ahem* when the kids are done playing. But no one will judge you if you need to play with it just a little.

Ready to make your own? Here's all you need:
- the free pattern
- an altoid-size tin (I buy them on Amazon)
- felt (I used light pink, dark pink, purple, white, yellow, medium green, dark green, light brown, sandy tan, and blue.)
- needle and thread (I used cream, yellow, and brown)
- E6000 glue
- black embroidery thread
Let's put the unicorn together first. Start by using the embroidery floss to make an eye on each body piece. I don't know how to embroider, but I can wing it enough to make a decent eye shape. It's basically just drawing with thread, right? Make sure you make one eye with the body piece facing right (like below) and the other with the body piece facing left!

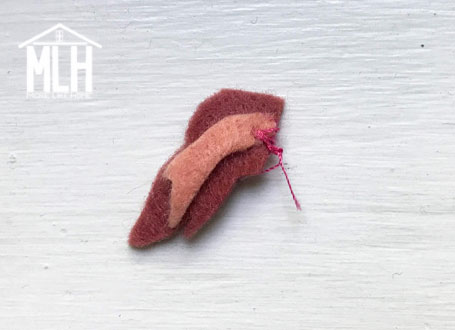
Stack the tail pieces together with the largest (light pink) in the middle and a smaller piece stacked on each side (dark pink on this side and purple on the other). Stitch them together at the base of the tail. I used pink thread for this but it doesn't really matter since it won't show when you are done:
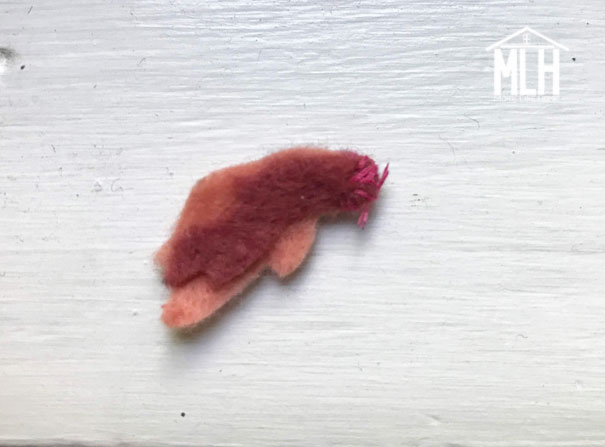
Do the same thing with the mane pieces. Stack them with the largest piece in the middle (dark pink this time) with a smaller piece on each side (light pink on this side, purple on the other). Stitch at the base of the mane.
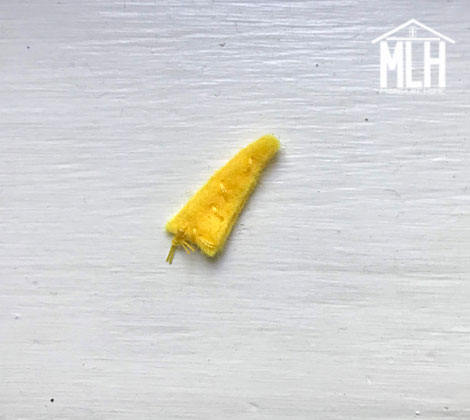
Stack the two horn pieces and sew them together with yellow thread.
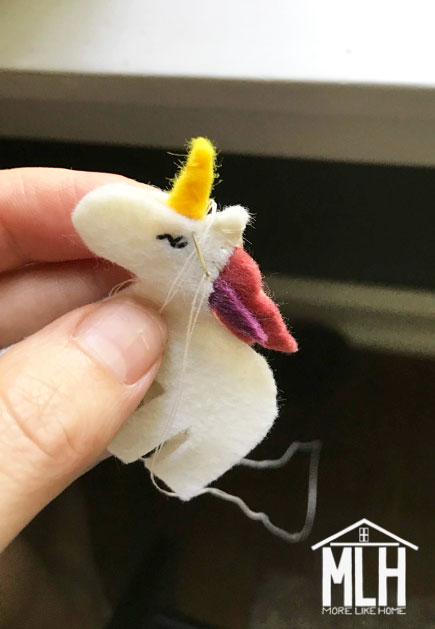
Sandwich the base of the mane, tail, and horn between the two body pieces. Sew around the edges of the unicorn with white or cream thread, making sure to get a few stitches into each of the added pieces! I also added a couple tiny pieces of white felt between the body layers to give it a little poof.
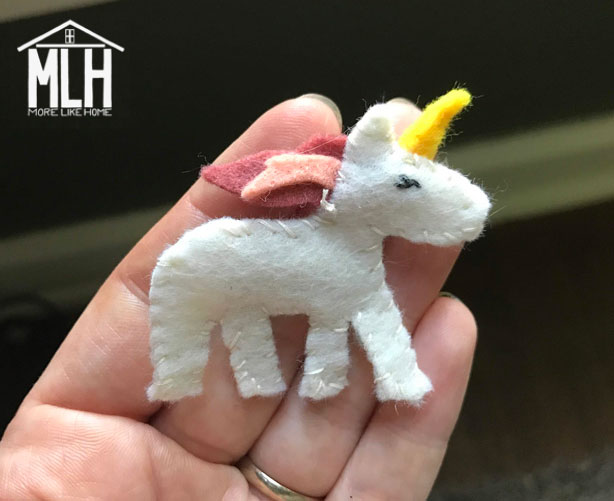
This was my first attempt. I forgot to put in the tail. Ugh.
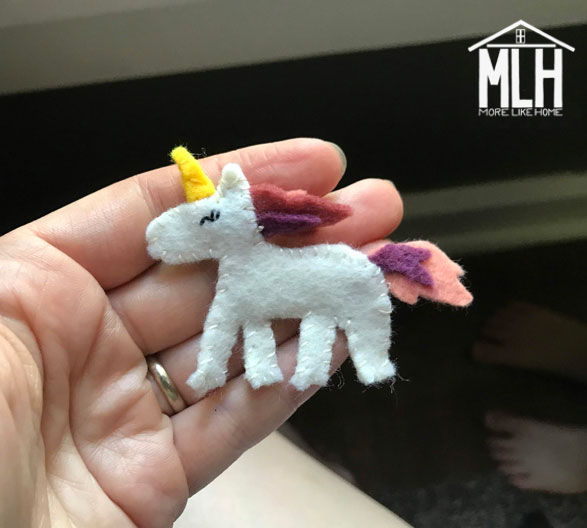
Much better!
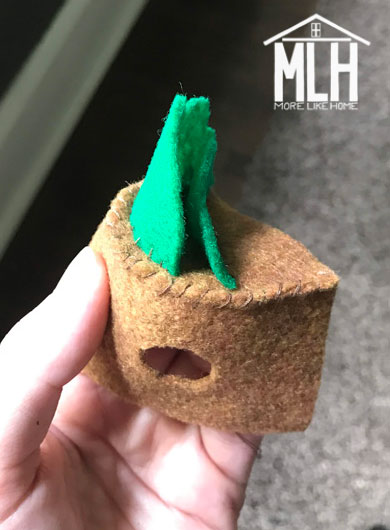
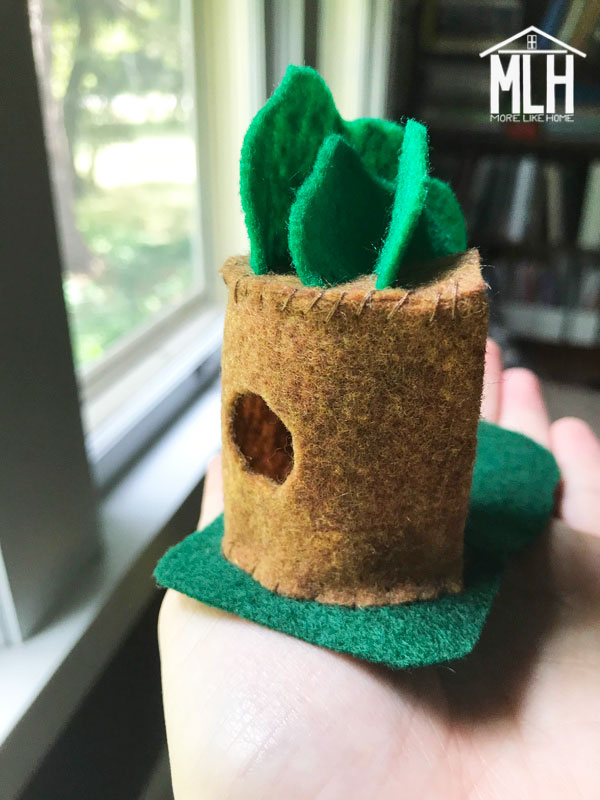
Now let's work on the treehouse. Curve the treehouse base around the treehouse top and stitch them together.
Then stand the treetops on the treehouse with the largest in back and smallest in front and stitch them to the treehouse top:
Stitch the base of the treehouse onto the grass.
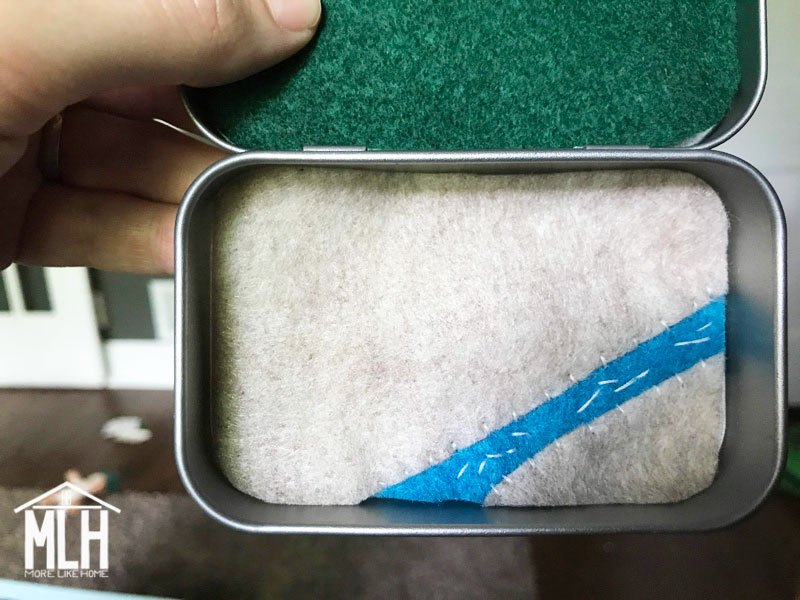
Stitch the river onto the "sand" (I used cream thread). I ended up cutting out a strip of the sand fabric where the river would run so the blue felt could sit under the edges of the "sand" and look more river-ish. I also used the thread to add little current lines in the river.
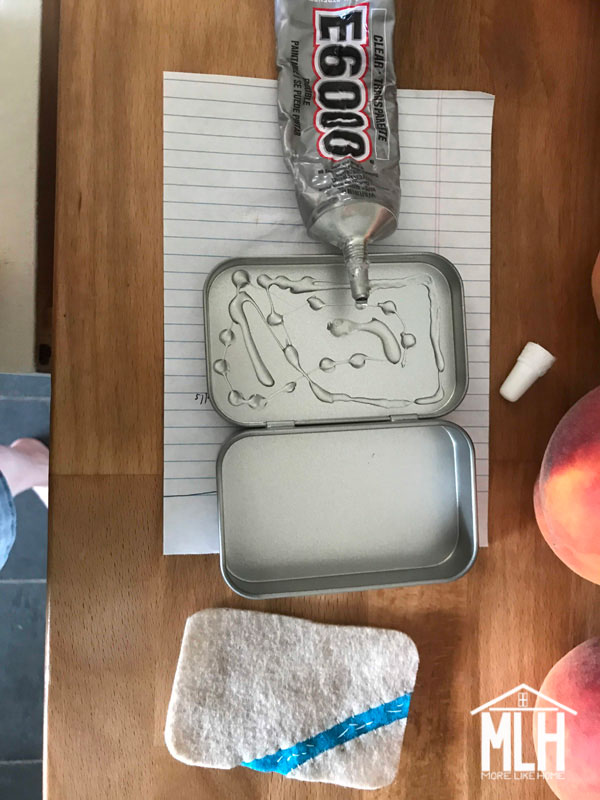
Use E600 to glue the grass (with treehouse already attached) into the lid of the tin, then glue the sand into the the base of the tin. Let it dry for a few hours.
The food is all pretty straight forward:
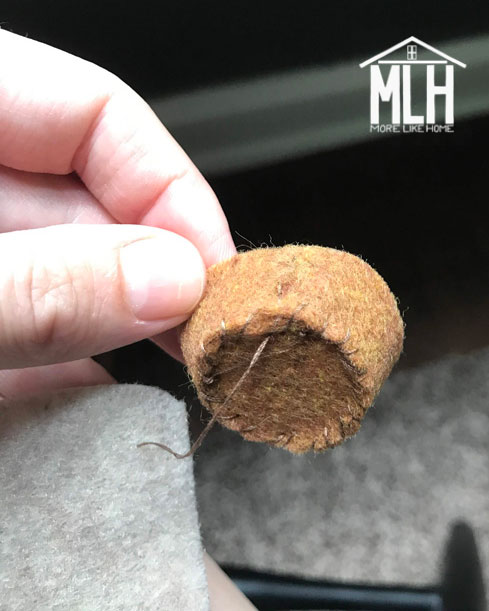
- Cupcake: stitch a wrapper and frosting piece onto each cupcake piece, then stack the two halves and stitch around the edges.
- Lettuce: stack the two lettuce leaves and stitch a line down the middle (I used yellow thread).
- Carrot: sandwich the base of the leaf between the two carrot pieces, then stitch around the edges of the carrot (make sure you catch the leaf with at least a couple stitches).
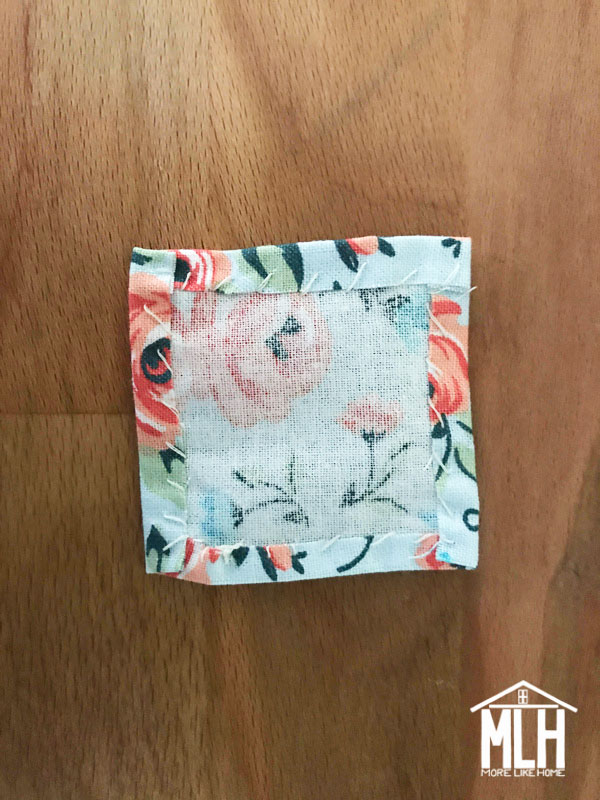
I also added a tiny blanket. It's just a tiny square of fabric with the edges turned under and hemmed.
That's it! You're ready to play!
While I worked on this little playset, the boys were working on this masterpiece (inspired by Toy Story 4's Forky):
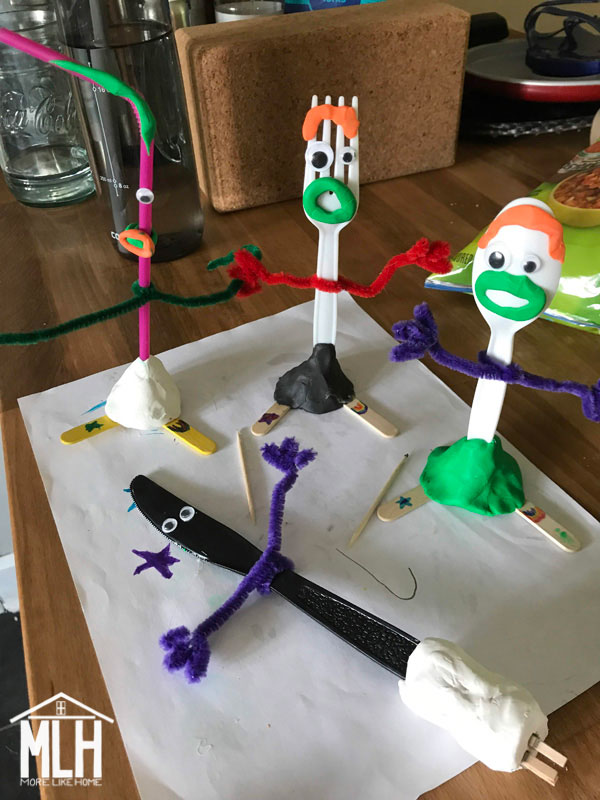
M3 made this Straw-y and immediately said "THIS IS MY FWAVORITE FING!"
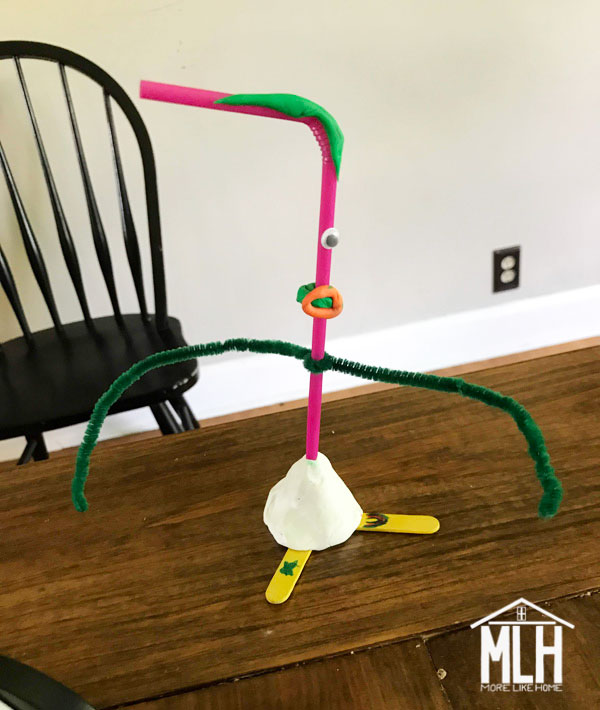
M2 named this caterpillar "wiggly":
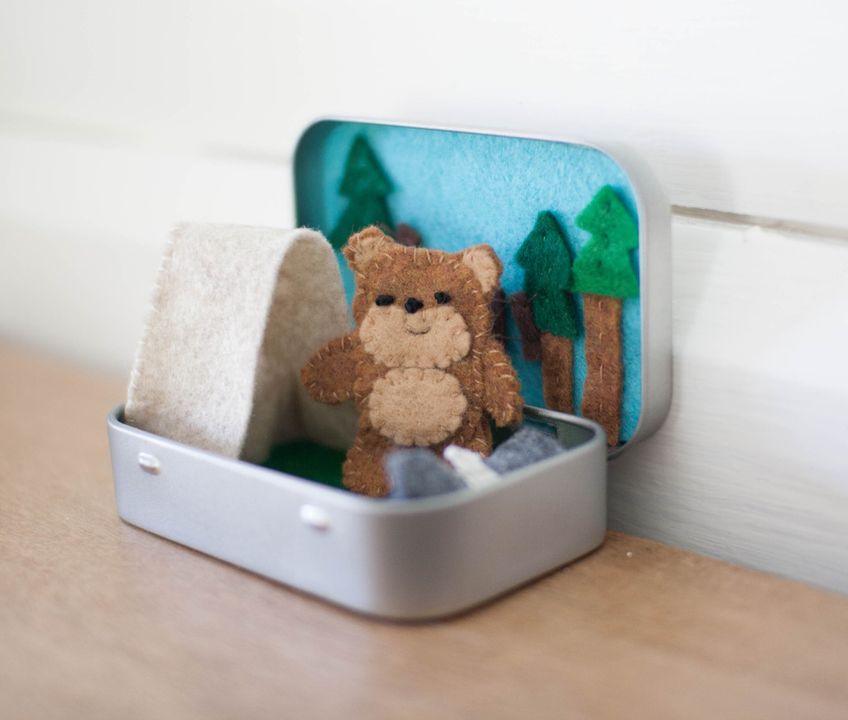
Don't forget, I also have patterns for several other felt toys (like this cute little bear playset)! They are the easiest toys to make and so cute!!
Let me know if you give it a try! What kind of set would you love to see next??
No comments:
Post a Comment