

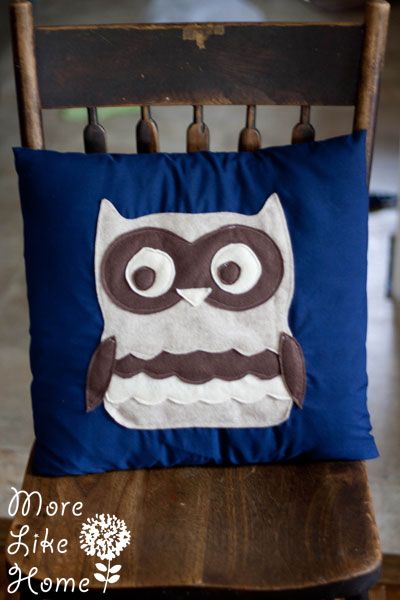
We're wrapping up the series with a few random projects that help fill in any gaps we missed earlier this month. Today's project is a little something for the home. It's an owl pillow!
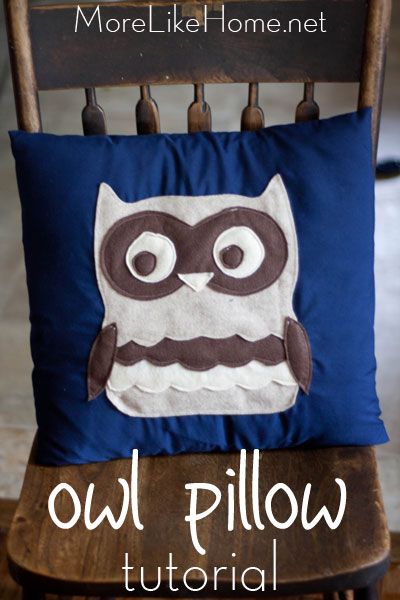
This is great for, well, anyone who likes owls (and come on. who doesn't?) but also could be fun for anyone who likes to keep things fresh around the house.
And you can totally suit this to anyone's style. Change the color of the pillow cover to match their decor, or even change the color of the owl to mix things up a bit! A white pillow with a rainbow color owl would be a fun twist, or even a gray pillow with a red and white owl. Or try a monochromatic owl in shades of blue.

But let's start with this guy. Here's all you need to make one (actually you can get two out of it so go ahead and make a pair!):
- 1.5 yards navy cotton fabric
- 1/4 yard dark brown felt
- 1/4 yard medium brown felt (I bought by the yard because I liked the colors better than the felt sheets)
- 1/4 yard off-white felt
- thread (I used off-white for the owl and navy for the pillowcase)
- 16 x 16" pillow form (buy a second one if you're planning to make a pair)
- owl pattern
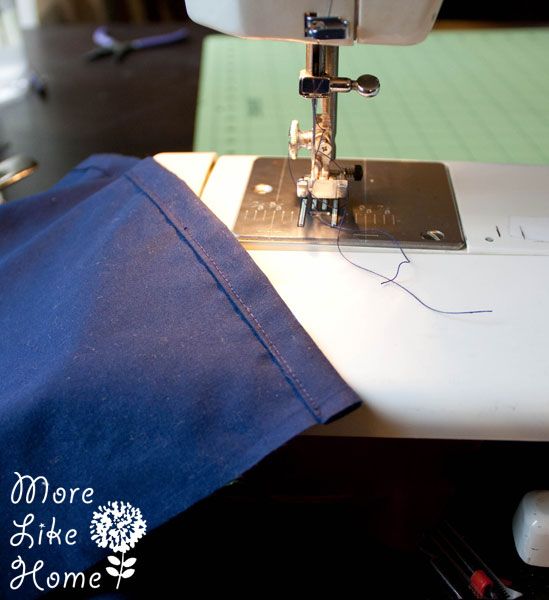
Start by prewashing & drying the cotton fabric. Cut a piece 17 x 40" (you can get two pillows out of the fabric, so it's perfect for making a pair!). Hem the short ends of the fabric by folding each end under 1/2" and press, then 1/2" again and press. Stitch right along the folded edge.
Then print out the owl pattern. It's more of a rough drawing, but you can cut it apart to make all the pattern pieces you need. :)

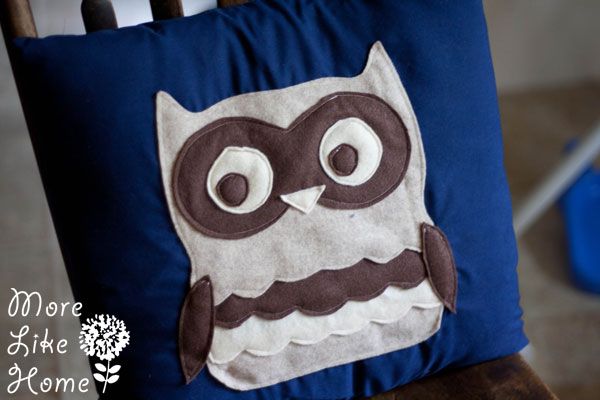
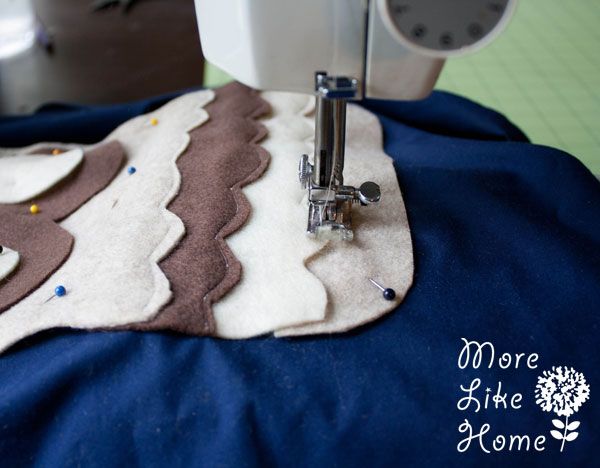
Make sure you put the pattern on the fold when you cut, and use it to cut out all the felt pieces. They're all pretty straight forward, the only thing that's not exact is the feather layers - I cut the bottom edge of each ruffle according to the pattern, but the top edge I cut straight about 1 1/2" up from the bottom edge (that way the layers will overlap). You should end up with something like this, and I have a breakdown by color below.
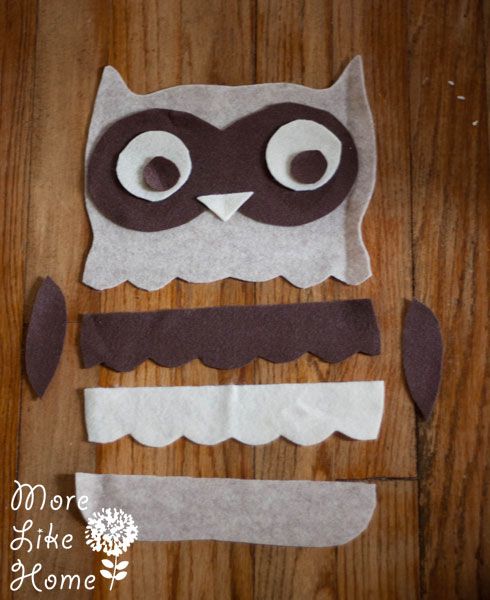
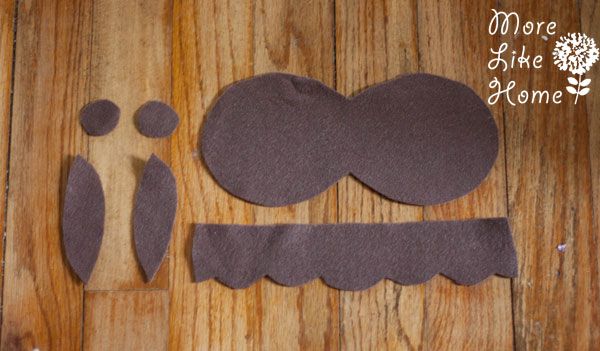
From the medium brownish cut the head piece, and the very bottom piece (I cut this one extra tall too so the feathers can overlap it).

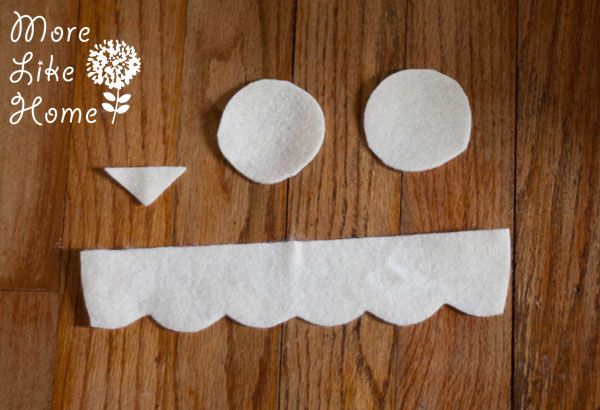
From the off-white, cut the eyes, beak, and the bottom layer of feathers (make sure you leave extra at the top for overlapping!).
From the dark brown cut the pupils, wings, eye circles, and top feather layer (with extra at the top for overlapping).
Find the center of the pillow fabric and lay out the owl pieces centered on the pillow. The head piece and feather pieces should be overlapped like the pic below. Pin them in place. You can save the pupils, beak, and wings for later, just start with the bigger pieces for now.
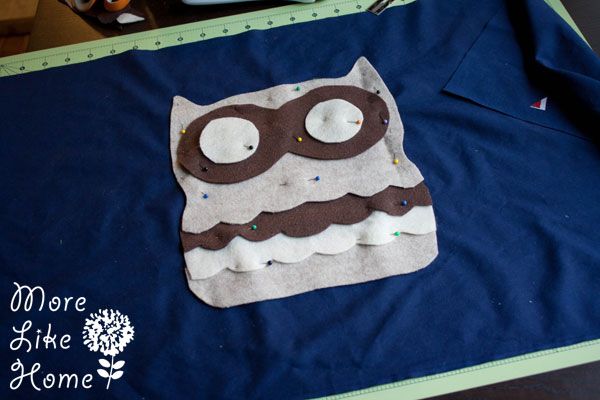
Now you can begin sewing it down. Start by stitching along the bottom, scalloped edges of head and feather pieces (since the pieces are overlapped this should catch the top edges of the pieces too). After the scallops are done, stitch all the way around the outside edge of the owl.
Then sew right around the edge of the eye circles to attach it. You can see in the pic that I just picked a natural color thread and used it for the whole owl so I didn't have to switch threads easy and cute! (and... the foot is not where I'm stitching. I had already stopped and moved it out before I took the picture. oops.)

Then sew around the edges of the eyes.
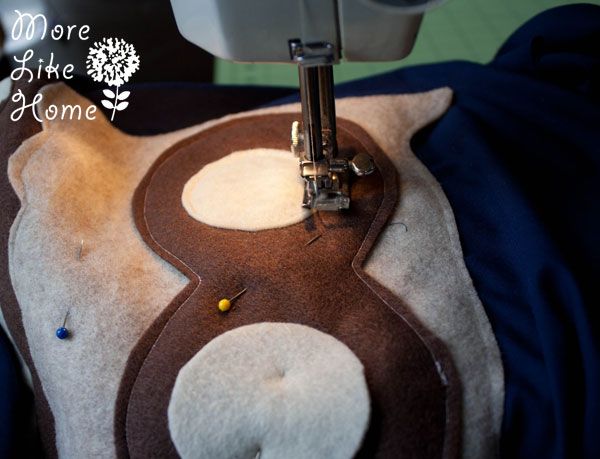
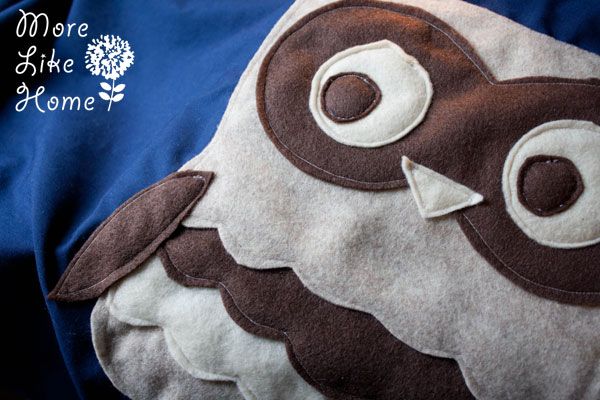
Now you can pin on the remaining pieces (pupils, beak, and wings) and sew around the edges. Just be careful to get the pupils pointing the same direction so you don't end up with Crazy Eyes.
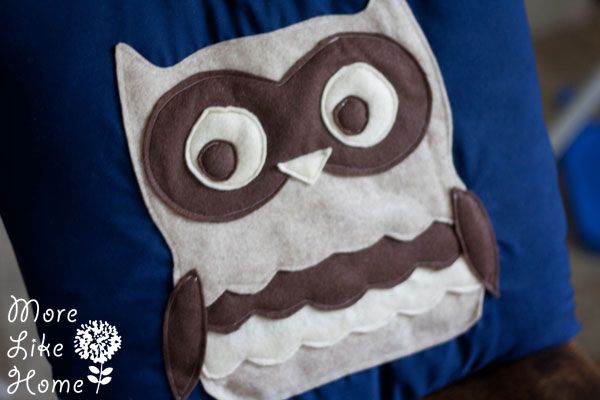
*cue terrible nighttime photography* Now that the owl is done you can finish off your pillowcase! Lay it out right side up and find the center of your owl. Measure from the center 8" to the left (since you're making a 16" pillow) and mark the spot with a pin.
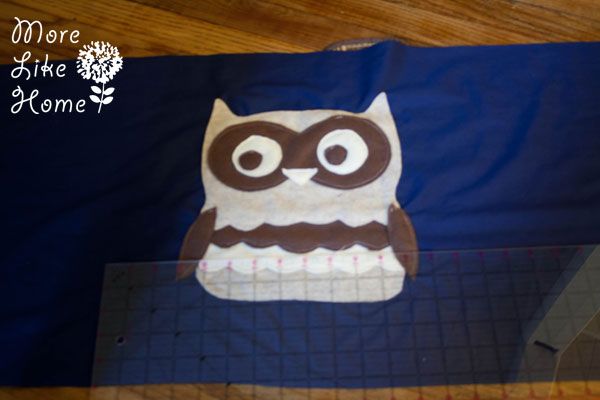
Fold the left side over at the marked spot, keeping the top & bottom edges lined up. Now measure from the left folded edge over 16" and mark the spot with a pin.

Fold the right edge over at the marked spot, keeping top and bottom edges lined up again, and pin through all the layers. Double check the width of the pillow, it should be 16". Now stitch along the top and bottom edges with a 1/2" seam allowance, back stitching at each end. Turn the pillow case right side out.

Now just stuff in the pillow form and you're done!

These are great to give as a set, too! If you do a second one, try making the eyes look the opposite direction. You know, so they're looking at each other! Another option would be to just give the pillow cases that they could use to slipcover existing pillows (great if you have to ship a gift!). I've actually done that for my dad, but made Christmas themed pillowcases for his couch pillows.
Here's about how much this project cost for me:
$4.20 - fabric on sale 30% off
$3.00 - felt (this is definitely a guess, I bought it last year on Black Friday)
$1.80 - thread on sale
$5.00 - pillow on sale 40% off plus a 20% off purchase coupon!
Total: $14.05
But remember the fabric cuts have enough left over to make a second pillowcase, so you just need to pick up and extra pillow form and you'll be under $10 per pillow!

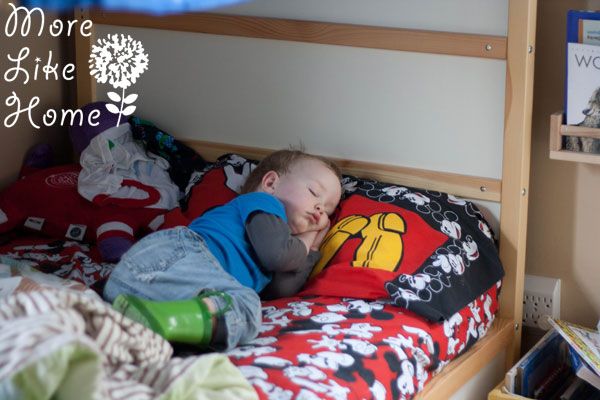
That's it for today's tutorial.... so we'll wrap up with a bit of our favorite big boy. First taking a nap in his rainboots:
And here he was yelling "Look mama! I makin' somfin'!" and it turns out he was using his wisk to lift the turner thing from the blinds onto the couch. He was very proud of what he "made."

Do you like to slip cover your pillowcases? What kind of picture would you want to put on a pillowcase?

nice)
ReplyDeleteWould the felt hold up well in the washer? If not could I substitute another material?
ReplyDeleteFelt doesn't wash very well (it pills pretty badly, but a fabric shaver may help). A good alternative would be fleece. It wouldn't fray or pill. It's a knit and can be a little trickier to sew around, but if you go slow (and use a walking foot if you have one) it should be fine. :)
Delete