
I keep going back to this porch I pulled out of a BHG magazine. I love the fresh mix of white and black that's warmed up with natural elements. And one of my favorite features is that rustic console by the door. I know console tables usually make an appearance in hallways or entertainment centers, but a porch is actually another great place to work in a console!

image via pinterest
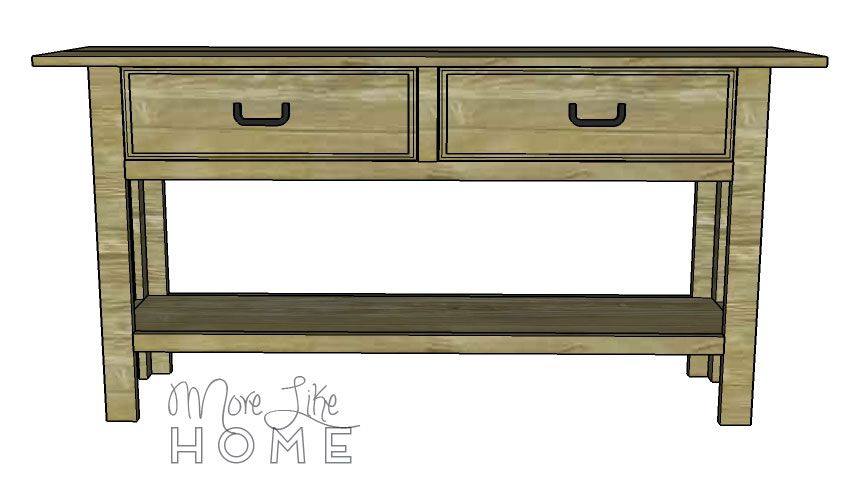
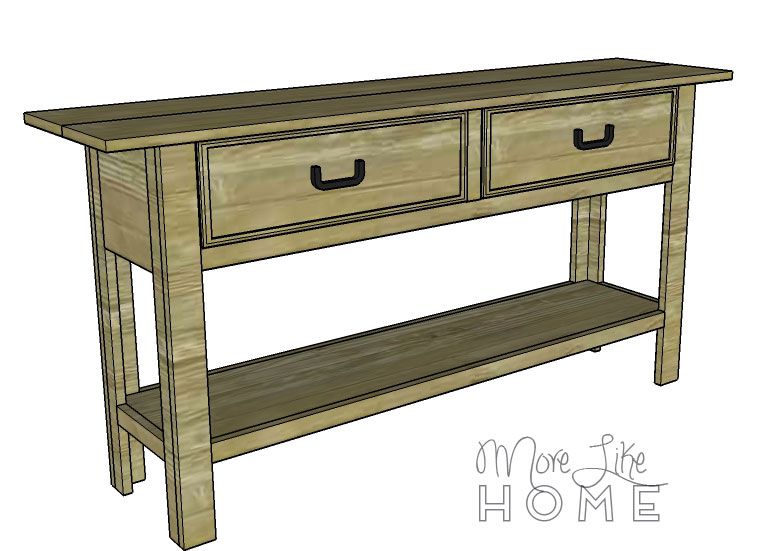
Bringing furniture onto your front porch makes it feel more like an extension of your home. It creates a warm welcome for guests and a comfortable space for you to relax. But... this rustic console is great addition for more than just its looks. It's also a functional place to drop your bags or groceries while you unlock the door, and a handy place to keep things like a deck of cards for chilling on the porch or a weeding tool you can grab for the front flower bed!
Here's what you need to build your own:
1 - 1x3 @ 10'
2 - 1x2 @ 10'
1 - 1x2 @ 8'
1 - 1x10 @ 6'
3 - 1x8 @8'
1 - 1x12 @ 10'
1x2" plywood - two pieces 21.5" x 10.5"
1/2" trim
Kreg Jig
1 1/4" pocket hole screws
1 1/4" wood screws
finishing nails
wood glue
Finished Dimensions: 61" wide x 22.5" wide x 30" tall
Measure twice, cut once (seriously, though). Use glue in every step. Read through all the
instructions before you begin. Be safe, have fun, and let me know if
you have any questions!
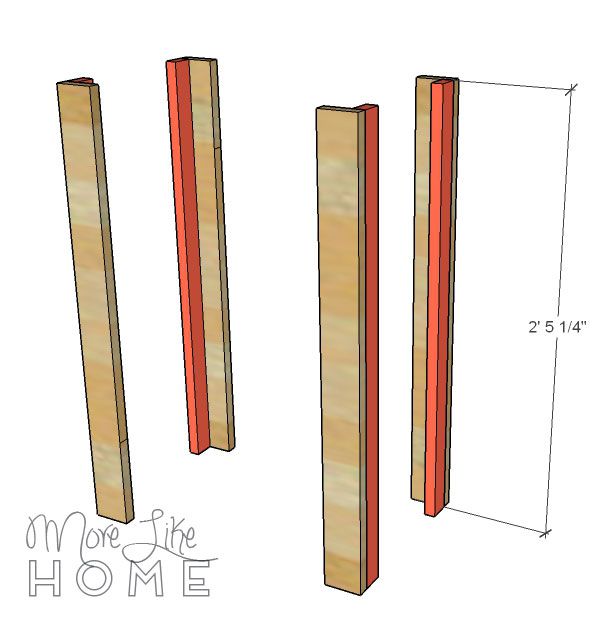
(A) 4 - 1x3 @ 29.25" (leg front)
(B) 4 - 1x2 @ 29.25 (leg side)
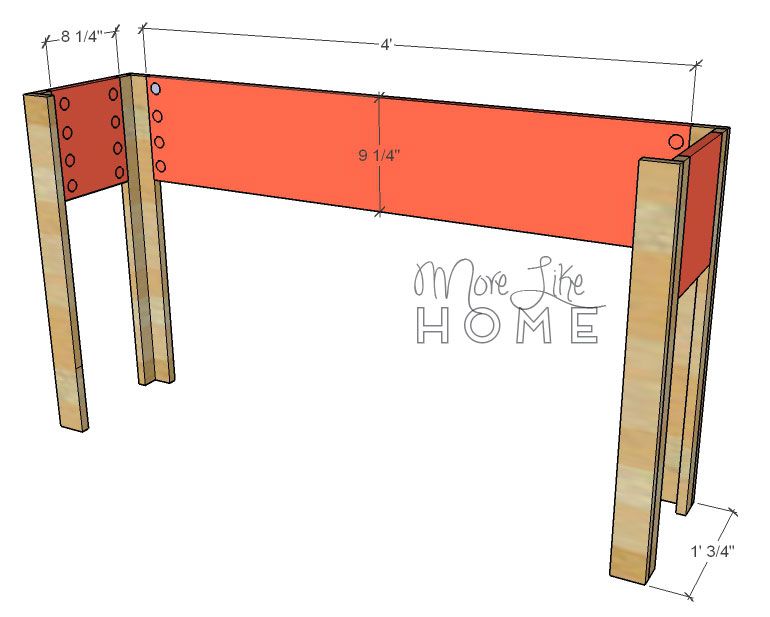
(C) 2 - 1x10 @ 8.25" (sides)
(D) 1 - 1x10 @ 48" (back)
(E) 3 - 1x2 @ 48" (stretchers)
(F) 1 - 1x2 @ 7.5" (stile)
(G) 2 - 1x2 @ 8.25" (side stretchers)
(H) 2 - 1x8 @ 65" (top)
(I) 2 - 1x12 @ 51.5" (shelves)
(J) 3 - 1x2 @ 11.25" (drawer dividers)
(K) 2 - 1/2" plywood @ 21.5 x 10.5" (drawer bottom)
(L) 4 - 1x8 @ 10.5 (drawer sides)
(M) 4 - 1x8 @ 23" (drawer front/back)
(N) trim
Start by assembling the legs. Attach one leg side (B) to each leg front (A) with a Kreg Jig or by drilling through the leg front into the leg side.

As you put the table together, make sure the leg front boards face toward the front & back of the table, and the leg sides point toward the side.
Use each side board (C) to attach two legs together with a Kreg Jig. Keep the top edges flush.
Then use the back piece (D) to attach the two side sections together using a Kreg Jig.
Use the first stretcher (E) to connect the front legs together using a Kreg Jig. It should be set down 7.5" from the top of the legs.
Then begin to install the stile (F) by attaching it to the stretcher with a Kreg Jig. It needs to be centered with 23.25" on either side.
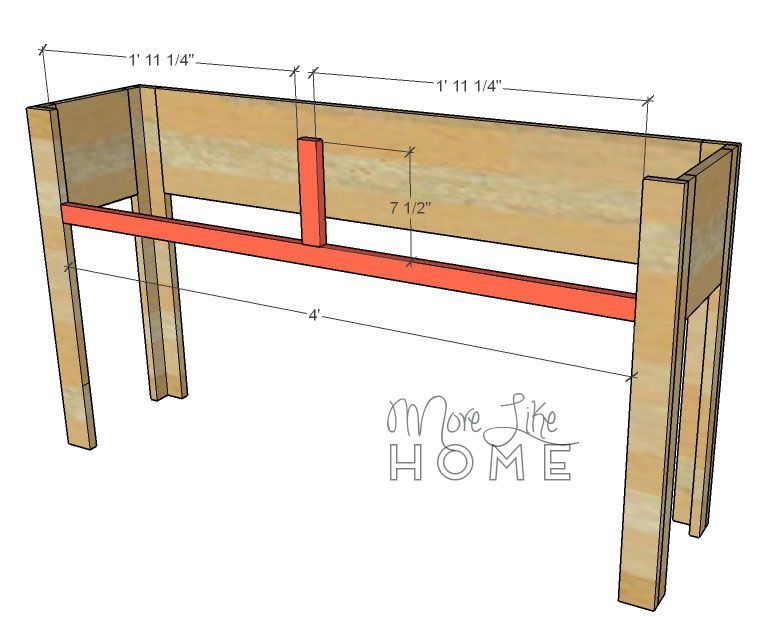
Add the other stretchers (E) between the legs at the bottom, one in front and one in back. Mine are set up 6" from the bottom of the legs and attached with a Kreg Jig. Then add the side stretchers (G) at the same height.

Next put on the top (H). You can attach the two top boards together side-by-side with the Kreg Jig. Then center the top on the console (with a 4" overhang on the ends and 1" overhang on the front).
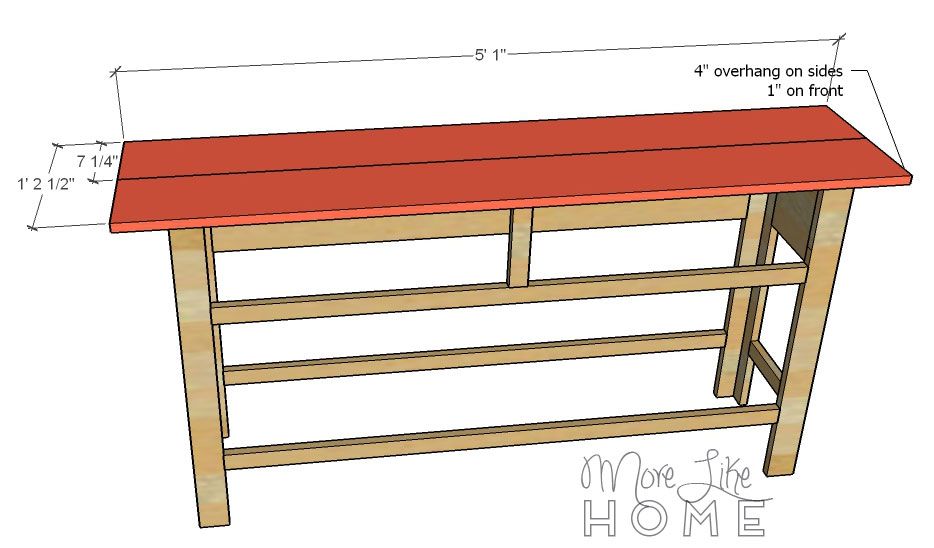
Attach the top from underneath using a Kreg Jig (put pocket holes in the back, sides, legs, and drawer divider).

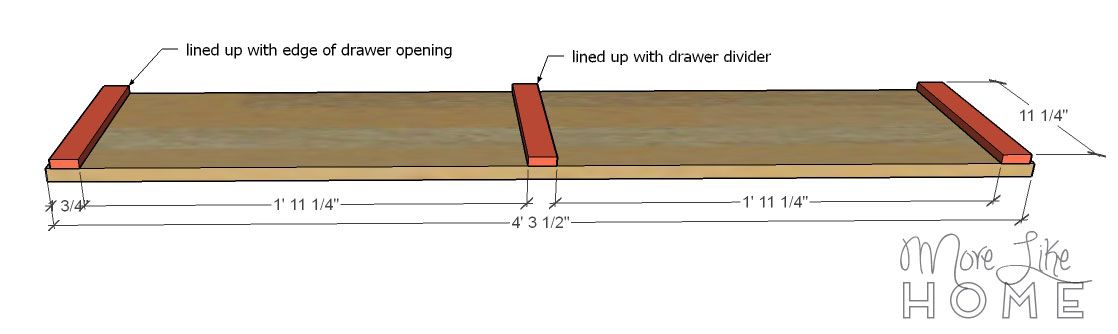
Next take one of the shelves (I) and attach drawer dividers (J) to the top. Put one at each end so the inside edge of the divider is 1.75" from the outside edge of the shelf. Center the third divider with 23.25" between it and each outside divider (the center divider should line up with the stile). Attach the dividers by drilling down through the dividers into the shelf with wood screws.
Install this shelf between the top stretcher and back board, keeping it flush with the top edge of the stretcher. Use a Kreg Jig to attach it from below.
Install the second shelf between the bottom stretchers, keeping it flush with the top edge.

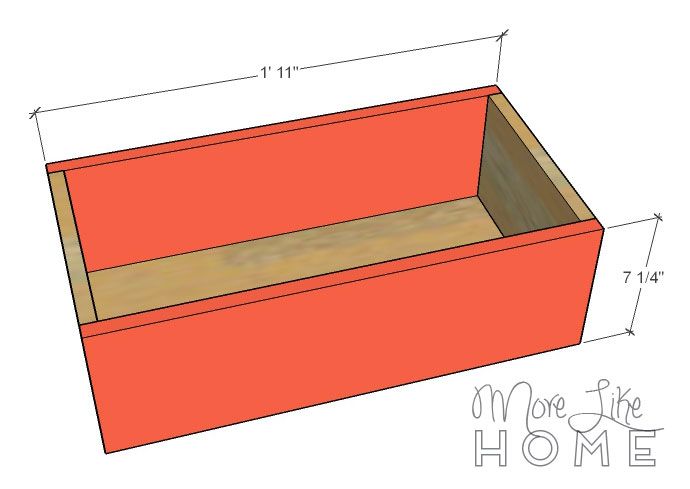
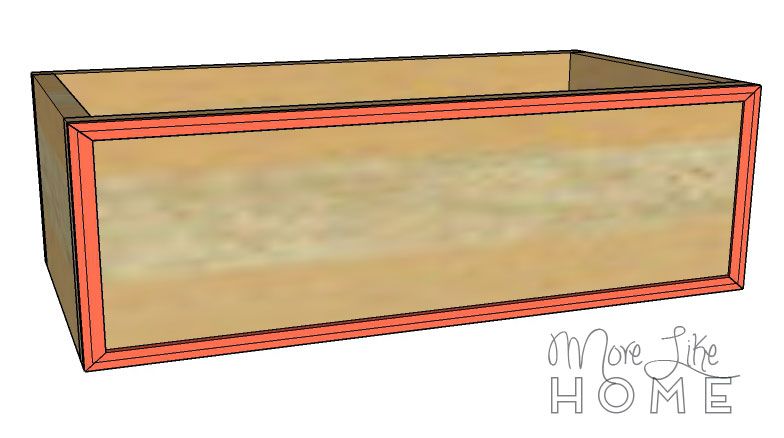
Now take each drawer bottom (K) and attach a drawer side (L) to each side using a Kreg Jig, or by drilling through the sides into the edges of the drawer bottom.

Attach a drawer front and back (M) to each drawer using a Kreg Jig, or by drilling through the front/back boards into the edges of the drawer sides.
Finally, you can install trim around the front of the drawer to match the inspiration piece. Use finishing nails & glue to attach the trim.
Fill any holes, sand everything smooth, then finish with any outdoor paint or stain and polyurethane you like. Add drawer pulls and you're done!
Once your table is built, you can finish off the look with a few great accessories. Try to focus on black and white anchors balanced with natural elements.
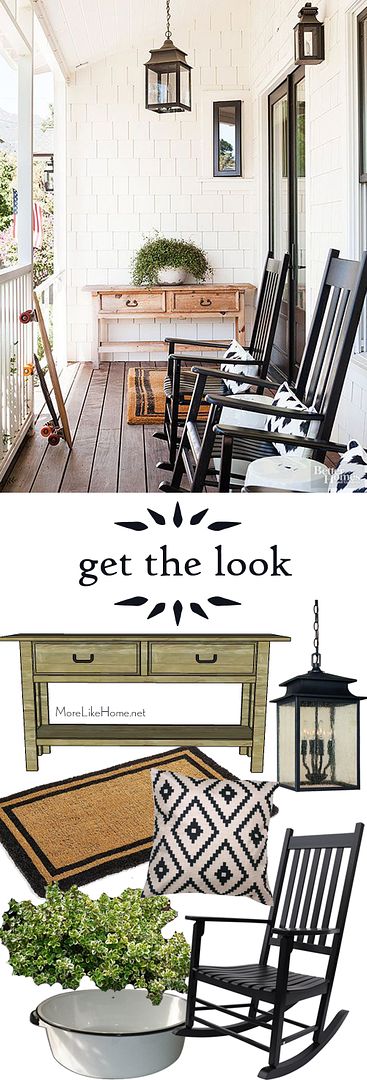
Every great front porch starts with a great rocking chair (or a swing!) and this classic black rocker is a perfect choice. Add a black & white geometric ikat pillow to step up both style & comfort. A black lantern light can really pop on a white porch (or try this similar lantern with a lower price tag). You could also put a coat of black spray paint on an existing light to update it for just a few dollars. Add some texture with a welcome mat and some greenery. Try something like creeping lemon thyme (or a mix of herbs) in a white enamel basin. It smells great, plus it's supposed to repel mosquitoes!
What are you building?
No comments:
Post a Comment