

Did you think I forgot today? :) I didn't... I'm just riiiiight on the verge of falling behind. Oops. But I'm here, and today we're kicking off a week that's all about the ladies! Starting with one of my very favorite tote bags!
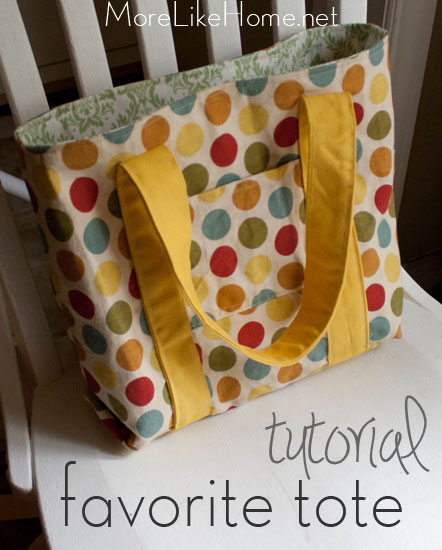
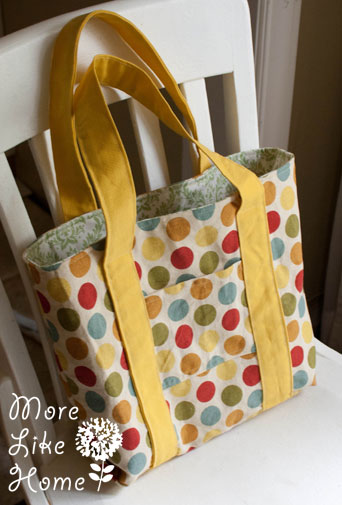
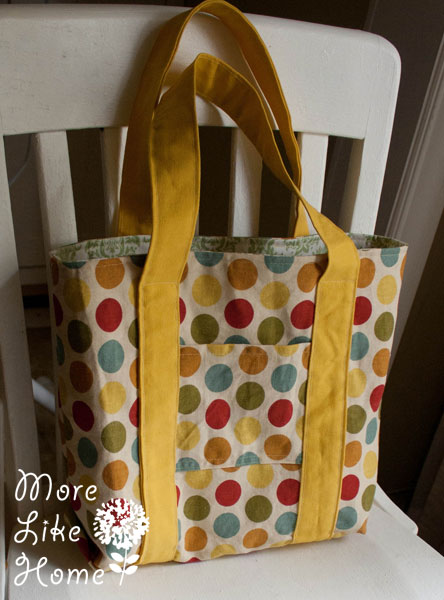
I don't know about you guys, but I have a lot of bags. A lot. They just speak to me. But one of my very favorite bags is a small, striped tote. I drooled over it at a thrift store and my sister snatched it up for Christmas. And it's the perfect size. So I used it as the inspiration for this new tote pattern!
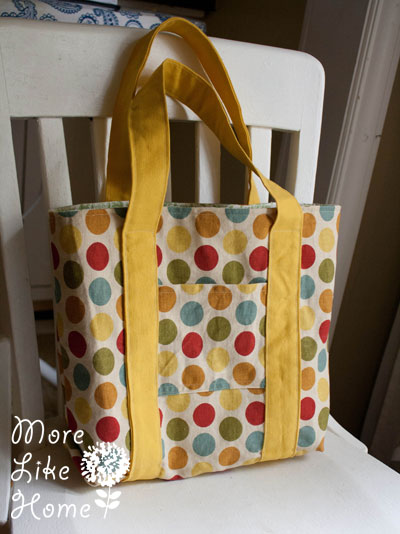
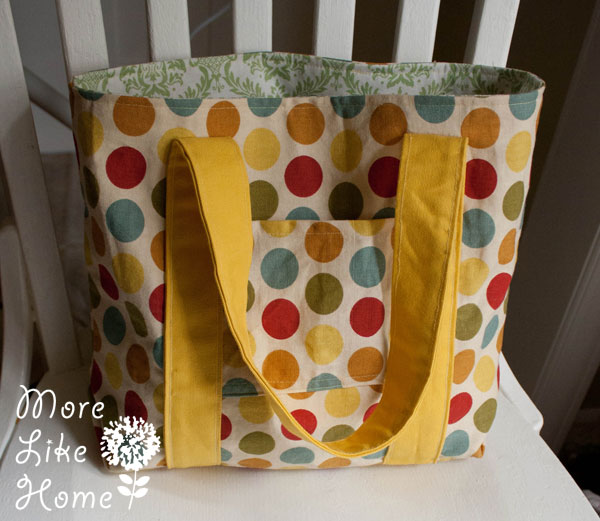
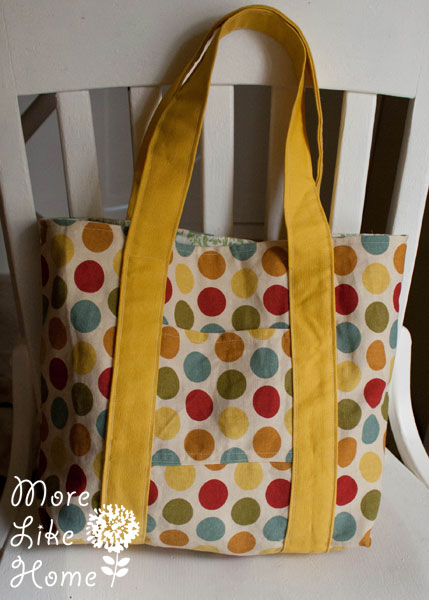
I changed a few things like the way the straps are attached just to make it a little spiffier. But that beautiful perfect size is the same. The finished size is about 11" wide x 9" tall x 4" deep.
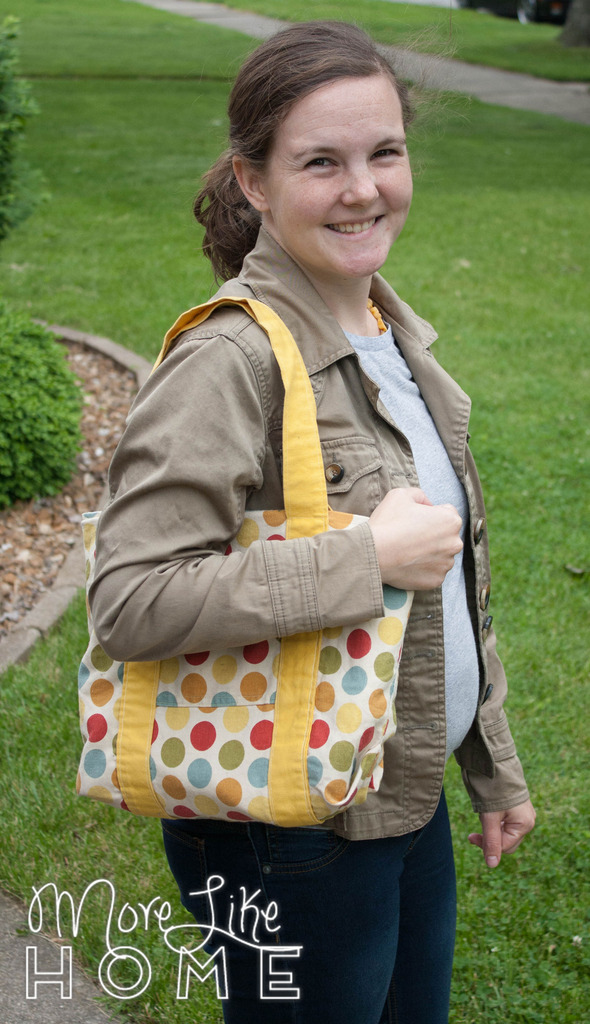
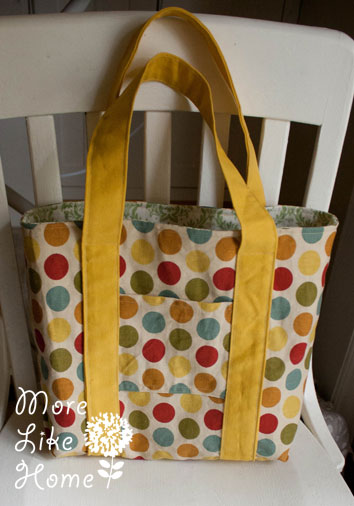
Here are some new pics for scale (thanks for the suggestion!). I'm about 5'2" and a little bit pregnant. :) We've been using this as our library bag.
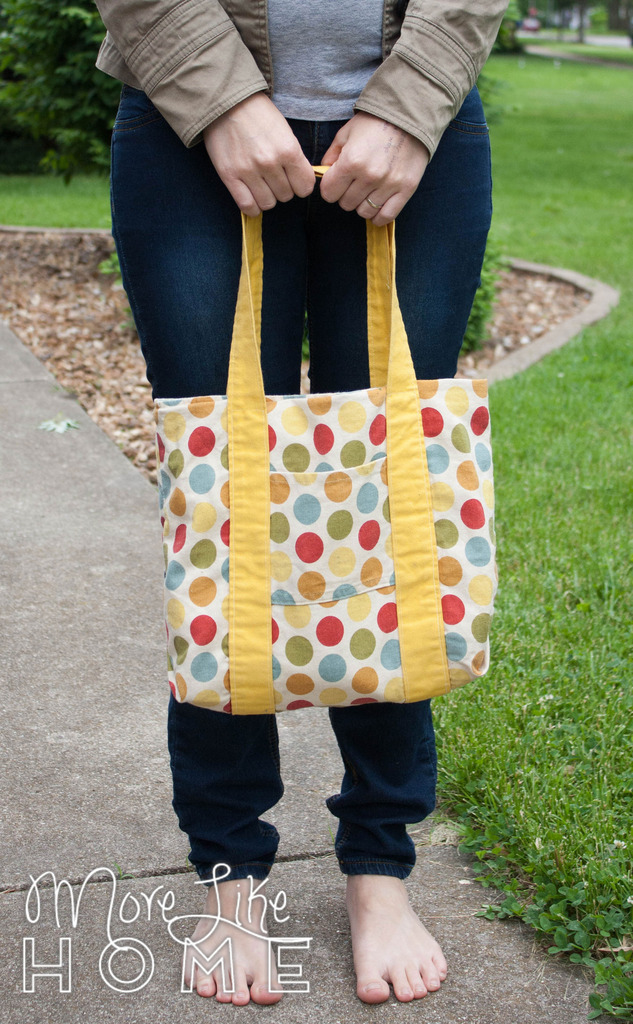
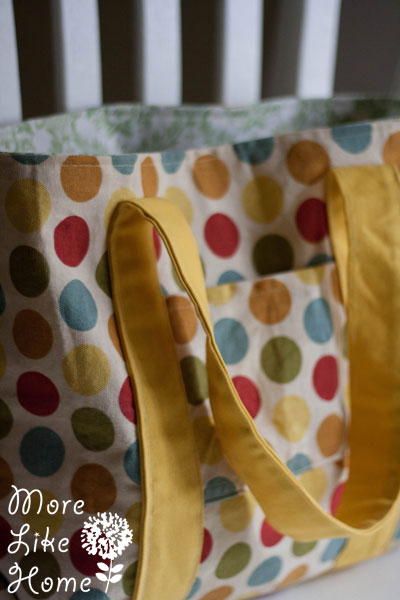
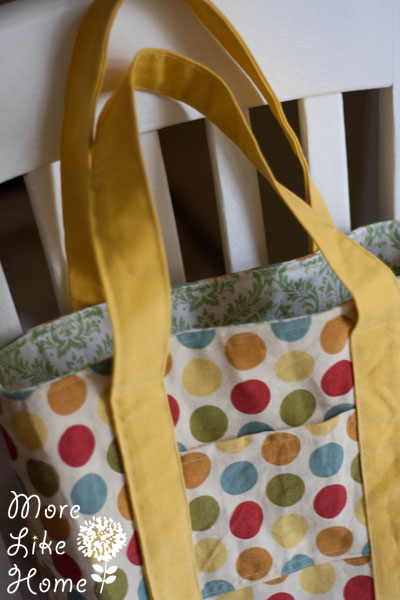
It's small enough to use a purse, but big enough to stuff in a couple diapers and wipes while I run errands. It has pockets inside and outside, and deep gussets for lots of usable space.
Here's what you need to make one:
- 1/2 yard duck cloth or canvas for the exterior
- 1/2 yard quilting cotton for the interior (or you can use another duck cloth and skip the interfacing)
- 3/8 yard duck cloth or canvas for the straps.
- 1 yard medium weight fusible interfacing
- thread
Start by pre-washing and drying your fabrics. Then cut out the following pieces:
From exterior fabric:
2 body pieces - 16 x 14"
2 pockets - 6.5 x 6"
From interior fabric:
2 body pieces - 16 x 14"
2 pockets - 6.5 x 6"
From strap fabric
2 straps - 4 x 45"
From interfacing:
2 body pieces - 16 x 14"
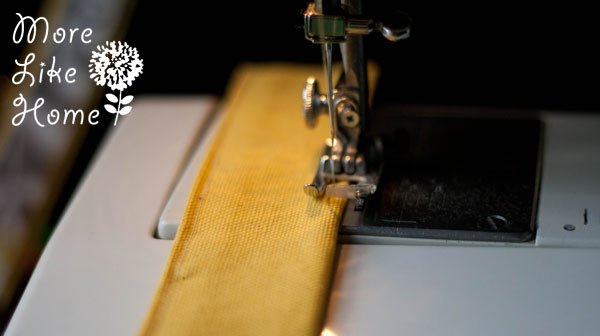
Once your pieces are cut out, go ahead and make the straps. Fold each strap in half lengthwise and press. Open them up and press the long edges in 1/2" toward the center crease.
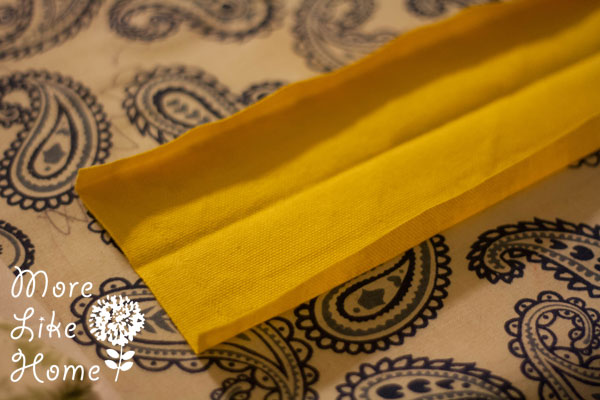
Fold along the crease again and pin. Then sew right along each long side of the straps.
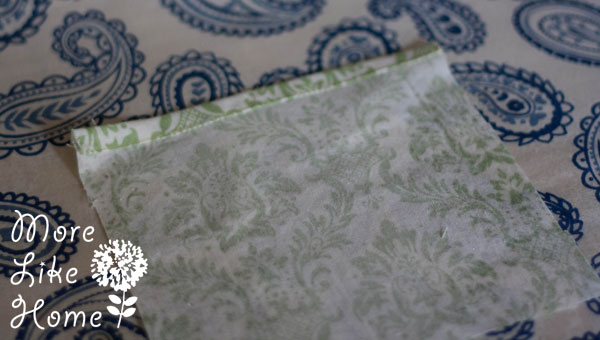
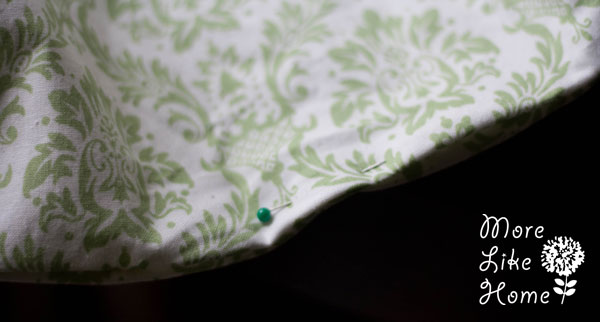
Now prep the exterior pockets. Do a simple rolled hem on both 6" sides of each pocket. Just fold the edge under 1/4" and press, then fold under 1/4" again and press.
Stitch right along the folded edges.
Apply the interfacing to the wrong side of the exterior body pieces. In the pictures it is applied to the lining pieces of this bag, but I've found I prefer the feel of the bag when it is applied to the exterior.
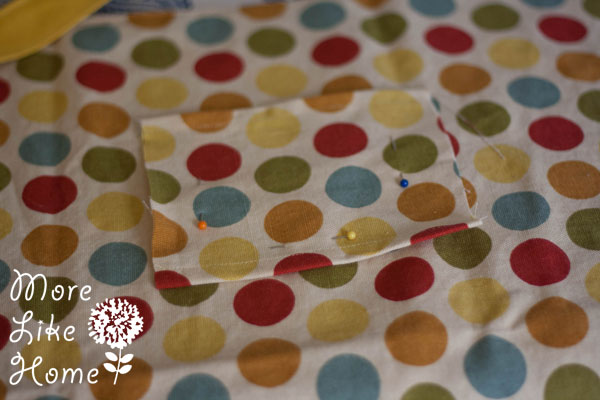
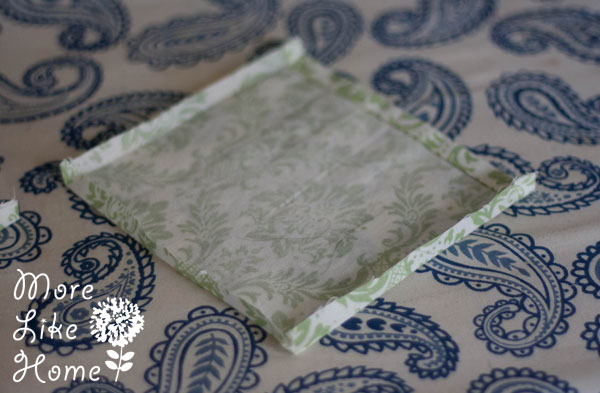
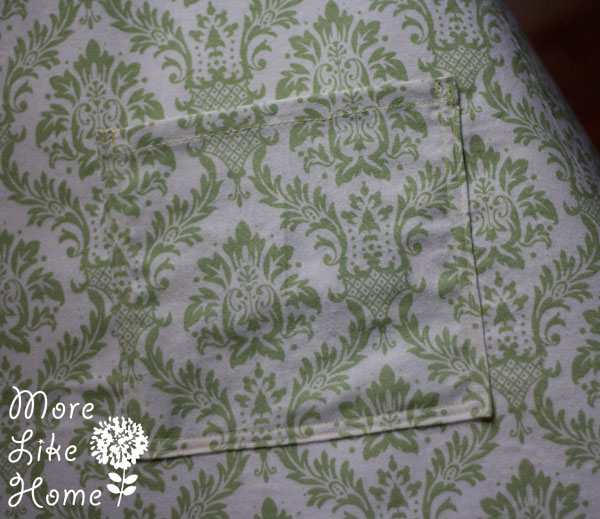
Now pin the pockets to the exterior body pieces. Lay the body piece so the 16" edges are the top and bottom. Then lay the pocket on so the hemmed edges are the top and bottom. Line the pocket up so it is centered across the bag with 4.75" on either side, and set it down about 3.75" from the top edge of the bag. Pin it in place. Repeat for the other exterior pocket.
So it should look something like this:
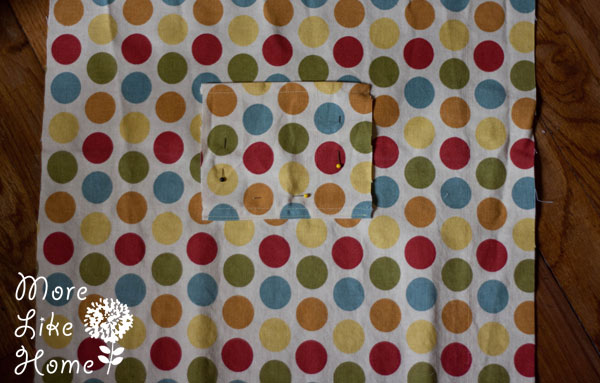
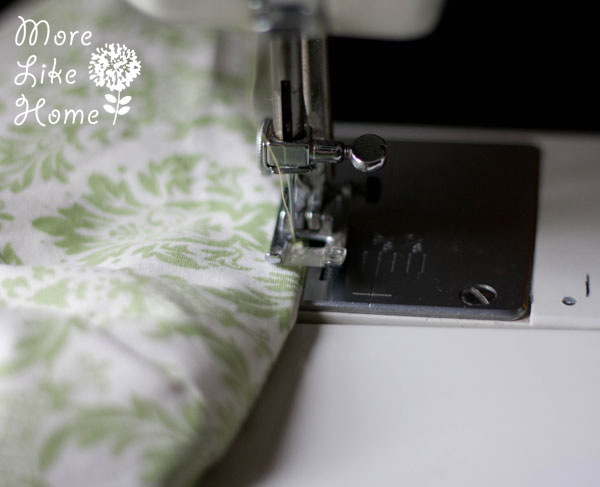
Stitch right along the sides and bottom edge of the pockets to attach them.

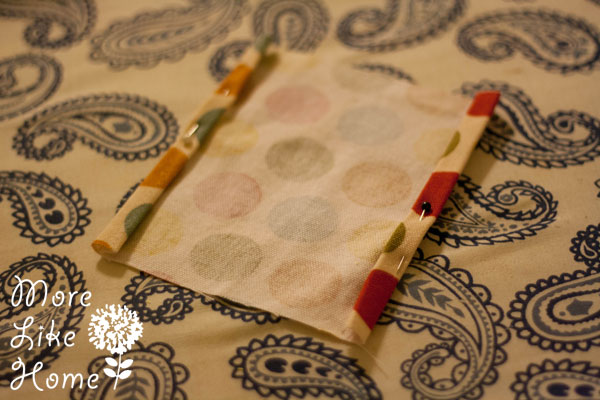
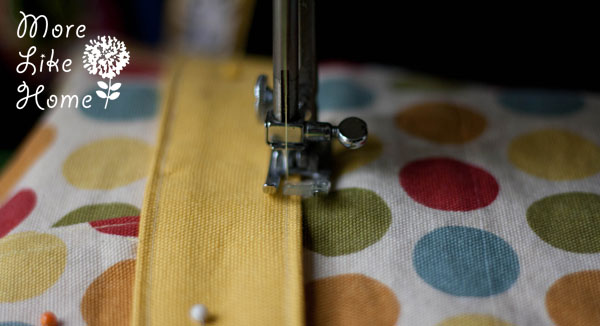
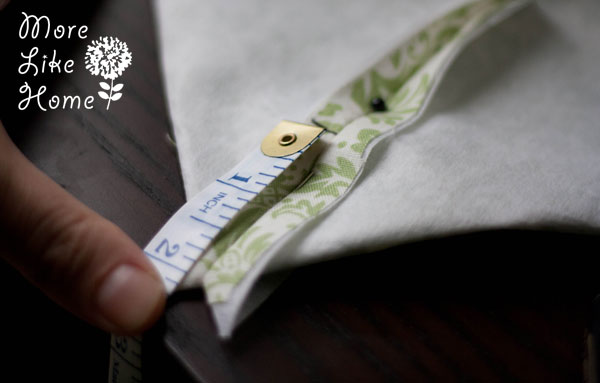
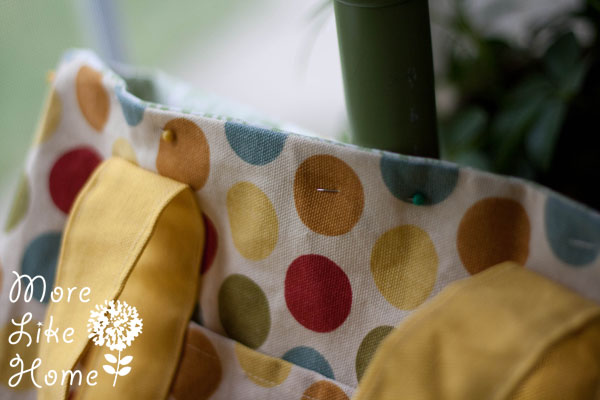
Now line up the straps. On one exterior body piece, a strap so it is set in 4" from from the left edge, and the end of the strap is flush with the bottom edge of the bag. Pin it in place.
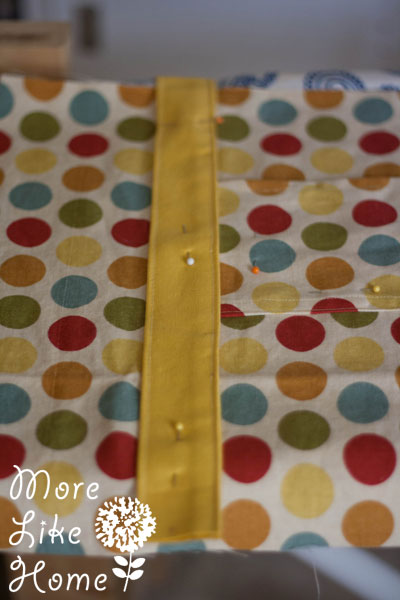
Then mark the strap 1/5" down from the top edge of the bag. I just used a pin to mark the spot.
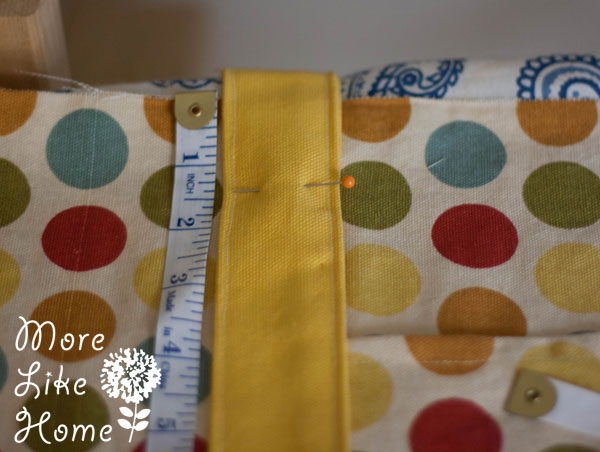
Line up the other end of the strap with the bottom of the bag and set it in 4" from the right side (make sure the strap isn't twisted at the top!). Pin it in place, and mark 1.5" from the top edge again. Repeat with the other strap and exterior body piece.
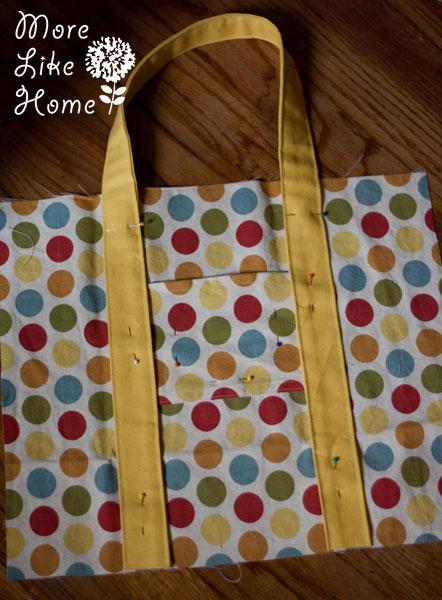
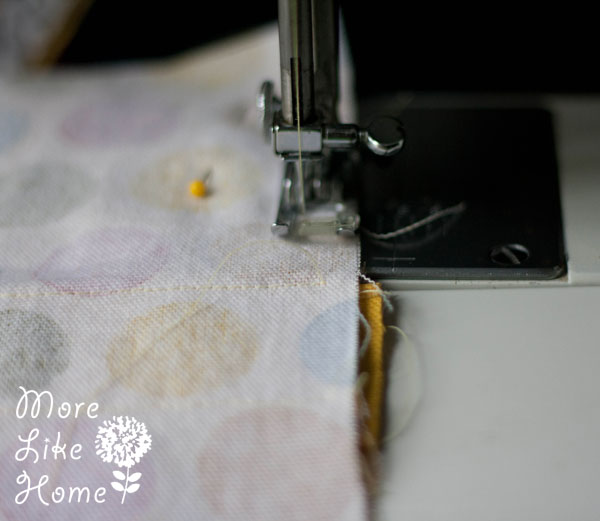
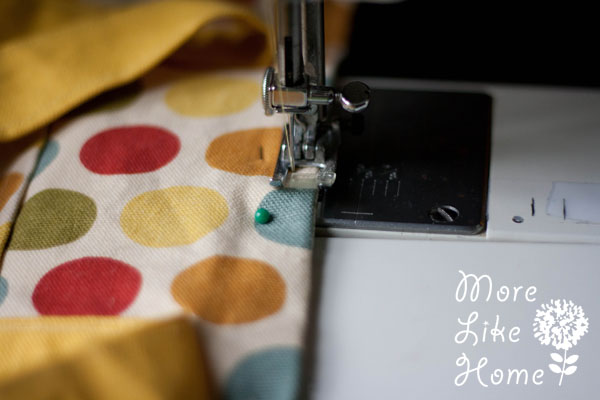
Starting at the bottom of one strap, sew right along the stitching line on the strap up until the 1.5" line you marked with a pin.
When you get to the pin put the needle down, lift the foot, and turn the corner.
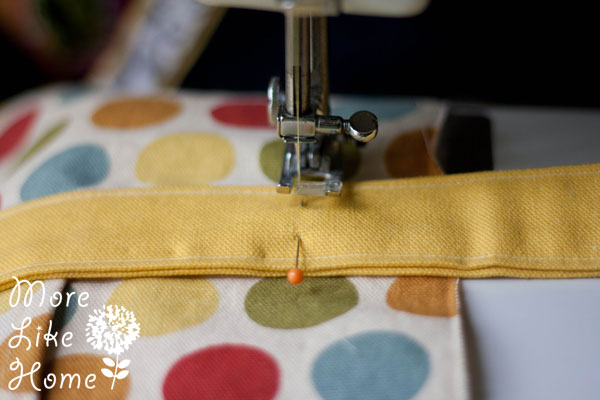
Put the food back down and stitch straight across the strap until you reach the other stitching line.
Turn the corner again and sew back down that stitching line to the bottom of the bag. Repeat for the other straps.
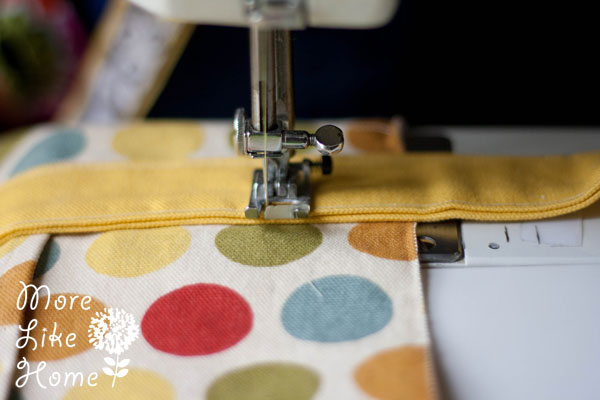
Once all the straps are sewn down, line up the two exterior body pieces with right sides together and pin just along the top and bottom edges. Sew along the bottom edge with a 1/2" seam allowance.
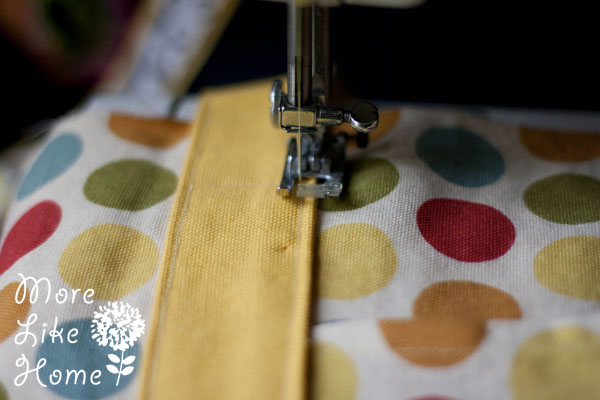
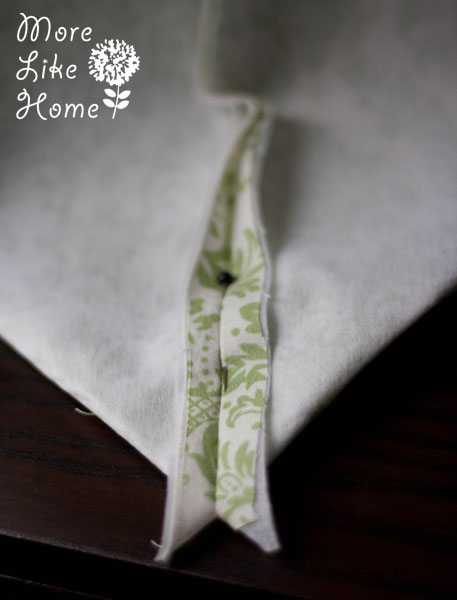
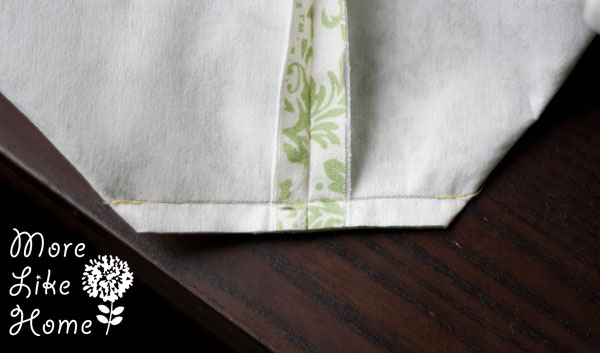
Now we're going to make what I like to call a "fancy gusset" on the bottom. On both ends of the bag, tuck the bottom seam up between the body pieces 2" and pin it in place. Make sure the top of the bag stays even.
Maybe this next pic is a better angle of that. Once both ends are pinned, sew along both sides of the bag with a 1/2" seam allowance.
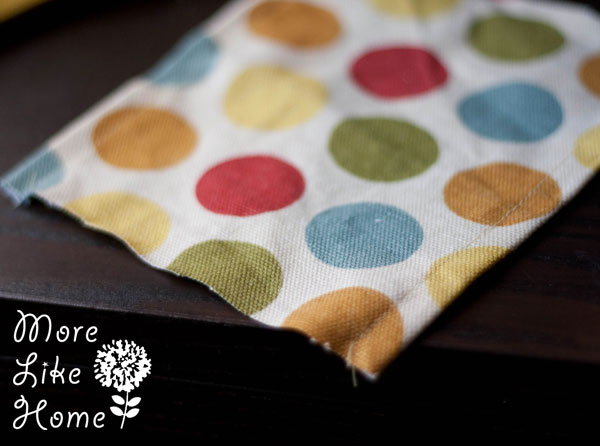
Flip the bag right side out. The gussets should look like this:
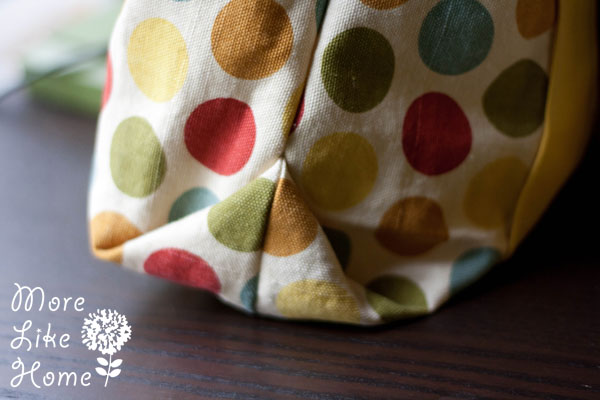
Oooo, fancy!
Now make the interior pockets. Fold the top edge o the pocket down 1/4" and press, then 1/4" again and press. Stitch right along the folded edge.
Then fold the other three edges under 1/4" and press.
Lay the pocket wherever you want on the lining (I did the same as my exterior pockets. You can do more pockets or different sizes to meet your needs). Pin them in place, then stitch right along the side & bottom edges. Then I like to do a second line of stitching about 1/4" in from the edges.
Now line up the body pieces with right sides together and pin them. Stitch along the side and bottom edges with a 1/2" seam allowance, leaving a 4" opening at the bottom for turning.
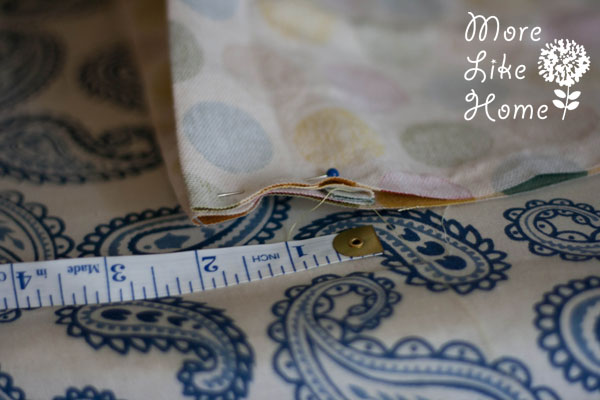
To make the interior gussets, flatten each bottom corner out to a point with a seam on top and bottom and pin them (you know they are lined up if the pin goes right through the seam of the both the top and bottom seams).
Measure in 2" from the corner and make a mark.
Then draw a line across the corner at that mark (the line should be 4" long).

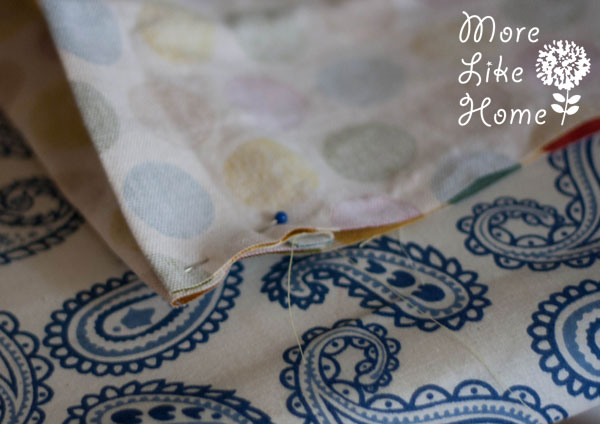
Sew right along the line.

Then clip off the corner leaving about 1/2" of seam allowance.
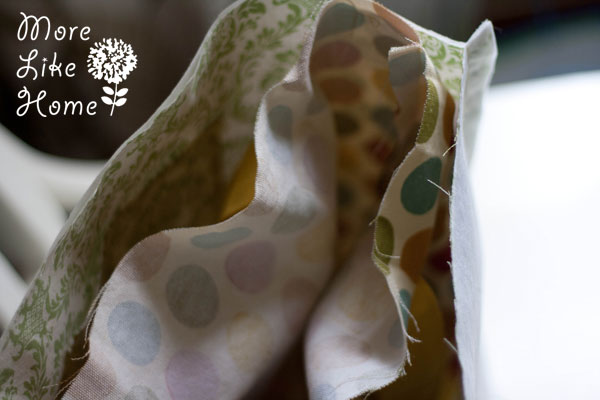
Keep the lining inside out, and slip the bag exterior (right side out) inside the lining (right sides will be together).
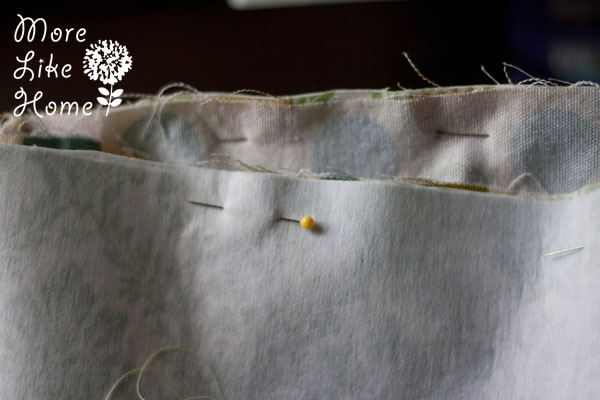
Line up the seams and pin around the top edge. Sew around the top edge with a 1/2" seam allowance (make sure you don't hit the straps). Flip the bag right side out through the hole in the lining.
Tuck the fabric in at the opening and pin the opening closed.
Stitch right along the edge at the opening to close it up.
Tuck the lining down into the bag. Pin around the top edge.
Sew along the top edge with a 1/4" seam allowance.
And you're done!
You can give the bag as-is, or fill it with gifts! Try craft supplies, books, baking utensils, or gardening tools & seeds.
And if you need to make one for yourself, I totally understand. You've been working hard on all these Christmas presents! Go ahead and give yourself a pretty way to carry them. :)
Here is my bag packed with my wallet, keys, phone, wipes, a diaper, sippy cup, and a little jacket. With plenty of room to spare!

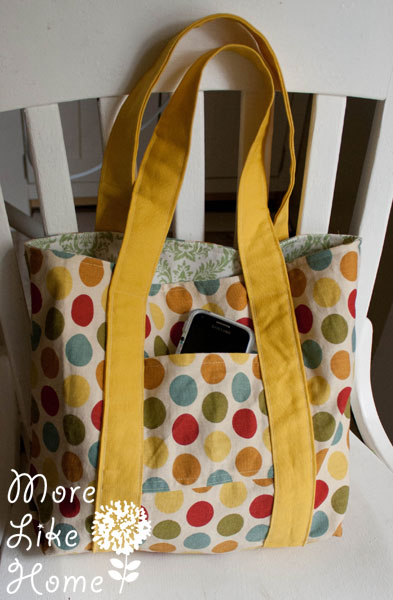
And the outside pockets are perfect for my phone and for keeping my grocery list & pen handy.
Here's what it cost me to make this bag:
$2.75 - 1/2 yard of polka dot duck cloth from the remnant bin
$1.90- 1/2 yard of lining fabric from the remnant bin
$2.05 - 3/8 yard yellow strap fabric from remnant bin
$2.00 - 1 yard interfacing
$0.00 - thread (already had it from other projects)
Total: $8.70
And really guys, if your Joann Fabric has a remnant bin you should check it out! Ours always has the remnants 1/2 off, and when I bought these they were an additional 20% off of that! And I even have enough left over for a smaller project (polka dot checkbook cover? I think so).
This might be my favorite project so far. But, you know, I do have a bag problem. ;)

What's your favorite kind of bag? I really restrained myself from doing a whole week of bags. ;) So tomorrow we'll be mixing it up with something that isn't sewing at all...

I love this! I might even try this with my very limited sewing skills.
ReplyDeleteGo for it! At least it's all straight lines, right? ;) I'd love to see pics if you make one!
DeleteThanks! This tutorial helps a lot! I' ve tried it and i've made it! Petra (amsterdam, netherlands)
ReplyDeleteI am in love with this bag and am heading to the fabric store today to find fabric to make it. I hope my basic sewing skills hold up to create this!
ReplyDeleteHow did it go? I'd love to see pics! :)
DeleteI don't see when to use the interfacing...
ReplyDeleteOh! Sorry! I'll fix that. It should actually be the very first step - apply the interfacing to the wrong side of the exterior fabric then continue with the tutorial. :) You could apply it to the lining instead (that's what I did on this exact bag) but I've found the bag holds it's shape better when it's on the exterior fabric. :)
DeleteLove this! What type of interfacing did you use?
ReplyDeleteThanks! I used a medium weight sew-in interfacing. Iron-on is easier to wrangle, but I'm thrifty. :) You could use a heavier weight if you want your bad to hold its shape better. Have fun, this is still one of my favorite bags!
DeleteI absolutely love the polka dot bag. I love bags and have them almost on every door knob. I am a polka dot nut. I have 6 drawers filled with polka dots.
DeleteCould you maybe share a photo of the bag on someone's shoulder or in hand? I made a bag once from a tutorial (it was a good tutorial) but it ended up being a lot smaller than I was hoping for. Thanks!!
ReplyDeleteI've had that same problem! Thanks for the suggestion, I just finally got pics taken today and added them in the post. Enjoy!
DeleteLove this and your tutorial looks very simple to follow, thank you for sharing it
ReplyDeleteYou're welcome, enjoy!
DeleteThis comment has been removed by the author.
ReplyDeleteI do not have any duckcloth in house right now I like for this project. Has anyone used quilting cotton for all pieces and been successful? I need this for a gift for a 10 year old girl. And, we do not have a regular fabric store in town.
ReplyDeleteHi, you could definitely do it all with quilting cotton but it probably wouldn't be quite as durable as duck cloth. If you're using quilting cotton for the straps I would suggest reinforcing them with interfacing as well. Good luck! :)
DeleteI used this as a base guide for my tote I just needed to make it bigger to hold more crap haha. Thank you for the tutorial!
ReplyDeleteOooo, that is a great idea! I'll have to give it a try, I like the sound of having my favorite bag in all the sizes. :) I'd love to see a pic if you have one!
DeleteI have just made one. I'm really pleased with the result, thanks so much for the pattern :-)
ReplyDeleteOh good! I'm glad you liked it! :)
DeleteI just used this pattern, altered a bit, but it was perfect! Thank you so much!
ReplyDeleteYour welcome, and I'm glad you like it!! Feel free to share pics on my facebook page if you'd like! facebook.com/morelikehome
Deletehi, I just finished mine..my very first bag. I just got a sewing machine for my birthday, that's why.;;;) Thank you sooo much for your pattern, really helps for beginners like me. will send the photo to facebook.
ReplyDeleteThat's great! Hope you love your new sewing machine!
DeleteThis is a wonderful tutorial. Thank you so very much for taking the time to do it. I would never have figured it out without the pictures!
ReplyDeleteSo glad you enjoyed it! :)
DeleteI love this tutorial! You speak my language for sure! :) I'm having trouble wrapping my mind around the fancy gusset...so you have another post or more in depth info on it? I just can't seem to understand how to do it!
ReplyDeleteHi! I don't have another post about it, but I may need to make one. I did a quick google search looking for a video I could link for you and I can't find anything! Sorry I don't have more help at the moment. Maybe if I knew the official name for this style of gusset I would have more luck!
Deletehttps://www.youtube.com/watch?v=rybv_DYr68Q this video shows a "triangle" gusset that is the same as your bag. Took me a while to find this!
DeleteHi! Love this tutorial, almost finished with it... but it's turning out a smidgen smaller than it looks in your pictures!
ReplyDeleteSorry to hear that! You're not the first person who has said it turned out smaller than they expected. Maybe I need to try some different pictures to show the size better.
DeleteI need to make this bag MUCH bigger. Will it make it harder to do that if I add on material? I'm a very novice sewer and I'm wanting to make something for a friend
ReplyDeleteNo, it won't be much harder at all! You can follow the steps to make any size bag you want. :) If you make it larger I would change a couple things to fit the proportions. You'll probably want to make the exterior pockets a couple inches wider so the straps can be a couple inches farther apart. Also maybe try making the gussets deeper (5-6" instead of 4"), but that's more personal preference. Have fun!
DeleteThank you! Excellent tutorial!
ReplyDeleteYou're welcome! Glad you like it! :)
DeleteHello. I'm desperately stuck on how to do the exterior fancy gusset. I just sewed the bottom of exterior fabrics. Thanks for this beautiful tutorial!
ReplyDeleteI'm so sorry, I'm really bad about checking for comments (obviously). If you're still stuck, you can instead do the outside gussets just like the inside gussets. I've been trying to search youtube for a video that would show the fancy gusset better, but I'm not sure what it's official name is and I'm not finding anything helpful. :/
DeleteLove this tote tutorial! The directions were easy to follow and the result was great! I ordered my fabric from here https://www.canvasetc.com/product-category/cotton-duck-canvas-fabric/ and got the 10% off for new customers discount at checkout!
ReplyDeleteThanks so much for the feedback!
DeleteHello, I love this and want to try and make my own, I have one question though:
ReplyDeleteIs this bag large enough for a regular sized ring-binder folder to fit comfortably? (A4 size)
Thank you so much xoxox
Hi! I would guess it would fit... but honestly we've lost the bag so I can't test it. It has to be in the house somewhere (I think) but for the life of me I can't find it. Sorry. If you wanted to be on the safe side you could cut the bag body a few inches larger, and follow the directions just the same to make a slightly larger bag. :)
DeleteGreat Tutorial. Your illustrations were very easy to follow. I really liked making your fancy gusset. Very clever!!! And looks so cute on the tote! Thanks for sharing this wonderful tutorial!!!
ReplyDeleteAw, thanks! I'm so glad you liked it! :)
DeleteReally enjoyed making this bag, great tutorial and i like the size, not too big. I used a matt oilcloth, and left a little of the lining showing at the top, before top stitching. 'Fancy' gusset looks good too. Thanks for sharing, will make more ����
ReplyDeleteSo glad you liked it!
DeleteIt worked great!!
ReplyDeleteYay! Enjoy it! :)
DeleteHola, me encantó el tutorial, fue de gran ayuda, pero las medidas no me cuadraron, el bolso salió pequeño y los tirantes quedaban cortos así es que yo los cosí a partir de las bolsas para que no quedarán tan cortos
ReplyDeleteThank you for this! I created one, and started it out bigger. I added a fancy inside to it with double layer pockets cut to size and now it's my knitting bag! It's got slots for all size needles from 0000 to 12, circulars, and the inside is great to store a project. I wish I had used a stiffer interfacing, and I wish I could post a picture, but it worked great! Thank you for this pattern! I intended to use it a lot.
ReplyDeleteWhen marking the top of the straps at one point you say mark 1/5 of an inch down and for the other side you say mark 1.5 inches down from the to on the strap. Just wondering which is right
ReplyDeleteShe definitely means 1.5
ReplyDeleteJust finished! My best work so far - bag#8. Thank you. Love it
ReplyDeleteGreat pattern and clear instruction. Can’t wait to make one. Thanks for sharing the pattern
ReplyDelete