

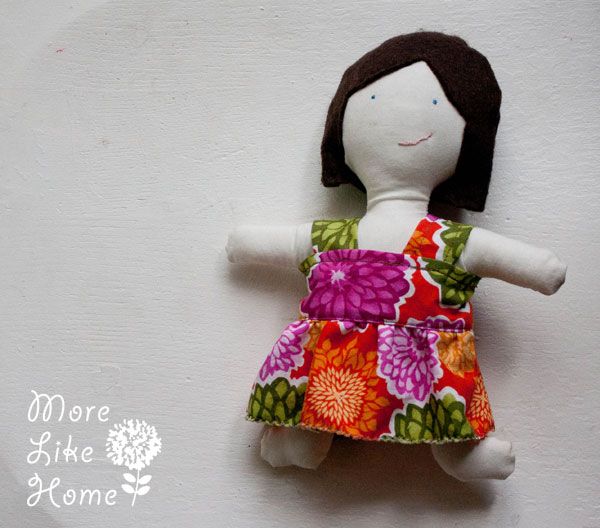
We're working on kids week right now, and today's project is something for the girls. Cute and cuddly rag dolls!

These are the perfect size for little hands and great to snuggle with. They come together pretty fast so you'll even have time to make a couple extra dresses for even more fun!

Here's what you need to make one:
- 1/2 yard cotton fabric for body
- 1 sheet flannel for hair
- thread
- embroidery thread for face (I used blue for the eyes and pink for the mouth)
- stuffing (I used polyfil)
- doll pattern (you can download it here)
- 1/4 yard cotton fabric for the dress (or a few scrap pieces of fabric, it doesn't take much.)
- 2" piece of sew-on velcro
Start by pre-washing and drying your fabrics. Use the doll pattern two cut out two body pieces from your body fabric (make sure you cut on a fold). If you want you can make a doll that looks like the little girl you're making it for, so pick a fabric to match her skin tone if that is your plan. I matched my own with this lovely ghostly white. Pin the pieces together with right sides together.

Stitch around the body with a narrow hem, 1/4" or less. Leave an opening at the top of the head for turning.
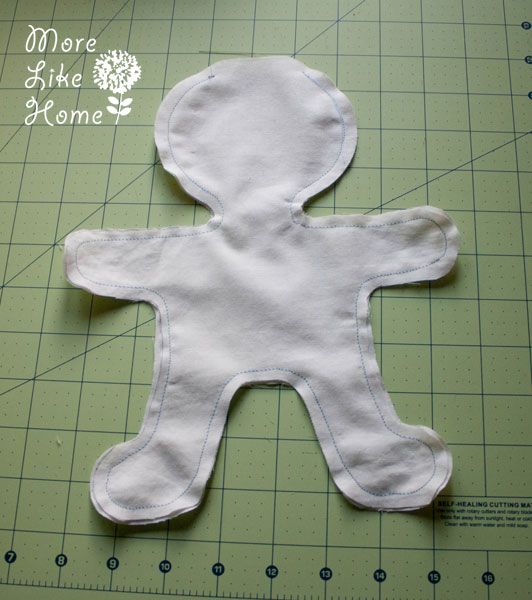
Clip the curves (yes, there are a lot of curves) then flip the doll right side out through the opening. You'll need something like a pencil or crochet hook to push out the legs and arms.

Stuff the body with your stuffing of choice. I used polyfil because I had some sitting in my closet!
Now you can make the hair. Lay the doll down on top of your felt and trace around the top of the head leaving a good 1/2" of space all the way around. You can cut the hair to match your gift recipient too, so you can make it longer or shorter than mine. Cut out the piece of felt, and then use it as a pattern to cut out one more piece.
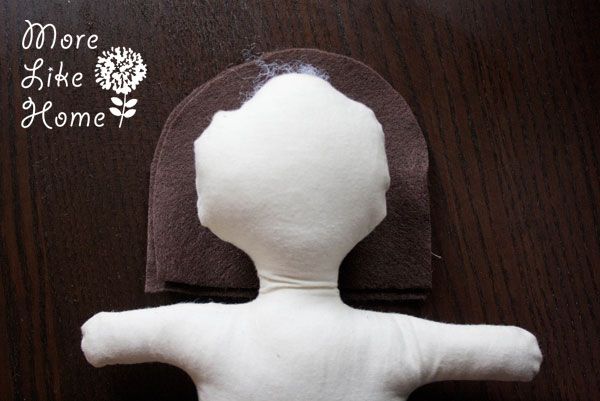
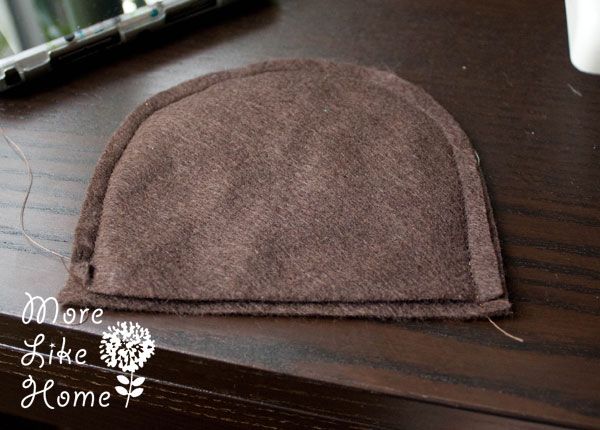
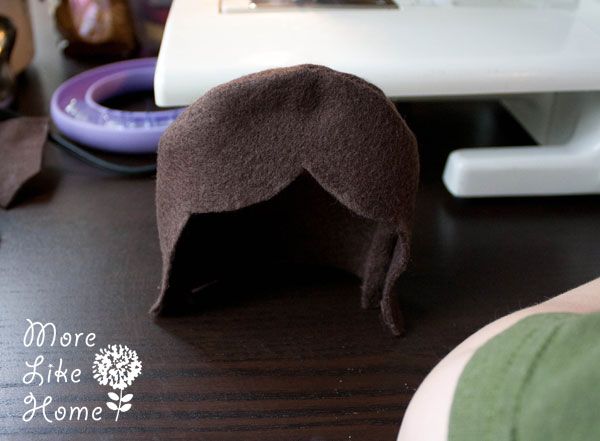
Stack the two pieces and stitch around the curved edge with a 1/4" seam allowance, leaving the bottom edge open.
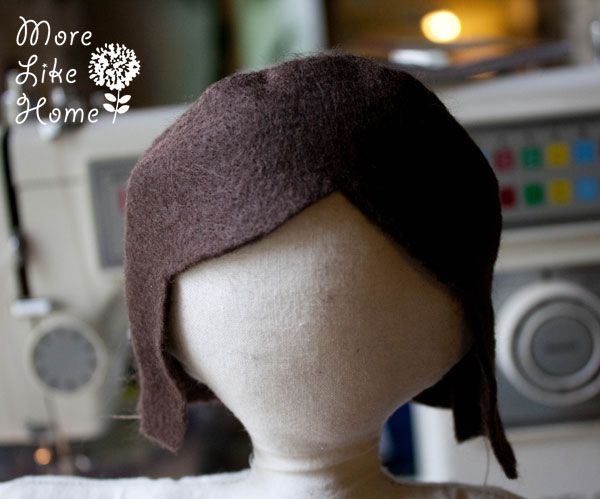
Flip the hair right side out. Now you can cut out the hairline from the front piece of felt (again you can try to match your recipients hair style). You can slip it on the dolls head and trim things up to make any adjustments and get a look you like.
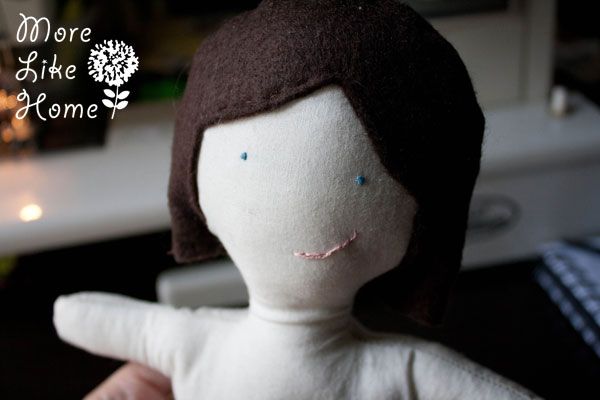
This is where I ended up.
I also tried making boy hair cut by rounding the back side of the hair and adding some boyish bangs.
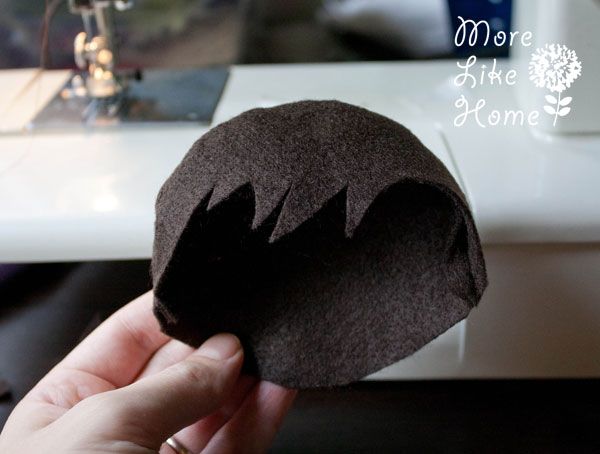
This is how it turned out. I totally love it, but I haven't figured out how to make boy clothes yet. I'm working on it. :)

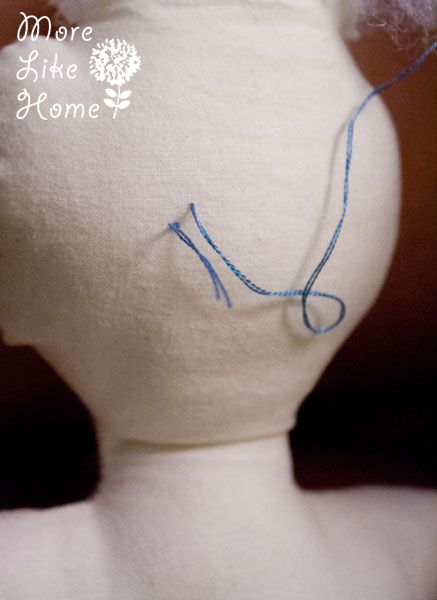
Before you attach the hair you can go ahead and make the face. You'll probably want to do this with the hair set in place to make sure your eyes end up in a good place below the hairline. Using two strands of embroidery thread (I used blue for the eyes) make a knot at one end leaving a two inch tail. Start on the back of the head (start high enough that your loose ends will end up hidden under the hair) and sew straight through to the spot you want to make an eye in the front. Stitch in that spot a few time to make a dot for the eye. Then sew through the head over to the spot where you want your other eye and stitch a few times to make that dot. It should look something like this (I actually did it with the hair still on to make sure I liked the placement).
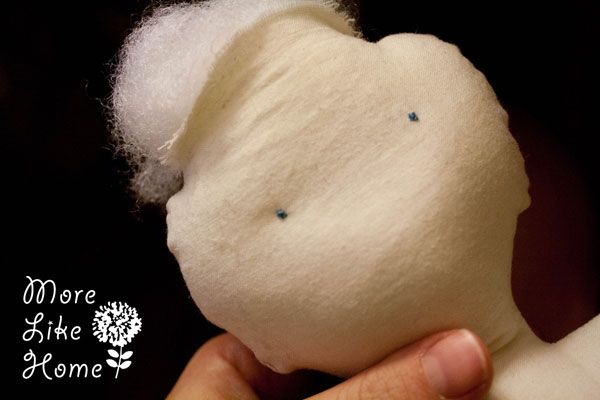
With the last stitch go straight back through to the back of the head near the tail end of the embroidery thread (like the pic below). Tie the two ends together to finish it off. Use the same steps to sew a mouth (I used pink for the mouth).
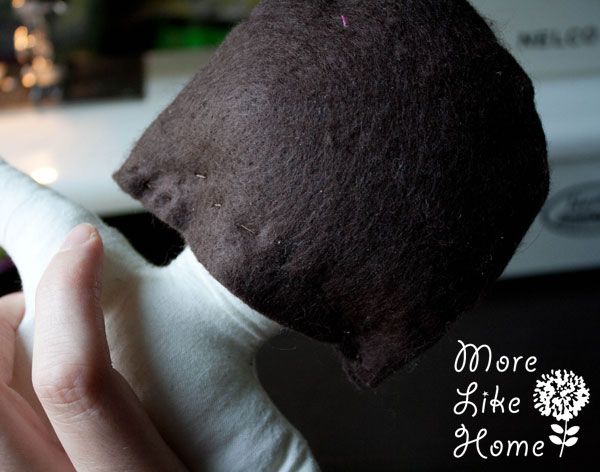
Now put the hair back on and sew it in place. I just used brown thread for this. Stitch all around the edges of the hair to attach it to the head. The pic below shows how I stitched around the front.
And I did a few stitches around the back of the head, not quite at the bottom of the felt so it sat a little prettier.
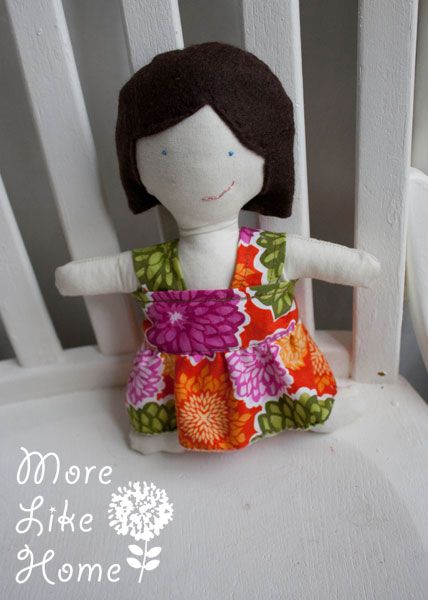
Now your doll is done! I'm sure there are all kinds of clothes you can make for these dolls if you experiment a bit, but today I'm just going to show you how to make a really simple dress (and you can easily adjust the sizes for any doll you have. you could even print my doll pattern bigger and make a dress to match for an older girl!). Start by cutting the following pieces out of your dress fabric:
- 1 bodice - 10 x 2"
- 1 skirt - 18 x 2.5"
- 2 straps - 3.5 x 1.5"
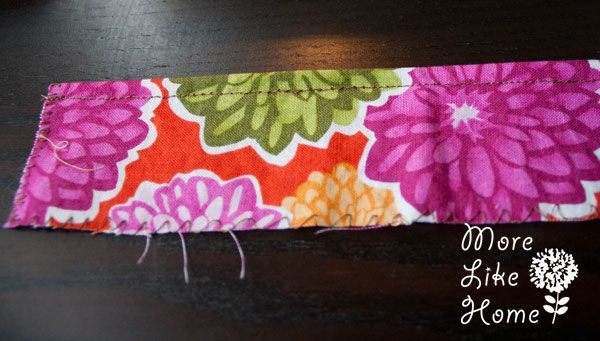
On the bodice piece, fold the top long edge under 1/4" and press. Topstitch along the edge.
Now you can gather the skirt. Use a long basting stitch to sew right along the top long edge of the skirt, leaving a couple inches of tail on the thread at each end. Pull the bottom thread to bunch the fabric up.
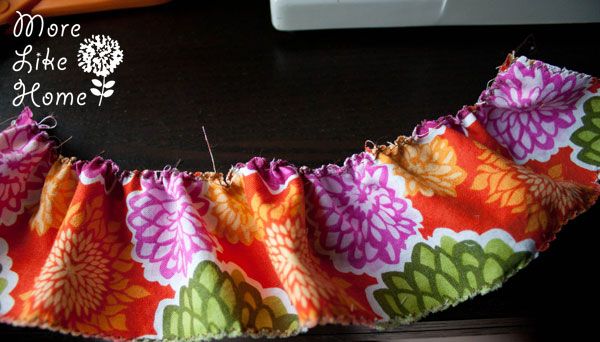
You want to bunch it until it's the same width as the bodice. With right sides together, line up the bottom edge of the bodice with the top ruffled edge of the skirt. Pin them together.

Stitch the pieces together with a 1/4" seam allowance.
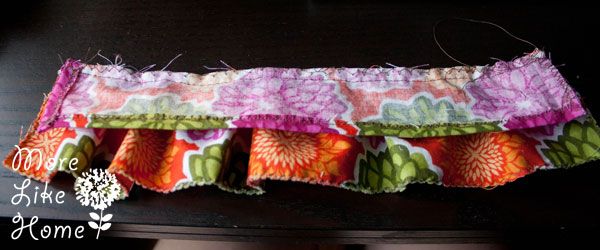
Open the dress and press the seam up toward the bodice. Topstitch right along the bottom edge of the bodice.
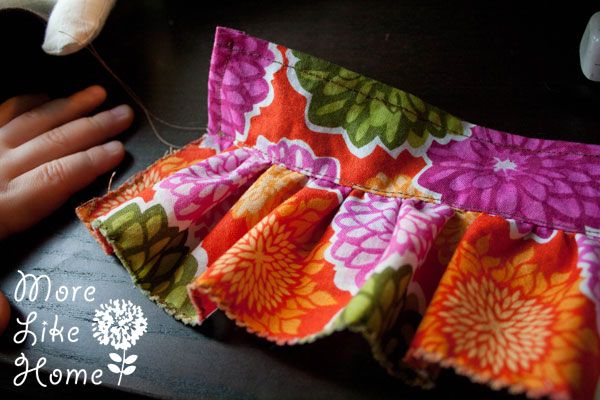
Fold both short ends under 1/4" and press. Topstitch along the edge.
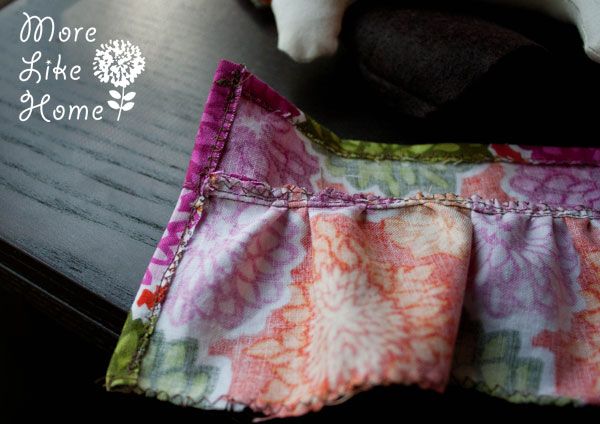
My plan was to fold the bottom edge of the skirt under 1/4" and topstitch along the edge, but my zig-zag stitch ended up giving it a kind of cute ruffly look so I left it alone. You can do either!
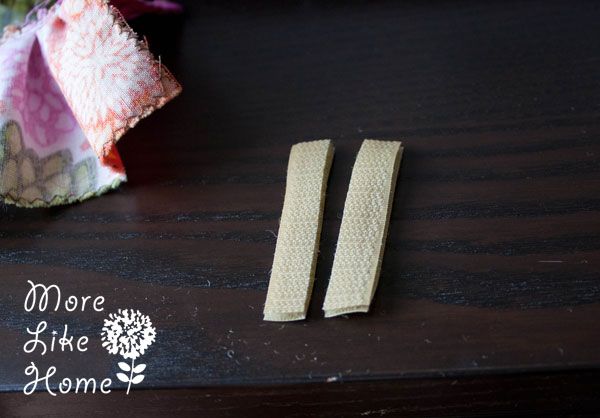
Now we can attach the velcro. You need about a 2" long piece. It should be kind of narrow, so I just used a 3/4" wide velcro I had in my stash and cut it in half length-wise.
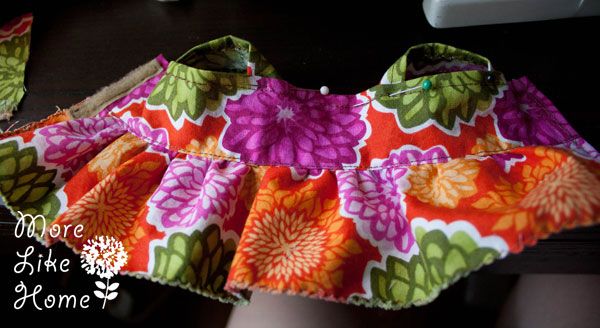
Sew the pieces of velcro to either side of the back of the dress like the pic below. They should be near the top edge, and remember to put one piece on the right side and one on the wrong side of the fabric.

Now make the straps. I don't have pics of this part, but just fold each long edge under 1/4" and press, then top stitch along the edges.
Go ahead and wrap the dress around your doll and velcro it in place. Set the straps on the doll and tuck the ends of the straps under the bodice of the dress in front and back. Pin the ends in place.

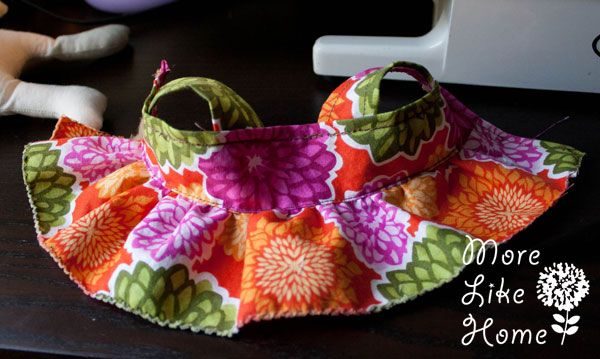
Take the doll off the dress. It should look something like this:
Sew the ends of the straps in place. (I stitched right along the top stitching line at the top of the bodice to keep it looking tidy)
Put it on the doll and you're done! Unless you're making extra dresses. Then you still have a little more work to do. ;)

This little lady is a perfect softie doll for snuggling up with at night. She's great for smaller girls, too, since she has no buttons or small parts. What a fun stocking stuffer for Christmas!
This is about what it cost for me to make this doll:
$1.75 - body fabric, on sale 30% off
$0.25 - flannel for hair
$1.80 - thread, on sale
$1.50 - embroidery thread
$0.00 - stuffing (left over from other projects)
$0.00 - fabric scraps for dress
$0.00 - velcro (left over from other projects)
Total: $5.30
So it will cost a little more if you have to buy everything new, but even so you can get at least 3 dolls from 1/2 yard of fabric and most of the other supplies (you'll need more felt) so for me it actually came out to only about $2 per doll! That is hard to beat!
You can have lots of fun with this by making a doll to match each of your kids or grandkids. If you're feeling extra inspired, you could even make the doll's clothes match a favorite outfit!
What is your favorite gift to make for a girl?

Where's my pictures of the boys, really look forward to seeing those cuties! lol, Love the doll, excellent idea.
ReplyDeleteHa ha, there will be more soon! :)
DeleteExcellent idea- I will be making one of these for my baby granddaughter for Christmas.
ReplyDeleteThanks, hope she loves it! :)
DeleteI can’t find the pattern to print
ReplyDeleteI am also looking for the pattern to print.
DeleteHere is the doll pattern: https://projects.morelikehome.net/extras/doll_pattern.pdf
DeleteThe dress doesn't have a pattern but all the measurements are listed in the post. Hope that helps! :)
How can I print the pattern?
ReplyDeleteHere is the doll pattern:
Deletehttps://projects.morelikehome.net/extras/doll_pattern.pdf
The dress doesn't have a pattern but all the measurements are listed in the post. Hope that helps! :)