
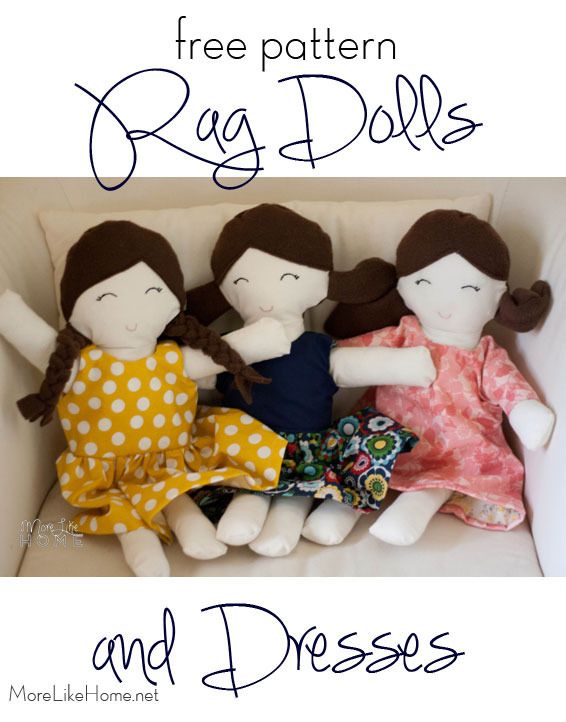
I've made another version of a little rag doll before (you can see the tutorial here) but this time I wanted something a little bigger with a more classic rag-doll look. Something perfect for a little girl to drag around and snuggle. I started by searching pinterest for the perfect pattern, but as usual there isn't anything exactly like I was picturing it in my head (I miiiiight be too picky). I found one doll by Miss Gioia that was the closest to what I was looking for and started from there. This is where we ended up:
If this doesn't make you want to play with dolls, I don't know what will.
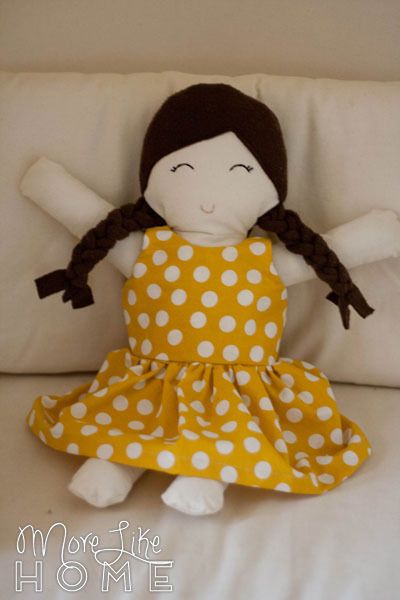
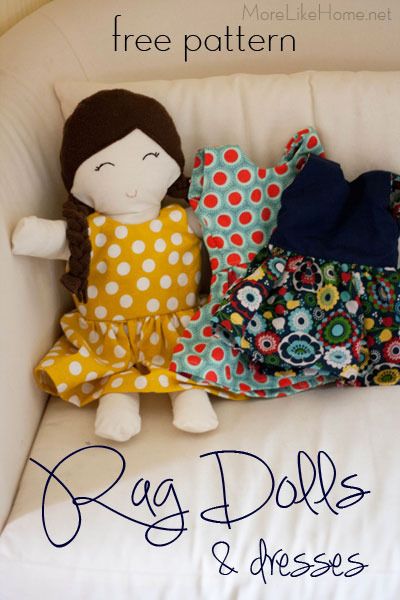
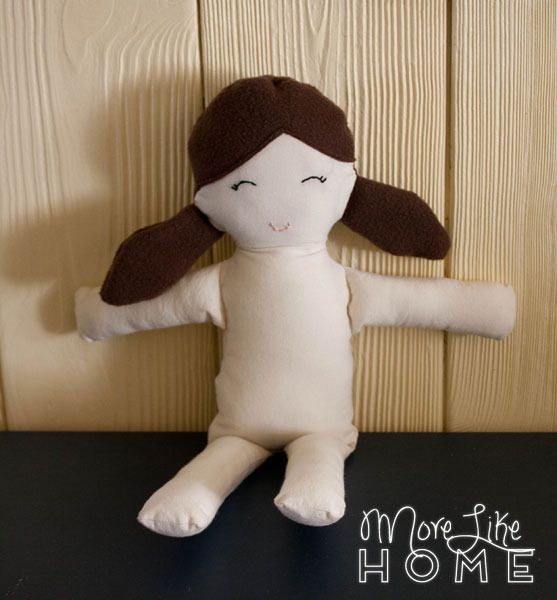
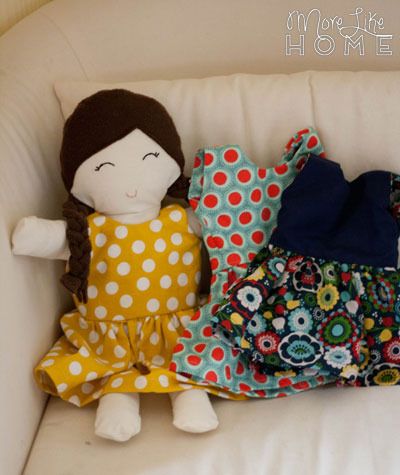
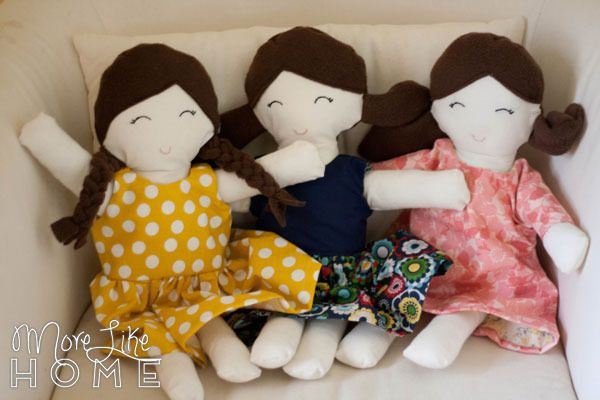
The finished doll is about 18" tall and super snuggly! In addition to the doll, I have patterns for two different dress styles - My Favorite Doll Dress & The Long Sleeve Doll Dress. Make them in a few fabrics and you'll have a full wardrobe!
But for today, let's get started on the doll. Here's what you need:
- 1/2 yard fabric for the body (muslin is a great cheap option, but a quilting cotton would work if you need a different color. 1/2 yard was almost enough for all three dolls.)
- 1/4 yard fleece for the hair (felt would work too, but it gets pills easier than fleece)
- matching thread
- embroidery floss (I used black for the eyes and pink for the mouth)
- stuffing
- the doll pattern
Start by printing the pattern. Then use it to cut out the following pieces:
Main Fabric:
2 body pieces
4 arms
4 legs
3 heads (yep. 3. stay with me.)
Fleece:
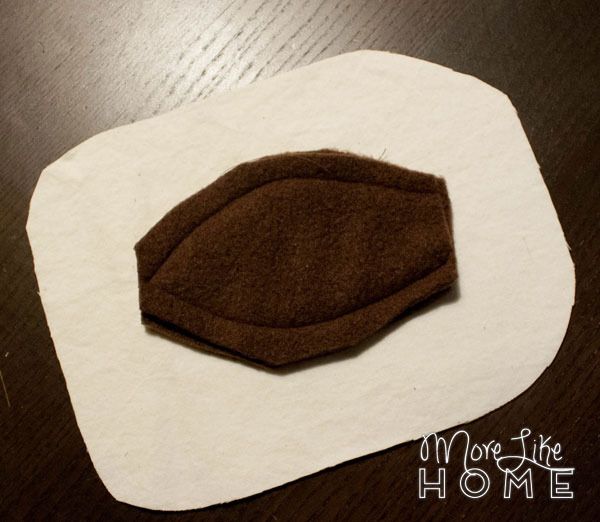
1 head
1 bangs
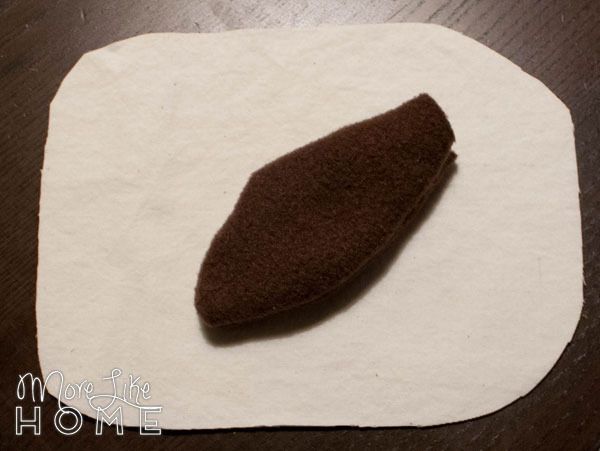
4 pigtails (you can also cut circles for buns instead, or my favorite is to cut six strips of fabric to make braids)
Make the hair. If you're doing pigtails or buns, put your pieces right-side together and sew around the edges with a 1/2" seam allowance leaving the straight end open. Clip the end (you should also clip around and curved areas but I don't have a picture of that. Sorry!).
Now flip it right side out.
To make braids instead, just cut six long strips of fleece. stack three strips and sew across the end to connect them together. Braid the strips, then sew across the other end.
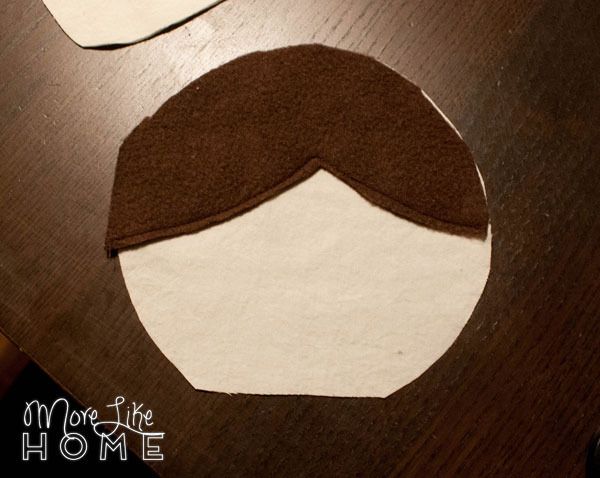
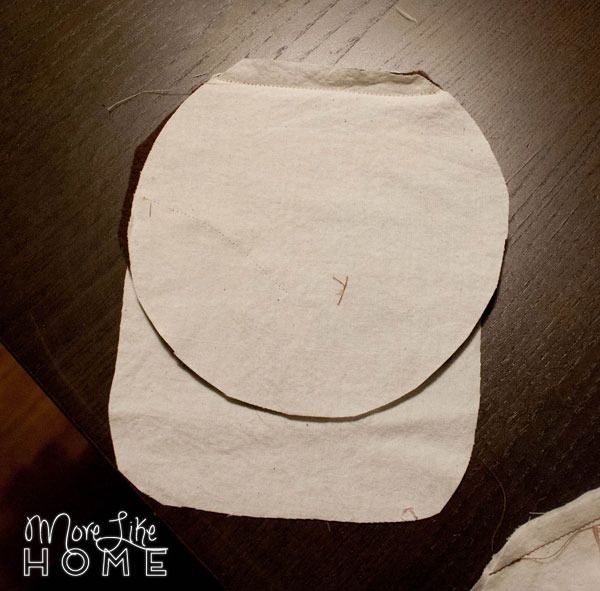
Next stack two of the muslin head pieces, and stack the bangs on top. Sew along the bottom edge of the bangs.
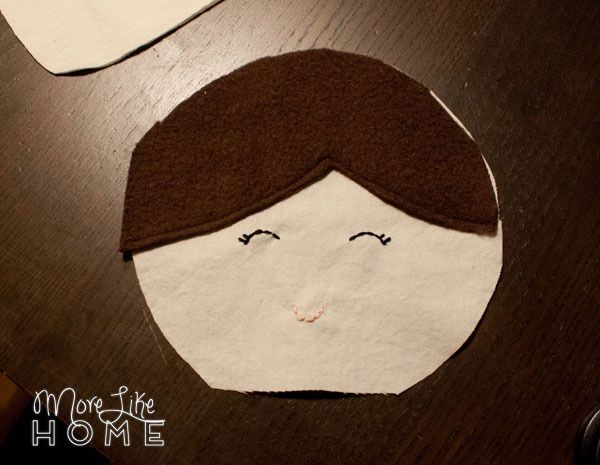
Use the embroidery floss to sew a face. I'll tell you now, I know absolutely nothing about embroidery but I just winged it and it turned out fine. I did find having two layers of muslin was important because the knots from the embroidery fleece would show through with just one layer.
Now put the head face-down on one of the body sections, lining up the straight edges. Sew along that edge with a 1/2" seam allowance.
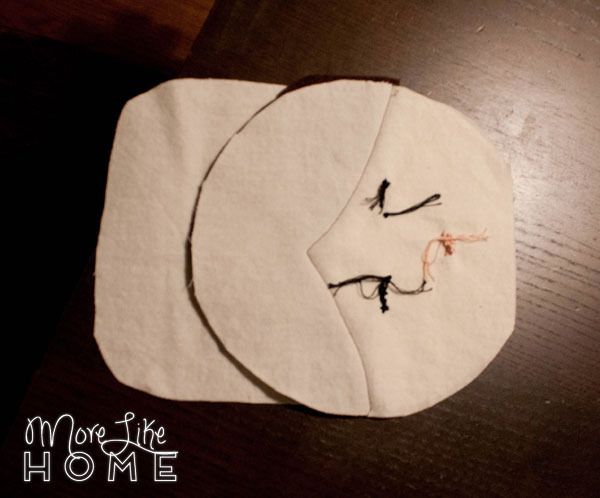
On the other body piece, lay the head piece of hair face down (if it has a right side), then the last head piece on top of that (fleece is stretchy so I used the muslin layer to make sure it would hold its shape). Line up the straight sides and sew with a 1/2" seam allowance.
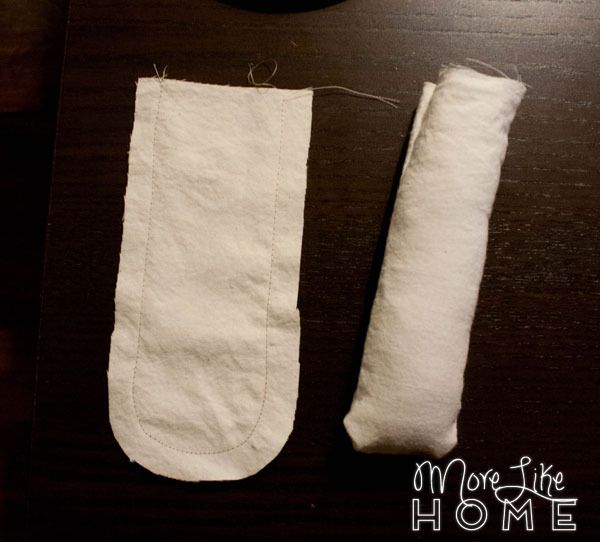
Next are the legs and arms. Stack two arms together and sew along the sides and rounded end with a 1/2" seam allowance, leaving the straight end open. Clip the curves (I didn't on this one, that's probably why my arm on the rigth turned out so square at the bottom). Turn the arm outside out and stuff it loosely. Repeat for the other arm and both legs.
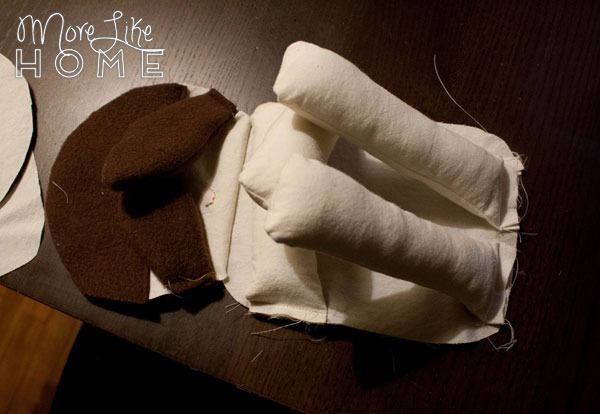
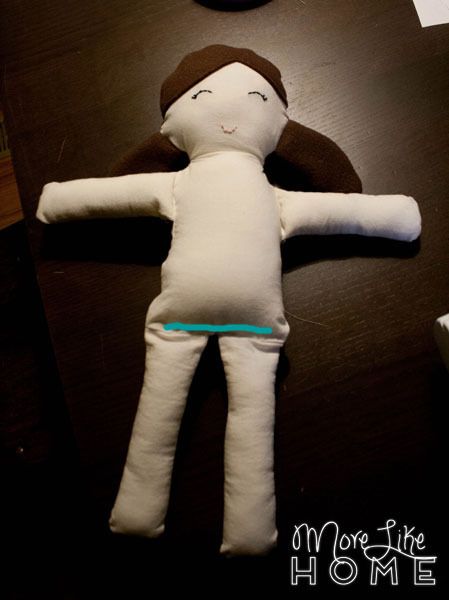
Now we can start putting all the pieces together. Lay one body/head piece face-up. Put the pigtails near the base of the head, pointing in over the face. Baste them in place with a 1/8" seam allowance. Put the arms facing in near the top of the shoulders, facing in, and baste them in place. Put the legs at the bottom of the torso facing in, and baste them in place to. It should look like this:
Place the other body/head piece on top, face down, and pin it in place. Sew around the edges with a 1/2" seam allowance, leaving 3ish" open at the bottom. Clip around any curved areas. Turn the doll right side out through the opening.
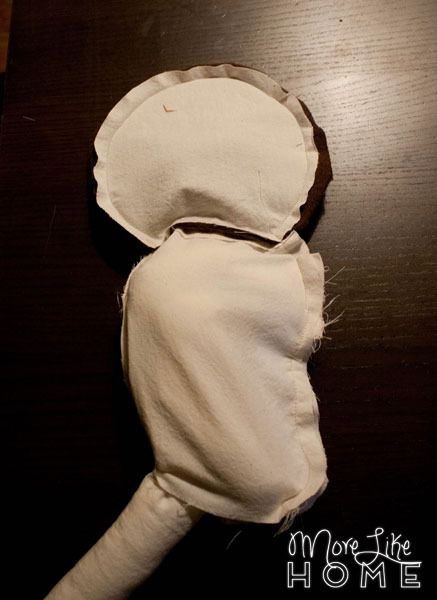
Use the opening to stuff the head and body of the doll. Tuck in the fabric at the opening and sew the opening closed.
The doll is done!
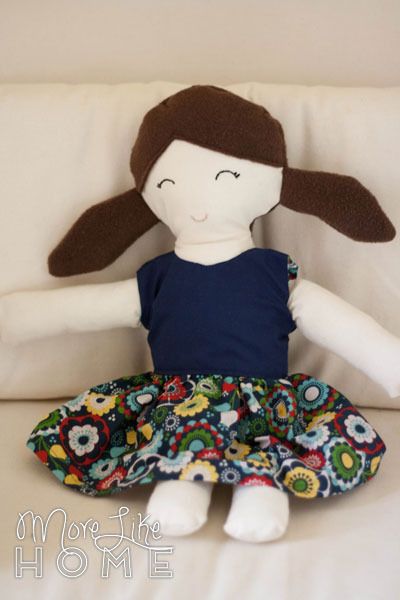
Now you just need a few dresses. The tank dress pattern is my favorite, but the long sleeve dress is super easy and versatile.
Here is Brother's finished doll and the dress he made. He was so proud of his work and so excited to give it to her!
These cute little ladies would also be perfect for Easter baskets! Try including a special Easter dress, or roll up all the outfits and put them in large Easter eggs to help fill the basket.
Have you ever made a rag doll? What are your favorite items to include in an Easter basket?

Thank you so much for sharing this. I've been wanting to incorporate more handwork into our preschool activities and this will be a fun project to work on together!
ReplyDeleteYou're welcome! Have fun!
DeleteJust completed a rag doll with her Minnie Mouse inspired dress along with a Minnie Mouse pillowcase dress for granddaughter Zoe's upcoming 3rd birthday. Can't begin to tell you how stinking cute the doll, dresses & Zoe are!!!
ReplyDeleteAwww, what a great gift! I bet Zoe loved that. :) I'd love to see it if you have any pictures! You can post on my facebook page or email me at MoreLikeHome (at) gmail (dot) com. :)
DeleteSuper cute! About how tall is the finished doll?
ReplyDeleteJust about 18". I'll add a note about that up in the tutorial! :)
DeleteSo I have used this tutorial three times now, and I absolutely love how sweet and simple it is. Even a sewing nincompoop like myself can use it. The first time I used it, I sewed a Virgin Mary doll for my 6yo who was having nightmares and loves the story of Jesus' mother. So I sewed your doll, basically the same as your pattern but without pigtails or braids, and then sewed a simple piece of cloth over her hair to make a veil. Amazingly, the simple addition of the doll stopped my daughters fear and nightmares almost immediately and she felt very comforted. Mary has not left her bed since I made her. God is good.
ReplyDeleteThen, just last night, I used your pattern to sew two Easter bunnies for my children! I used your pigtail pattern for -- you guessed it -- ears! I also sewed two circles of fabric, about the size of coffee cups, together, stuffed them, and then sewed them onto the backside of the bunny for tails. My children are just beside themselves this morning to play with them.
Thank you for such a wonderful pattern. We are having so much fun with it. I suspect my 3yo son will want a new doll sewn soon. I wonder what I'll make next! (I suspect a male doll with a beard will be the request. :P)
That is such a sweet story. What a great comfort for your daughter! :)
DeleteAnd I LOVE your Easter bunny idea! I'd love to see a photo of your bunnies (and share it up in the post if that would be okay with you). You can email me at morelikehome (at) gmail (dot) com or share photos on my facebook page. Thank you so much for the feedback, I'm glad you're enjoying the pattern!
I just printed off all the patterns. I wanted to make this for my granddaughter for her birthday! Thank you for sharing!
ReplyDeleteWhat a great gift! I hope she loved it! :)
DeleteHi! how do you make buns for hair?
ReplyDeleteHi! The easiest would be pigtail buns - just cut circles or ovals instead of the pigtail shape and attach them the same way I did the pigtails. Or you could do one a single bun on top in the same way. :)
DeleteDo you by chance have a boy clothes pattern? I made a boy doll for my son who asked for one but I'm struggling with the clothes. Thanks!
ReplyDeleteHi! I don't have a pattern for boys clothes, but that's a great idea. I wish I'd thought of that! I've used a basic doll clothes pattern from Joann Fabric to make pajamas for a stuffed animal before, so maybe that would work for this doll?
DeleteI just printed off the pattern and im not seeing hair on the back of the doll?
ReplyDeleteThere aren't any pictures either, did you just not put hair on the back?
Dang I didn't see the cut 1 fleece on the head part of the pattern...silly me
ReplyDeleteGlad you found it! I'd love to hear how it turns out! :)
DeleteI love this pattern so much!! I'm making my 4th one today!!
ReplyDeleteI have just made this doll- but have put her arms too low. How can I adjust the pattern- long sleeve to accommodate this?
ReplyDeleteThis is so sweet! Are you familiar with Operation Christmas Child shoe boxes? Do you think this doll would fit? I think it'd make a great addition!
ReplyDeleteYes! We love Operation Christmas Child! I think it would fit, it's a good size doll but it's very floppy and squishy so it should squeeze in there no problem. :)
DeleteI thought what a great idea to make a fabric rag doll for the Christmas shoe box project!
DeleteI have never made a rag doll before. I can sew,so just a matter of finding the right pattern. I prefer to use yarn for the hair. Thanks for all the good comments.
Where is the doll pattern to download
DeleteI made this doll for my great niece for Christmas. So cute! I did something wrong though because the arms ended up uneven. I will make another one for the gift. Thank you for the pattern and tutorial.
ReplyDelete