
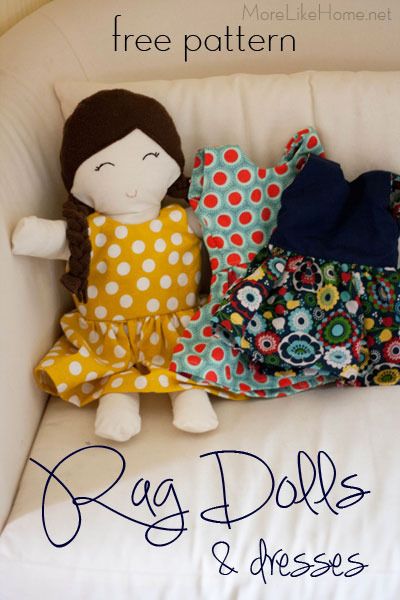
Here's what you need to get started on your rag doll wardrobe:
- 1/2 yard fabric
- thread
- velcro (or snaps or ribbons or buttons, but velcro will be easiest for the kids to use on their own)
- the pattern
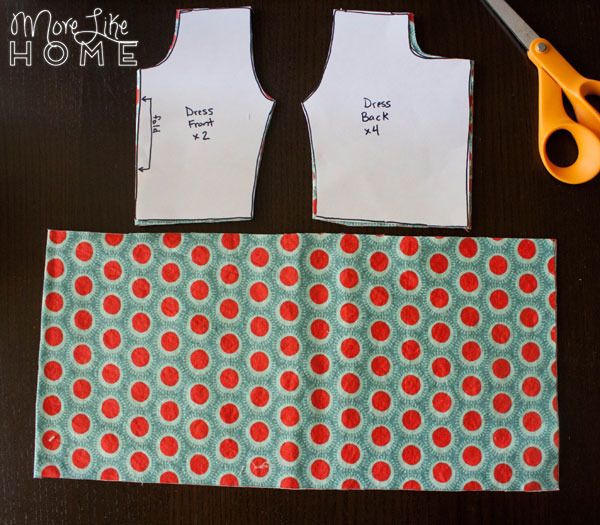
- 2 dress fronts
- 4 dress backs
- 1 skirt 7 x 30"
Lay a dress front right-side up, then lay two dress back pieces face-down on top of it, lining up the shoulders and sides. Sew across each shoulder with a 1/2" seam allowance. Repeat with the remaining front and back pieces.
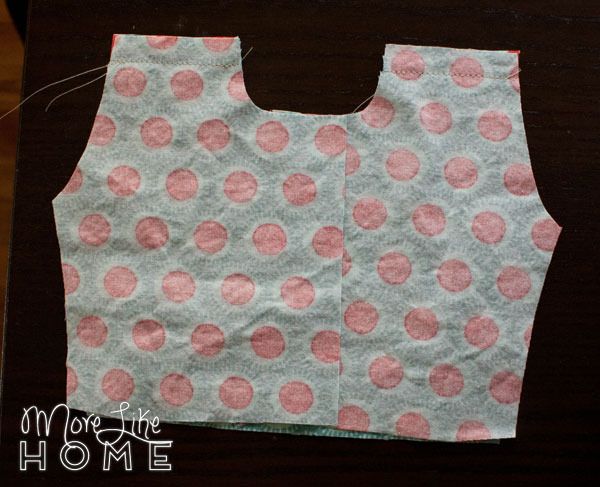
Open each front/back piece up and press the seams flat, then stack the two piece on top of each other with right sides together. Sew around the arm openings with 1/2" seam allowances. Then sew down one side of the back opening, around the neck opening, and up the other side of the back with a 1/2" seam allowance.
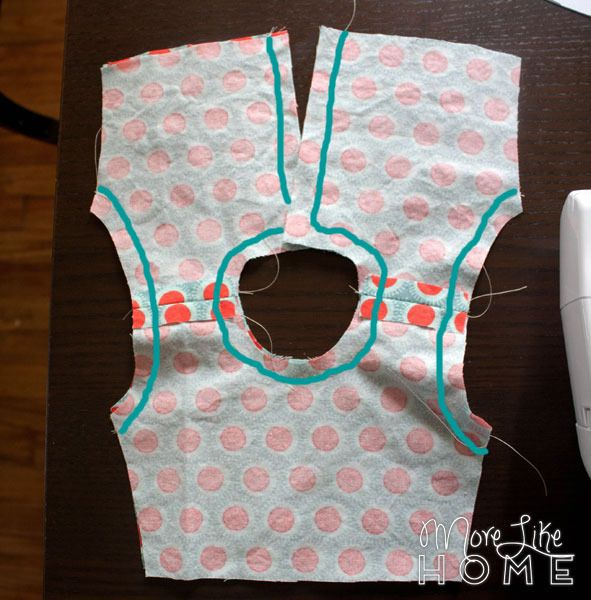
Clip the curves.

Turn the bodice right side out, then press around the seams to get them nice and sharp.

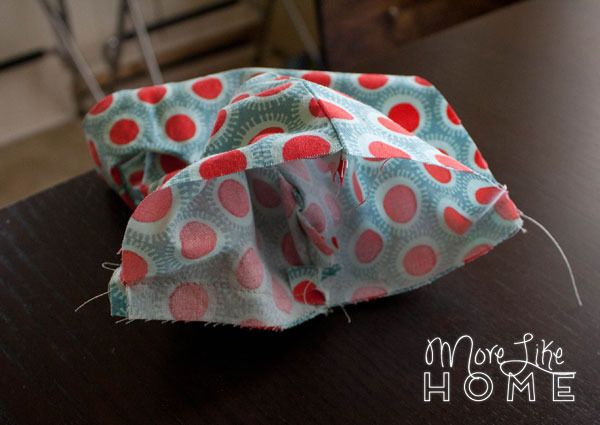
Fold the bodice with right sides out. See how the raw edges line up at the sides? Starting with the inside layers, pin them together with right sides together, working your way around to the outer layers, so they have right-sides together too. It will look super wonky, but hang in there.

Sew around the raw edge with at 1/2" seam allowance. See? Wonky.
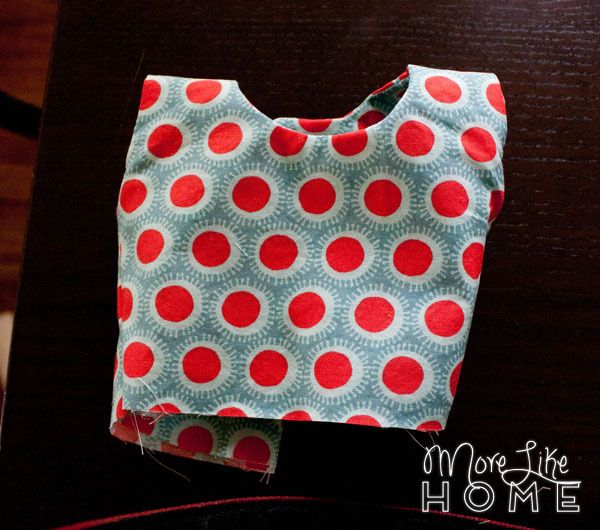
Turn it back right-side out and press it. You'll have a nice finished bodice. Now we can work on the skirt.
Fold the bottom edge under 1/4" and press, then 1/2" and press. Stitch along the folded edge.

Fold the skirt in half with right-sides together. Starting at the bottom edge sew along the short ends with a 3/4" seam allowance, but stop about about 2" from the top edge. Press the seam open, then press each raw edge of the seam under 1/4" and press again. Sew the seam allowance down along the folded edge. (see next pic)
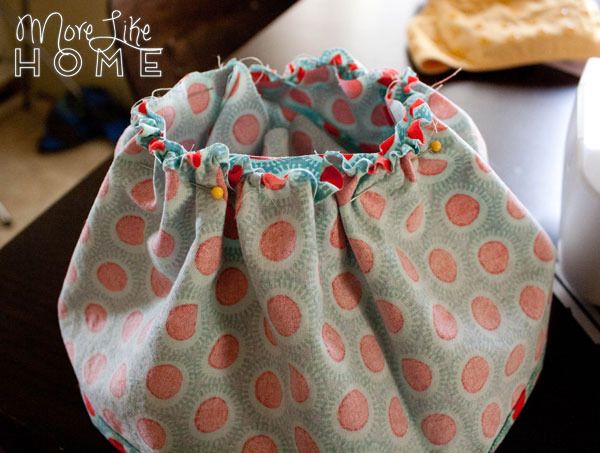
Baste around the top edge of the skirt with a 1/8" seam allowance.

Carefully pull the threads at the ends to gather the top of the skirt to the right length. You want it to match the length of the bodice.

Slip the bodice inside the skirt (with right sides together). Line up the opening at the back of the bodice with the opening on the skirt, and line up the bottom edge of the bodice with the gathered edge of the skirt. Pin them together, but make sure you're only pinning through the outer layer of the bodice. Sew around that edge with a 1/2" seam allowance being careful not to sew through the bodice lining.
Turn the dress right-side out. Tuck the edge of the bodice lining under and pin it down.

Sew along the bottom of the bodice lining.

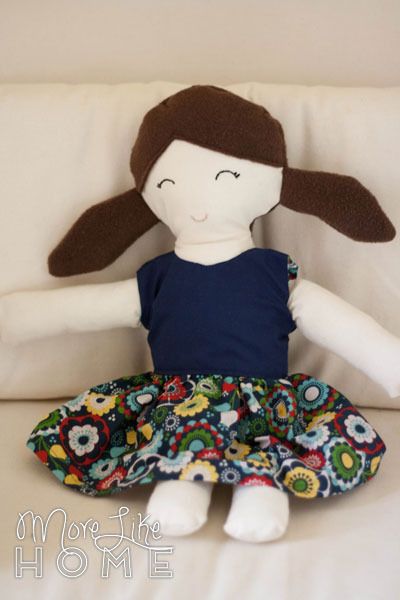
Now just attach some velcro, snaps, or a ribbon for tying the back of the dress closed. All done! I looove this dress and I'm especially digging the two-tone look. I've found that smaller scale prints like polka dots or small flowers work best for a dress this size.
Happy sewing! :)

I’m making charity dolls and ran across your pattern. It was a lovely pattern and the instructions were easy to follow. I made 3. Thanks so much for sharing. I was going to send you a photo but don’t see where I can do that.
ReplyDeleteWhere can i find the rag doll pattern
ReplyDeleteHi! The doll pattern is in this post:
Deletehttp://www.morelikehome.net/2016/03/rag-doll-tutorial.html
Your doll making posts are very helpful. Thank you for sharing.
ReplyDeleteYou are so welcome! Glad you enjoy them!
DeleteA little complicated for me. Do you do a you tube version of this outfit? I’m better when I can see it done live.
ReplyDelete