
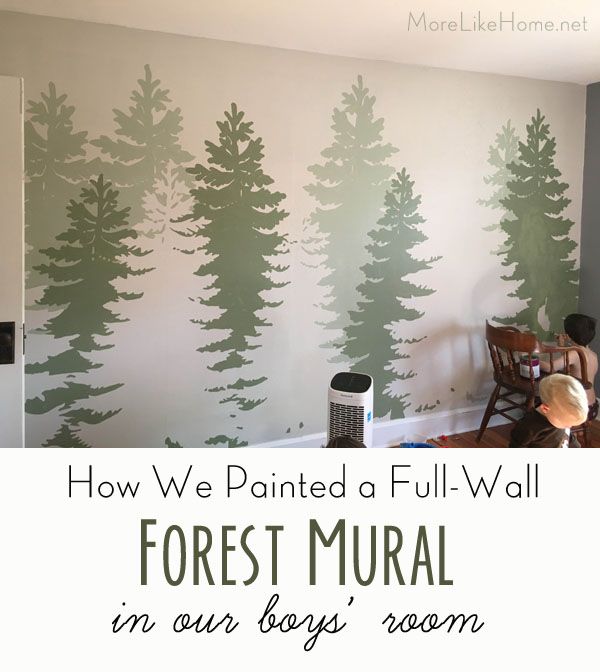
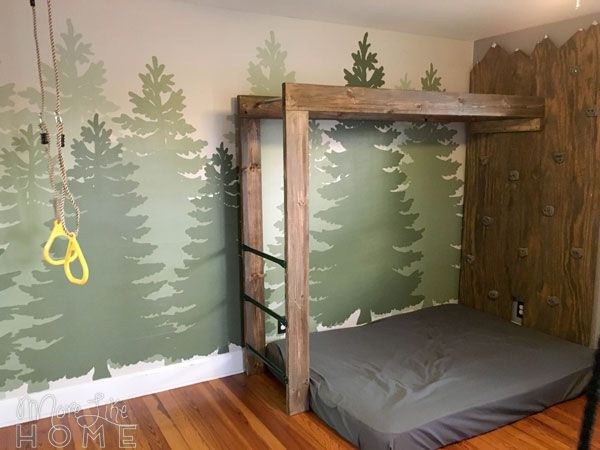
If you follow me on instagram, you've probably seen a few peeks of the surprise we put in the boys room for Christmas. Their camping theme room (or maybe more of a wilderness theme, there aren't actually any tents) is complete with a mountain peak climbing wall, monkey bars, and swings. A real winter adventure zone for all these little fellas! We'll be sharing the plans for all that soon, but today we're staring with how we painted the mural wall (which is easier than you might think).
Our first step was painting that wall. Their room is the same blue-ish gray that it was when we bought the house (we've barely touched the upstairs at all), and I knew it needed to be lighter for our forest wall to pop.
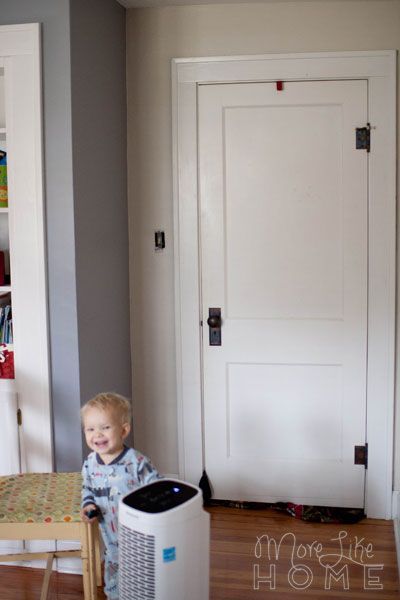
You can see the original color to the left of the door.
So I painted it this fancy custom shade of light gray that I like to call "Georgia's Gray." I made it myself with science and precision. I took a gallon of Fossil Gray paint left over from our living room and poured some into a half gallon of leftover white. And stirred them together to make a lighter gray. BOOM. Free paint. I mean fancy paint. We only painted this one wall for now (plus around the doorway because it was too hard not to paint that little space next to the door) but there's a slight debate in the household about whether we should paint the rest of walls. I will admit, now that it's done, the blue-gray is growing on me. But I'm withholding judgment until we get the rest of the room together.


As for the actual mural, I had a pretty specific style in mind - I wanted evergreen trees with a realistic shape (not a cartoon/triangle shaped tree), a simple design (nothing too busy), and I wanted the perspective to make sense (like you're walking along the trees, not looking down on treetops). I started by hunting on pinterest for inspiration, but gave up pretty quickly when I didn't find anything like what I had in mind. I started messing around in photoshop and ended up with this:
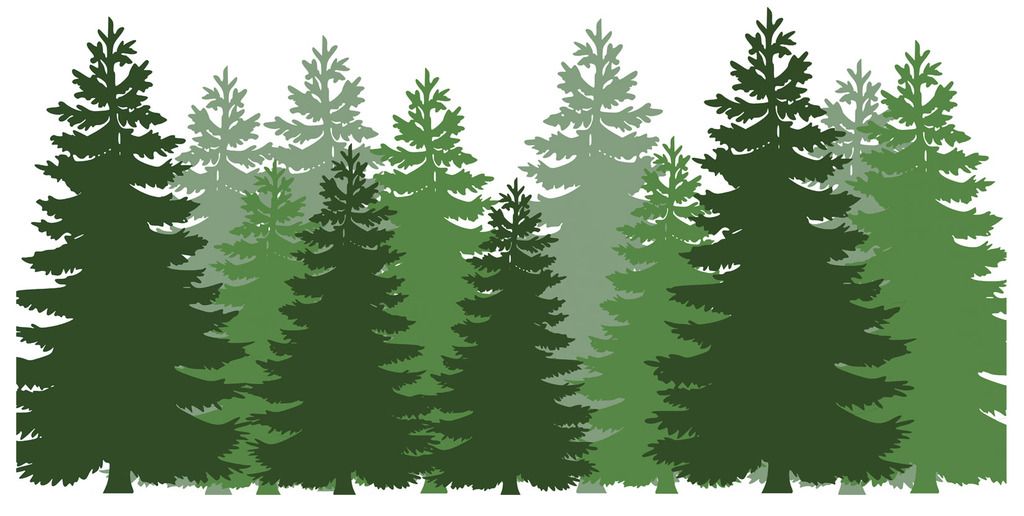
A realistic tree shape in a simple color blocking style, growing right up from the floor. Check, check, check!
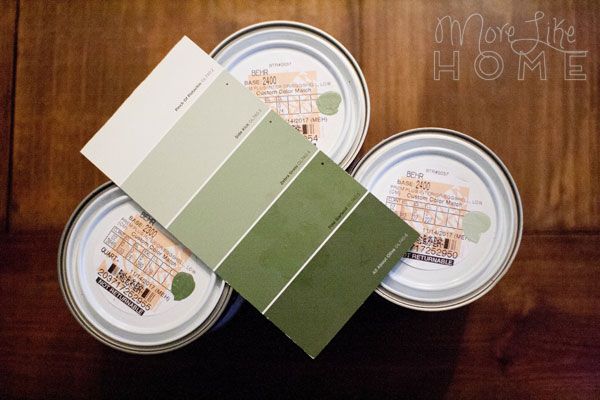
I wanted the trees to be a nice earthy green (nothing too bright), so I looked for a paint card with more muted greens and a gray undertone. Fortunately I've collected quite a pile of green paint cards in an attempt to color match a few greens in our house (bonus that it's my favorite color), and pretty quickly picked a winner. It helped having just my little stash to sort through instead of a whole store! The winner was a card from Home Depot, and I went with the three center tones on the card:
Side Kick (OL740.3)
Zebra Grass (OL740.4)
Pine Garland (OL740.5)
I bought a quart of each in an eggshell finish in Behr's zero VOC paint (no fumes in the boys' room, please!).
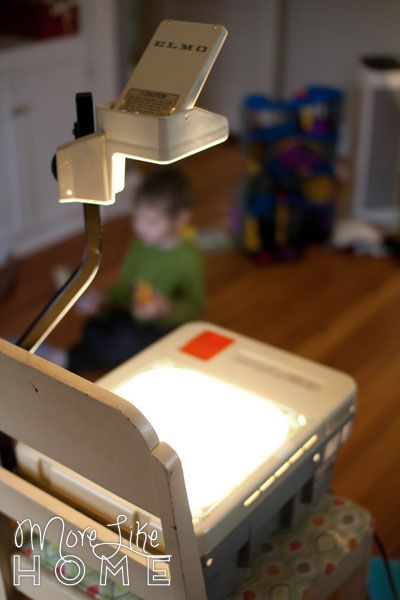
Now here's the only tricky part of this project: you need an overhead projector. I was able to borrow one from my mom (she got it at a rummage sale for $2!), but you may be able to rent one from your library or office supply store.
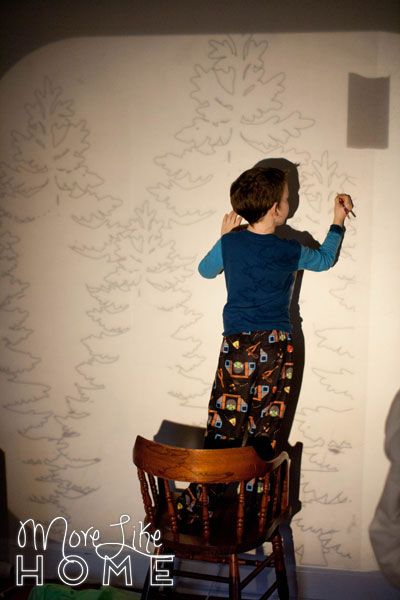
I made an outline picture of the trees that we could use to trace the design on the wall and printed them on transparency film. You can click the image below to print your own, but you'll have to play around with the print scale to get the right size for your space. I had to zoom in and split the image across three transparencies in order for them to project tall enough. FYI, you have to print transparencies with a laser printer (not inkjet) or have it printed at an office store.

We set up the projector and got to work! Here are a few tips we found helpful:
- put the projector on a chair
- tape the transparency in place so it won't get bumped
- scoot the chair each time you change transparencies (we used three)
- each time you switch transparencies, line it up the best you can but don't sweat if it's not perfect. Just connect the lines as you draw.
- bring the pencil sharpener. You're about to go through a whole lot of lead.
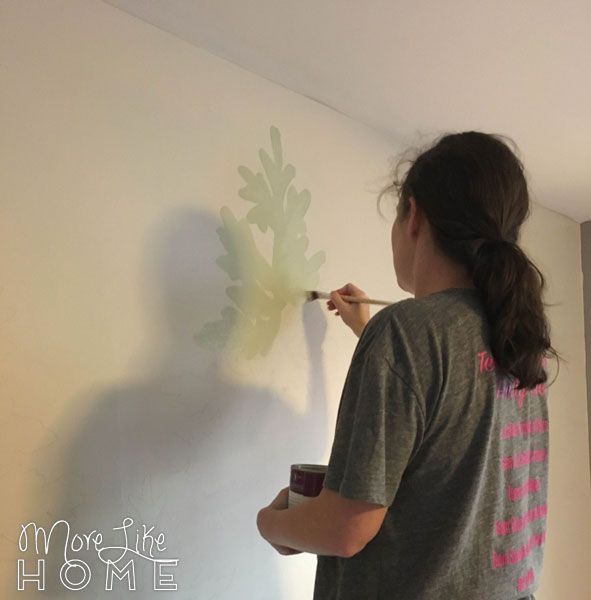
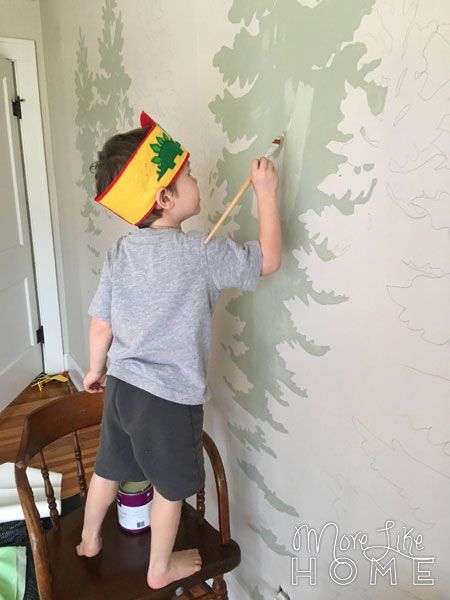
After that we called it a day. This took a while and I'll tell you know, my arm muscles obviously are not what they should be. But the next day, we were ready to start painting. I found it easiest to start with the back row of trees (it's easier to paint over any messy edges later than to fill in between the front trees without messing them up) so we opened our lightest green first.

I used a small artist brush (like this one) to paint the outline of each tree in the back row. (I referenced my photoshop image to make sure I painted the right ones!)
But the boys insisted I leave the centers for them to paint. And they did not let me forget it. So I painted in the edges pretty far and left openings in the very center that weren't close to the edges. Like at all. And I gave them the small paintbrush to fill it in with. Wonder of wonders, we wiped a few drips on the floor but they didn't get a single stroke outside the lines. And they felt like superstars.
Next up was the center row of trees with the medium green. I started by checking my photoshop image and marking each middle tree with a spot of paint:
And we filled them in the same way. I started with the edges...
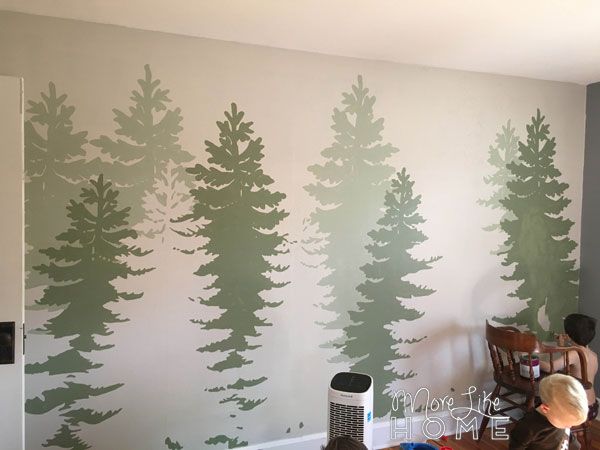
...and they filled in the middles.
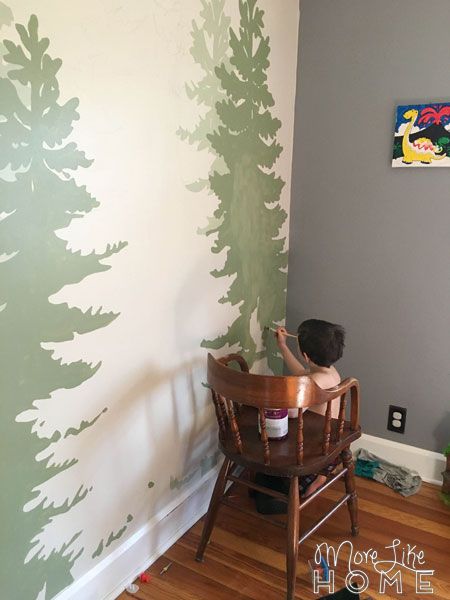
And finally we did the front row with the darkest green. For this row, I started with the edges again, then filled them in most of the way with a larger brush before I let the boys loose. We had a lot more tree to cover here. I used over half the quart of the dark green!
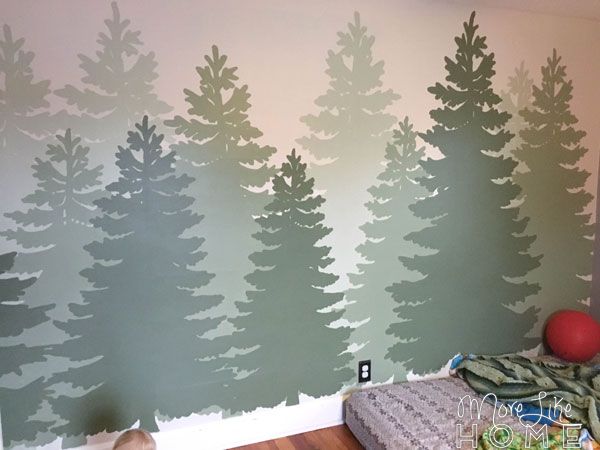
I had to do a touch-up second coat, especially on the darker colors, but it went quite a bit faster since the edges were good. Then we let it dry and air out a few days just to be safe (the boys slept in our guest room that week) and it was done!
P.S. I found a baby walrus:
A very thirsty baby walrus.

This mural ended up taking a few days to finish, but it was a pretty simple process and a fun project for the kids. We'd love to hear if you paint your own!
So what are you thoughts on murals? I'll tell you what, my eyes have been opened and I am fully on board!
Would you be willing to tell me how you blew up the transparency to fit the wall?
ReplyDeleteHi! I used photoshop and stretched the photo to completely fill the height of an 8.5 x 11" sheet. I had to split it across three pages to get all the width. If you don't have photoshop, you can do the same thing for free at canva.com. Another option is that most printers let you "scale" or "zoom" your image. You can just tell your printer to print it bigger! Hope that helps. :)
DeleteI'd love to see more but most of the pics don't show.
ReplyDeleteSorry to hear that! Hopefully they are working for you now. We got a few notes about the same problem across the site the same day! Technology is just crazy sometimes. :)
DeleteI love it. We are trying to do something similar for our sons 4th birthday. I can't find a decent forest image and wondered if you would be willing to share your one? I don't have photoshop to make my own.
ReplyDeleteMany thanks
Hi! Up in the post there is a black line drawing of the trees I used. If you click on the photo you can save the image and print it out. You'll need to mess around with the zoom to figure out what size will work with your projector and wall space. Good luck!
DeleteEeek!! Im so happy to find your blog on pinterest and see that someone has gone before me to do a project like this!! My sons both want camping bedrooms but refuse to share a room! For the older boy who visits and his room is a guest room when hes gone, im doing this mural! But we have wood panel walls so ill need to spackle the grooves first 😩. The younger boy is getting a starry night sky and dark tree tops around the lower part of the wall and a sheet made into an a-frame tent over his bed so it feels like hes in a treehouse in the tree canopy! His room is actually a closet 😂 a HUGE (about 12x15') walk in closet, and the bedroom is the playroom. Its in the finished attic so the roof lines are a little different (straight walls, then slanted then a flat ceiling) and hes so excited for it to feel like a big tree top fort!
ReplyDeleteOh my goodness, this all sounds amazing! I love to see the starry night sky when you're done. And I'm totally planning to add tents over our bunk beds, too! Love this all!!
DeleteHi! I’m going to try this in my sons room this week. Can you explain the scooting of the chair and what that was for? I’m not sure how I’m going about this yet but I’m going to try!!
ReplyDeleteWould you be willing to print and sell or sell your transfer sheets? I’m lost at how to make it 3 pages
ReplyDeleteI love this 😍 I wanna do the same forest, thank U for this DIY!!
ReplyDeleteJust did this in my son's room using the template provided. The mural ended up being roughly 7'X12'. The whole thing took a lot longer than I had anticipated, but turned out great. Thank you for sharing the outline. I never would have taken on this project without it.
ReplyDeleteHow long did this take? This would be awesome in my classroom
ReplyDeleteI know this is an old post but just wanted to thank you for such detailed instructions! I followed them exactly and did the same mural on my sons wall - it turned out so well! Thanks for taking the time to do this!
ReplyDeleteI love this. Where can I get a printable copy?
ReplyDeleteA quick note to thank you for this inspiration! We were volunteering at a raptor rehabilitation and education center this fall and after a remodel of an enclosure, we had a blank wall that just screamed out for a mural. A Pinterest search brought us many ideas but only having four days to complete the project helped narrow the ideas and your mural was perfect!. I cut one huge tree from heavy cardboard and just traced the front tree line then started again with pulling the pattern higher and tracing the background trees. It was a lot of ladder work but by the end of the second day, we had volunteers come in to start filling in the trees. Everyone was able to paint what they wanted and we were done and cleaned up on Friday afternoon! Birds went back into their new fancy enclosure on Saturday morning. These birds are unable to be released back into the wild and are actually educational birds. It’s a fun back drop for visitors to see. -Terri
ReplyDelete