
- Removable Bunk System (the backbone of our DIY camper!)
- DIY Insulated Window Shades
- DIY Window and Door Screens
- How we pack and organize our camper van
- Camping at Sleeping Bear Dunes + Petoskey

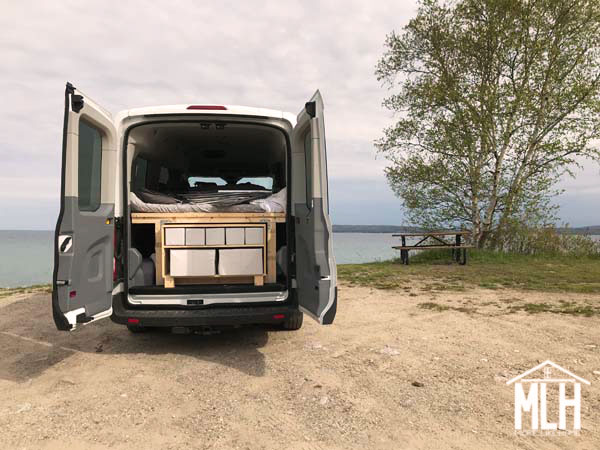
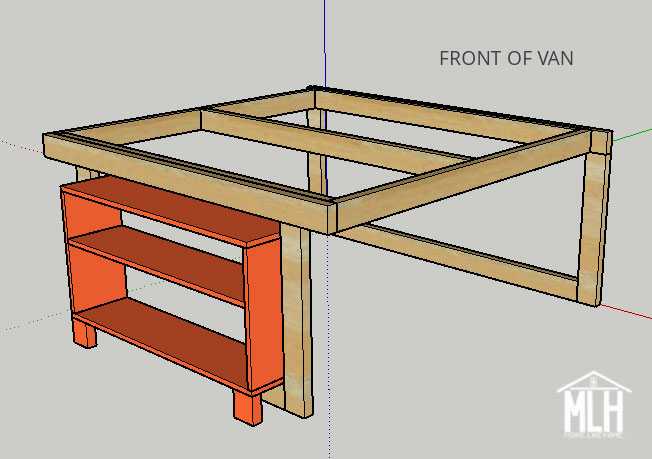
You can see the shelf inside the back doors in the photo above. This shelf is specifically designed to work with our removable bunk system. This van (Ford Transit T-350 XLT MR) is our full-time family vehicle so we definitely didn't want it to be a permanent camper. We designed removable bunks so we can put seats in for friends and family, take them out to haul furniture, and then pop in the bunk beds and go camping again. It's a hard working, versatile vehicle!
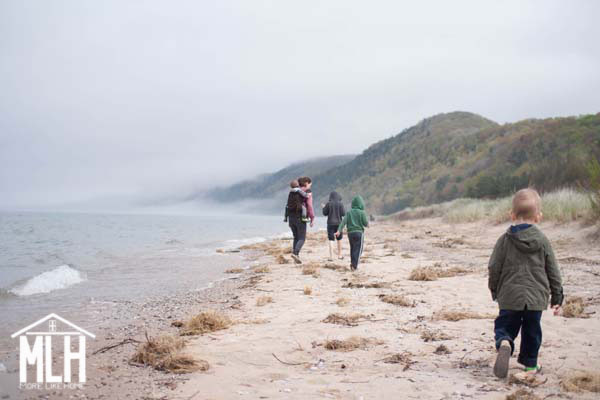
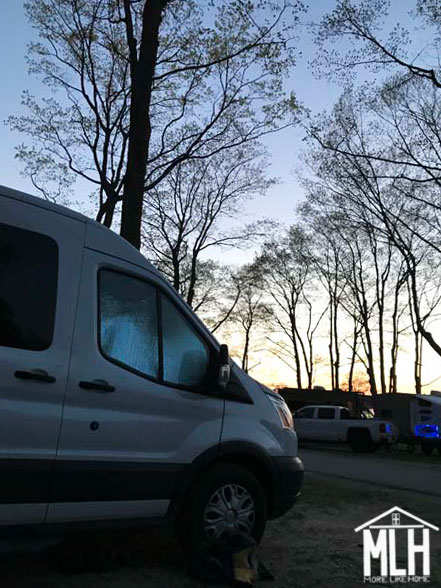
Esch Beach at Sleeping Bear Dunes, MI
With six people on the road, I
The separate bins have worked great for the boys getting themselves dressed in the mornings. It's so easy for them to find something to wear when all their clothes are in their own bin. So far we've been able to fit each of the boys clothes into four of the smaller bins on the top shelf. The fifth small bin holds hats and sunglasses. One large bin hold both Nathan and I's clothes, and the other large bin has been great for whatever extras we need to pack - swimsuits in the summer, or hoodies, hats, and gloves on this colder trip. We also pack a small clothes hamper for wet/dirty things that we set up in one of the carseats while we are parked.
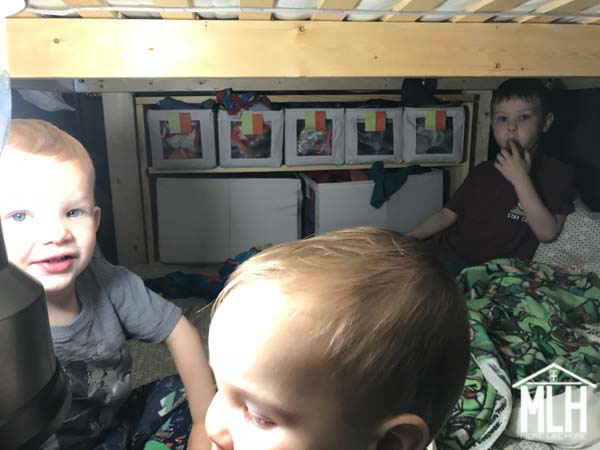
For the most part we just crawl into the bottom bunk to get what we need, but it's also super handy to have them right by the back door in a pinch. When they boys got wet or sandy, we could open the back doors, grab fresh clothes, and get them changed before they even set foot in the van!
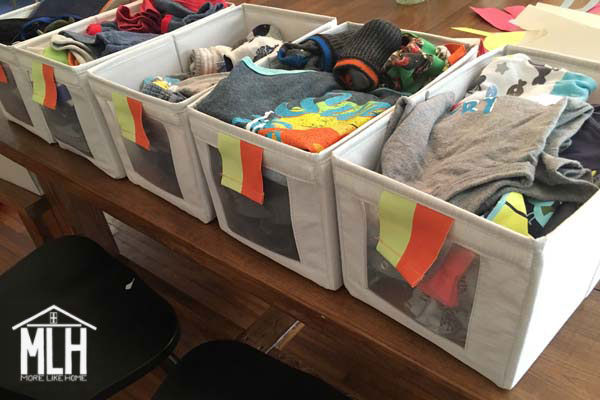
I might label the bins next time so the boys have an easier time identifying their own. Here are the bins from inside, under the bunk:
This is all you need to build your own shelf:
- 2 - 1x10s @ 8' long
- 16" scrap of 2x4
- 1 1/4" wood screws
- optional: Kreg jig with 1 1/4" pocket hole screws
- five small ANGELAGAN bins from Ikea (they come in sets of 3 - 7" x 10 3/4" x 6 3/4") $10/set
- two large ANGELEGAN bins from Ikea (9 3/4" x 17" x 9 3/4") $8/each
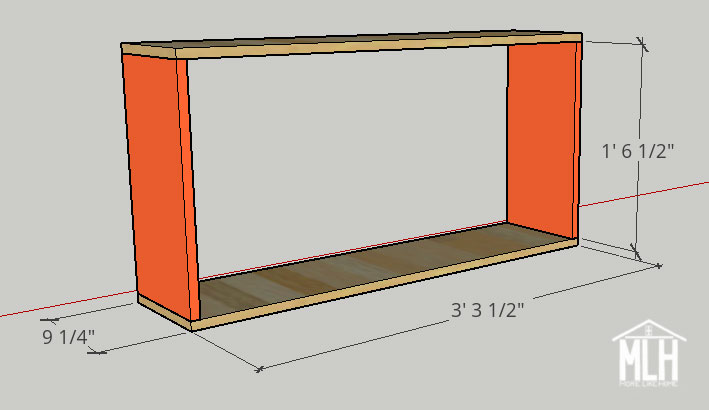
2 - 1x10 @ 39 1/2" (top/bottom)
2 - 1x10 @ 18 1/2" (sides)
1 - 1x10 @ 38" (shelf)
4 - 2x4 @ 4" (feet)
Start by attaching the sides to the top/bottom. Drill down through the top board and up through the bottom board into the ends of the side boards with 1 1/4" screws. If you have a Kreg Jig, make pocket holes along the top and bottom of the side boards and attach them to the top/bottom with 1 1/4" pocket hole screws.
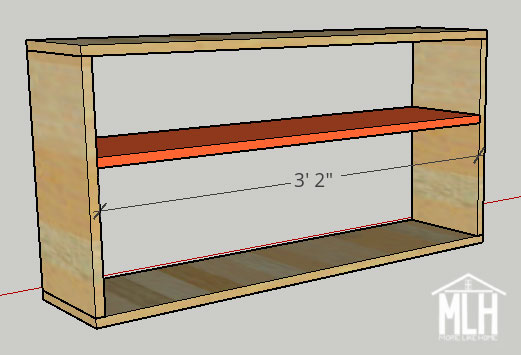
Install the shelf 7" below the top board (mark the height on both sides to make sure you keep it level). Drill through the side boards into the ends of the shelf with 1 1/4" wood screws. If you have a Kreg Jig, make pocket holes along both ends of the shelf and attach it with 1 1/4" pocket hole screws.
Attach a foot to each corner of the bottom. Drill down through the bottom shelf into the top of each foot with 1 1/4" wood screws.
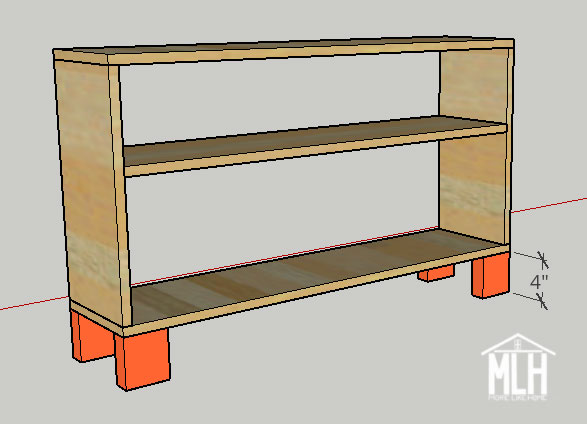
You can sand it down and paint or stain it if you'd like, but I didn't want to put that much time into it and just left it raw. NBD. It's just for camping, peeps.
When you're ready to go, the shelf tucks into the back opening of the bunk bed frame.
The shelf perfectly fits these bins from the Ikea children's section:
- five small ANGELAGAN bins from Ikea (7" x 10 3/4" x 6 3/4") $10/set of 3
- two large ANGELEGAN bins from Ikea (9 3/4" x 17" x 9 3/4") $8/each
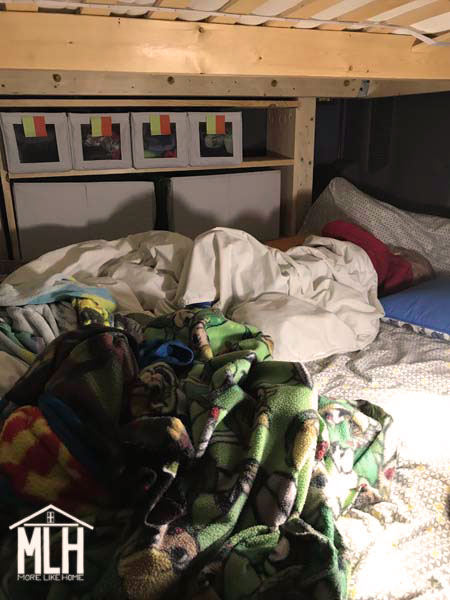
And here's a late sleeper on the top bunk (see how we built the bunk here):

So, how is the shelf working for us? Pretty good, so far!
A whole family of rain boots drying out by the tire - I'll probably pack rain boots for every camping trip from now on!
That's it for today! I'd love to hear how you handle clothes while you're camping. Any suggestions we should try?
No comments:
Post a Comment