

When I was collecting the frames I didn't worry about color because I knew I would paint them all to match anyway. I was just looking for frames that were in good condition, had a nice shape, and had glass (if they have a matte it's a bonus!). By shopping yard sales I saved a ton of money on this project. I didn't spend more than $0.50 per frame!

When it came down to painting the frames I knew I wanted either black or white so I looked at a few inspiration pictures to help me decide. Here were the main two I was looking at:
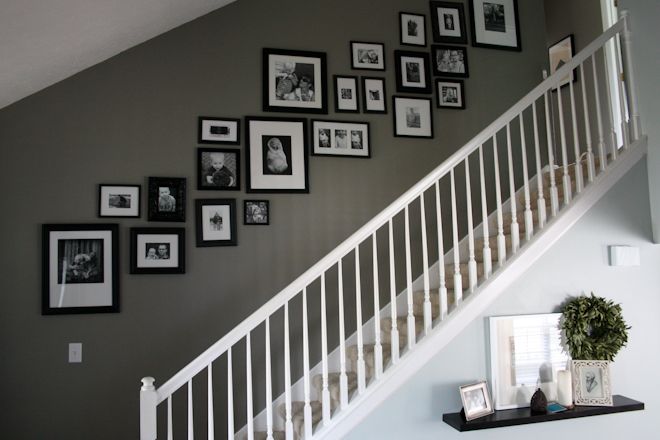

After looking at my inspiration pics, I decided on white for two main reasons.
- The black frames looked kind of dark and our living room doesn't get tons of light so I didn't want to make it any darker than it already was.
- I like that the white frame wall worked with color pictures in the frames. I want to be able to do some color, either in pictures, or other art in the frames, and I think black frames on top of that would be too busy.

Before I put any frames on the wall, I made a template of each one (using old magazine pages) so I could figure out my arrangement before I put any holes in the wall. I'm embarrassed to say my wall looked like this for a good month (after I decided on the layout) before I finally put up the frames that were already painted and waiting in the basement. I am ashamed. But then my husband had a long weekend off and I decided it was time! So while he entertained Baby B I got to work.

Before I took down the templates I measured the hardware on the back of each frame (some of the frames didn't have hanging hardware so I bought some kits at the dollar store). I measured in to the middle, and then down from the top of the frame to the bottom of the hardware. This told me exactly where each nail would need to go, so....

...I was able to mark this spot right onto the templates and go ahead and put my nails up. It was an easy way to get everything hung right where I wanted it. Then I just pulled the templates down and put my frames up on the nails.

Ta-da! This is just kind of a dry run without the glass or any pictures in them yet, but I like it already! That one little brown guy still needs painted, I just picked him up last weekend.

I'm already glad I decided to go with white for the frames. Nice and light.

I even like how they look empty. Maybe I'll leave them like this for a while.

I still have a way to go, but at least I've made some progress, right?

Hanging magazine pages as templates is brilliant and beats having the hubs follow me around to hold things up while I decide on placement. Never too old to learn.:)
ReplyDeleteLove the white frames! I have seen the magazine template before but I like that you added the nails while the templates were still up :)
ReplyDeleteThanks! I just learned that trick myself, and it worked great. A I'm glad you like the white! Now I just have to find something to put in them.... :)
ReplyDeleteI really like the frames up the stairwell.
ReplyDeleteMe too! We don't have an open staircase like that, but I'm working on a black & white gallery on the wall at the top of our stairs!
ReplyDelete