

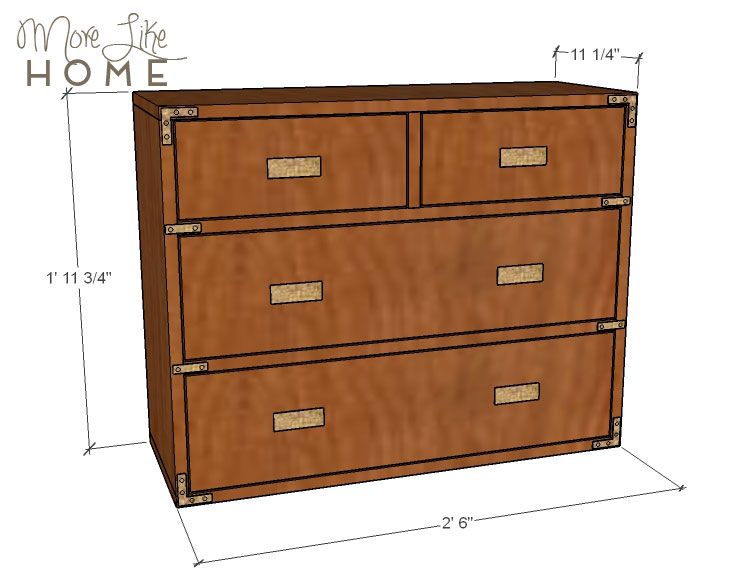
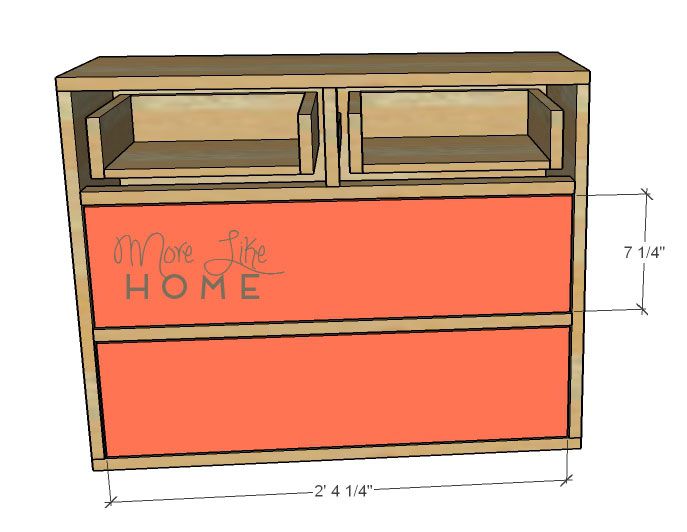
So let's go ahead and get started with our little chest of drawers. I love having drawers in my nightstand to keep things tidy, and this little guy is just perfect for the job. (I also have a whole series of nightstand plans to tickle your bedside fancy) This guy is a workhorse and a key design component in the space. Finished dimensions are for this piece are 30" wide x 23.75" high x 1.25" deep.
Read through all the instructions before you begin. Measure twice before you cut. Use glue in each step. Use appropriate safety gear. Be careful and have fun!
Shopping List:
- 1 - 1x12 @ 6'
- 1 - 1x12 @ 4'
- 1 - 1x2 @ 6'
- 1 - 1x4 @ 6'
- 2 - 1x6 @ 6'
- 1 - 1x8 @ 6'
- 1/2" plywood - you only need half a sheet for this project!
- 1 1/4" screws AND a couple 2" screws (if you don't have a Kreg Jig)
- OR a Kreg Jig + 1 1/4" pocket hole screws (optional, but makes a nicer finished project without holes to fill)
- finishing nails (optional)
- wood glue
- 6 drawer pulls
- 4 sets 10" full-extension side-mount drawer slides
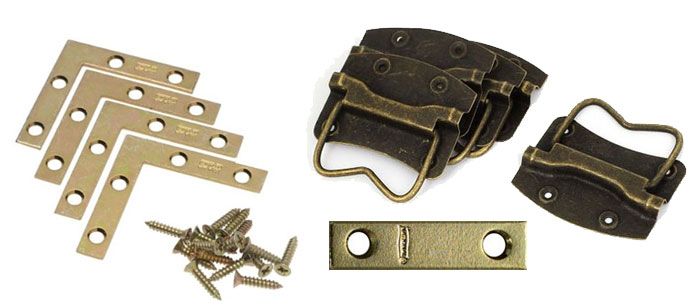
- 4 - 2" flat corner brackets
- 4 - 2" mending plates
- finishing supplies

Cut List:
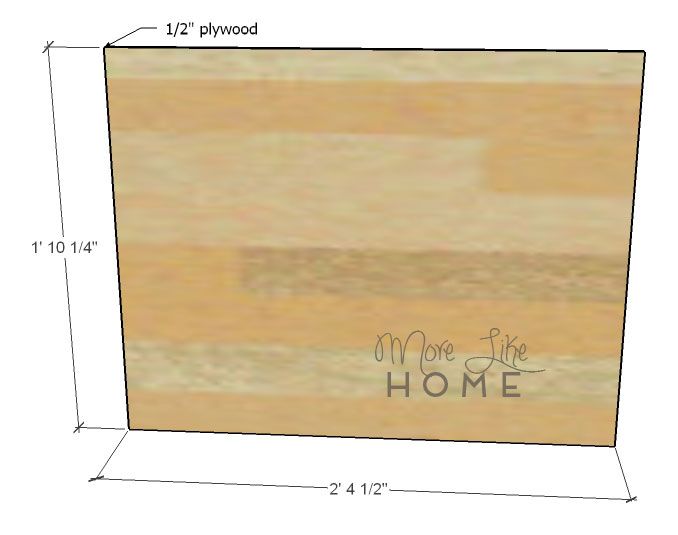
(A) 1 - 1/2" plywood @ 28 1/2" x 22 1/4" (back)
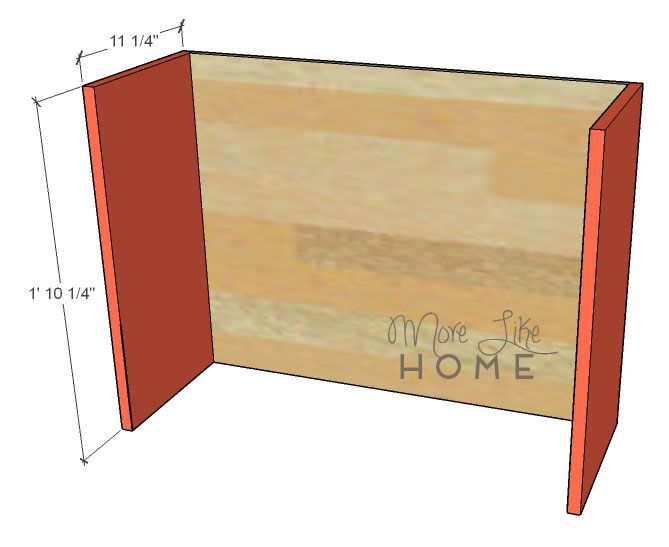
(B) 2 - 1x12 @ 22 1/4" (sides)
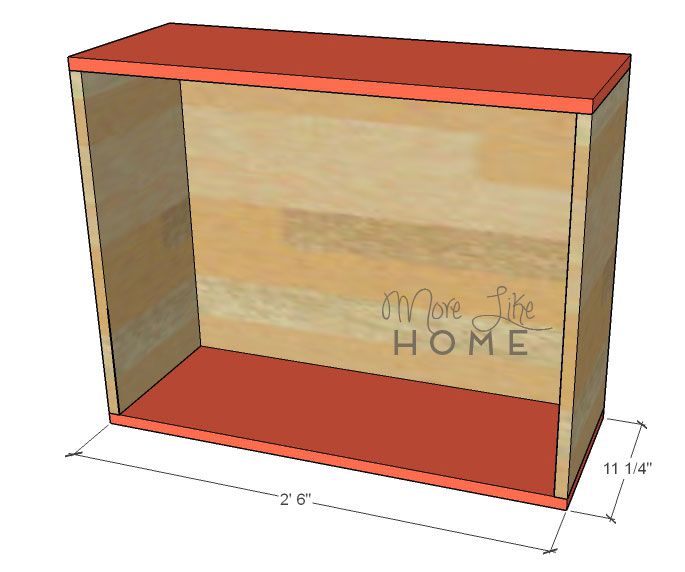
(C) 2 - 1x12 @ 30" (top/bottom)
(D) 2 - 1x2 @ 28 1/2" (drawer dividers)
(E) 1 - 1x2 @ 5 3/4" (vertical drawer divider)
(F) 1 - 1x2 @ 9 1/4" (slide support)
(G) 2 - 1/2" plywood @ 11 3/8 x 9 1/4" (small drawer bottom)
(H) 2 - 1x4 @ 11 3/8" (small drawer back)
(I) 4 - 1x4 @ 10" (small drawer sides)
(J) 2 - 1/2" plywood @ 26 x 9 1/4" (large drawer bottom)
(K) 2 - 1x6 @ 26" (large drawer back)
(L) 4 - 1x6 @ 10" (large drawer sides)
(M) 2 - 1x6 @ 13 5/8" (small drawer front)
(N) 2 - 1x8 @ 28 1/4" (large drawer front)
Cut a piece of plywood 28 1/2" x 22 1/4" for the back (A).
Set the back between the two side pieces (B) and attach them by drilling through the sides into the edges of the back board (or use a Kreg Jig to attach them with no visible holes!).
Attach the top board (C) across the top of the sides and back. Drill down through the top into the sides and back (or use a Kreg Jig). Then attach the bottom board across the bottom.
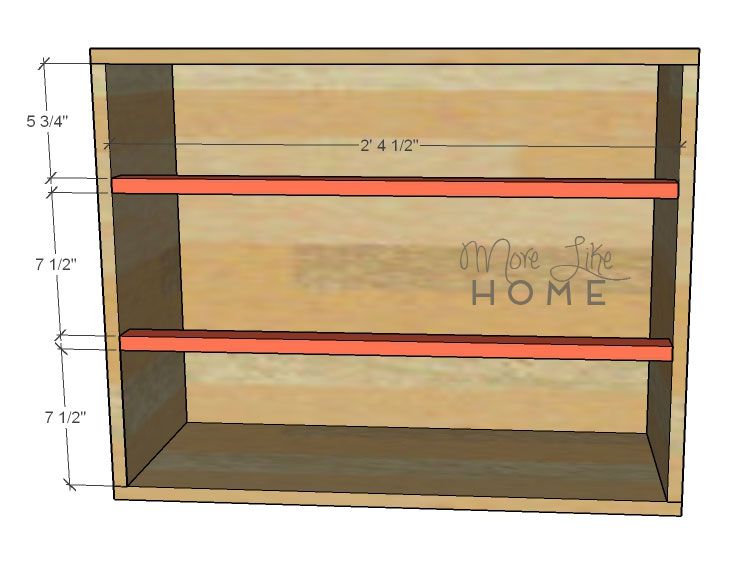
Install the drawer dividers (D) to separate the drawer openings. The first should be set down 5 3/4" from the top, and the second should be down 7 1/2" from the first divider (leaving a 7 1/2" space at the bottom). Attach them by drilling through the sides into the ends of the dividers (or use the Kreg Jig).
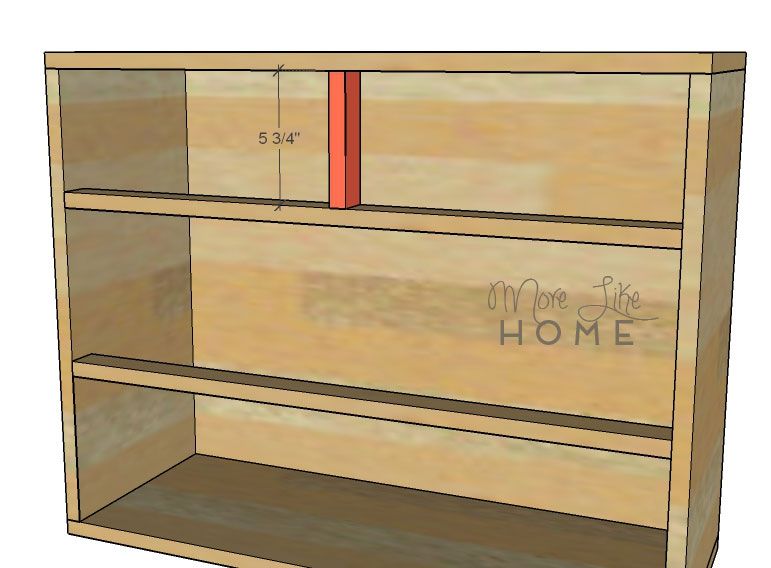
Next up is the vertical drawer divider (E). It should be centered across the top opening with 13 7/8" of space on either side. Attach it the same way you installed the long drawer dividers.
Now you can install the drawer slide support (F). It should run between the vertical divider and the back board. Make sure the back end is centered and it runs straight or you'll have a terrible time installing the drawer slides later! Set it at the appropriate height for your type of drawer slides. You can drill through the back and divider into the ends of the support, or use your handy dandy Kreg.
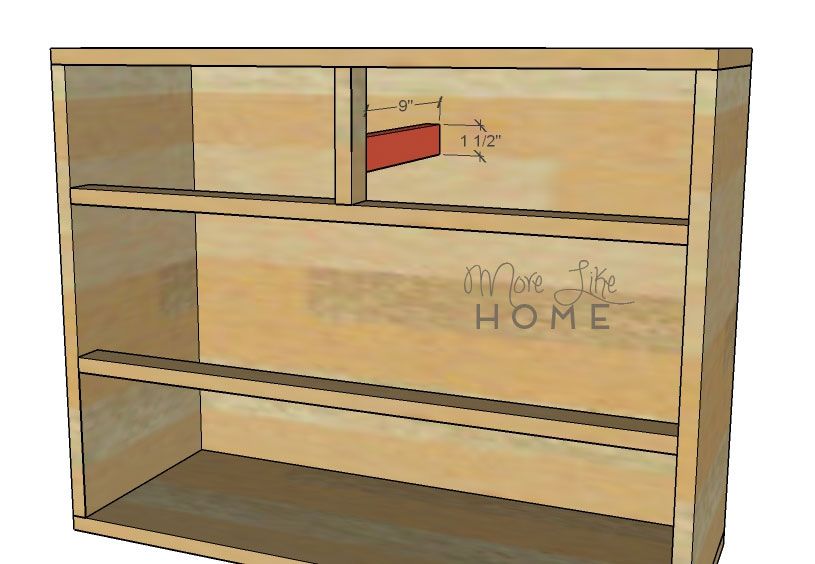
Sorry, this slide support (F) is actually 9 1/4" long. Not the 9" that is shown.
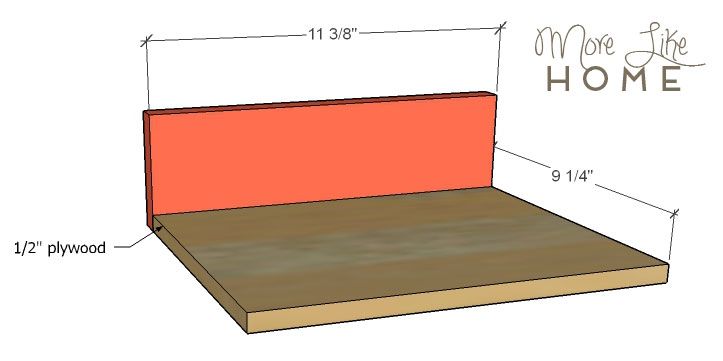
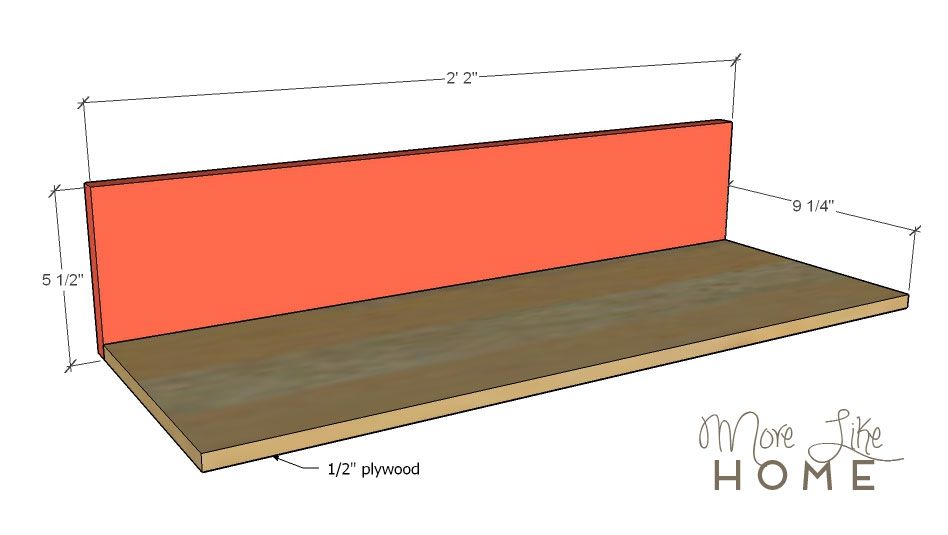
Now you can start assembling your drawers. Start by double checking the width of your drawer openings. You want your drawer boxes to end up 1" narrower than the openings (leaving 1/2" space on either side for the drawer slides). We're making 12 7/8" boxes to fit our 13 7/8" openings. If your opening is off, adjust your boxes accordingly! Okay, now attach the small drawer back (H) to the small drawer bottom (G). Drill through the drawer back into the back edge of the drawer bottom (or Kreg it).
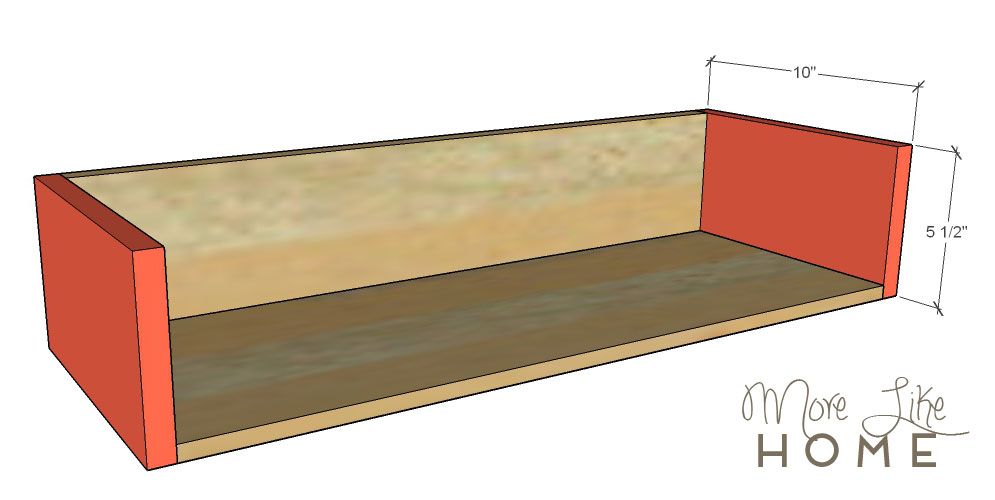
Attach the small drawer sides (I) by drilling through the sides into the drawer back and bottom. Repeat to build the second small drawer box.

Next build your larger drawer boxes in the same way. Attach the drawer back (K) to the drawer bottom (J) by drilling through the back into the edge of the bottom.
Attach the large drawer sides (L) by drilling through the sides into the back and bottom. Repeat for the second large drawer.
Follow the instructions on your drawer slides to install your drawer boxes. If you used 1/2" plywood the drawers should sit right against the back board, and the drawer box should be recessed 3/4" from the face of the chest (so your drawer fronts will end up flush).
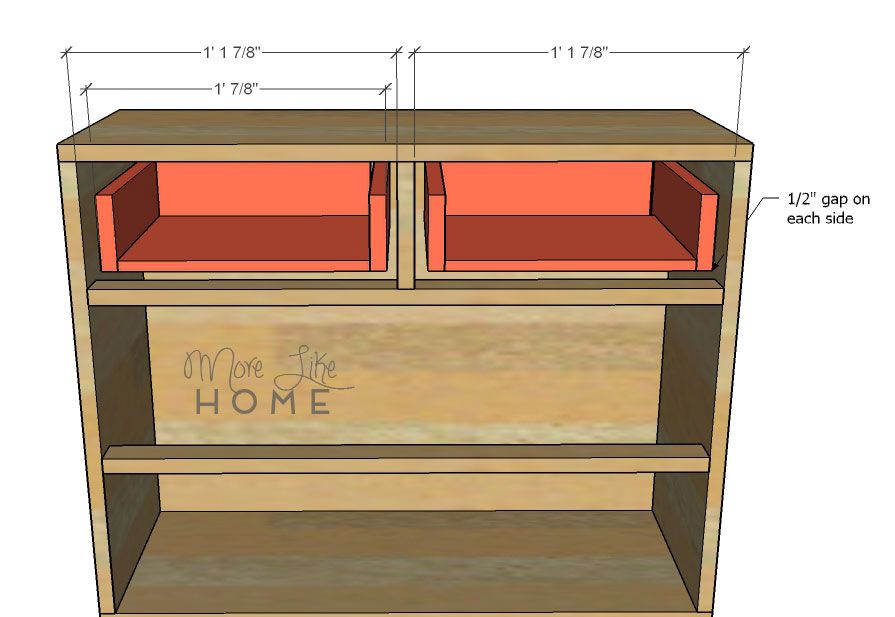
Install the large drawer boxes, too.

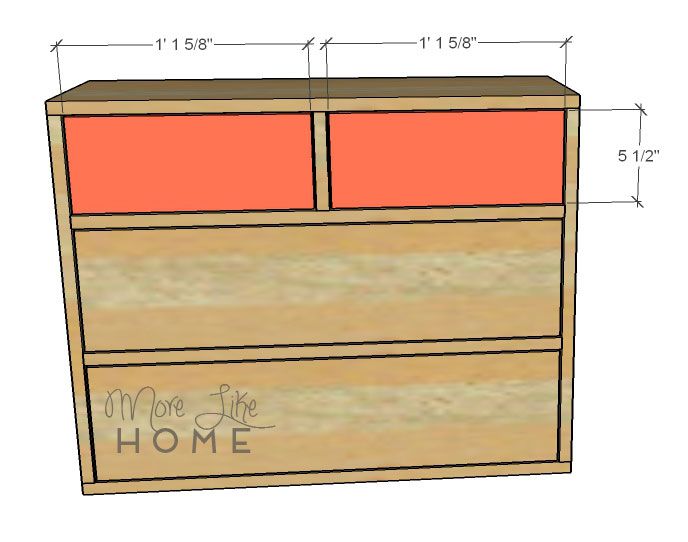
Next are the drawer fronts. With the drawer boxes in place, center a drawer front over each drawer box (with a 1/8" gap all around). Use screws or finishing nails (and glue!) to attach the drawer front to the drawer box (remember the drawer sides are set in 1/2" from the sides of the drawer front!). Our favorite method is to use a couple finishing nails to get them in place, then pull the drawers out and add a couple Kreg Jig screws inside to make it really strong without leaving any big screw holes in the front.
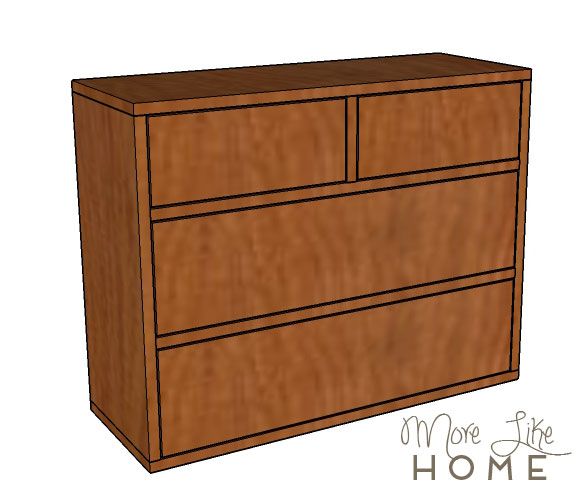
Fill any holes with wood filler (if you used a Kreg Jig you can hide all the holes inside!). Sand everything down really well, starting with a coarse paper and working up to a finer paper. Don't skimp on the sanding. It makes a huge impact in the final products, and is the difference between a rough or professional looking finish. Then finish with any paint or stain and polyurethane you like. I'd try something like Minwax's Early American to get the look in the original photo.
But you're not quite done yet. The details really make this chest so you'll need just a few pieces of hardware to finish it off right. Add a flat corner brace in each corner, and a mending plate on each end of the long drawer dividers. Don't forget the drawer pulls (I'm liking these right now).
NOW you're finished.
Now that you've built the captain's chest, you just need a few more key pieces to really complete this style. Ready? Let's get the look!
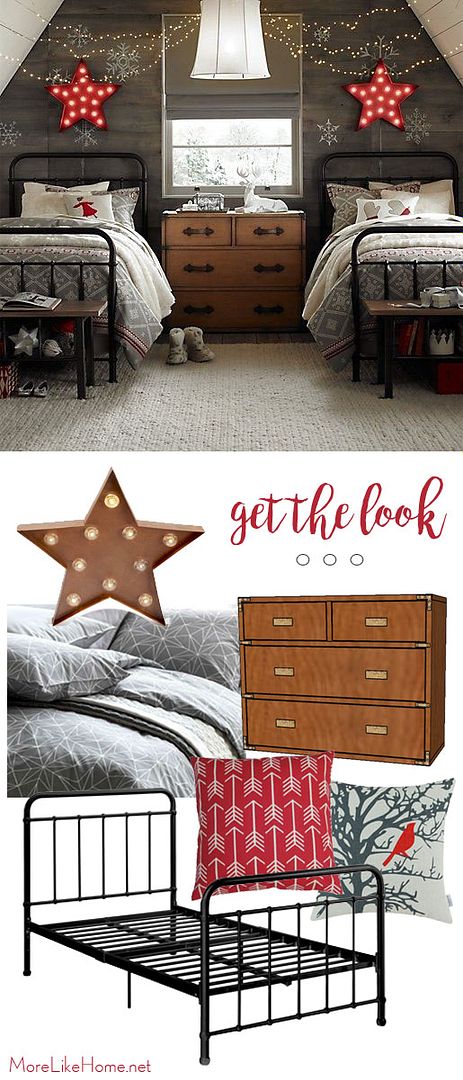
One of my favorite features in this room are the marquee star lights! You can get a similar look by giving these metal marquee stars a coat of red spray paint (or leave them gold for a more neutral design). At $20/each it's one of the better deals I came across! You can set the backdrop by mounting a weathered gray laminate flooring on the wall. Try something like this or watch your local home improvement stores for a discounted remnant if you don't need a lot. A pair of black metal bed frames makes this room perfect for siblings or guests! Make the beds up with peaceful gray and white duvets, but add a punch of red with throw pillows like this or this.
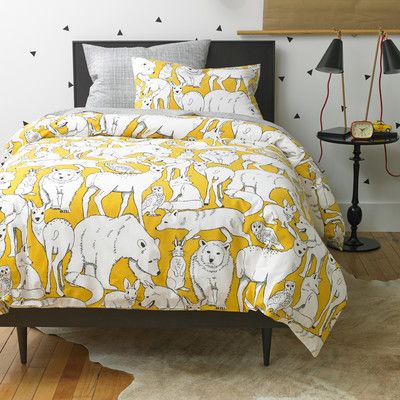
P.S. Yesterday I came across this yellow duvet on Wayfair and couldn't not show it to you guys. It would be a great alternative for adding a color pop to the space instead of using the red stars an pillows. Plus the bears and deer would be a sweet fit in this rusti-chic design.
What have you guys been hacking lately? And what's your favorite color to pop in a neutral space?
No comments:
Post a Comment