Showing posts with label basement. Show all posts

Sunday, March 8

Nightstands Day 5 - Floating Bookshelf


Welcome back! It's day five of our nightstand series and we're building something a little different today! You can see the entire series here. Today's plan is an add-on project that would go great with any nightstand in our series. It's a simple floating bookshelf that you can mount above the nightstand to keep your tabletop neat and clutter-free! The sides work as built-in bookends to keep your books where you want them.

I spotted a metal version of this shelf alongside yesterday's nightstand in the 2015 Ikea Catalog. Again, their price isn't bad, but DIY will cost just a few dollars AND gives you the option to customize the size of your shelf!

Shopping List:
1  -  1x6  @  4'
thin plywood scraps OR a set of braces
wood filler
wood glue
1 1/4" screws
2" screws
Kreg Jig with 1 1/4" pocket screws (optional)

Finished dimensions per shelf are 16 1/2" wide x 3" tall x 5 1/2" deep. Overall height depends on how far apart you mount them. :)


Monday, September 29

Basement Laundry Room

I have an itty bitty laundry board on pinterest. It only has four pins on it. Why only four? Because they so perfectly pin down just exactly what I dream of for a laundry room. This is my single favorite laundry room in all of time and space (and I'm pretty sure it was one of the very first things I pinned):

 image via pinterest

The whiteness, the wood countertops, the plants, the natural light, the oversize pendants... this is my laundry room love. Followed by this close second (yep. basically exactly the same thing):

 image via pinterest

But let's hop out of pinterest for a moment and into my actual laundry room dungeon basement.

Friday, August 9

It's About Time... for New Basement Curtains

There are quite a few things in the basement that we still haven't touched since we moved in almost 3 years ago. But we finally checked curtains off that list! And let me tell you, it was time. Not only were they outdated, but they were pretty gross and just kind of thrown up there. Take this guy for example. The curtains are hanging on a piece of elastic that's tied to a few nails. Nice. Not to mention some of the curtains were shorter and only covered half the window so people could totally see in when I did laundry in my underwear. No. I was not deterred. But I'm glad to have full coverage now.


The rest were hung on springs! Seriously, long springs stretched across the window. They at least hung straighter. But still they weren't too pretty and I'm not sure if these had even been touched since the house was built. They were pretty nasty. They came down and went straight to the garbage. Then after a good sill-vacuuming and window-washing, I was ready to get some new curtains up there!


I finally got motivated to check it off our list when I stumbled across a pretty set of sheets in the Wal-Mart clearance for only $5. Yeah, I can work with that.

Saturday, April 6

Basement Planning Update

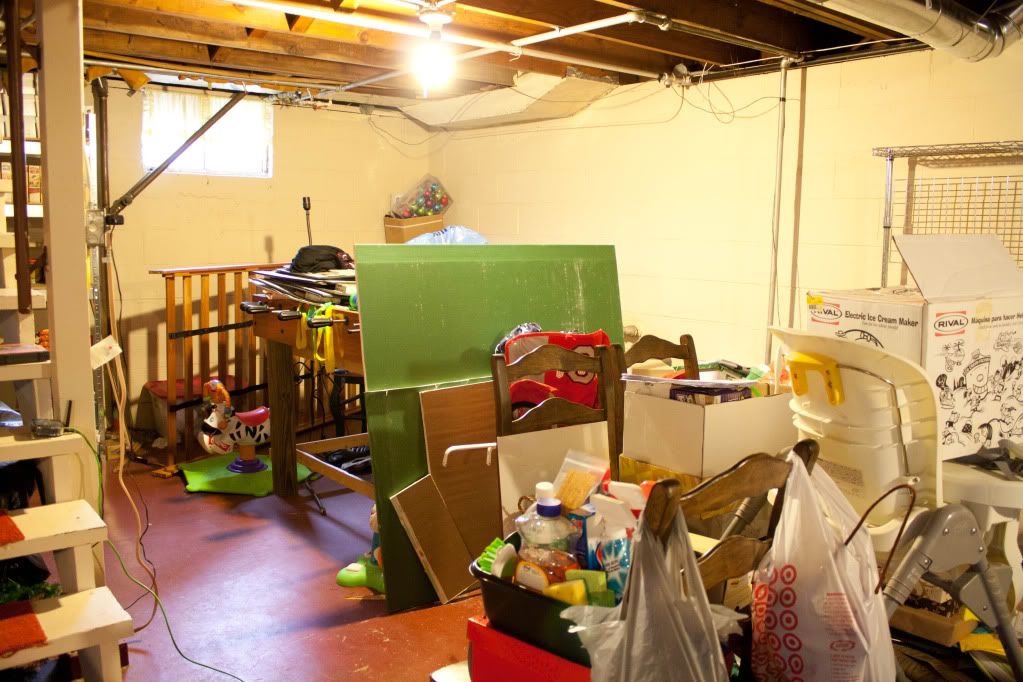
You guys know we tend to hop around from project to project. And we're at the point in the cycle when we start thinking about the basement again! What's that? You forgot we even had a basement? Yeah... it's been a while since we've touched anything down there. Partly because we decided to focus on some of the big kitchen projects first, and partly because winter hit and we couldn't go out to use the saws and what-not. But now that spring is on the horizon, we're ready to jump back in. Let's peek at where we left off:

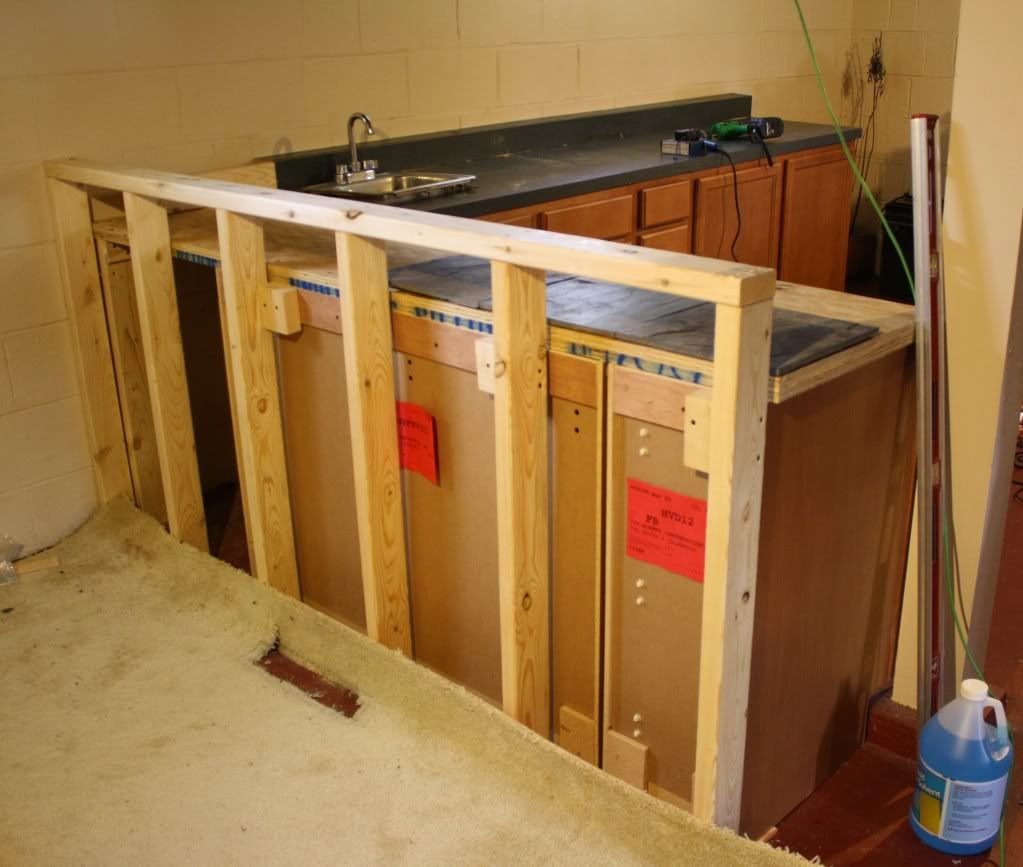
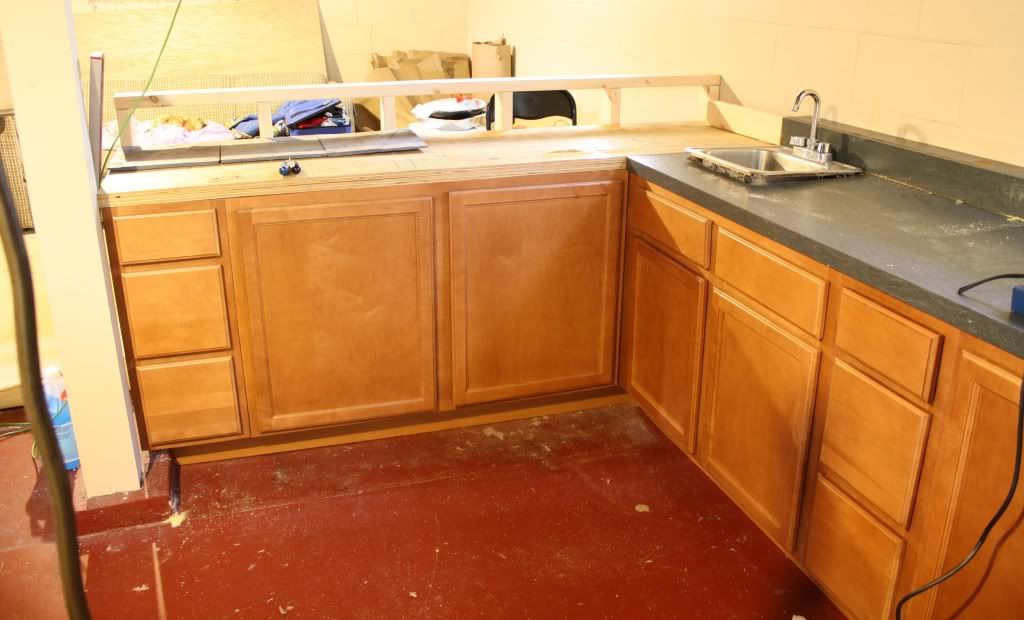
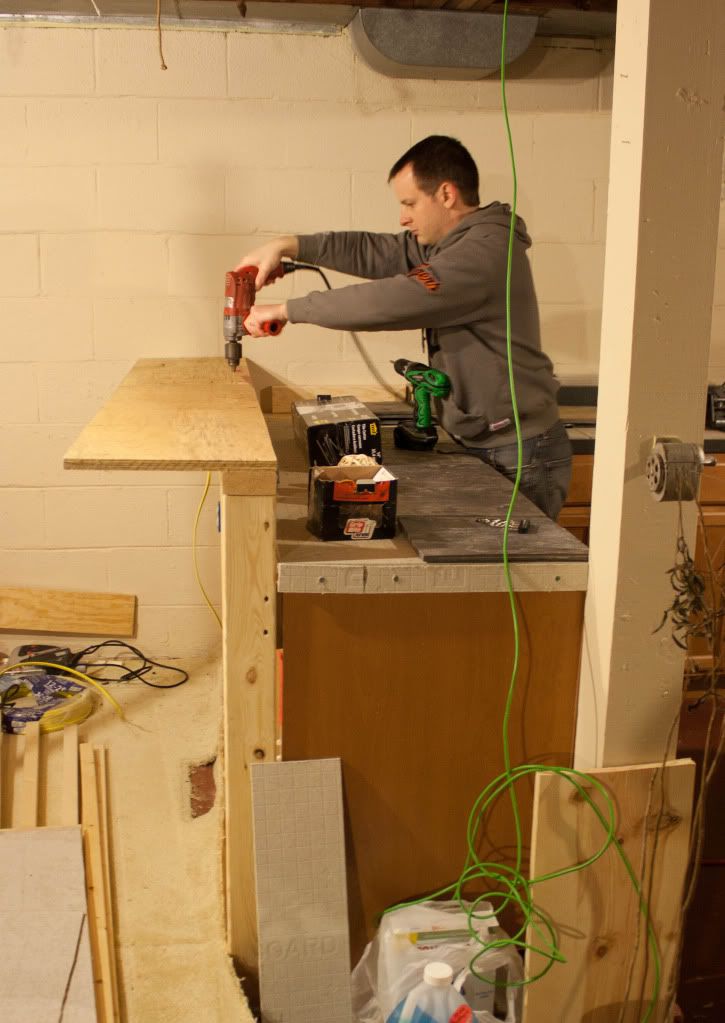
Last year we started working on our plans for the bar area. We got as far as installing cabinets, running water lines to the sink, and we even have the countertop bases all in place now. But that's where things slowed down.


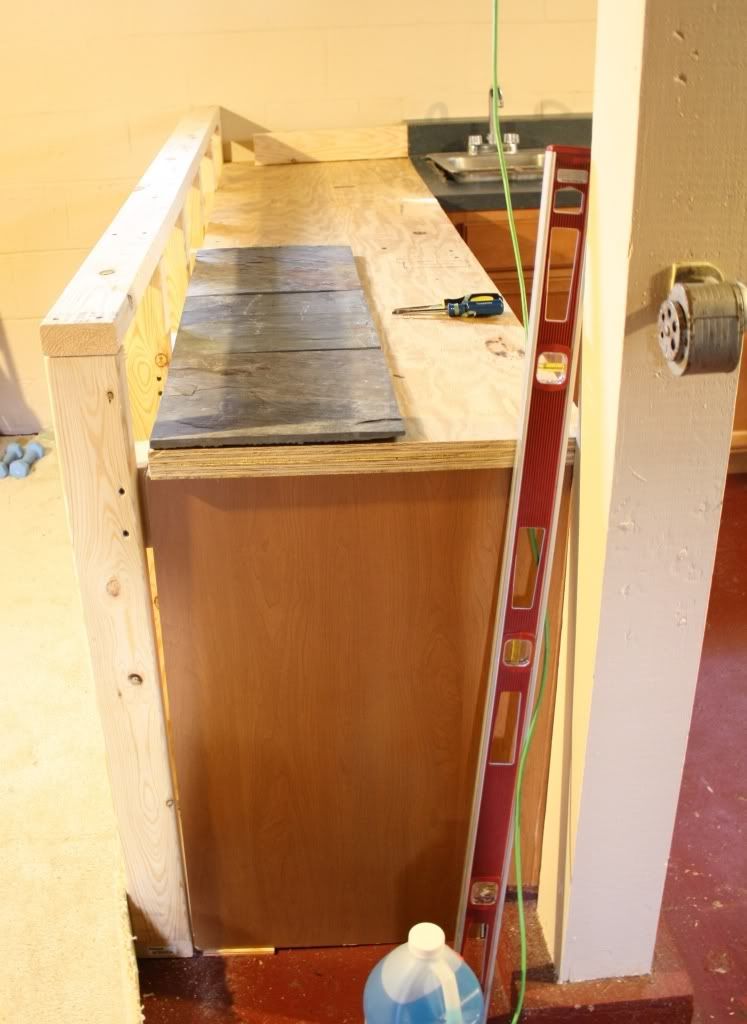
Our next step is installing the tile countertop (we already have all the slate and grout ready to go!) but we're missing one important thing - a wet saw. By the time we started thinking about tiling it was already too cold to think about sitting outside and getting wet anyway, but we did a little research and found out Menards rents them out (I think it was $30 for 3 hours, but that was last year so we'll have to check again). And let's be honest, that's not a lot of time pull off a whole countertop and we don't want to pay an extra 30 if we can avoid it. So we're going to try to do some planning ahead of time and see just how many tiles we'll have to cut. That way as soon as the weather is warm enough we can git 'er done. I'd really, 
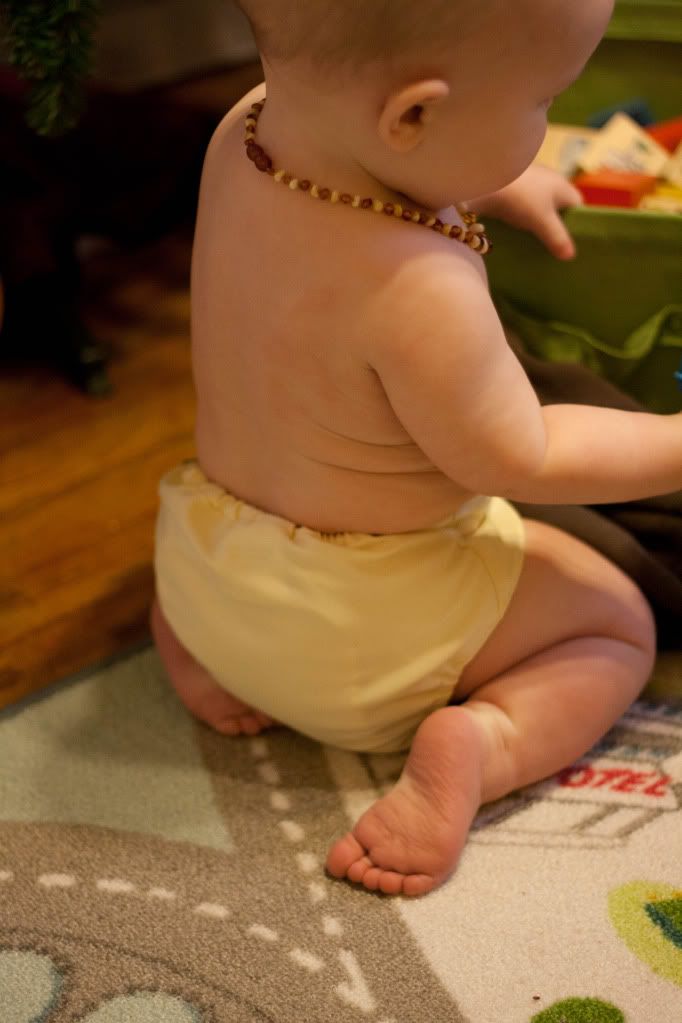
really like to get it finished before #2 makes an appearance. We'll see. :)
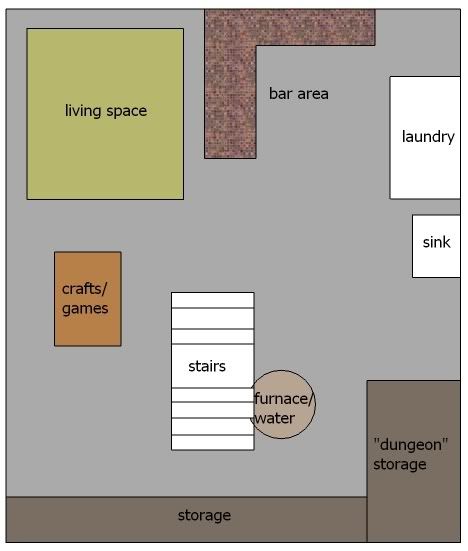
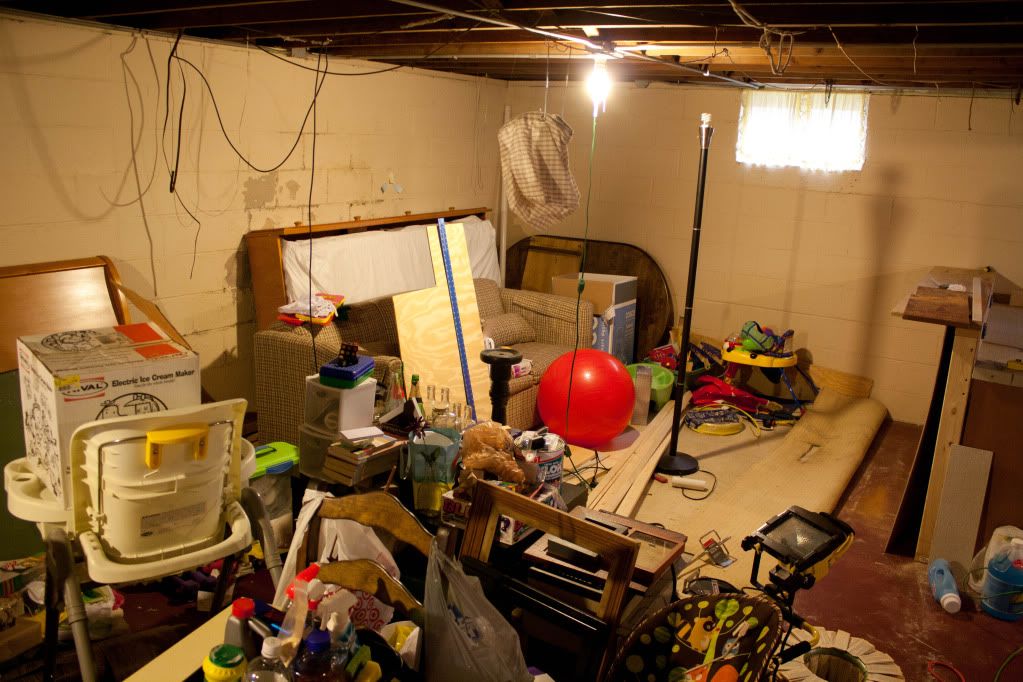
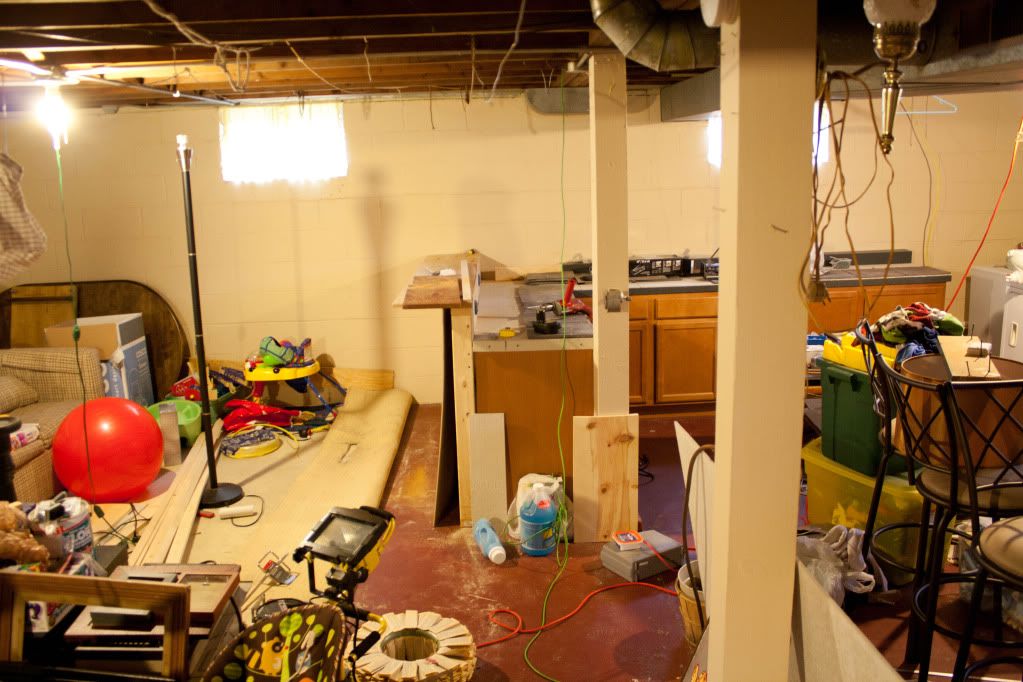
We also made some 
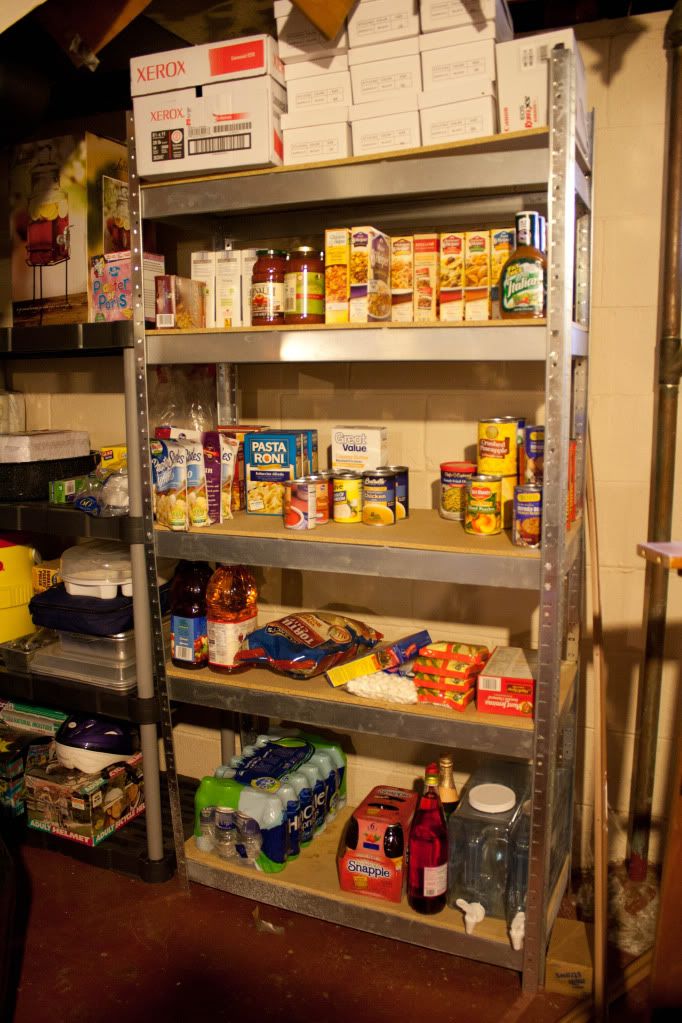
tentative plans for using the rest of the space. The bar area is really all we've touched so far, but we're planning to make it a fun, liveable space that can double as an extra guest room when the whole family comes. And of course there needs to be lot's of storage.


Now that I'm really itching to tackle this part of the house again, I'm looking for some style and design inspirations for the space. So far we've been working on lots of functional aspects, but we definitely want it to look pretty too. I'm still trying to decide on what direction we'll go, but here are a few of my favorite inspirations from pinterest.

You may not have noticed, but the cement floor is currently red. And scratched. And really really ugly. So we definitely plan to re-paint it. Now I'm just trying to decide if we should keep it simple with a solid color or try something a little more fun like stripes or a stencil.

painted floor via pinterest

I would LOVE to pull off this feel. Exposed wood, metal work, muted colors, just really comfortable and casual. I don't know if it's something we'll be able to do with shorter ceilings, less natural light, concrete floors, and no metal to speak of. But I'm keeping my eyes open for ways to get them same vibe.

basement via pinterest

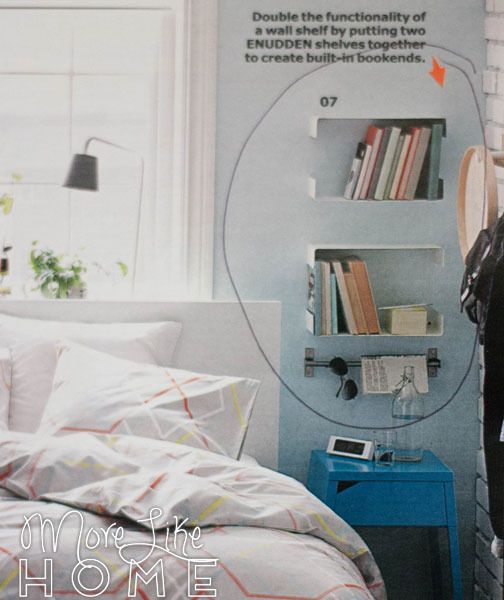
I know I shared this picture 
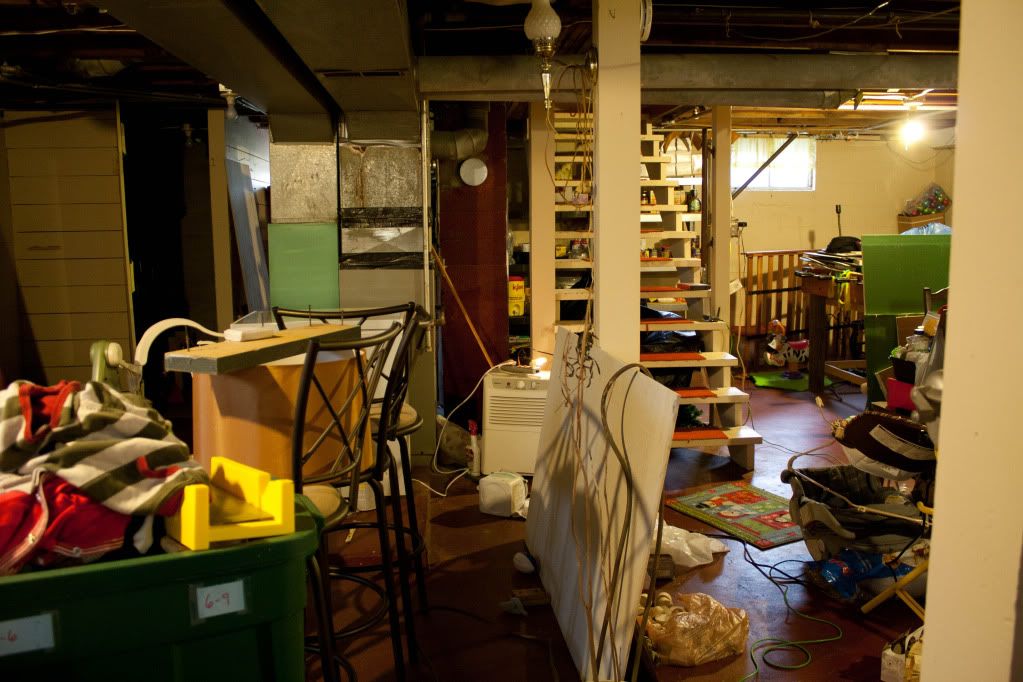
before, but this is still my favorite idea for the laundry space. I want to dress it up bright and simple so I can leave it open to the rest of the basement.

laundry room via pinterest

We're still planning to section off the storage area since it probably won't be pretty. Right now I'm thinking we'll either do some white flowy curtains like in the pic above, or bring in the wood aspect with an up-cycled pallet wall like this.

pallet wall via pinterest

Apart from the countertop, most of the work is going to be cosmetic. You know, the fun part. :) Plus lots of cleaning. Boo. But I really feel like we should be able to pull off a good part of it this spring. So this me starting the timer before baby #2 gets here in July. Game on, husband.

Wednesday, February 29

Raising the Bar

Literally. My hubs & dad have been working on getting our basement bar all put together! The last time my dad came to town they got all the installed and built up a short wall behind the cabinets where the raised bar will be.


They also attached our yard sale countertop (on the right side) and built a top out of plywood for the rest of the cabinets.


We also started planning tile layouts with our slate, but haven't installed any yet.


Intermission. Starring Baby B. This was taken a couple months ago and he looks so tiny!


Since then my mom has worked her magic on the bar in the form of pipes & wires! That's right, we have several outlets hooked up around the bar & water & drain pipes running to the sink (she also put in a drain for our washer so it doesn't have to drain into the sink anymore!). The bad news = we found out the sink that came with our yard sale countertop leaks. Boo. So while the water is hooked up, we can't actually use it yet. But at least it will be ready when the time comes!


Mister Husband has also installed concrete backer board on the countertops (which is an important step before tiling!) and in the picture below he is installing a base for the raised bar. I LOVED this step because it gives us a great feel of what the bar will be like when it is finished.


He's also been working on covering the half wall with plywood and finishing the tile backer board. We were hoping to do some tiling this weekend so we bought a tile "cutter" from Lowe's. It is supposed to score the tile, then snap it in half. Supposed to. On our first tile the handle snapped instead of the tile. SO disappointing, mostly because we weren't able to make ANY progress with the tile this weekend. However, we found out Menards rents out tile saws for $35 for 4 hours so we have our back up plan! Since it's a wet saw we'll have to wait for warmer weather to use it, though, so this project is on long term hold for now. But at least we've made some good progress in other areas. And here's a run down of what we still have left to do in the basement:
  • tile the countertops!
  • make a concrete countertop for the raised bar
  • support said countertop
  • find a new faucet
  • paint the floor
  • paint the walls & bar support
  • make new curtains
  • recover the couch
  • close in ceiling
  • get a rug for the living area
  • create zones for different activities
  • organize
  • find a way to section off storage areas from guest space

The work at this point is kind of tedious, but it's definitely important and it's a big step toward the fun changes (like tiling and painting). Do you have any tedious projects going on right now? Or any tiling advice for us?

Friday, January 27

Impossible, but it's OK

So...I planned to join the Imagine the Impossibilities Challenge this month by organizing & cleaning my basement (see my plans here). The goal is to have a useable, decent space by the end of January. Which is... MONDAY?!? Okay, first off all, the first month of 2012 is almost over. Holy cow. Second, I've made almost no progress and am wondering if I did, in fact, pick an impossible task. But I'm going to try to work hard on it the rest of this week so I at least have something to show on Monday. For now, if you want to brace yourself, I'll give you a peek at what I'm starting from. No judging. Deep breath. Here we go.

From the steps, this corner will be the living area. There is a couch under there. Yikes.

This is straight down the steps. The bar is right ahead.

To the right is the laundry area & utility sink. Yikes again.

From the other end of the basement, this is looking back toward the stairs. It's hard to tell, but there is a closet thing in the left corner that we like to call the dungeon. We keep tools in there now, but the space isn't being used very well.

This is the corner to the right of the stairs. There is a foosball table somewhere.

This is the space behind the stairs where we have all of the shelving. It's the only proof of progress I have so far!

This is the pantry area we wanted to have. A small success, but it's encouraging!

I actually worked on some more areas today while giving my newly made Mai Tei carrier a test run. I usually can't get anything done when Baby B is awake so I made a carrier I can use to hold him on my back. I think it was a success - Baby B fell asleep in it while I was working! Speaking of Baby B....

"oh, here are my pants!"

He's as cute as ever and, frankly, doesn't give a hoot what the basement looks like. As long as we have snuggles and blocks and blueberries, nothing else matters. So I may or may not get the basement done, but here's to not sweating it. After all, he's only small once and he is SO much more important!

Monday, January 16

Imagine the Impossibilities

I've decided to join (a little late) the Imagine the Impossibilities Challenge. The basic idea is to think of one super daunting task, something that at first thought seems impossible, and pull it off by the end of January. You can find more details at The Space Between and see some of their examples (like sewing a bag, making homemade bread, and cleaning out the basement) and while your there go ahead an challenge yourself to embrace the impossible this month! Why not, right? :)

After Karah invited me to join the challenge, I started thinking about some of the daunting goals I have for our house. Some things unfortunately had to be eliminated - like concrete countertops (because they won't set right if pour them in the winter) and gutting the bathrooms (which still requires some serious money saving first). So I narrowed down my list to things that can be done in the frozen tundra for next to nothing. And I found my winner. Enter - my basement. While we still have a long list of projects to tackle down there, one big, super annoying, put off for far too long project to tackle...is the junk. Boy oh boy. A years worth of random I-don't-know-where-to-put-this-so-I'll-throw-it-down-there stuff in unorganized piles. But besides the junk I'm going a little bit further. I want this to be a functional, liveable space that we can go ahead and use even though it's not totally finished. I want to figure out what kind of layout we want down there, get things organized where I want them, and find ways to divide up the space. And whatever we use needs to be basement friendly because it is definitely possible to get water down there during storms. Here is a rough layout of the basement:


Here's what we need down there when it's all said and done:
  • laundry area that looks nice or is hidden
  • bar & living space
  • craft/game table & storage
  • freezer
  • long term storage for baby clothes & seasonal items
  • permanent storage for tools
  • pantry area
  • space dividers to keep storage out of site from living area

I have a few ideas for how to pull all this off. I would love to do enclosed storage units (like below) to keep everything hidden, but that's not in the budget right now.

basement storage & ideas - via Young House Love

I have a few industrial type shelving units down there for now so I need to find a way to hide them from view since they are out in the open. So I'm thinking about doing some kind of space divider to section the storage off from the living space. Maybe a solid wall?

this divider won't work for our basement, but it is SO cool - via pinterest

Or maybe I'll hang curtains to separate the spaces.

curtain dividers -via pinterest 

Or hang curtains just in front of the shelves instead of blocking off a whole section.


Or use pallets to divide the space, which would be cheap and easy!

pallet wall via pinterest
I would love to dress up the laundry area like this and leave it open to the rest of the basement.

 via pinterest

And of course we want to generally spiff up the space, maybe something like this:

basement design idea - via Pinterest

So I have big goals, but for now I'm working with what I have to get things just organized and liveable. I'll keep you posted and let you know if I get it done this month! Do you have any impossibility to tackle?

Tuesday, July 19

Sometimes We're Spontaneous

We have a bar in our basement. A sagging, rickety, orange shag covered bar. And while we love the idea of a bar in the basement, this one is definitely not going to make the cut!


My husband is excited to be taking on this project. He told me what his plans were and I drew up this picture for him quite a while ago. We didn't really plan to start this project soon but wanted to have a plan in place (like we have for the kitchen!) We had been slowly collecting a few things and storing them in the basement until we would need them someday.

Then it happened. We were at a flooring outlet this weekend to see if they had any tile (they didn't have much) but while we were there we saw they had a row of clearance cabinets. Marked down more than 50%. We'd been looking for second hand cabinets, but hadn't come up with anything cheap enough. We started doing a little math and saw that these clearance cabinets were coming in close to the price of second hand cabinets in our area. They were vanity cabinets so they were 2" shorter than standard kitchen cabinets, but we knew that would be close enough for our bar. We were seeing if they had the sizes we would need to feel the space, and an employee walked up and said he could take off another 30% if we buy today! Sold! We ended up spending about $325 for all the cabinets we needed. After that we went to Lowe's to use a 10% off coupon that was about to expire. We found exactly the tile we were looking for so we bought it (and paint for our master suite and guest room!) and rented a pickup from Lowe's to go pick up our cabinets. A friend helped us haul them to the basement. And just like that, we were ready to start tackling this bar. We went right to work and had the old shag bar ripped out in no time. 


We found out the bar had wheels on the bottom, but it was SO heavy we never knew until it was mostly taken apart. I think it's safe to say they were not the right choice for the job. :)


Then after a little cleanup of the area we slid the new cabinets (and the countertop and bar stools we had already collected) into place just to get an idea of what it will look like.


Not a bad start. And it was nice to see such a dramatic change in such a short amount of time. We went from the first picture to the last picture all in one afternoon. We still have a lot to do, obviously, but it is looking so much better down there already!
Subscribe