Showing posts with label patio. Show all posts

Wednesday, June 19

DIY Outdoor Bench Plans (for Wall Panel System)

Earlier this week I posted plans for an outdoor wall panel and shelf similar to Ikea's new outdoor collection. Today we're moving on to the optional outdoor bench that works with the wall panel system.
Built by an anonymous reader - thank you so much for the beautiful photo!

It's a great way to add seating and storage to your patio! You can use the bench on it's own or with any combination of panels and shelves from the wall panel system.

Source: Ikea

There are a few notes on this project before we get started:
  • The only difference with my plans is that the shelves and hooks won't be adjustable like the original (but if you know where to get that kind of hardware I'd love to hear about it!!). Our shelves and hooks will be screwed in place instead. 
  • Be sure to install your panels carefully so they don't tip over! They should either be attached to a wall, or you could put posts into the ground to attach them to. 
  • For outdoor pieces it's a good idea to finish each piece with an outdoor paint or poly before you assemble it. That way all the edges are sealed from water. If you finish it when you're done, just be careful to get into the cracks really well.
  • I like to do projects that can be done with a few simple tools, but for this one you'll really need a Kreg Jig to assemble it. Sorry!

If you're ready to get started, this is what you'll need:

Monday, June 17

DIY Outdoor Wall Panel System Plans

Have you guys seen Ikea's new outdoor collection? It's all pretty sweet, but the part that has me itching to break out the power tools is the modular wall panel system. It's perfect for making an outdoor space feel cozy and inviting, and it's totally customizable!

Built by an anonymous reader... we are in love with this patio!

But of course I don't want to pay $40 for a single panel, so today we're to DIY our own! We'll start with plans for a basic panel & shelf today (and of course you can use the panels without shelves!).

Source: Ikea

And later this week I'll add plans for the optional outdoor bench that works with the system. So start planning that patio makeover! You can use any mix of panels, shelves, benches, and hooks to make an outdoor space perfect for entertaining or just relaxing with a good book.

Source: Ikea

There are a few notes on this project before we get started:
  • The only difference with my plans is that the shelves and hooks won't be adjustable like the original (but if you know where to get that kind of hardware I'd love to hear about it!!). Our shelves and hooks will be screwed in place instead. 
  • Be sure to install your panels carefully so they don't tip over! They should either be attached to a wall, or you could put posts into the ground to attach them to. 
  • For outdoor pieces it's a good idea to finish each piece with an outdoor paint or poly before you assemble it. That way all the edges are sealed from water. If you finish it when you're done, just be careful to get into the cracks really well.
  • I like to do projects that can be done with a few simple tools, but for this one you'll really need a Kreg Jig to assemble it. Sorry!


So, ready to get started? Here's what you'll need:

Wednesday, March 14

Hello Springtime!

This little boy LOVES to be outside. He also loved it when he was teeny tiny, but then got stuck indoors for most of the winter. But these last few summer-like days have been spent in the great outdoors, and he just might be in heaven.


 It took him a few minutes to decide that he liked crawling in the grass, but then he was unstoppable! And it turns out he really likes dirt.


While he was crawling around wreaking havoc on my plants and anything else he could reach, I used the opportunity to freshen up the patio a little. I gave it a good sweeping and brought the pillows out of "storage" (aka a pile on top of the grill). The husband also took the grill out of it's "protective covering" (aka Mount Patio Pillows), cleaned it up, and proceeded to grill us a delicious dinner! I also washed the pillow cases for the throw pillows. And then I rearranged things, because that's how I roll.


Baby B took a moment to help me. 

"This pillow is better here, mom!"

I just split up the sectional (see how we built the sectional here) a little to give better flow to the yard. Is that silly on a patio? Maybe, but it's still fun. :)


I think it makes the space more conversational and opens it up to the yard. Plus we could slide a folding table in between the benches when we cook out, which we've done 3 times in the last week!


I haven't dug out the seat cushions yet, but I actually kind of like the look of this. Although it isn't good for napping. :)


 Who knows if it will even stay this way long? So far I love it, but once we use it some more I'll know if it is really functional for us or not.  What do you think? Better or worse than before?


And that's what Baby B and I have been up to, along with plenty of romping, ball rolling, and trips to the park. Just enjoying those blue skies and these blue eyes!


Have you been taking advantage of these warm days???

Saturday, July 30

Patio Perfection

Remember when we built this outdoor sectional?


Once it was finished I went on the hunt for cushions to make it nice and comfy. I considered making my own, but once I counted the cost of foam and fabric (even if I waited for a half-off sale at Joann Fabric) I realized it would still be pretty pricey to go that route. So I kept my eyes open for pre-made cushions and finally found some on sale at Walmart. For $25 each it was more than I originally hoped to pay, but they were a better deal than I was finding anywhere else so we went for it. Oh, and they were green. :)


The only problem was that the first day we put them out it was super windy and we were afraid they were going to blow away! So I went digging in my ribbon basket and found some white ribbon (that says "happy holidays" on one side) that I got in an after Christmas clearance last year. Then I did something I try to avoid at all costs - I got out my needle and thread to sew them on...by hand. Ugh. I'm not of fan of sewing by hand, but it was the best way I could come up with to get this done. It actually wasn't as bad as I expected and I had all of them done in one evening while we watched Monk. Then I felt silly for letting them sit in the kitchen for over a week just because I was putting off sewing them. Oops. :)


Then it was back out to the patio to tie them on. Much better. Those babies aren't going anywhere!


I could have bought matching back pillows for the same price, but I knew I would have a lot more options when it came to these than I did with seat cushions and I could find a way to make something much cheaper. I've been collecting regular throw pillows at yard sales that could do the trick. I'm up to 7, and have only spent $1.00 total on them so far! I've been picking up any I found for a good price without worrying about color because I planned to make matching pillow cases for all of them anyway. I also have a few throw pillows from the house that I added to the mix.


Then when I found a whole box of white fabric at a yard sale for $4 I bought it planning to dye it yellow to make curtains. I started with Lemon Yellow for $3 and followed the directions on the box to dye the fabric. It came out looking a little neon, so I went back to the store and picked up Golden Yellow on sale for $2.


I'm still not sure if it's what I want for the curtains, but I thought it would be perfect for the patio pillows (and I only used about 1/4 of the dyed fabric so I should still have enough left for curtains if I decide to use it).


I made my pillow cases using the same technique I show in this pillow cover tutorial. It's super easy and a great project for a beginner. My pillows were all standard 17" pillows so my cases would all be the same size. The easiest way to make a bunch of things that are the same size is assembly line style! I started by measuring and cutting my first pillow case, then used it as a template to cut the rest to save time measuring. I also cut two layers of fabric at a time to make it go even faster. (The dark color of my pillows was going to show through the yellow so I also cut white fabric to line the pillow cases. I just sandwiched the two layers together and sewed it all at once). Then I ironed all the edges, then did all the sewing. I also played around with the decorative stitches my sewing machine can do to dress them up a little.


I really like how bright & summery the yellow looks, and it goes with the yellow dots on the other pillows. I think I'll look for a water-proofing spray to make them more durable for outdoor use. I'm glad that this project is done so we can just enjoy the space for the rest of the summer! 
 

Here is the final cost breakdown for the whole project:
Furniture: $130
Seat cushions: $125
Back Pillows: $10
Total:  $265


If we had bought the same thing from West Elm, we would have spent over $1600! Want to save tons of money building your own sectional? Ana White has free plans to build your own Corner Sectional Units and Middle Sectional Units (you can also build an ottoman/coffee table and, while you're there, search "outdoor" to find all kinds of other plans for patio furniture).  Here are my modifications to build the sectional with 2x4's instead. And here is the tutorial I used to make pillow cases for my seat back pillows. Enjoy!

Wednesday, June 1

2x4 Outdoor Sectional

 
We had family in town for a Memorial Day weekend full of food, walks, flower planting, and the occasional thunderstorm/tornado. It was a great weekend in spite of that last part. :) We also managed to knock out a little patio project while some very willing babysitters kept an eye on Baby B.


I've had my eye on this outdoor collection (picture below) from West Elm, but it cost $149-279 per piece! That was never going to happen for us. So we knew we would have to build it if we wanted to have a sectional for our patio.


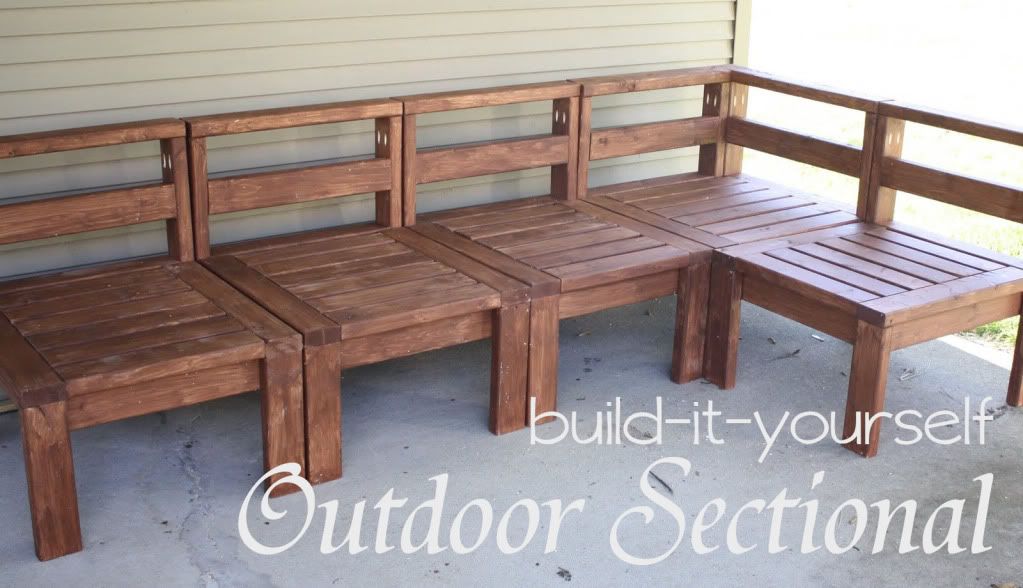
Fortunately for us, Ana White already had plans for a similar sectional on her website! (Want to build your own? You can find the plans here and here.) It turned out great and looks just like what I wanted! We did make a few changes from her plans, mainly because we used 2x4s instead of 1x4s, so we had to adjust some measurements to get the same overall dimensions. We chose 2x4s because they were actually about 1/2 the cost, but a bonus for me was the chunkier look we got with the 2x4s.

So, ready to make your own?


Here are the adjustments we made for using 2x4s for the armless sections (shown in red):
2 – 2×4 @ 24 1/2" (Seat Side Aprons)
1 – 2×4 @ 18" (Seat Front Apron)
2 – 2×4 @ 23" (Seat Supports)
2 – 2×4 @ 24″ (Seat Sides)
6 – 2×4 @ 17″ (Seat Boards)
2 – 2×4 @ 13 1/2" (Front Legs)
2 – 2×4 @ 27 1/2" (Back Legs)
1 – 2×4 @ 24″ (Back Top)
2 – 2×4 @ 21" (Seat Back Board and Seat Back Apron)
Step 2: over hang should be 1 1/2" instead of 3/4"
Step 5: You will have 13 1/2" below the seat back board instead of 14 1/4".
Plans here


For the corner seat:
1 – 2×4 @ 23" (Front Apron) AND 2 @ 23" (Seat Supports)
1 – 2×4 @ 24 1/2″ (Side Apron)
1 – 2×4 @ 24″ (Side Seat Board)
6 – 2×4 @ 20 1/2″ (Seat Boards)
2 – 2×4 @ 13 1/2" (Front Legs)
4 – 2×4 @ 27 1/2" (Back Legs)
2 – 2×4 @ 21" (Back, Short Top Apron and Seat End)
2 – 2×4 @ 22 1/2″ (Back, Long Top Apron and Seat End)
1 – 2×4 @ 24″ (Short Top)
1 – 2×4 @ 27 1/2″ (Long Top)
Step 2: over hang should be 1 1/2" instead of 3/4"
Step 5: You will have 13 1/2" below the seat back board instead of 15" to the top of the board.
Plans here


I think that's it!


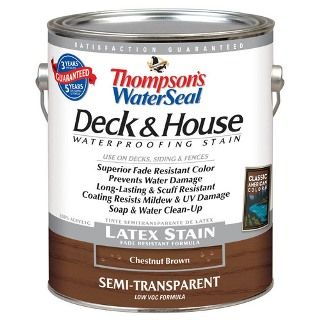
Like Ana suggested, we cut all the pieces and then finished all the sides of each piece before assembly. Instead of painting, we decided to try a waterproofing deck stain. It was super easy, we just painted on one coat and let it dry. It has a 3 year warranty for decks, and since our furniture is on a covered patio (and won't get traffic like a deck) we're hoping it will hold out just fine for our purposes. This is the one we used:


I had fun on this project using my first mother's day present - a miter saw! It made the cutting go SO much faster. I also broke in my Kreg Jig, which resulted in very sturdy furniture with almost no screw holes showing. I think it also made things go a lot faster.


Overall we probably spent about 10-12 hours on the whole project (mostly in one loooong day between storms). I probably wouldn't recommend tackling all the building in one day. Unless you have a babysitter in town and have to get it done while you can. :) For the project cost, we spent about $90 on wood, $20 on Kreg screws, and $20 on finishing. So our total was about $130, which is less than the cost of just one piece at West Elm! We're still looking for cushions, but haven't found a cheap enough option yet. :)


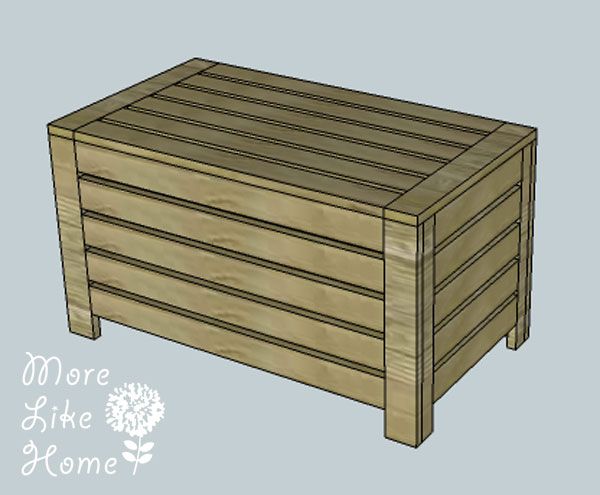
We're still planning to add some coffee table squares (plans here) and maybe a few chairs of some kind down the line. I'd also love to have this table set, but we may not have room for it on our current patio.


And just for the record, you probably shouldn't work in flip flops because 1) you might hurt your feet and 2) you'll probably ruin your nail polish.


So there you have our little weekend project. We can't wait to finish turning this patio into a great summer hang out!


We are SO ready for summer! :) 

*UPDATE: We found cushions on sale at Target and after some terrible experiences with customer service returned the two we had. Then seat cushions went on sale at Walmart so we grabbed some green ones! And we're hoping to get some inexpensive back cushions at IKEA. I'll keep you posted. :)


DIY Projects with More Like Home Make a Pottery Barn Inspired Coffee Table Build a Storage Bed Build an Attractive Console Table
Subscribe