Friday, March 28

My Favorite Pie Crust {& Blackberry Pie}

Some days you just need a yummy warm dessert. Pie has been one of my favorites so I thought I'd share my favorite pie crust recipe in case you would like a slice! Granted I'm no pie expert, but I clipped this recipe from a magazine a few years ago and it has been a favorite ever since. This recipe makes three single pie crusts, but I usually divide it in half and roll it a little thinner to get two double crusts. You can wrap the second crust in saran wrap and a ziploc to store it in the fridge for three days, or in the freezer for a month (just thaw it overnight in the refrigerator before using it).


Before we start, let me tell you that these pictures may not be the best representation. I snapped these after it was half eaten and spent the night in the fridge... which was my only chance because we eat it straight out of the oven and it's gone in a flash. This one lasted two and a half days. Minus two tiny pieces for Big Brother, there were two of us eating it. So it may look like a hot mess, but boy oh boy is it yummy!


In a large bowl combine:

Wednesday, March 26

Starting Seeds Indoors

You guys, I can hardly wait for warm garden weather. We started our square foot garden two years ago, but last year was kind of a dud with just a few tomato plants that showed up on their own (I was pregnant and totally unmotivated.) so I'm ready to finally give it a real go again! The boys and I spent a really warm day last week hoeing the garden and pulling up the last few plants still hanging out from last summer to get it new-plant-ready. Of course today it's snowing. So it's still going to be a while before we can actually get things started out there. But we are not deterred, and in fact we're actually already going strong in the guest room! We're trying something new this year to save a few dollars and we're starting our plants from seeds indoors. After reading up and stressing out and trying to map out a planting schedule, I decided I might as well jump in before it's too late. I took parts of what I read here and there and I'm making the rest up as I go. So this is how we started our seeds indoors in seven easy steps. It may not be the best (so please give me any tips you have!), but it's certainly better than the nothing we were doing before!


Step 1: Buy seeds. 
We had a collection of seeds in the freezer from 2+ years ago that we started with (no sense buying more if these would still sprout!) We needed to fill in a few gaps for veggies we hadn't grown before or had bought as plants later in the season. We ordered our new guys from SeedsNow, which specializes in heirloom, non-GMO seeds, and best of all offers sample size packs for just $0.99 each! The packs we ordered have between 10 - 200 seeds depending on the veggie, but that's plenty for our backyard garden purposes. I may try saving seeds at the end of the season for next year. I'll let you know how that goes.


Step 2: Find pots.

Saturday, March 22

Letter "M"

Today we're making... you guessed it... a letter "M." If you remember back to my 2x4 series, one of the projects were letters to make a large "EAT" sign. Well one of my readers ran with that idea and is making initials for the kids. Great idea! We had an "E" and "A" already but were missing an M. So, anonymous reader, this is for you! Have fun, and I hope your kids like it!

 Shopping List:
1  -  2x4s @ 6' long

Tools:
Saw
Drill
4" screws (or Kreg Jig & 2 1/2" self tapping screws)
Wood glue
Wood filler

2x4 Cut List:
(A) - 2  @  24" (sides)
(B) - 2  @  19"  (middle)

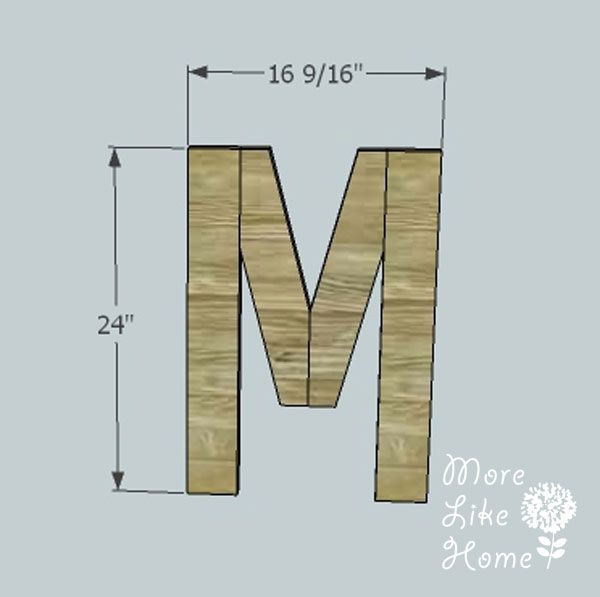
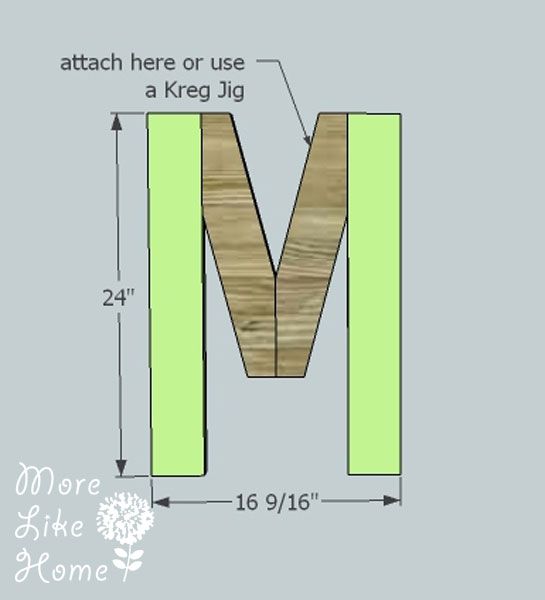
Dimensions: 16 1/2" wide  x  24" tall  x  1 1/2" deep


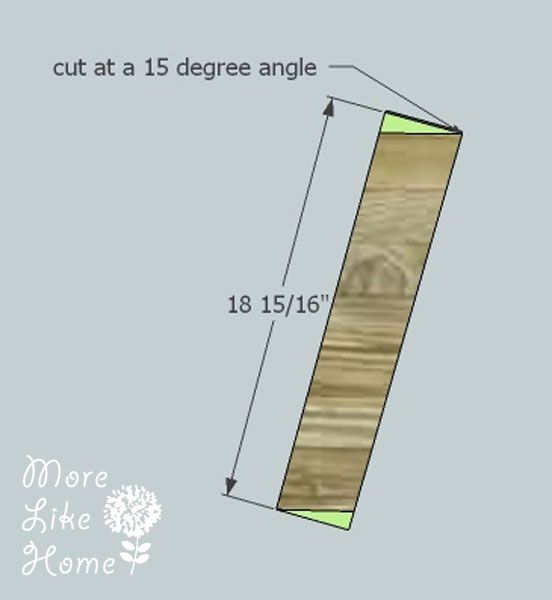
Start by cutting your legs and center pieces. Then comes the tricky part - making the angle cuts on the center pieces. On each center piece cut the ends at a 15 degree angle like in the pic below. You want the ends to be parallel, so double check your lines before you cut.


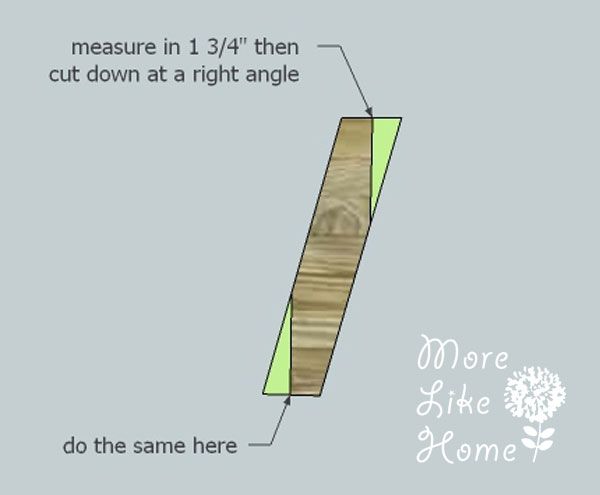
Then, on each end, measure in 1 3/4" from the acute angle (the right corner on the top and the left corner on the bottom) and use a square to make a line straight down from that point, perpendicular to the cuts you just made on the ends.


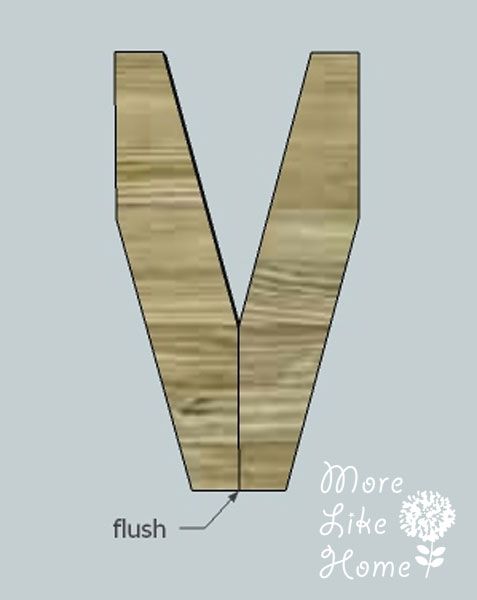
Attach the two center pieces together like in the pic below. Make sure the bottom edges are flush and either use a Kreg Jig to join them, or drill through the side to attach them. Don't forget the glue.


Now you can attach the two side pieces. Make sure everything is flush across the top and attach the pieces using a Kreg Jig or drill through the middle pieces into the side pieces.


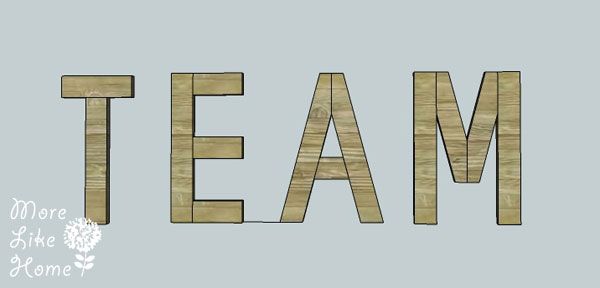
And that's it! Finish it however you like with paint or stain and polyurethane. If you're feeling ambitious you can use the original letters to make a "TEAM" sign.


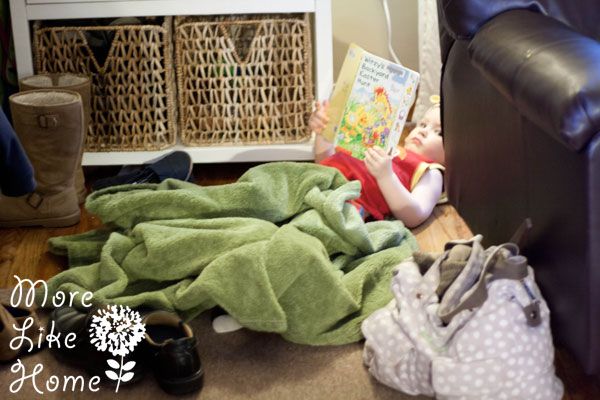
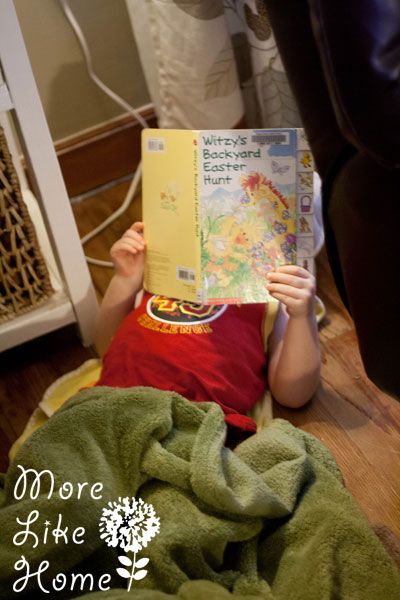
For today's Big Brother feature, I found him like this and he said "Mama, I just be feeling tired."


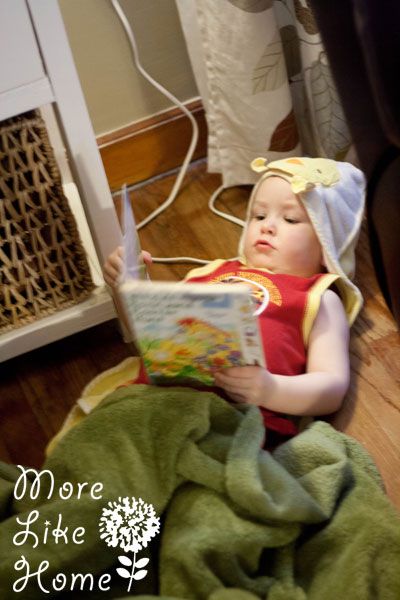
So he put Baby Brother's ducky towel on his head, grabbed a library book and a blanket, and set up camp behind the chair. Good call, bubba.


This is my cue that he wants to be left alone and I should stop taking pictures:


Happy Saturday and goodnight!

Wednesday, March 19

How I Dyed a Wrap {and what I learned for next time}

My favorite way to wear Baby Brother right now is the wrap a friend made for my when Big Brother was tiny (check out all my babywearing posts & tutorials here). She dyed it a pretty gray color and I loved it. But now I've reached a point where I feel like it's maybe just a bit boring? I'm more exciting than plain gray, right? So I decided to give my wrap a little dip dye makeover. This is the before, tiny Big Brother included:

Even looking at this now I think "Wow, that's pretty!" So hopefully I didn't make a huge mistake. Ha!

And this is the (slightly) less boring after:


There's still some gray involved (and I wore a gray shirt. ha.) but I added some color along the rails. That also makes it easier to adjust when I'm putting it on because if the blue part is loose I can just grab the blue tail and tighten it.


The dye wasn't very hard to do and it was actually SUPER fun. I made some mistakes so some spots are a bit splotchy and uneven. But I still love it! Here's a rundown of how I did it next time, and what I would change next time to fix my mistakes. Here's what you need to get started:
  • a wrap (cotton or linen work with this dye & technique. if you don't have a wrap you can make your own. Joann Fabric carries linen fabrics and a cotton fabric called Osnaburg that is super affordable and a favorite for DIY wrapping.)
  • soda ash (to set color. You can also use washing soda. I didn't know that before I ordered my soda ash so I ended up using some of both.)
  • salt 
  • fiber reactive dye (fiber reactive dyes bond to the fibers. DO NOT use RIT dye because it doesn't bond and will come off in baby's mouth when they chew on the wrap! Dylon dyes available at craft stores work well but the colors aren't always as vibrant as I would like. For this project I stepped it up and ordered Dharma dyes and don't regret it. I used Avocado Green and Teal Blue)
  • well ventilated area, mask & gloves (better safe than sorry! you don't wan't any dye powder going in your eyes or nose, and the dye will stain your hands if you don't wear gloves.)
  • container like a small garbage can (I've read that anything used for dying will not be food safe anymore, so don't use a kitchen pot or anything like that!)
  • coffee filter 
  • hangers, clothes pins, and something to hang it on like a tension rod or drying rack

Monday, March 17

Staying Sane in Perpetual Winter

It's March. We've been cooped up for months with two little boys. And we still (for the most part) have our sanity intact. The boys and I spend most of our time at home right now because it's easier than bundling everybody up and buckling the carseats and going to one of the two free activites in town. But we've found a few things that help pass the dreary days. So here are my tips for weathering a long winter with my little guys (Big Brother is almost 3 and Little Brother is 7 months):

Invest in some great creative toys:

Anything with lots of possibilities to keep them interested day after day. Things like blocks, building sets, or cars. We scored this huge wooden train set at a yard sale for $30 and it has been invaluable this winter. Big Brother asks almost daily to play choo choo trains. He gets to be creative, learn to problem solve (to get the ends of the track to meet up!), and we can make different tracks everyday to keep it interesting. It really gets his imagination going, too. The trains always have voices and drive to the library/Grandpa's house/park.


Bonus tip - if you're buying train tracks look for the kind that are a solid piece (on the left) not the ones with the ball end attached (on the right). The balls can fall off and be a choking hazard. We've had to glue a few back together already.


The boys also have a set of hand-me-down duplex legos from their daddy. More hours of creative fun! He's been playing with these for over a year and still isn't bored with them. His current favorites are making stairs and zoos (that he fills with our Noah's Ark animals). Anytime he doesn't feel like playing trains we pull these out instead.


When he feels like trains AND legos we're in luck because we have train legos! (plus a Thomas train from his BFF that fits perfectly). Baby Brother loves the lego set too!


Saturday, March 15

A Day at the Museum(s)

Husband had a day off this week for spring break and it just so happened a few nearby museums had free admission the same day! So we packed some snacks, hopped on a train, and made a day of it. Our first stop was the Museum of Science and Industry.

Seriously boys, am I the only one having fun here?


That's better.

Little Brother checking out the tractor tires.

Big Brother insisted it was Baby Brother's turn to ride and pushed him around for a while.

He gets extra chins when he sleeps.

We had took a break to eat our packed lunch then headed to the Field Museum. There are quite a few sections that would be more interesting to older kids, so we just hit up the animal and dinosaur areas.

Look out behind you!!!

All in a dinosaur footprint. And yes, I am the same color as the walls. They have excellent taste. And I need some sun.

Doing some serious thinking. Now he's started saying "I'm doing science."

You guys. We found a crocodile. Maybe the highlight of his day.

My favorite was looking at bugs. "It's up high. Me jump me see it!"

It was a beautiful day so we wrapped up with a walk along the lake to Millennium Park and had dinner at Potbelly's. All in all, a super fantastic day off. What have you guys been up to?

Friday, March 14

Kitchen Conversion Chart {free printable}

I'm always looking for new ways organize... everything. My home, my thoughts, my plans for dinner. I'm one of those people who need things written down in front of me if I'm going to remember. My phone has an alarm for every birthday, and I have at least 6 tabs open on my browser at all times. That last one drives my husband crazy. Speaking of Husband, I've lost count of how many times I've asked him how many teaspoons are in a tablespoon when I'm trying to double a recipe. FYI it's three. Clearly if I don't remember by now, it's time to make a cheat sheet. And I have the perfect spot! I found these adhesive cork boards at a yard sale last summer and put them up inside one of our kitchen cabinets. It's a great place to keep the recipe I need for dinner or new recipes I want to remember to try.


It's easy to access while I'm cooking so it's the perfect spot for my cheat sheet. I couldn't find a chart that had all the details I wanted to include so I made my own! All the measurements and hints I need in one handy chalkboard-style printable:


It has basic conversions for cups, to ounces, to tablespoon, to teaspoons, along with cooking temperatures for meat and a few other helpful goodies.

You can print a kitchen conversion chart here.


I like the fun chalkboard-look and it's been really helpful already!


What's your favorite trick for staying organized in the kitchen?

Wednesday, March 12

Painting the Kitchen... Again!

Did you notice the other update in Monday's post about our new backsplash? We painted the kitchen! Again! Hopefully for the last time, but you know I can't make any promises. Last time we painted it with a bright, cheery yellow. But wait... let's start with a little back story. Green is my favorite. Always has been, probably always will be. So naturally any time I paint a room I want to go at least a little on the greenish side (like our living room). My dear husband foresaw this way back in our rental days. From the moment we started looking at houses he made me promise not to paint every room green. And you guys, I'm really trying. Hence I started with yellow in the kitchen. You're welcome.


But... time went on... and it just didn't make my heart happy. Hmph. While I like the color itself, it just didn't flow with the living room. It made the space feel chopped in half. It's wide open between the two rooms and the main space we live in, so we really needed something that felt more calming and cohesive. I also thought it felt... I don't know, oppressive?... anytime we had the lights on. It was like a yellow pit of despair. Apparently yellow in daylight and yellow in fakelight are two very different things. Lesson learned.


Since I pretty much love the living room, repainting the kitchen to match was a pretty easy decision. The didn't have my exact shade anymore, so I pulled a couple that were really close and taped them up for... oh... 8 months or so? Does it really matter? It was a long time. Because that's how long it took me to choose. I wanted something a little lighter so it flowed without matching exactly, and because our kitchen doesn't get that much light so I didn't want anything that made it feel even darker. But I also wanted a little contrast with the white cabinets. So in the end I went with... the top middle color "Dakota Trail."


We bought paint at Lowe's and this time went with Valspar's Ultra Kitchen and Bath. Usually semi-gloss is recommended for kitchens & bathrooms since you can wipe it down easily without removing the finish, but this one let us get all the way to an eggshell look with those same qualities. Plus it was low odor, zero VOC, and had a built in primer! I'll tell you right now, we cracked the can and took this picture the day before Baby Brother was born. It was that good old nesting instinct that finally painted our kitchen. (It looked scary limey yellow when we first opened it but it dried much better)


Monday, March 10

DIY Faux Brick Backsplash

Last summer after a spur-of-the-moment kitchen upgrade I asked you guys what color you thought would look good on my new faux brick backsplash. Remember that? Yeah, it was like 8 months ago.


There were votes for a dark gray or navy, but the number one response was a nice clean white... so we went with it!


I'm so happy with how it turned out. It adds a bit of character to our kitchen and the white really brightens things up. And although it was a bit time consuming to make sure it fit, it was really pretty easy to pull off. Here's all you need to make one:
  • a sheet of faux brick paneling (it came in a 4' x 8' sheet at Lowe's)
  • reciprocating saw (or jig saw or whatever you can use to make cuts around outlets and windows)
  • adhesive
  • finishing nails
  • paint & primer
  • paintable caulk
The hardest part of this was measuring where to make all the cuts. I sketched the backsplash area, complete with outlets & bump-outs around the window and sink, and measured measured measured to make sure everything would fit exactly. Then I measured again. Then we used the measurements to draw out the backsplash on our sheet of paneling. We used our reciprocating saw to cut the pieces the right height, then to cut out any notches and holes (for the cut-outs, like for outlets, we used a large drill bit to make a hole inside the outlet space as a starting point for the saw).


Friday, March 7

PlayDoh Busy Bag

Big Brother has been loving our busy bags (see them all here) while we've been cooped up this winter. And this play dough bag is no exception! This one was so easy to make and he loves it. I picked a few printable pages from this site, ran them through our handy laminator, then punched holes on the top edge and used binder rings to hold them all together. I keep it in our busy bag bin with a couple jars of play dough.


There are tons of pages to choose from and I picked out something like 18 of them. After I printed them I lined up two pages back to back when I laminated them to make reversible sheets so I didn't waste any of the laminating pouches.


Some of the sheets I printed were the numbers, making eggs for the chicken (and giving it a nose), teeth for the crocodile, apples for the tree, carrots for the bunnies, and making faces. I LOVE watching him do the face one. It is so stinking funny how he interprets faces and what parts he thinks are important. Like mustaches. And sometimes he just needs eyebrows and we forget the eyes.


I'm pretty sure he said this is a big mustache. And the small dot above it is the tiny mouth. He may not be totally clear on where a mustache goes.


So that was a fun and easy busy bag to make. And I'm really glad we don't have carpet when he uses it. :) Now for extra cutes, Big Brother last summer playing with the Cranium play dough:

He always needs a knife for playdough.

Warming up.

Sometimes it helps to stand up. Better leverage?

How do you keep the kiddos entertained when you're stuck indoors?
Subscribe