
There were votes for a dark gray or navy, but the number one response was a nice clean white... so we went with it!
I'm so happy with how it turned out. It adds a bit of character to our kitchen and the white really brightens things up. And although it was a bit time consuming to make sure it fit, it was really pretty easy to pull off. Here's all you need to make one:
- a sheet of faux brick paneling (it came in a 4' x 8' sheet at Lowe's)
- reciprocating saw (or jig saw or whatever you can use to make cuts around outlets and windows)
- adhesive
- finishing nails
- paint & primer
- paintable caulk
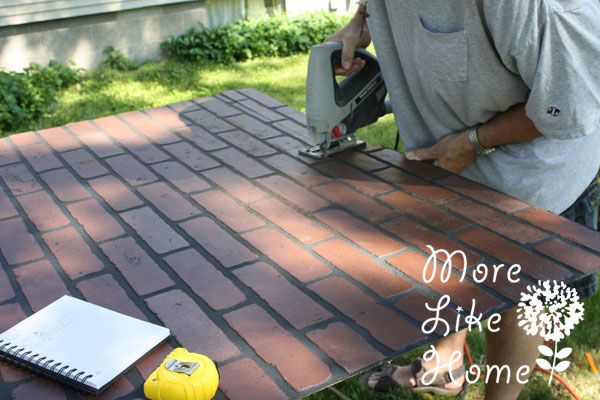
After each piece was cut we set it in place for a dry run to make sure they fit perfectly. That way we could go ahead an fix anything that wasn't just right (we cut the outlet holes a little small so we had to go back and make them a little bigger).

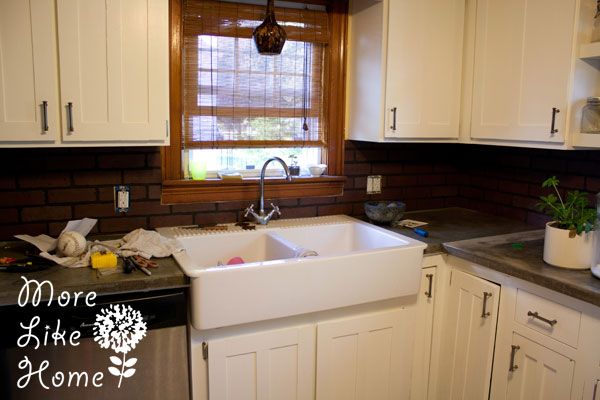
You can see in this pic that we also added a 1x6 up above the sink to hide the extra cord from the pendant light.
For our backsplash we ended up needing three pieces to reach all the way across. We wanted the bricks to line up exactly so it looked more like real brick with no obvious seams. We cut the first piece so the bottom row was a full brick (see below) and the top row got cut off about halfway down the brick. That made it easy to line things up across the rows because for each piece we made sure the bottom row started with a full brick. To line up the sides of the sheets we just paid attention to how each edge ended. Using the corner below as an example... the piece on the left wall ended with 1/2 brick on the bottom corner, so we made sure to start the sheet on the right wall with the other side of the brick. Doesn't that line up so pretty?
After we liked how everything fit together we took the pieces back outside to prime and paint. Because horizontal painting is so much easier than vertical painting! Especially for getting in all those crevices. We started with a coat of primer (leftover from painting our cabinets). I used a foam roller for most of it and a brush to touch up any spots the roller missed. It was a great project for a little boy who was dying to help.
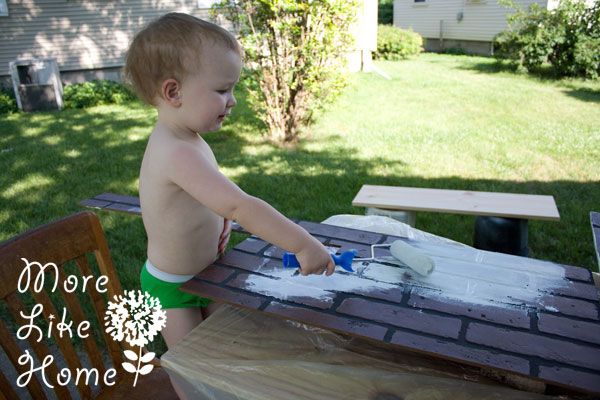
Ohmygosh he's so tiny! This was before he even had a brother!
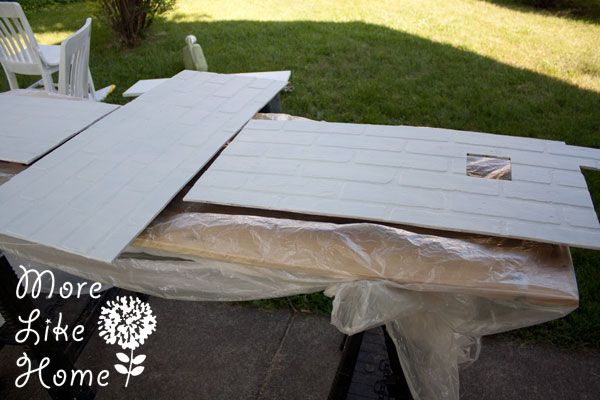
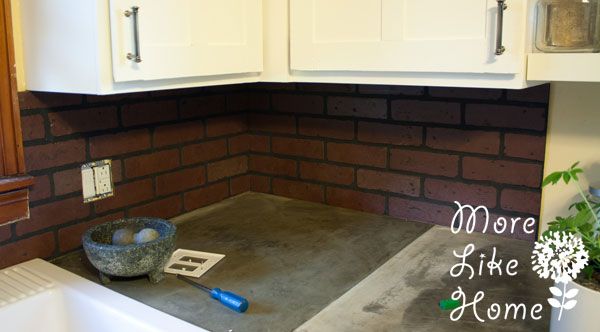
We let that dry for several hours before we brought it in so it would be less likely to get messed up if we bumped it. Then we brought it back in and used a few lines of all-purpose adhesive on the back to stick it in place. Ours actually was a pretty tight fit and basically wedged in tight enough to stay in place while the adhesive dried, but if yours is a little looser you could use a few finishing nails to keep it in line.
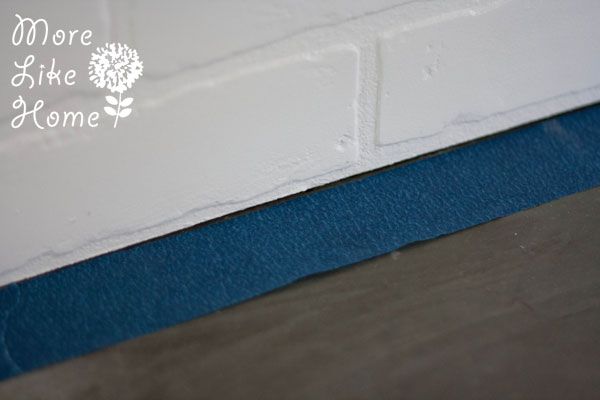
Now for the full disclosure section... we had that done back in July, before Baby Brother was born. Two weeks ago I finally finished up the last and easiest part. BOOM. So once the adhesive dries (which does not actually take 8 months. My bad.) you'll want to caulk around the edges. This paneling is made from some kind of particle board so you really don't want any moisture sneaking into those cracks to warp your bricks. It's most important along the bottom edge where it meets the countertop since that's where spills can sneak in. I also did the seams where the sections came together to make it a little more seamless. To keep it nice and tidy I started by putting a line of painters tape on the countertop along the crack.
Also across the back of the sink. Basically anywhere I didn't want extra caulk spreading out and looking sloppy.
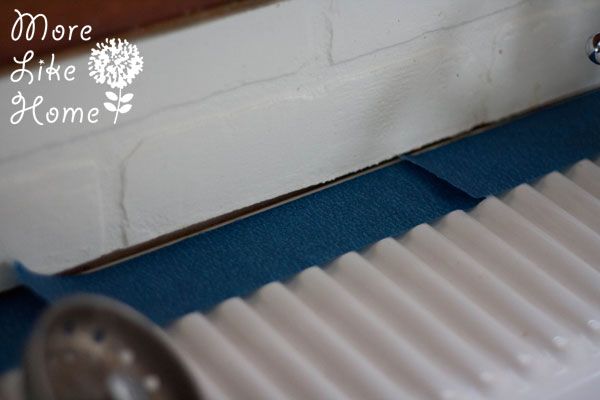
I put a thin line of caulk along the crack (make sure it it paintable, especially if your backsplash is not white). Then I went back and used my finger to smooth it out and wipe off any extra caulk.

Then I pulled up the tape and let it dry.

And that's it! Except I also had to move all my stuff back where it went. Then I was really done.
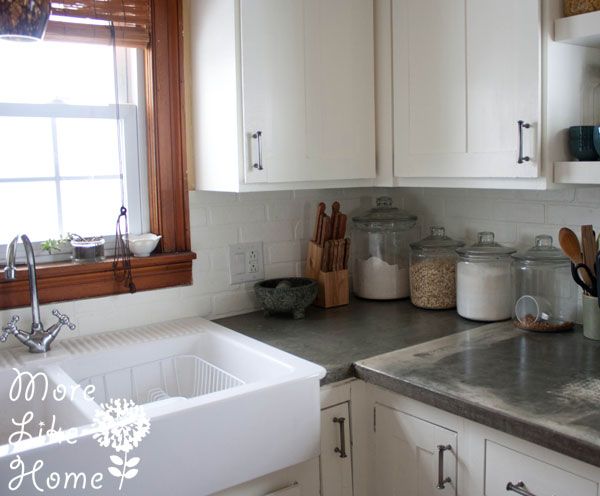
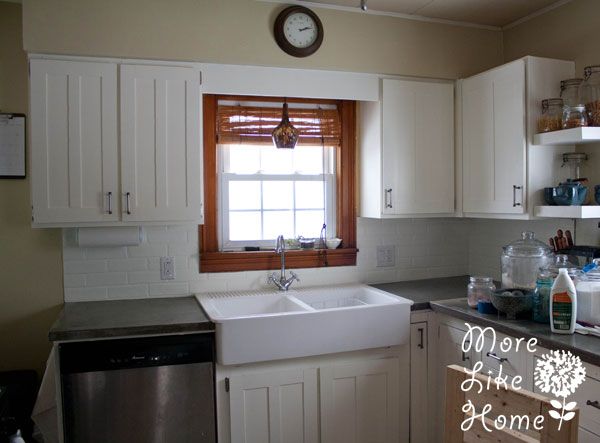
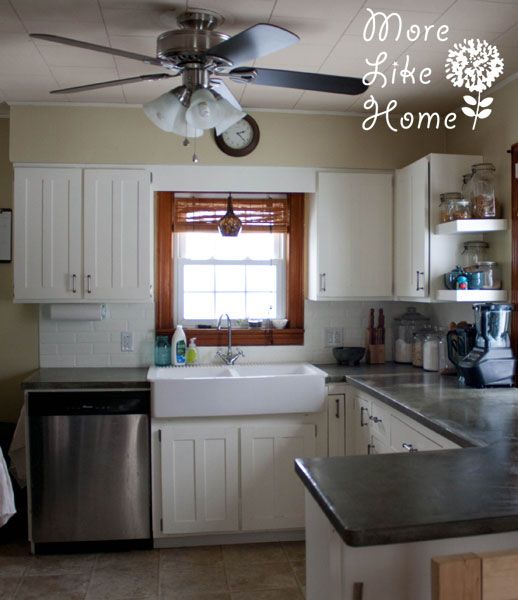
Now we have a brick-look backsplash with just a little work and absolutely no grouting!
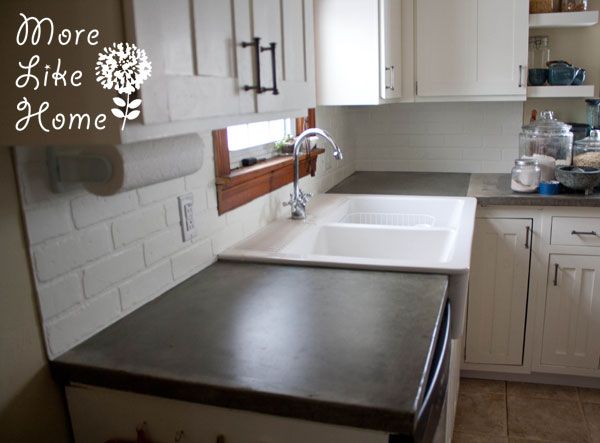
And it was pretty cheap for a backsplash. Since we used leftover paint, primer, and adhesive the only thing we had to buy was the brick paneling for just about $20! And we have almost half the sheet leftover.
The brick texture is hard to capture farther away. In real life it definitely looks like brick, even from across the room!
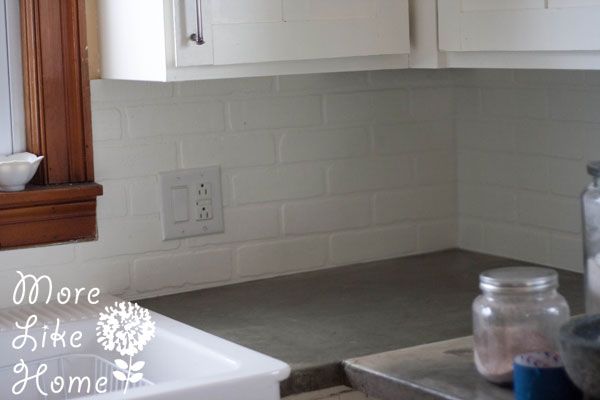
I'm so happy with the white because everything blends in so it looks neat instead of busy or cluttered.
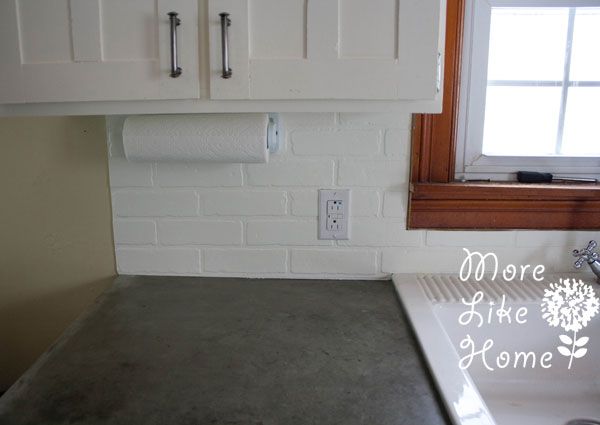
See the paper towels and outlet? No? Just a little kitchen camouflage.
I know I keep saying this, but I really thing we're almost done in there.
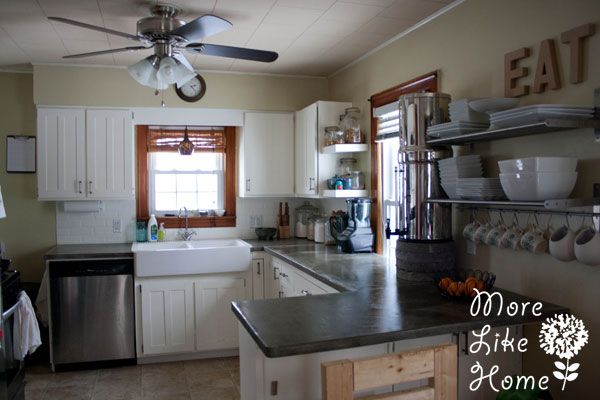
And I can't believe how far we've come! As a reminder, this is how our kitchen looked the day we closed on the house:

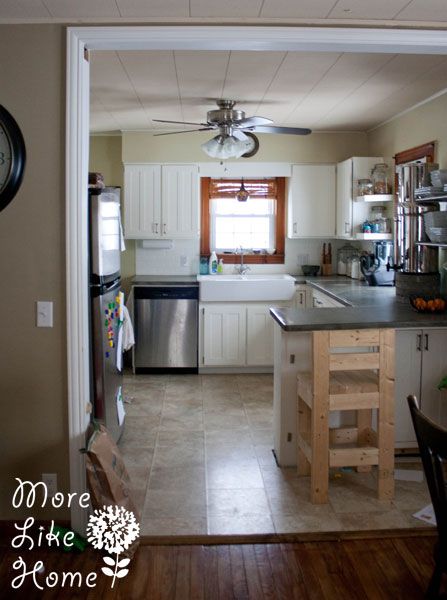
And this is what it looks like today:
You can check out more of our 2 1/2 year kitchen saga here.
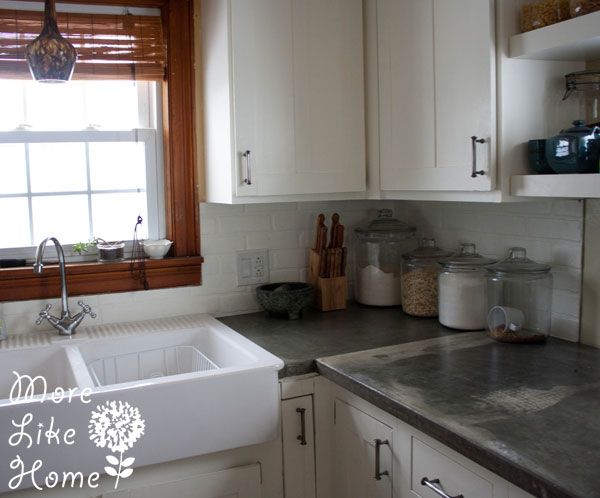
I probably should have showed where we ended the backsplash a little better. It was quite the debate. On the left side the wall cabinets go farther than the base cabinets & countertop (see above) and we decided to stop at the edge of countertop. The countertop is what you see when you're looking down working so we wanted it to make sense that way (as opposed to hanging over the edge of the countertop and looking goofy). The right side was trickier (below) because we have wall cabinets, then floating shelves, then the window. My first thought was to stop at the edge of the shelves, but husband talked me into stopping at the cabinets instead. For one thing it was easier - the shelves are at a different height and there is another outlet - but also it might have been weird to stop so close to the window without going all the way to the window? I don't know, but he definitely made the right call. We stopped at the edge of the cabinets and haven't looked back.
I love how much brighter it feels, especially during these gloomy winter days. And it's flowing beautifully with the rest of our house.
Oh look! One more flash-back picture of Big Brother before he was a big brother! This was when he first figured out puzzles that are now entirely too easy for him.
Have you done a backsplash makeover? What would your dream backsplash be? I actually would love a white subway tile, so faux brick was great option for a fraction of the cost!

What a creative idea with the faux brick. Wow, your kitchen makeover is just beautiful. What an improvement. Looks so much brighter and much more functional now. The extra counter space is wonderful. Really like what you did there, GREAT job.
ReplyDeleteThank you so much! We've been really happy with it so far. :)
DeleteI absolutely love this look and your idea! Me myself am looking for that "brick color look" and seeing how this was pretty easy I'm super excited to let my husband know of the NEW project we are going to do!
ReplyDeleteHa ha, my husband is always so thrilled to hear those words. :) Have fun! I'd love to see how it turns out!
DeleteIt looks very nice. This is exactly what my husband wants to do to our kitchen this weekend. We are closing on our home on Friday. I was curious on how the brick paneling is holding up in the kitchen. I was worried about moisture. We own a body shop so my husband was going to clear over it with a matte clear for extra protection.
ReplyDeleteThank you! We had it up for two years until we moved and it held up great! Even just with the paint and no sealer we didn't have any problems. We did caulk along the bottom with a clear caulk to keep spill from seeping under.
Delete