P.S. Check out the rest of our free DIY Desk Plan Series here!
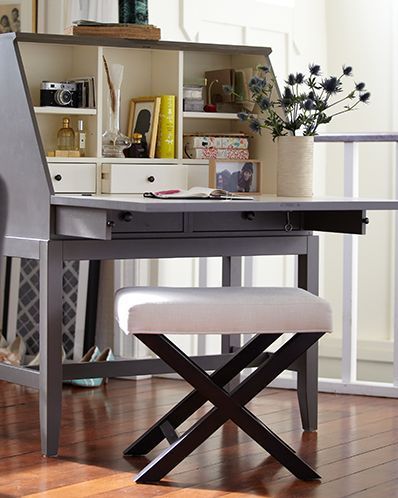
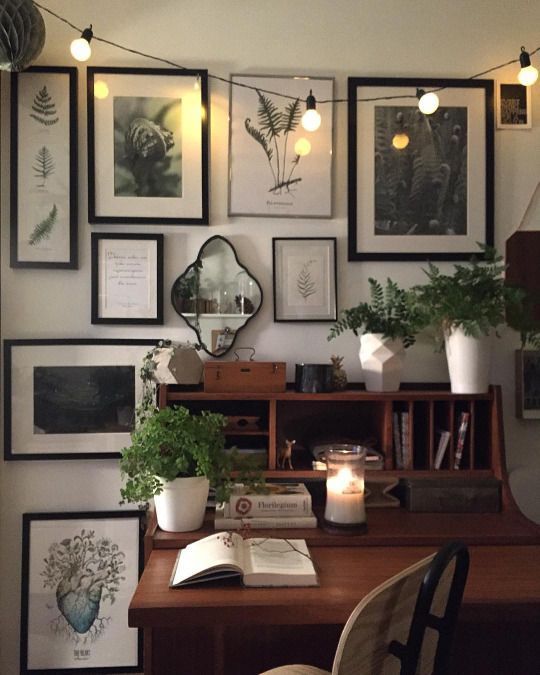
We'll start with a few more secretary inspirations for you. Like this fresh painted version.
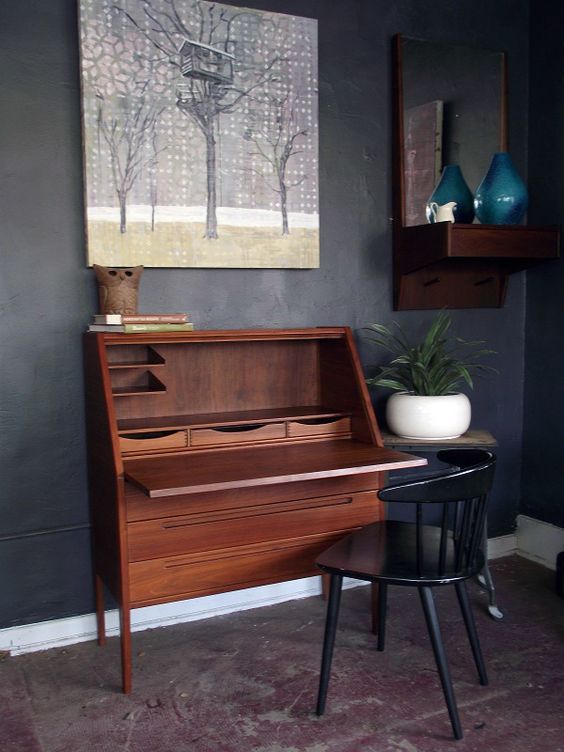
You guys know I love a Mid-Century Modern. I love that style vibe in this desk, but also wanted to show how you could get something more this shape by adding more drawers to the bottom of your desk. You can also cut notch drawer pulls!
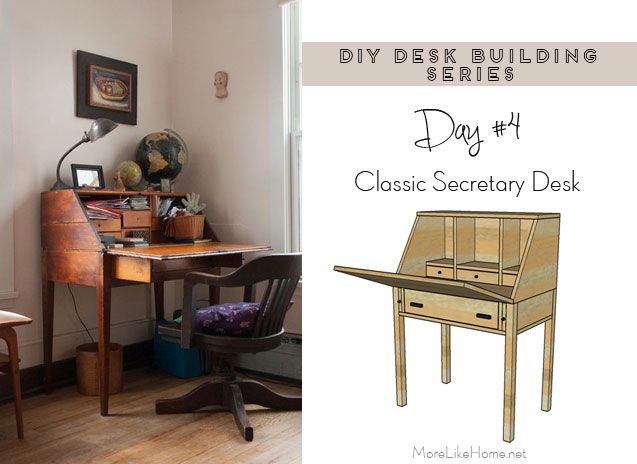
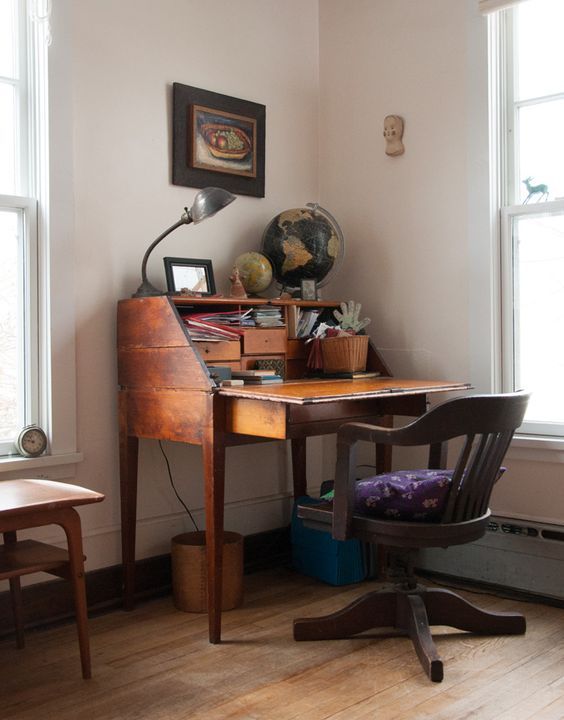
I love an antique desk, and this one is no exception. You can tuck this in just about any corner and have a perfect, cozy little workspace. P.S. Every secretary should probably have a globe on top.
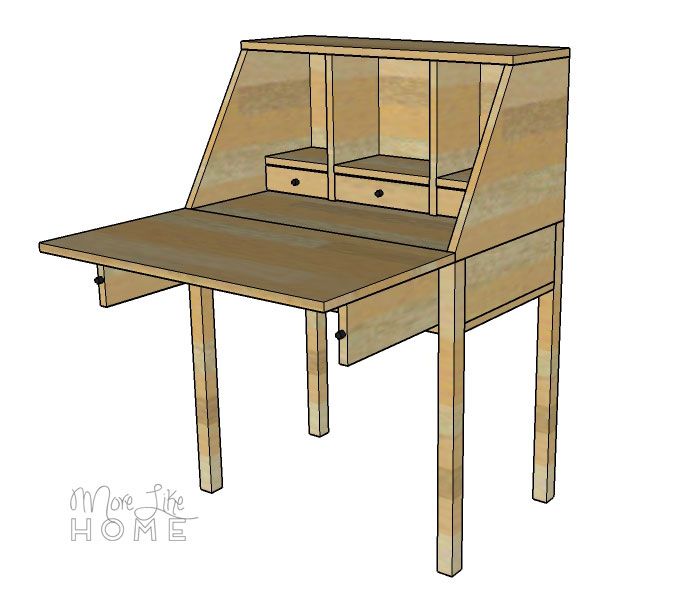
Nooks and crannies, crannies and nooks. One of my favorite things about a secretary is the built-in storage. Tiny drawers, tiny shelves, or a mix of both. Get creative in your secretary and build the best storage for you.
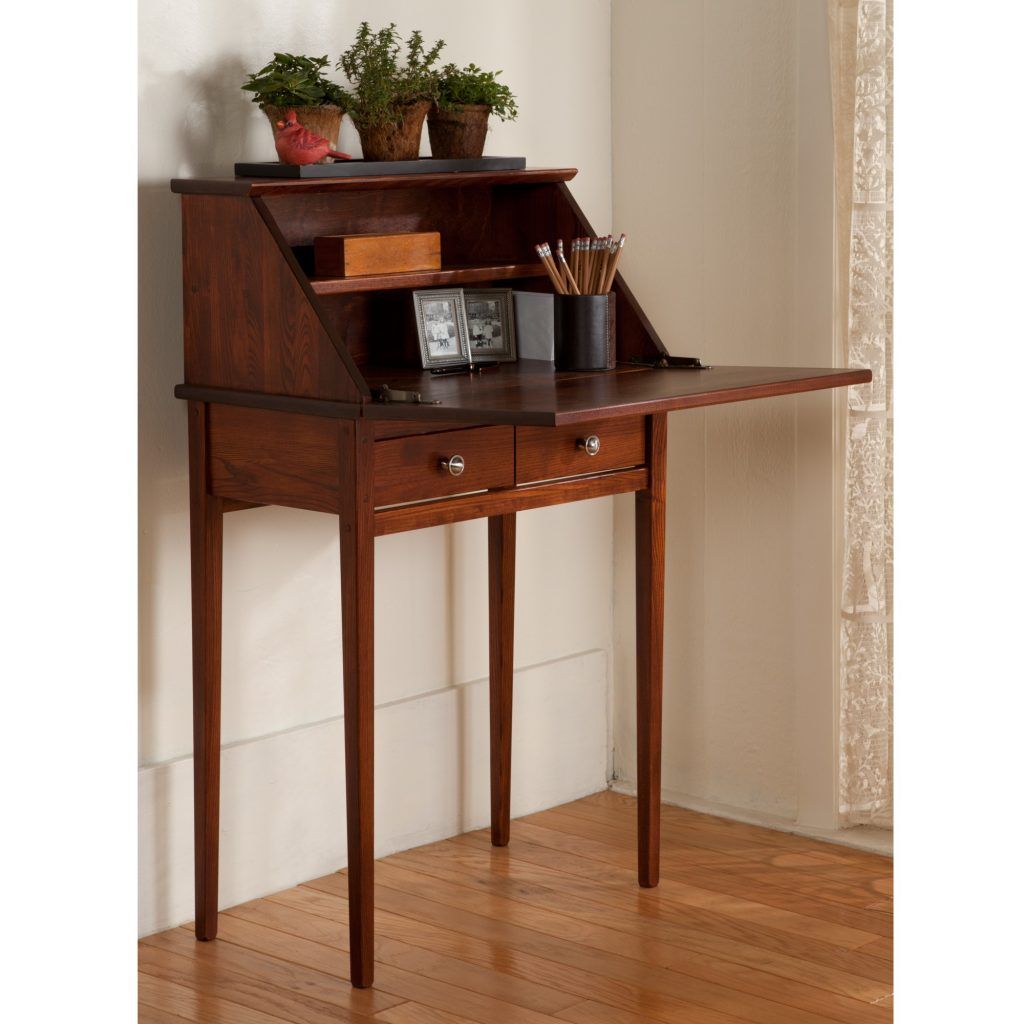
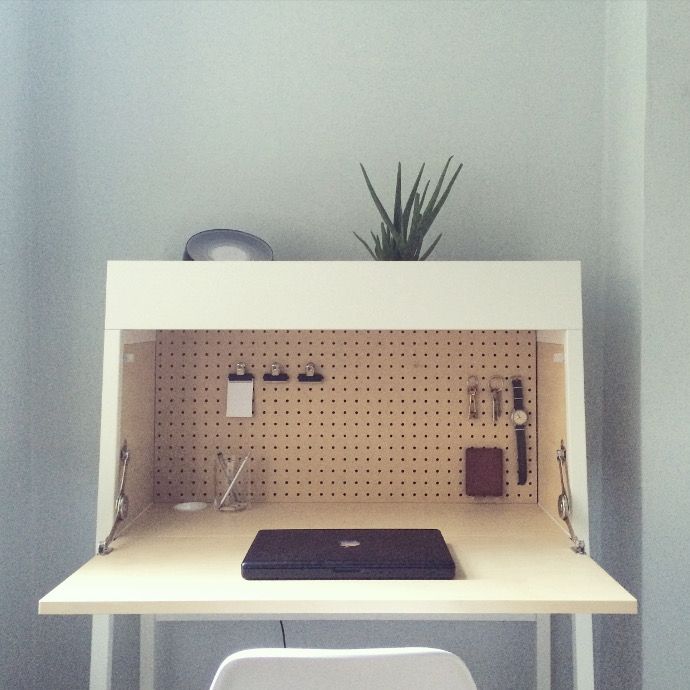
Last but not least, this simple and sweet little guy.
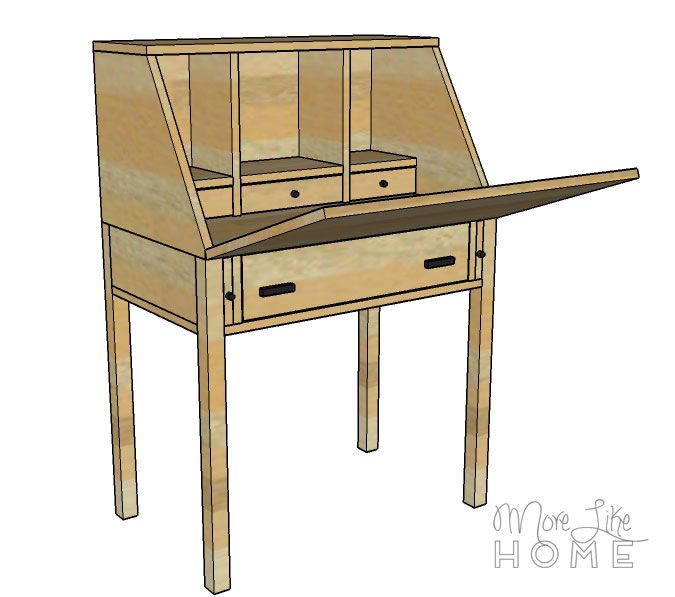
Fair warning: this is a more advanced plan with a lot of parts. I wouldn't recommend it as a first project. But don't panic! We have a much simpler version of a secretary desk on day 6, and a wall-mount version coming later in the series!
Shopping List:
1 - 2x2 @ 10' (or two 6' boards if your store doesn't have a 10')
1 - 1x6 @ 8'
1 - 1x6 @ 6'
11" scrap of a 1x2
1 - 1x4 @ 6'
1 - 1x8 @ 6'
1 sheet 3/4" plywood
1/4 sheet 1/4" plywood (for interior drawer boxes)
two hinges
1 set 16" drawer slides (we love full extension slides)
knobs or pulls for the drawer
two small knobs for the pull-outs
three small knobs for the inside drawers
Kreg Jig and 1 1/4" pocket hole screws
1 1/4" wood screws (and 2" wood screws if you don't have a Kreg Jig)
finishing nails
wood glue
sandpaper and finishing supplies
Cut List:
(A) 4 - 2x2 @ 28" (legs)
(B) 2 - 1x6 @ 15 1/2" (base sides)
(C) 1 - 1x6 @ 27" (base back)
(D) 1 - 3/4" plywood @ 30 x 18 1/2" (base bottom)
(E) 2 - 1x6 @ 17 3/4" (dividers)
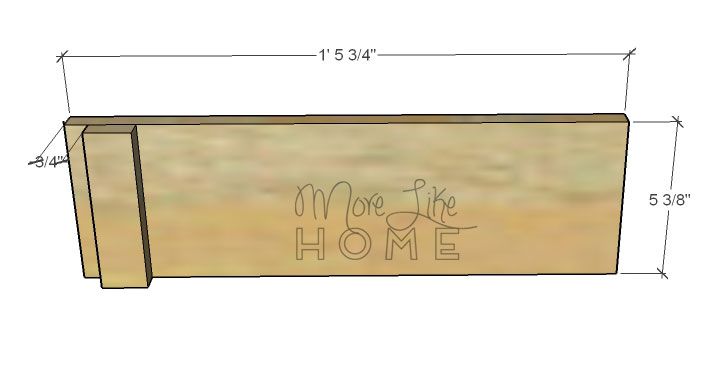
(F) 2 - 1x6 @ 17 3/4" (slides)
(G) 2 - 1x2 @ 5 3/8" (stops)
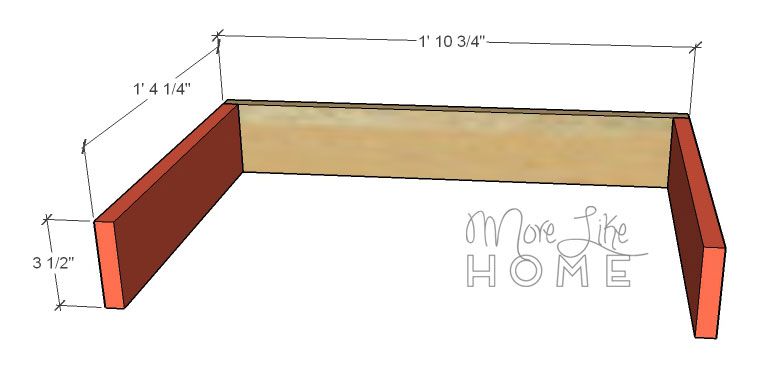
(H) 1 - 1x4 @ 22 3/4" (drawer back)
(I) 2 - 1x4 @ 16 1/4" (drawer sides)
(J) 1 - 3/4" plywood @ 17 x 22 3/4" (drawer bottom)
(K) 1 - 1x6 @ 23 1/2" (drawer front)
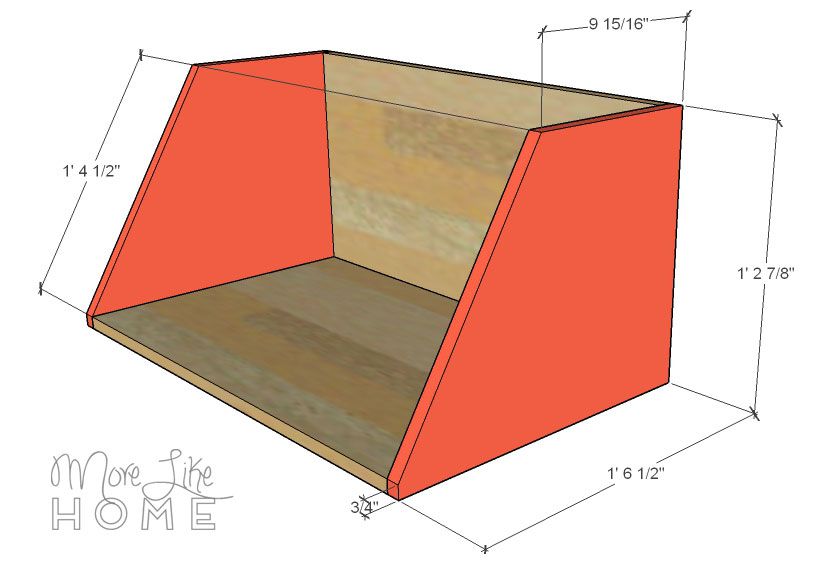
(L) 1 - 3/4" plywood @ 28 1/2 x 17 3/4" (hutch bottom)
(M) 1 - 3/4" plywood @ 28 1/2 x 14 7/8" (hutch back)
(N) 2 - 3/4" plywood @ 18 1/2 x 14 7/8" (hutch sides)
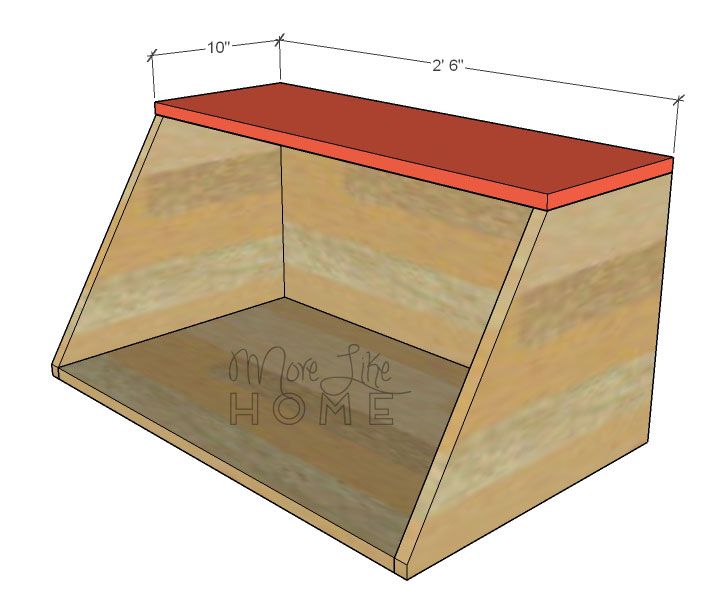
(O) 1 - 3/4" plywood @ 30 x 10" (hutch top)
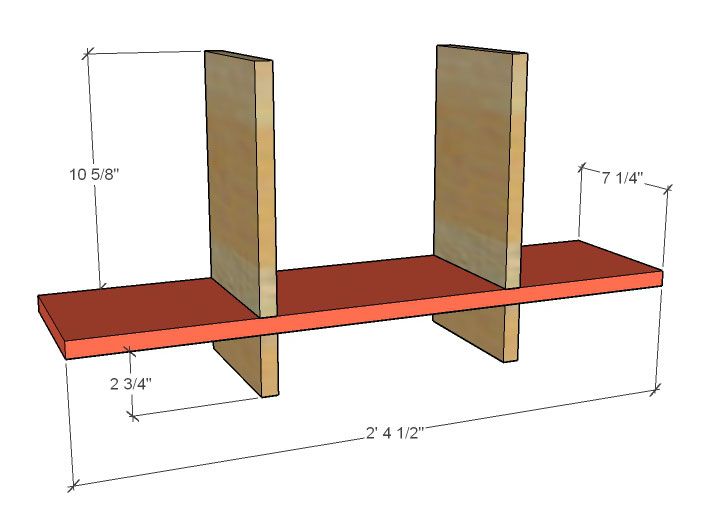
(P) 2 - 1x8 @ 10 5/8" (shelf divider top)
(Q) 2 - 1x8 @ 2 3/4" (shelf divider bottom)
(R) 1 - 1x8 @ 28 1/2" (shelf)
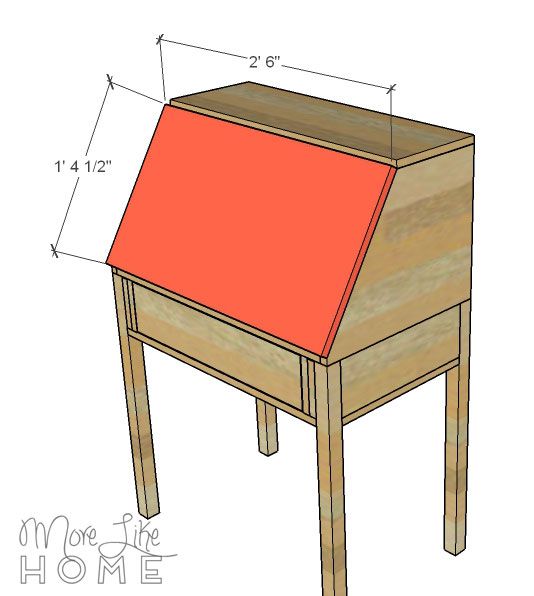
(S) 1 - 3/4" plywood @ 30 x 16 1/2" (front)
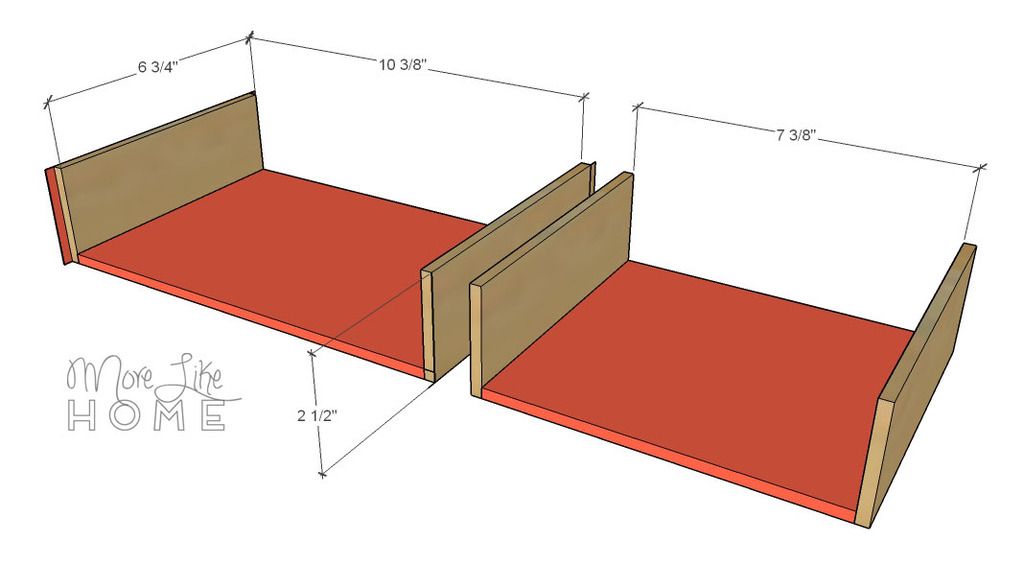
(T) 6 - 1/4" plywood @ 2 1/2 x 6 3/4" (mini drawer side)
(U) 2 - 1/4" plywood @ 7 3/8 x 6 3/4" (side drawer bottom)
(V) 1 - 1/4" plywood @ 10 3/8 x 6 3/4" (center drawer bottom)
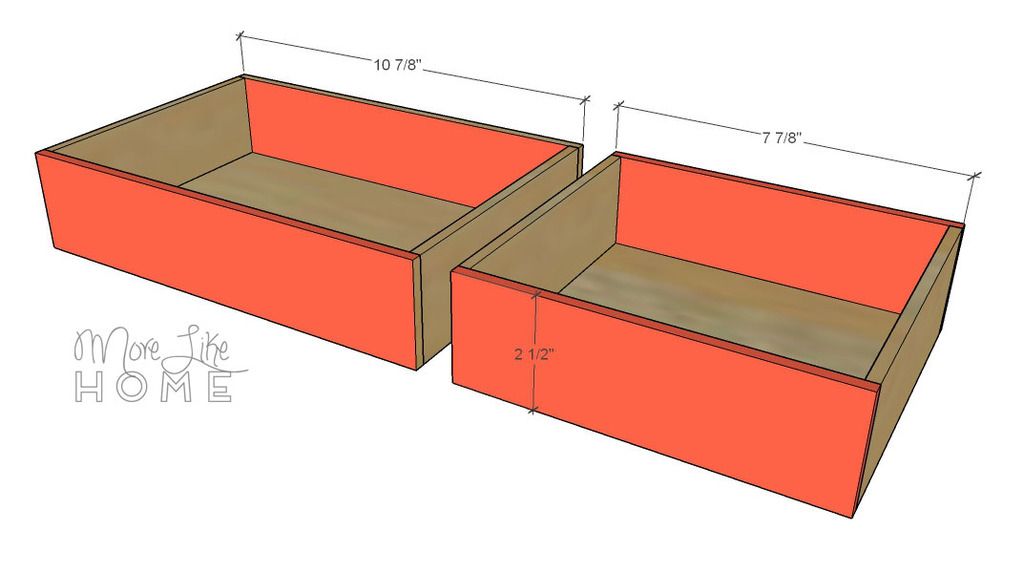
(W) 4 - 1/4" plywood @ 7 7/8 x 2 1/2" (side drawer front/back)
(X) 2 - 1/4" plywood @ 10 7/8 x 2 1/2" (center drawer front/back)
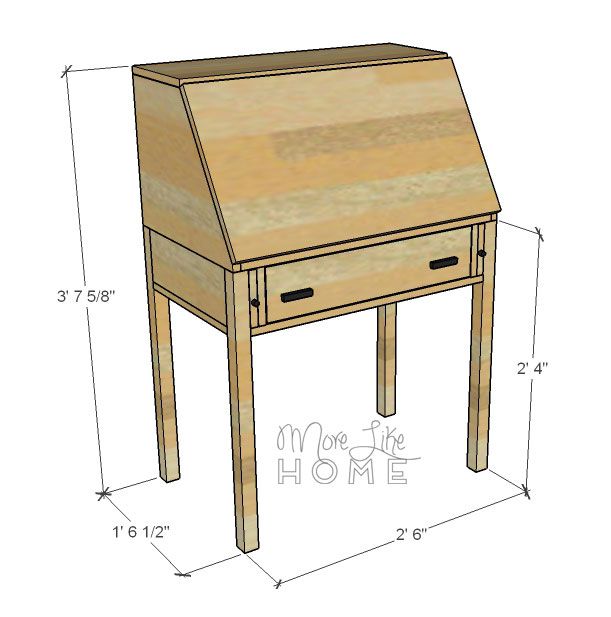
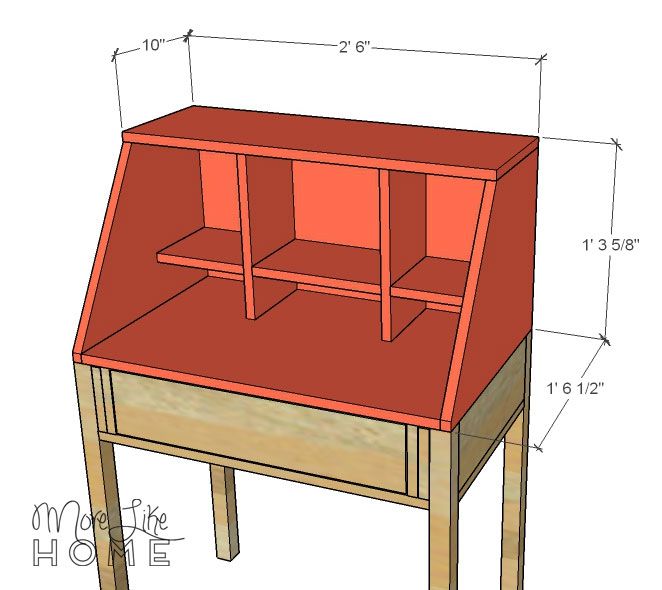
Dimensions: 30" wide x 18 1/2" deep x 43 5/8" tall
Measure twice, cut once (seriously, though). Use glue in every step. Read through all the instructions before you begin. Use 1 1/4" wood screws unless otherwise indicated (any time we mention the Kreg Jig or pocket holes, you'll be using the 1 1/4" pocket hole screws). Pre-drill and countersink all your screws. Be safe, have fun, and let me know if you have any questions!
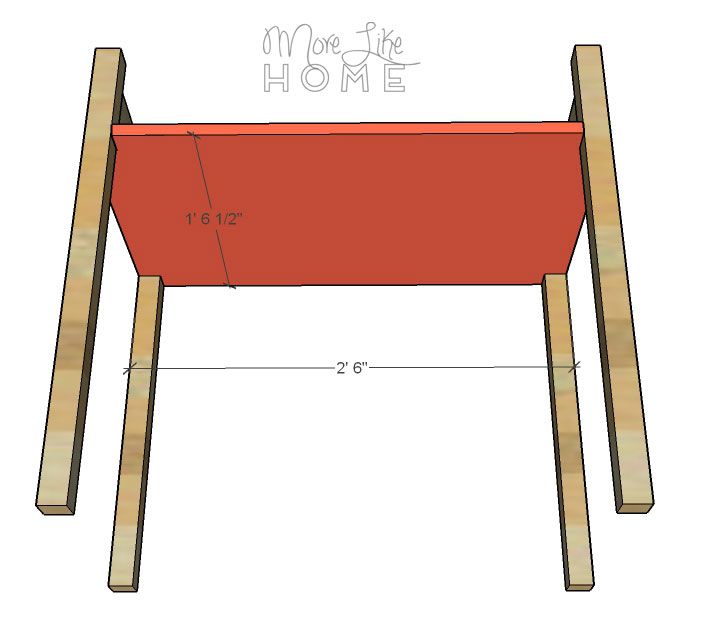
Attach two legs (A) to each side (B). They should be flush at the top. Use a Kreg Jig, or drill through the legs into the ends of the side board. Repeat with the remaining legs and side. If you're using a Kreg Jig, put pocket holes around the bottom edge of the sides and back boards.
Connect those two leg section with the back board (C). Make sure it's flush with the top and attach it in the same way you did the side pieces.
Cut notches in each corner of the base bottom (D) that are 1 1/2" wide and deep.
Slide the bottom board up under the side and back boards. The notches will fit around the four legs. Attach the bottom board to the sides and back using a Kreg Jig, or by drilling up through the bottom into the sides and back.
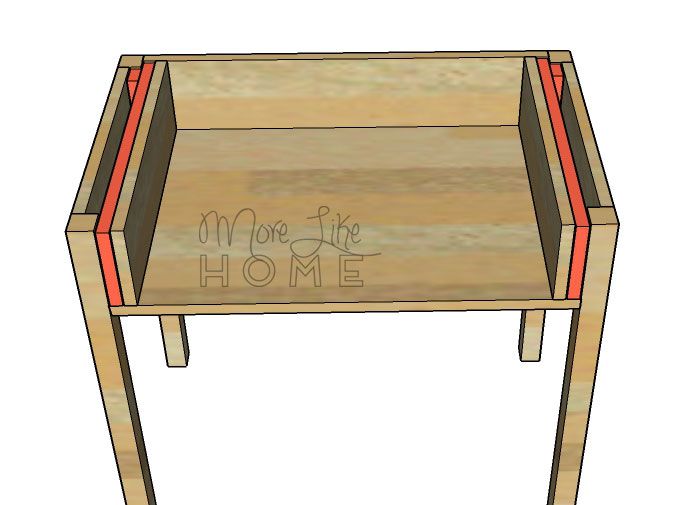
Put in the two divider boards (E). Make sure they are straight because you'll be attaching the drawer slides to these later. They should be set in 7/8" from the legs. Attach them with pocket holes in the back and bottom edges of the divider, or by drilling in through the back and bottom boards into the divider.
Start by shaving each slider down to be 5 3/8" tall. Then attach a stop (G) to each slider (F). It should be flush with the top and bottom edges to slide smoothly, and be set in 3/4" from the back edge.
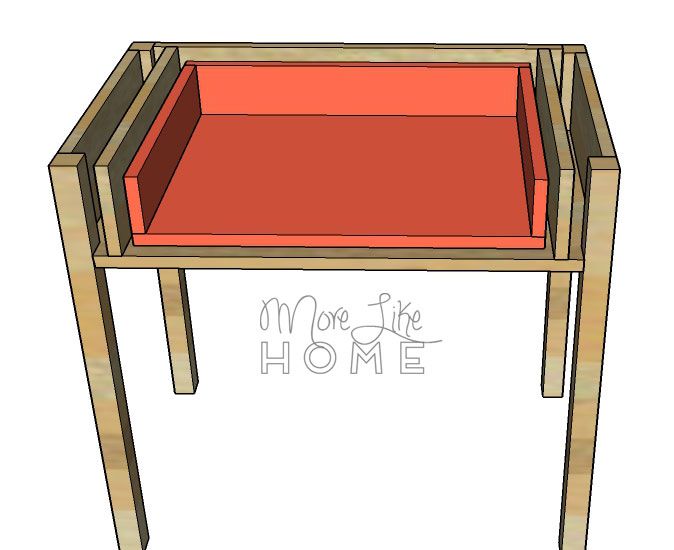
Set a slider into each space left by the dividers, with the stops toward the back.
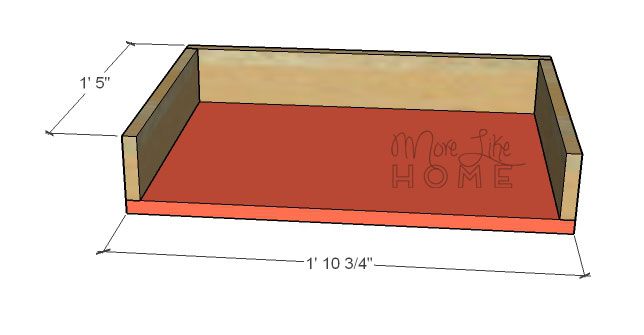
Next build the drawer box. Attach the two drawer sides (I) to the drawer back (H). Use pocket holes in the sides, or drill through the back into the ends of the side boards.
Attach the drawer bottom (J) by drilling up through the bottom into the sides and back.
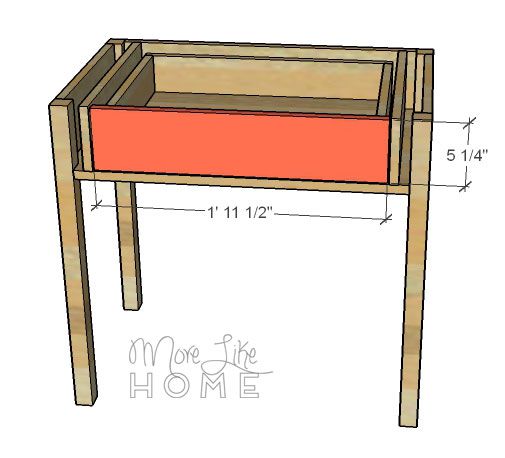
follow the instructions on your drawer slides to install your drawer box. Make sure the box closes all the way against the back of the cabinet, leaving it inset 3/4" from the front face.
Shave down the drawer front (K) to be 5 1/4" tall. Install the drawer front with a 1/8" gap on each side and at the bottom. This will leave a 1/8" gap at the top later. If you prefer you can wait and attach the drawer front after the hutch is installed.
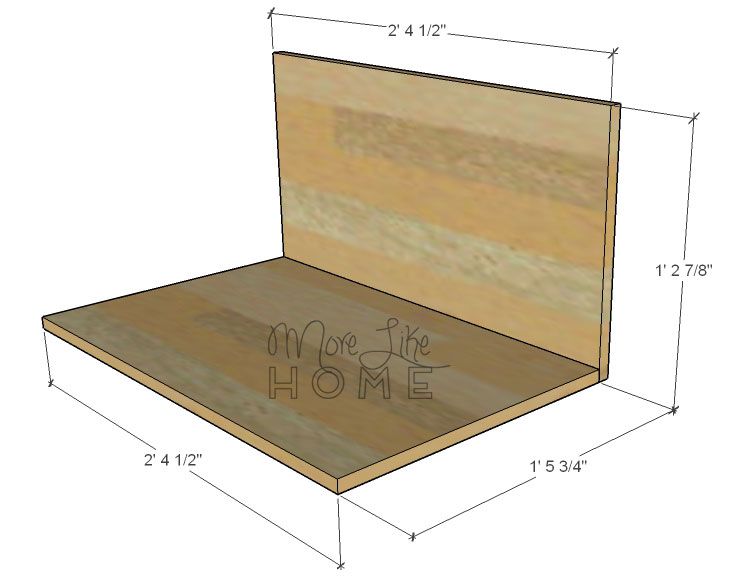
To build the hutch, start by attaching the hutch bottom (L) to the hutch back (M). Use pocket holes along the back edge of the bottom board, or drill through the back into the edge of the bottom board.
Cut the front edges of the sides (N) at an angle. Measure in 10" from the top right, and 3/4" up from the bottom left. Draw a line connecting those two marks and cut along the line. Then attach the sides to the hutch. Use pocket holes along the sides of the back and bottom, or drill through the sides into the back and sides.
Attach the hutch top (O) using pocket holes along the top of the back and sides, or by drilling down through the top into the back and sides.
Attach the hutch to the base. You can drill down through the bottom into the tops of the legs and dividers.
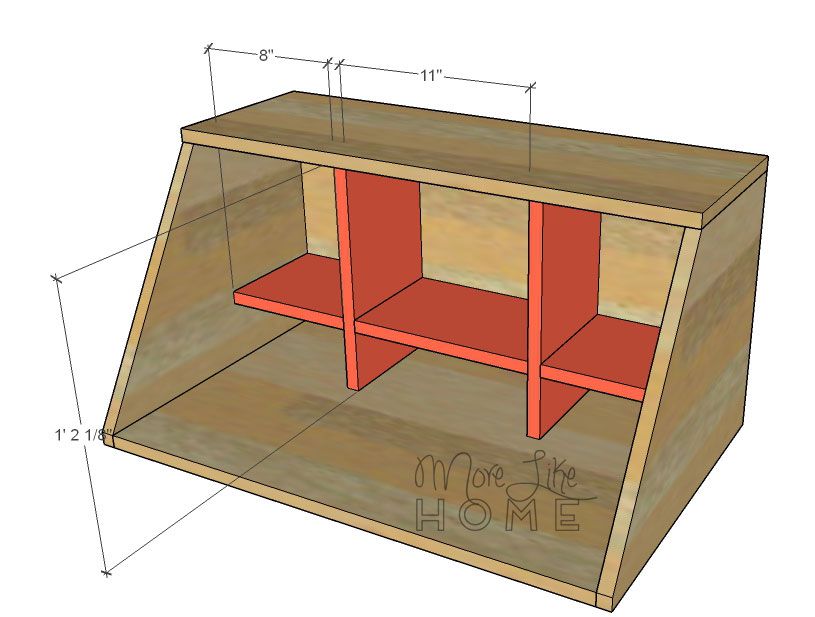
Build the interior shelving. This is just one option. You can build any configuration you like, or leave it out all together!
Use a Kreg Jig to attach the top dividers (P) and bottom dividers (Q) to the shelf (R). They should be set in 8" from each side, with an 11" opening in the middle.
Fit the shelving into the hutch. Attach it with finishing nails. Nail through the top and sides into the ends of each shelf and divider. You could also use screws, but nails won't leave large holes to fill.
Fit the front onto the cabinet and use the hinges to attach it.
You can add hinge supports if you want, but this desk has the classic pull-out sliders to support the desktop while you work.
Last but not least, you can make three mini drawers to fit into the shelves. You'll be making two narrow drawers and one wide drawer. Start by attaching two sides (T) to each drawer bottom (U and V). The sides should be flush with the front, back, and bottom edges. Use finishing nails for this since the plywood is so narrow! Nail through the sides into the edges of the bottom boards.
Attach the fronts & backs (W and X) to each drawer. Nail through the front and back into the side and bottom boards. Let the glue dry before you put them in, just to be sure they don't stick.
To finish, fill any holes with wood filler then sand everything down really well. This is the most important step for a professional finish! Start with a rough sand paper, then go over everything with a medium paper, then again with a fine paper. Once it's super smooth, finish it with whatever paint or stain and sealer you like.
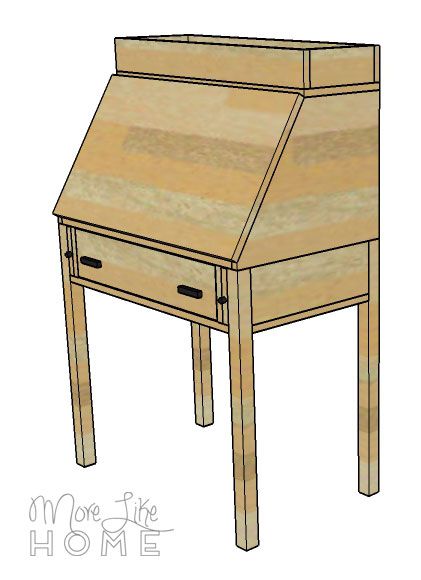
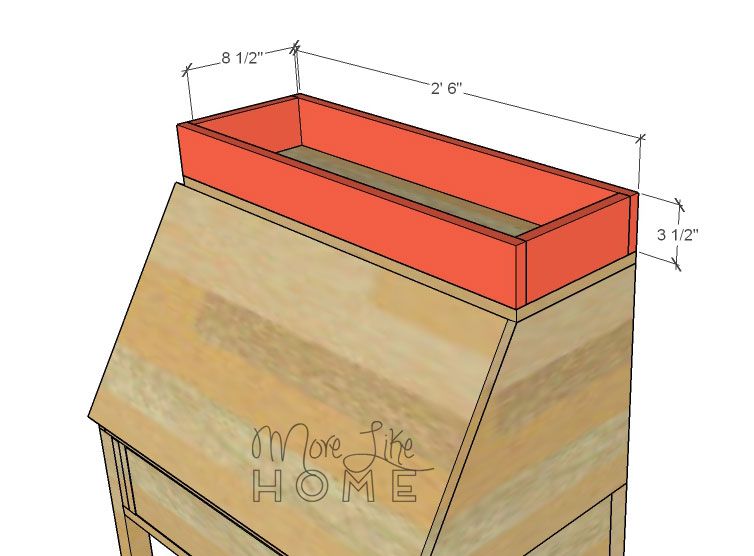
Fun bonus project: you can add a little shelf edge around the top. And before you shoot that down, scroll a smidge to see a couple really cute versions of this.
(plain desk on the right, shelf added on the left)
Just add pieces of 1x4 (or any other width of board you prefer) around the top. This would be easiest with a Kreg Jig.
This project has tons of room to customize the plan and make it your own. Have fun!
That's it! Come back tomorrow for another DIY desk plan, and check out the full series here!






I love this one!
ReplyDeleteMe too! :D
DeleteDo you have any pictures of the final product in real?
ReplyDelete