Showing posts with label organizing. Show all posts

Saturday, October 2

Boys' Closet Reveal (Low-Budget Makeover!)

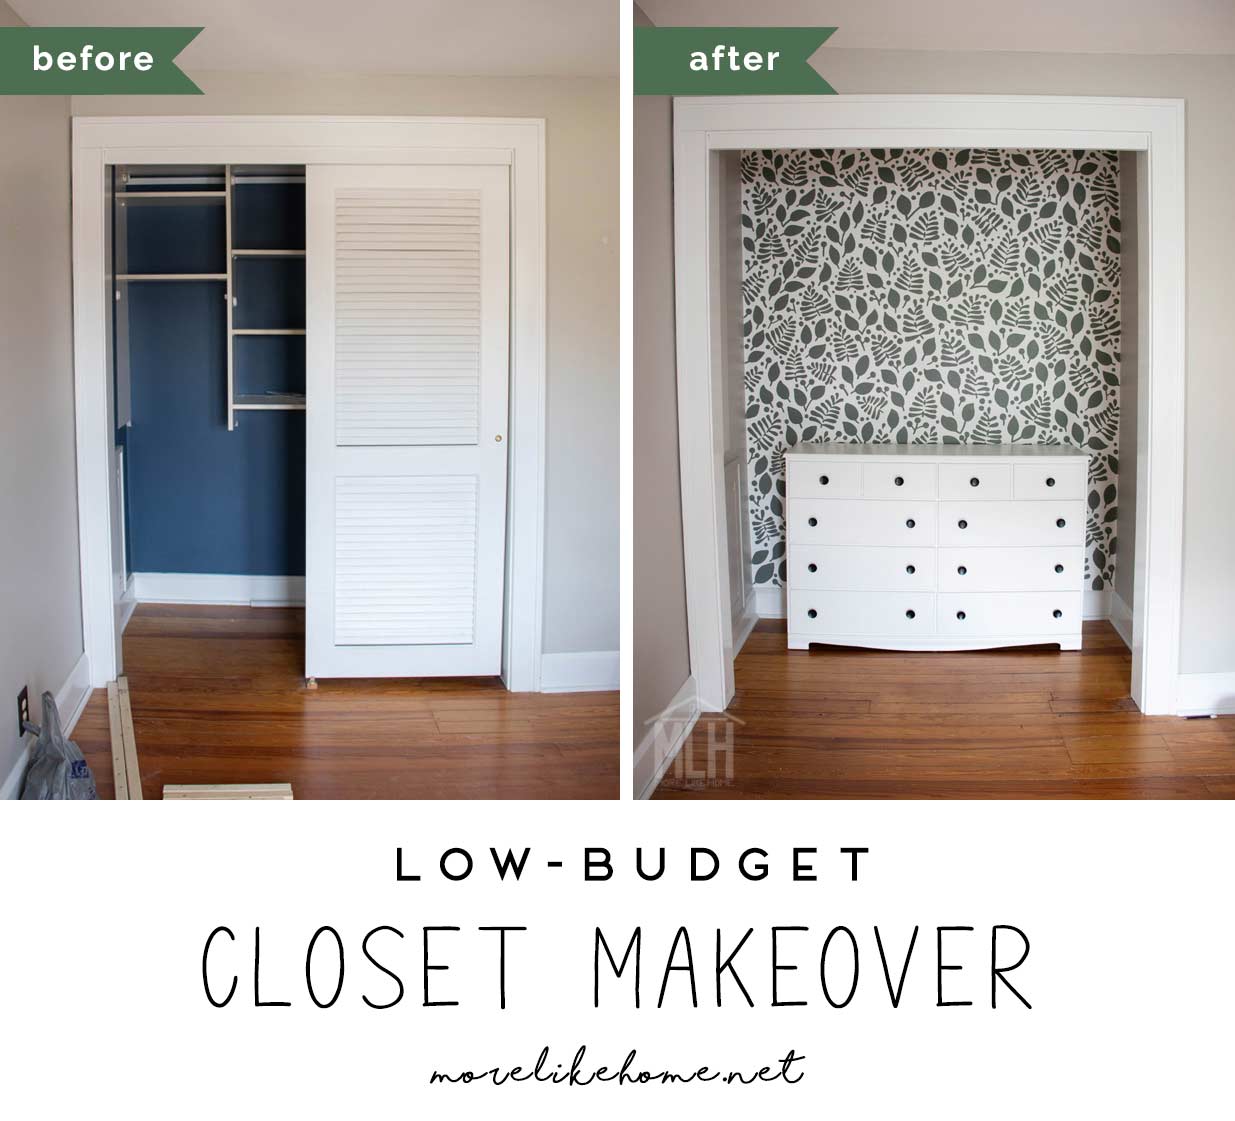
Hey guys! It's time for the closet reveal! You saw a peek of it in the bunk room reveal (check that out here if you missed it), but the final details are done and this closet is already working hard for our boys. This was a 100% low-budget use-what-we-have project because seriously, guys, you don't have to spend a fortune to create a beautiful home for your family! Here's a reminder of where we started and where we left off during the bunk room reveal:


And here's their closet today: 


Friday, December 27

How to Organize + Store Christmas Decor

I think we can all agree on one thing: the worst part of Christmas decorating is taking them down when Christmas is over. Ugh.

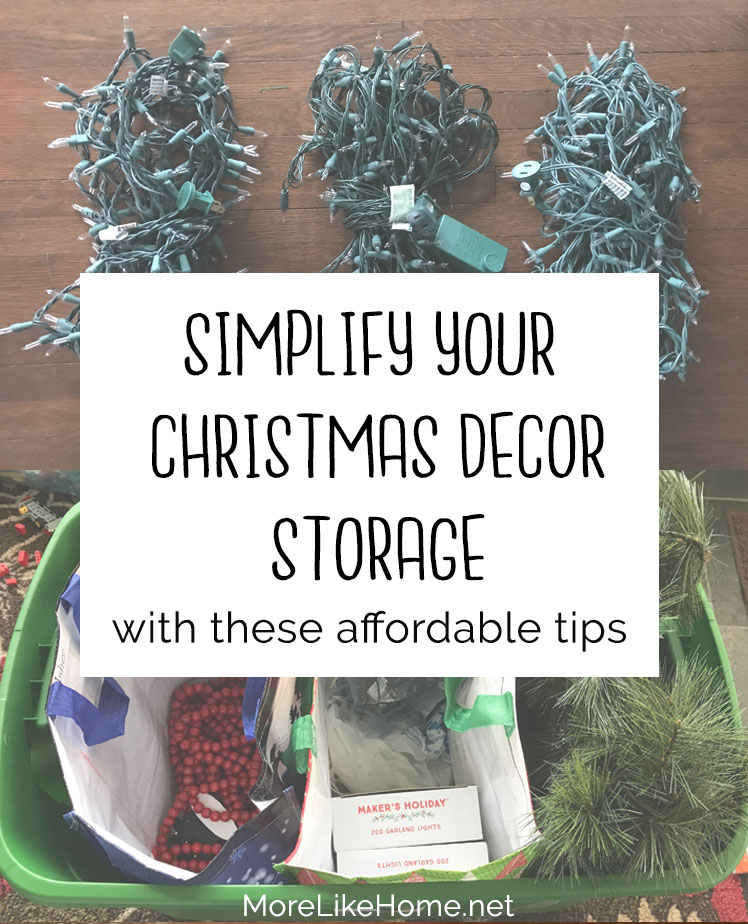
But it doesn't have to be so bad. This is your chance to set your self up for success next year! As you pack up, start by re-evaluating what you have, deciding what you truly need and want to keep, and purging the rest. Then, once you've settled on what is staying in your stash, you can organize and store your items in a way that makes them easier to find and use when you're decorating, and easier to pack away when you're done. So today I'm going to share some of my favorite tips for packing and organizing decor that is easy, cheap, and will save you both time and sanity next year.


Thursday, August 22

Packing + Organizing a Camper Van for a Family of 6

I've mentioned a few things about how we pack our DIY Camper Van, but I wanted to try to give you a better idea of how we actually make it work. What we pack, how we pack it, and where it all fits. So this is the post with all the nitty gritty (but probably not-super-interesting) packing details. Hold onto your hats, folks, and let's start at the beginning:

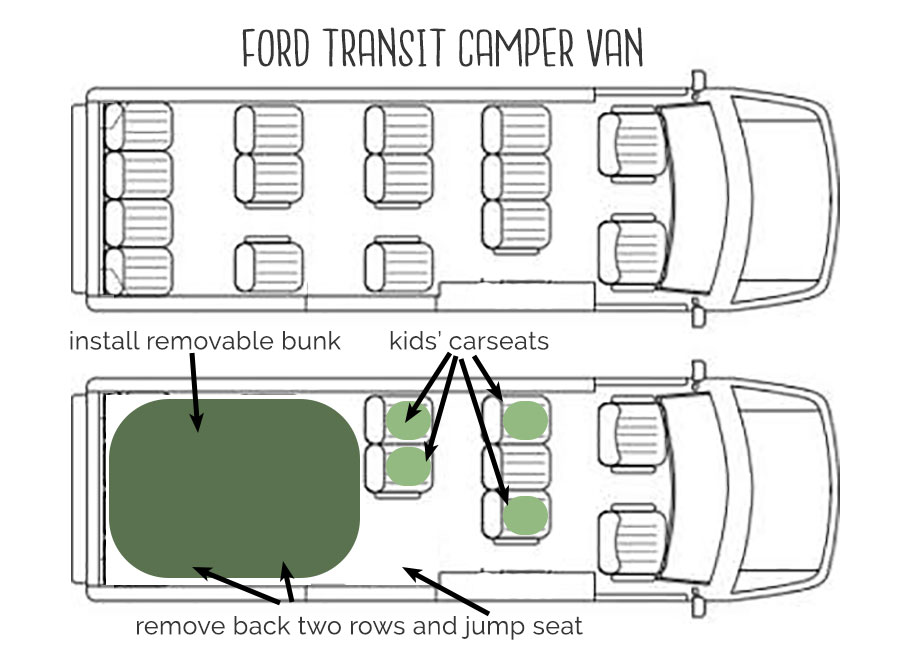
The first step in packing our camper van is to remove the back two rows of seats and the jump seat right by the door. This leaves room for Nathan and I in the front, followed by a three-seat row with two carseats (I left a seat between them open so I could sit by the baby sometimes), followed by a two-seat row with two more carseats. We've found removing the jump seat makes a world of difference when we're getting in and out of the beds! It's a little extra work to get it out, but totally worth it!

Not to scale. That leg room is false.

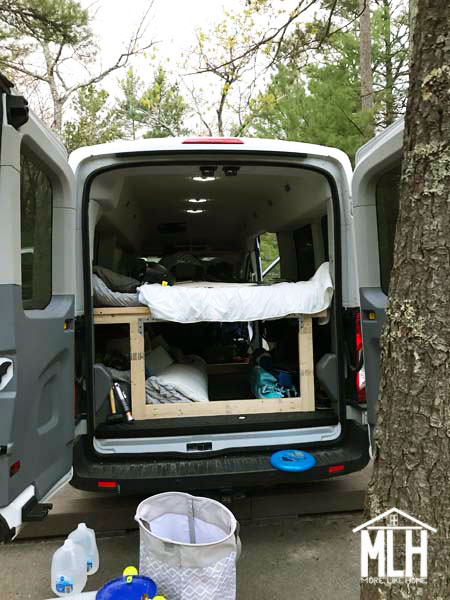
With the seats out, we can install the bunk system (it's removable when we're not camping and the foundation of making this van work for our family of six!). Once the bunk is installed, I put in both mattresses in place and go ahead and make them up with sheets, blankets, and pillows. Then I roll up the bottom bed toward the left side of the van like this:


Sunday, January 13

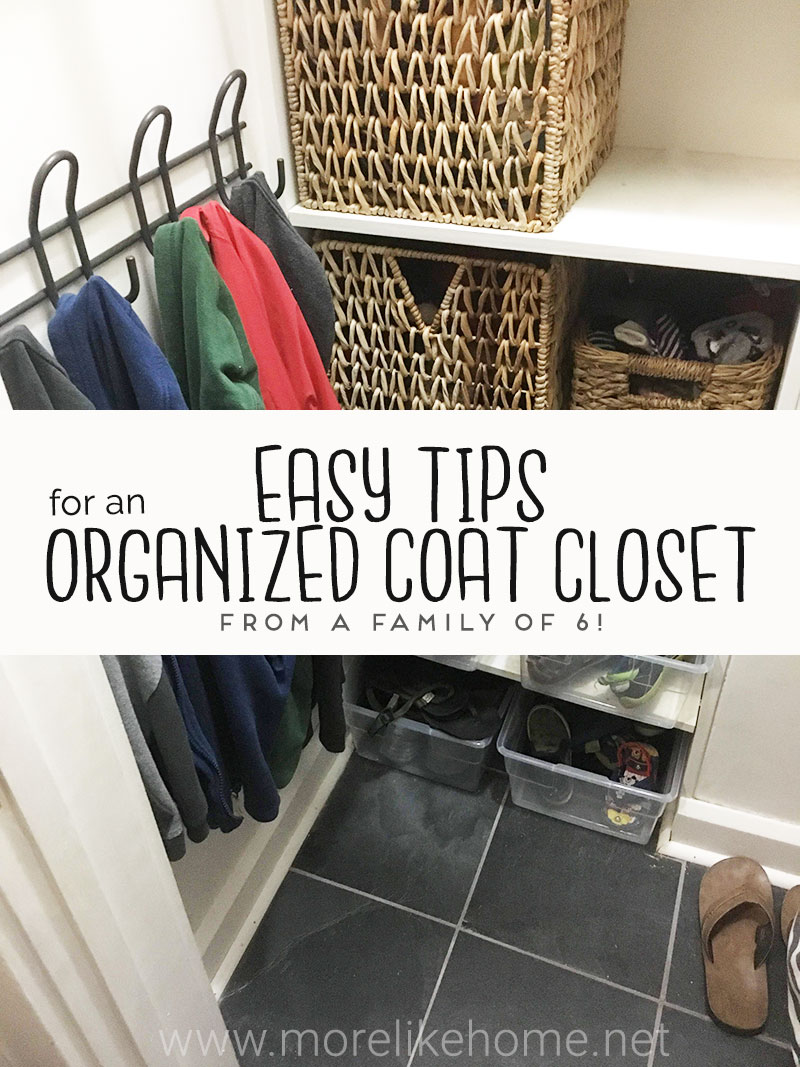
7 Coat Closet Organization Tips (from our family of 6!)

Something about a new year always has us itching for a fresh start!  I'm ready to organize, declutter, and simplify (along with another huge overhaul you can read about here). And I started with this little coat closet that sits just inside the door. 


Two years of coats on the floor and piles of shoes was all this momma could handle. I did some very basic "organizing" last year with a few baskets I brought in the move plus a couple empty diaper boxes (yup.). It was enough to get us by for a while, but I finally had to face the fact that it just wasn't serving our family as well as it could. The good news? It was a super simple fix and it didn't cost much!

Saturday, January 5

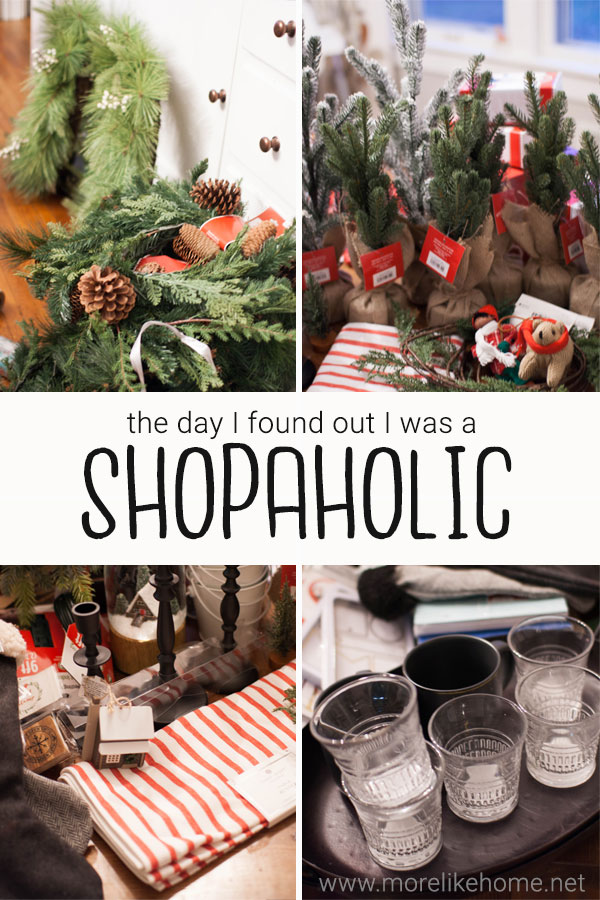
Confessions of this Shopaholic (and a journey toward less)

Hello, my name is Georgia, and I might be a shopaholic.

I was reading a book last week that opened my eyes to what a shopaholic really is. It's not the lady in high heels carrying and armload of shopping bags. I mean, sure, she's probably a shopaholic too, but that's not who I'm talking about. Because shopaholism (probably a word. maybe.) doesn't always look like that. The shopaholic also looks like the tired mom-of-four who goes to the store for two things and leaves the store with five things. Every single time. They may be little, inexpensive things - a new mug, an extra fuzzy scarf, two rolls of ribbon (they were on sale!) - but they are still extra things, compulsively bought, and most likely not accounted for in the budget.

I decided our house was too cluttered. No more! We need to purge! Then I went shopping after Christmas and brought home all this. Because sales! It's so beautiful! The deals! This is where my story of shopaholism begins.

Monday, February 20

DIY Coat Racks on the Cheap (two for $25!)

This week we learned that coat racks can be crazy expensive. Expensive enough to make me wonder "Do we really need to hang those coats up?" The cheapest we found was almost $30 for four hooks! Fortunately we found a DIY option that was much more affordable, and we ended up with two huge coat racks for under $25! (you may want to check out this super cute version we made with Ikea hooks, too!)


This is our first winter in our new house, and we've quickly developed a bit of a coat problem. It looks like this:


That would be all the snow pants and snow coats we own. And this is where we've kept them since November. The wouldn't fit in our little coat closet, and I didn't want snowy footprints through the house so we just dropped them by the door. Until this week, when I realized the crazy obvious solution I'd been overlooking. The hallway.


Sunday, January 1

2017 {the resolution train wreck}

I have a thing with resolutions. Namely, I don't remember them. Most years I'll think of a few vague goals I want to accomplish... and then promptly forget about them... until the next new year's eve rolls around. And I'm suddenly like "OH NO WAIT. I think I was supposed to do something this year. Oops." And I don't even know what the thing was that I was supposed to do. Which makes this year's main resolution even more fitting. Because this is it, guys. This is the year I get my life together.

LOL because I probably made this same resolution every January 1st for the past five years.

But here we are, and forward we go.


Now I'm hoping to tack down just a couple solid mini-goals to help keep myself in check (if I remember long enough to make it to a check point. Obvs.). So here you have it. The 2017 "mama's gotta get it together" game plan:
  • Meal Plan. At least the dinners for the whole week. And have like a shopping day to get all the things to make all those meals.  I hear it's a thing people do.
  • Cleaning Schedule. Fact: I printed out a daily and monthly cleaning schedule a friend showed me a few weeks ago. I even laminated it and hung it on the fridge. I haven't followed that list one single day. 
  • Write in our Funny Boy Journals. I keep them on my nightstand, and I'm going to start writing in them at least a couple times a week. Ideally every night. This is priority uno because these little books are some of my most prized possessions and there is a gold mine of funny in this house.
That's it. And I'm pretty sure it will change my life if I let it. Maybe. Unless I'm one of those people whole thrives on chaos and disorder and no structure. Either way, this is the year to find out.

But jk that's not totally it because I like to bite off more than I can chew/remember so I also made another short list of unrelated goals. As follows:
  • Spend at least 1 hour outside every day. Unless it's way bitter cold. Or we're sick. Or I have another really good reason. (I like a healthy amount of loophole in my resolutions)
  • Read more. 
  • Look at my phone less.
  • Watch these boys play more. And remember they're only little a little while and make the most of it. How's that for a vague, guilt-ridden goal? It's like the perfect storm of resolution-making.
  • Oh, and buy a cheap/crappy camper, fix it up, blog about the whole thing, and go camping on the weekends. Husband will be glad we did this and have lots of fun. 
The end.

But, seriously, whatever we do this year, I'm just glad these are the guys I get to do it with.

What do you want to do with your 2017?

Saturday, September 24

Organizing the Van with Kids (and our "backup box")

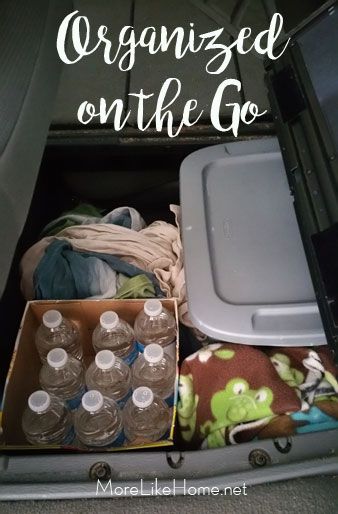
Traveling with kids usually mean hauling a lot of stuff. The more kids. Even a trip to the grocery store can mean sippy cups, lost shoes, and an outfit change if you have a potty trainer. Sometimes we feel like we're packing enough for a weekend trip when we're just heading out for a few hours! Rather than lugging a huge diaper bag every time we leave the house, we've found it's much easier to keep a few key items stashed in the van permanently. Things we don't necessarily need to carry in our bag, but we want to have access to without running home. Here's what we pack and how we do it:


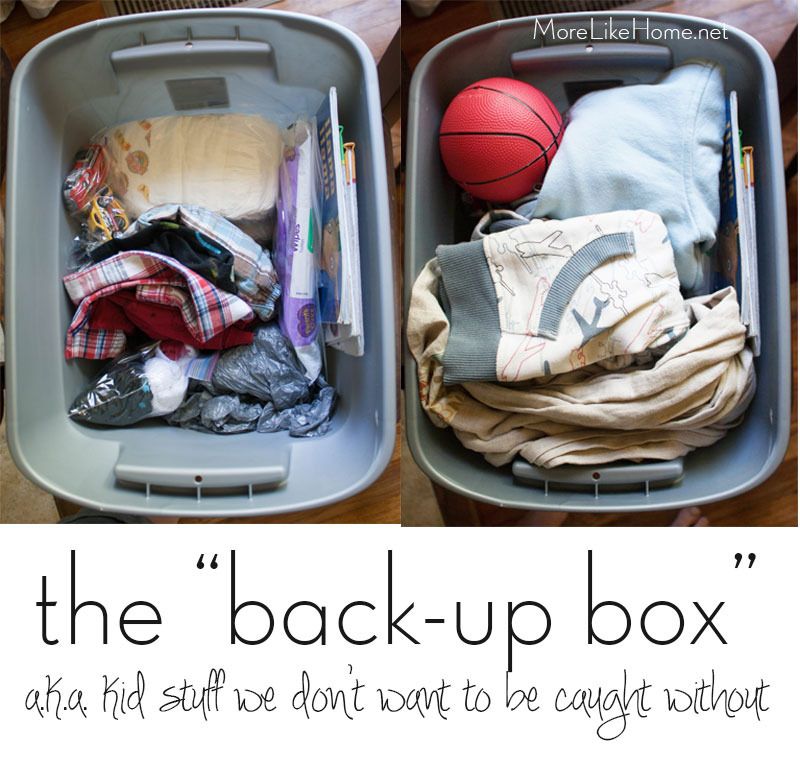
We have a Grand Caravan with "Stoe and Go" storage, which is wonderful for storing these extra items without sacrificing our trunk space! But if you have a car, you could totally do the same thing in a trunk with a couple small totes. Before we had our van we actually kept this first box on the floor below one our rear-facing carseats for easy access. This box was the first thing we ever packed for emergencies. We call it our "back-up box." Which is basically all the kids stuffs we might need in a emergency.


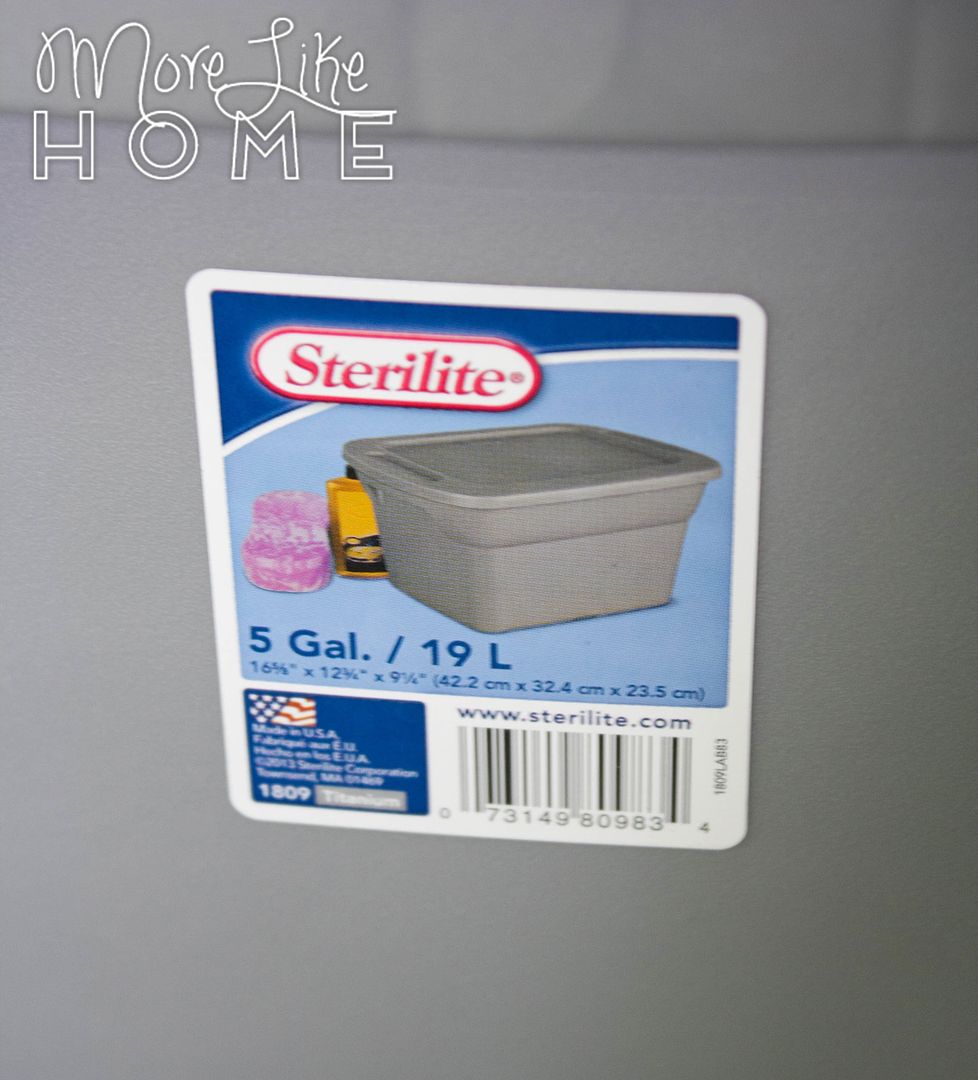
We use a small 5 gallon tote from Walmart, I think it was $6 but that was a few years ago. It's enough space to pack for our three kids without taking up too much room in the van.


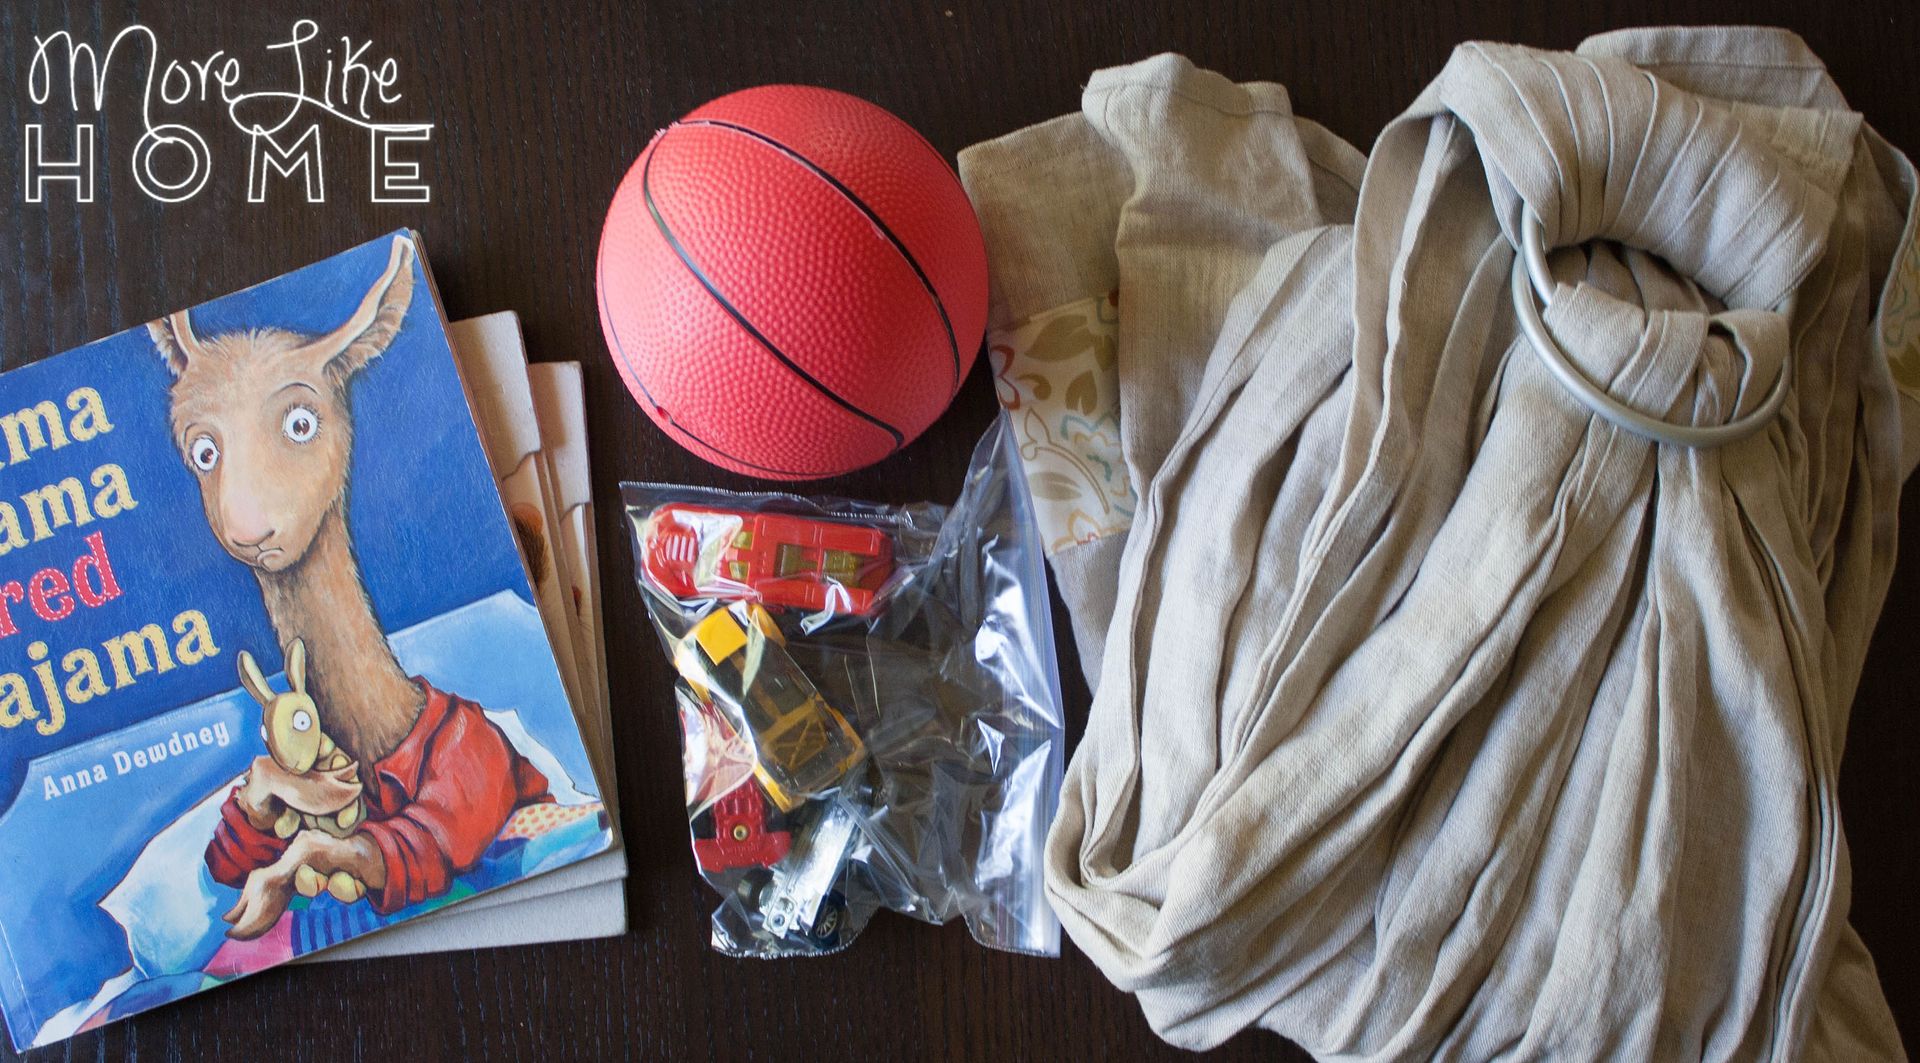
What's in it? Let's take a look. A few books, a soft ball, and a few small toys (cars or animals) in a baggie. We always have something to entertain them if we end up having a long wait! We also kept a baby sling in the box while it was in our car, but now it's usually stuffed right in the Stow and Go so we can get it out quickly.


Tuesday, September 20

DIY Mini Van Stroller... Holster?

We always keep an umbrella stroller in the back of our van. We've been caught a few times wishing we had one with us and, frankly, we're tired of it. And tired of carrying tired kids. But when our travel stroller lays in the trunk, it takes up all the floor space and has left us pulling it in and out every time we need groceries. So we had to choose between being stuck stroller-less or wrestling with the stroller while loading groceries with three kids. I don't know which was more inconvenient. We needed a better way to have our stroller with us without using up our valuable storage space.


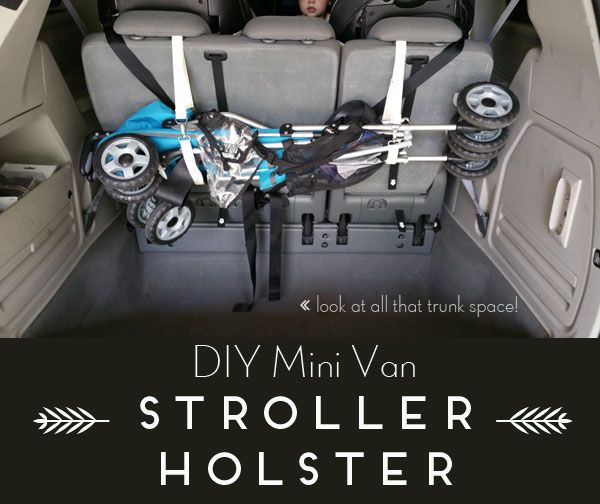
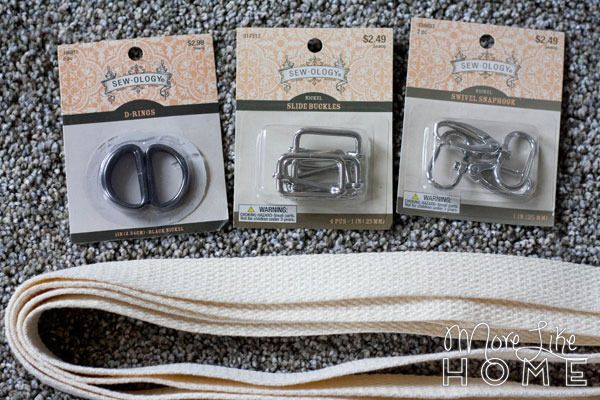
That's when I stumbled across a picture of a stroller hanging on the back of a van seat using an old belt. BOOM. That was the answer to our woes. Except without the belt, which actually seemed difficult to get the stroller into. So I bought a few simple supplies from the fabric store and got to work making our very own stroller holster. It only took about 20 minutes to make both straps! Here's what you need to make your own:
  • four 1" D-rings
  • two 1" slide buckles
  • two 1" swivel snaphooks (or any similar kind of clip) 
  • three yards of 1" webbing you can probably get by with two yards, but I bought three to be safe  (they had several colors, but I chose with white because I didn't want to risk color bleeding onto the seat upholstery)

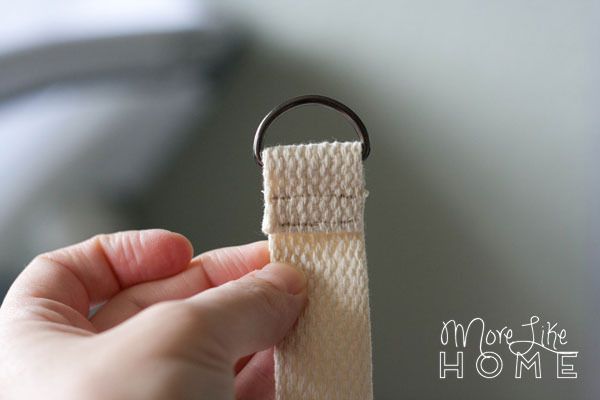
Start by cutting your webbing in half to make two straps. Thread the end of one strap through a D-ring so about 1.5" is through. Fold under the raw edge, then sew along the folded edge to lock in the D-ring. I did a second line of stitching to reinforce it:


Wednesday, September 14

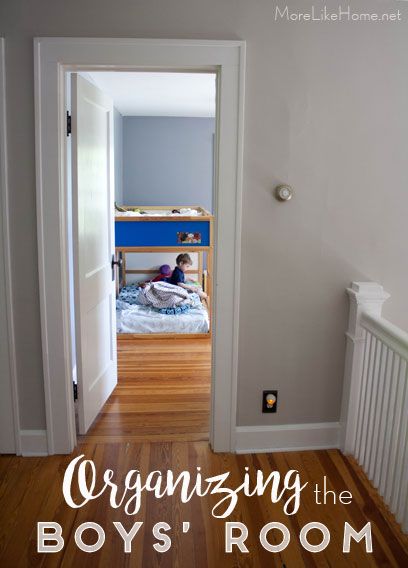
Organizing the Boys' Room + Free Printable Toy Labels!

We have to make a choice. Keep the toys under control, or be overrun. We're doing our best to choose the former, and we've found two main weapons in this battle - limiting the number of toys we keep, and finding a way to organize/manage the ones we have. Most of the toys are stored in the boys' room, so that's where we've been targeting our organization tactics.


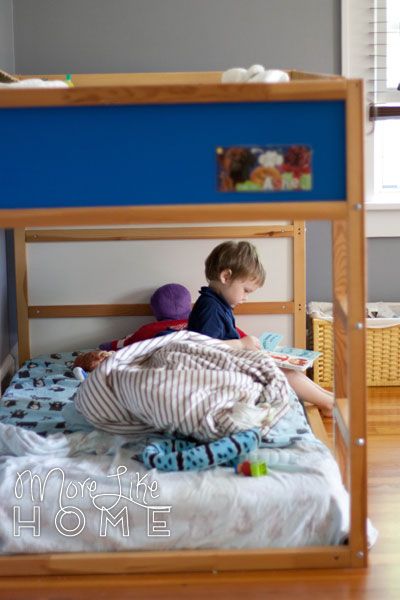
We want them to have plenty of space to play with the toys we have. Because toys do their job better when the boys have room to spread out and stretch their imaginations. Keeping fewer toys stored on the floor helps, and so does our Ikea bunk bed.


Next to the bed we keep our basket of board books (these are books the baby can pull out, too!) and a box of wooden blocks (also baby-friendly).


Sunday, September 6

Two Kids, One Dresser {less really is more}

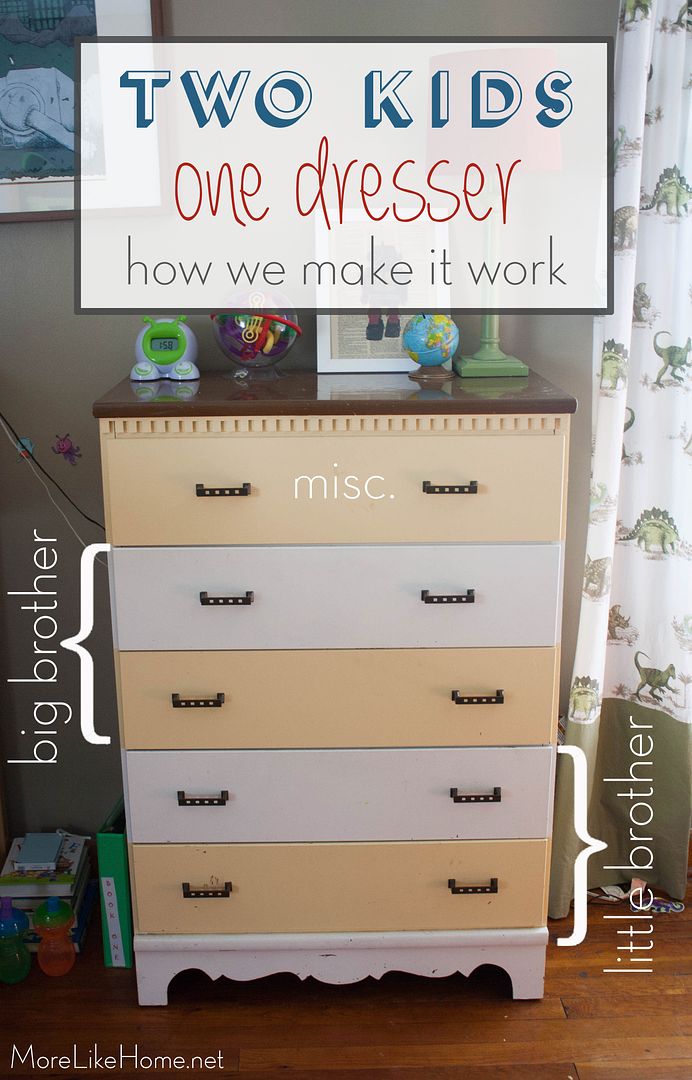
Our two boys have always shared a dresser. It started because we just had one dresser, but now it's become a more strategic move. Our house is about 1200 square feet, but we want to make it feel as big as possible. Especially in the winter when we tend to be more cooped up, we want to have plenty of room for the boys to run and play. One of the best ways we've done this is to be careful with how we use furniture. Because less furniture = more space. We don't keep pieces that aren't useful (we recently ditched our little-used coffee table for more open floor space in the living room) and try to make sure the pieces we do have are really functional for what we need.


So let's take a peek in their dresser. We have it organized with little brother's clothes in the bottom two drawers (so he can reach them), big brother's are in the next two (he's tall enough to see in both of his drawers), and the top drawer has all of their socks and other miscellaneous items like leg warmers, belts, and tiny bow ties. Let's do a quick dresser tour, starting at the bottom - in the very bottom drawer is an organizer bin with his little underwear and all of his shirts. Right now it's mostly short sleeves and tank tops, but there are a few long sleeves tucked in the back for chilly days. The next drawer has jammies on the left side and all of his shorts (plus a couple pairs of long pants).


Big brother's drawer are similar - shirts and underwear on bottom, jammies and pants on top.


Friday, February 6

Easy DIY Branch Key Holder

Today we're looking at phase two of our entryway mini makeover. Heavy on the mini. Part one involved upping our coat rack game with more, bigger hooks (see how we did it here) but this part focuses on a much smaller problem that caused much more grief. They keys.


We've spent seven years of married life keeping our keys in a bowl. Then Baby Brother learned to climb. Nothing is safe. After countless times swiping our keys, losing them for days at a time, and setting off our car alarm (apparently we're slow learners?) we finally decided it was time to move them somewhere higher. We figured hanging them would be the best option to get them out of reach but still easily accessible for us. I looked at a few key holders but nothing felt like a good fit, so I decided to just make our own with a branch straight out of our backyard.


Here's all you need to make your own:

Wednesday, February 4

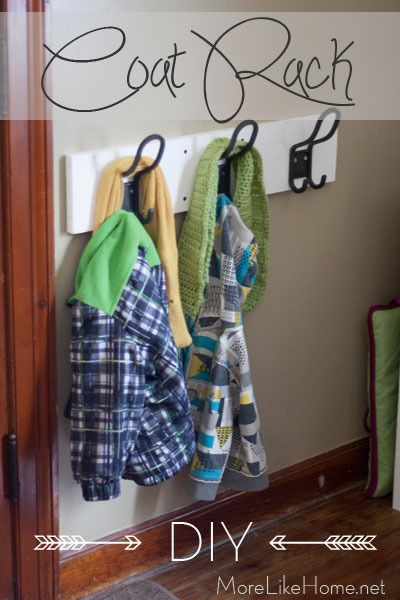
Easy DIY Coat Rack {entryway mini makeover)

We spent a little time this week on a few easy projects to upgrade our little entryway. Our "entryway" is actually just the corner of our living room (which is also our dining room and open to the kitchen) so when it looks sloppy, basically the whole house looks sloppy. Now that winter is here we've found that our few little coat hooks just were not up to the task at hand. You guys, so. many. coats. All on the floor. (you might also like our new DIY coat racks!)


So task #1 was cutting back the number of coats. That helped quite a bit. The next item on the agenda was upping the number of coat hooks so that we could each have a space for our own coats, plus a little room for guests.


But first let's review. This is how our entryway looked for the first 3 years we lived here (you can see how the whole living area was set up here).


About a year and half ago we finally spiffed it up a bit when we added a new entry table with baskets to hide the shoes (plans to build your own are here).


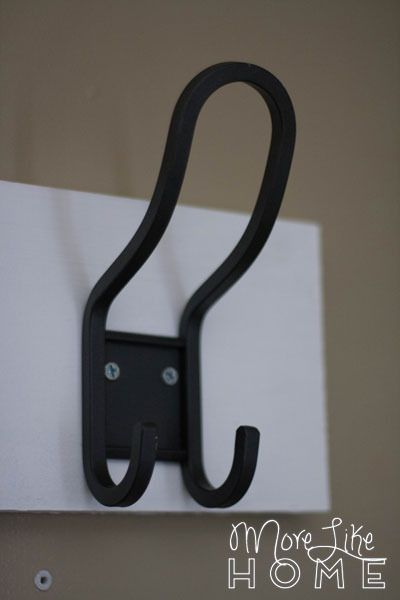
Cue trip to Ikea. I'd been keeping an eye out for new hooks (the ones we had originally were discontinued) so when we went to Ikea last month I made sure to check the coat rack section. It left me pretty disappointed. But then I spotted these guys in the bathroom section! Two hooks in one, room at the top for scarves or purse, and pretty to boot? I'll take six, please.


We decided this time around to attach the hooks to a board instead of straight into the wall. This gives it a more built-in look and allows us to anchor the whole board to a stud (no need to worry about plastic anchors or the hooks ripping out of the drywall). I cut two 26" pieces from a 1x6" board (of course you can do whatever size fits your space best) and Big Brother helped me paint them white. And Baby Brother kept touching the paint. If you're feeling too relaxed today, try painting indoors with small children. It's perfectly nerve wracking. Once the boards dried I attached one hook right in the middle of each board, then one about 6.5" away on either side.


My stud found a stud and used 2" drywall screws to attach the board (and made sure it was level). We added 2 more screws on the other side to make sure it won't pull away from the wall and to make it look more balanced, but the ones in the stud will be doing most of the work here.


We did two rows of the hooks so the kids can reach to hang up there own. The top set we put as high as we could comfortably reach, and the bottom set we put high enough that the boys' coats wouldn't drag on the ground (and tried to keep them low enough that they weren't totally inaccessible behind our coats).


It's looking much better... but how will it look with those rowdy coats?


They boys' hooks are working perfectly. Big Brother loves having his own hook with a special spot for his scarf.


And even our coats are pretty neat and contained. Whew.


Do you have an actual entryway or do you have to squeeze it in a corner too? What are your favorite ways to keep it tidy and organized?

Tuesday, November 11

Putting the Closet to Work

You may have forgotten we have a funky walk-in crawl-in closet in our master bedroom. Yeah, we kind of forgot about it too. And so it turned into the cluttered dumping grounds of everything that is in the way. Behold.


We at least kept this convenient walking crawling path that allowed us to climb into the back recesses of space below the sloped ceiling. I should have taken a picture that showed the back better, it reached back pretty far until the the ceiling meets the floor.


Oh, and all the dump-stuff didn't fit around the crawling path so we spread the dump-zone out into the landing. Oops.


So obviously some serious organizing was in order, but first we needed some storage space! My original idea was to use the same adjustable shelving we put up in the garage, but the detail & leveling needed to navigate that sharp ceiling slope was more than I was up for. So I went with my next best (basically free) option. I took a few of the wooden shelves from that adjustable system and screwed them together into a moveable bookcase thing like. I didn't have to buy any new wood and I used up more of the shelves that were stacked in my garage! This is what I ended up with:


We dragged it upstairs and after a couple hours of sorting & decluttering we were left with this... not so monstrous sight. Huzzah!

Wednesday, September 10

The Shelves I Almost Threw Away

As much as I try to get rid of any extra junk-stuffs, I still have some borderline hoarder (hoarderline? anyone?) tendencies fighting to gain ground. My biggest weakness is the organizing stuffs. Boxes, baskets, even... wait for it... shelves. This particular set of shelves was found at a yard sale two summers agao. It's one of those adjustable deals that attach to the wall with moveable brackets. A whole huge set of them for $2. My mom talked me into buying them (she also loves a good organizational gadget) so home they came. And they took up a huge chunk of my garage for two years. I looked at them probably five times a year and had this dilemma with myself:

I should probably get rid of those.
No I'll keep them.
But I just tripped on the brackets AGAIN.
But what if I need to organize something?
So much wasted space. We're obviously not going to use them at this point.
But organizing.

And so they stayed. Until that fateful day when I had the big "duh" moment that starts most of our projects. Our garage was a mess of disorderly chaos and I looked at Husband and said "we need some shelves in here." *dropped jaw spin move toward pile of shelving* Oh. Like these shelves that have been lying right beside all the other junk for TWO YEARS. And so our scattered piles of wood scraps became this:


Everything up off the floor in a tidy stack. And now that we can actually see what kind of scraps we have, we are actually burning through them. No more buying whole boards when we have a smaller piece that fits the bill. Whew.


We had to put them high enough for our super long car's bumper to fit underneath, which also left enough room on the ends to tuck some of the outside toys away.


Those couple shelves started a garage landslide that lasted an entire afternoon. When we were done, you guys, it was tidy. You know, for a garage anyway.


Complete with clear pathway beside the car. *angels sing*


No more piles of tools on the grill. Which has resulted in much more grilling. Hooray summer!


And those tools have found a tidy home in the cabinets with the help of a few cheapy plastic bins. And yes, those cabinets have always been there. Why did we put the tools on the grill instead of in the empty cupboards. I do not know this. It just happened, okay?


Now that it's cleaned up, maybe hopefully it will please please stay that way. Please. We only used a teensy bit of the huge shelving set and now we're on this whole shelving rampage. We're working on expanding our pantry, and even adding some shelving to our master closet. It's going to be so adjustable around here.

And no. The moral of this story is not that I should become a hoarder and keep all the things. Maybe it's more like "I need to stop watching Lost and put away all the stuffs instead of waiting two years." Because I'm totally watching Lost again. Even though I know I'll hate the ending. Don't judge. In fact I'm going to watch it right now because I have two nappers?!? And as my friend Robin always says, "two sleepers should never be wasted on dishes." Pass the popcorn.

What are you glad you kept for way, way too long? Or have you purged something only to regret it later? How do you find balance between keeping and tossing? And tell me straight, guys, is Lost just as disappointing the second time around?
Subscribe