Showing posts with label garden. Show all posts

Thursday, March 5

How to Propagate Houseplants (more plants for free!)

You guys know I love low-budget home decor, and what's more low-budget than free? So today we're talking free houseplants! I'm going to show you how I propogate a few of my favorite houseplants to start brand new baby plants without paying a dime!

Did you catch my post last week about my top 6 favorite houseplants? It's a great place to start if you're looking for plants that are low maintenance and hard to kill. And this is a perfect follow up because guess what? All of my favorite plants can be propogated!

The best time to propogate is in the spring when plants are ready naturally ready to grow quickly... so get those pots ready, folks! It's almost time!


All these plants can be propogated with one of two methods: dividing or rooting. Both happen to be super simple, they just take a little time (you're growing new plants, after all!). If you're looking to get a big plant quickly then propogating probably isn't the best option for you, but if you're looking to slowly grow your collection (or sprout a few plants for friends) using what you already have? Then read on, friends! Here are the plants we'll be looking at today (although you can use these methods for many houseplants):
  1. Succulents
  2. Snake Plants
  3. Aloe
  4. Pothos
  5. Spider Plants

Monday, June 5

Old Bricks, Raised Beds, and a Truckload of Dirt

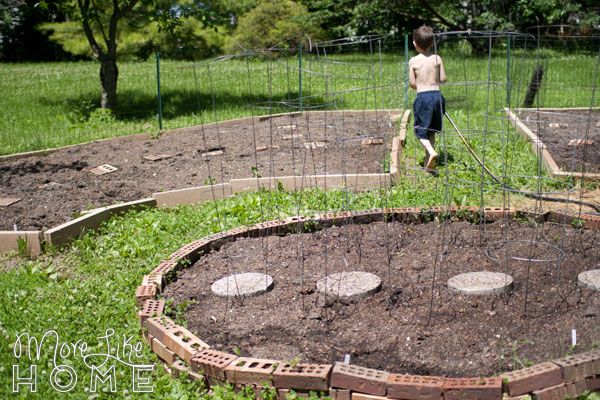
Our garden finally came together a couple weeks ago, and we're so excited to see what happens! We spent several weeks planning, budgeting, and piecing things together. And now we already have little sprouts popping up all around!


Want to see more garden posts? Check out my original square foot garden, what I planted in it, how to plan a garden layout, 2x4 garden fence, critter-proof salad garden, companion planting, starting seeds indoors, and my temporary mini-greenhouse.

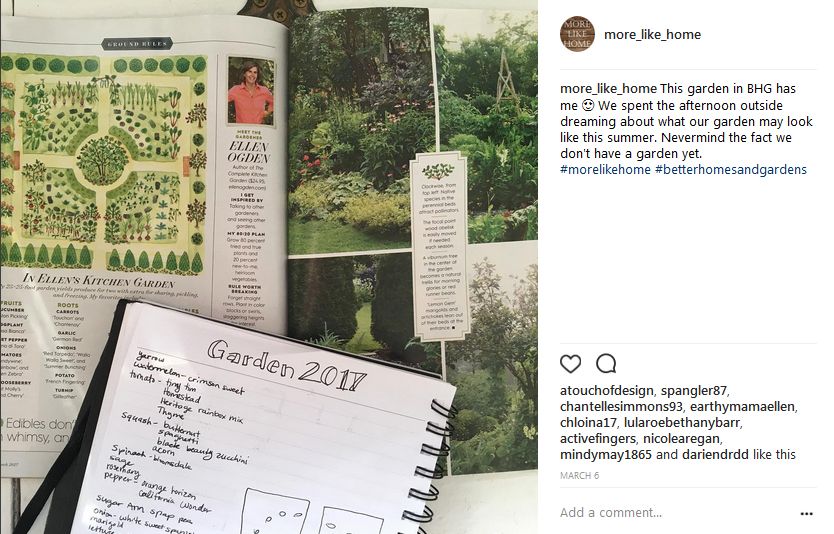
At first I planned a few simple rectangle beds like we put in at our last house. But then I came across this garden in an issue of BHG that got my wheels turning a whole different direction.


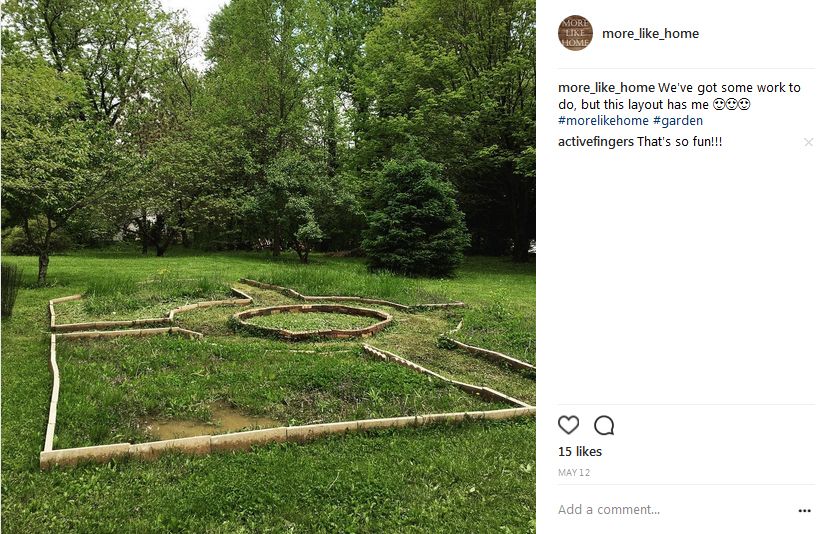
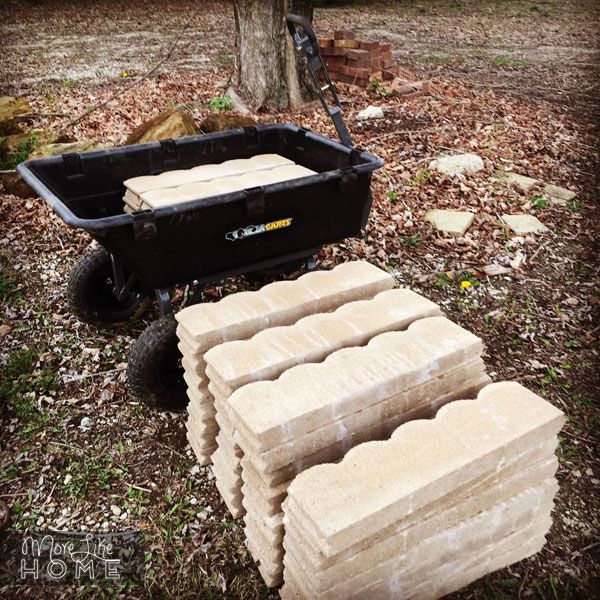
It looked so lush and peaceful. Where my plan was straight and boring, this garden was creative and flowing. I loved the curved lines, decorative elements, and the mix of flowers with veggies. And so our new garden plan was born. (we post updates like this on Instagram!) We created a pattern of brick-lined raised garden beds tucked in between a few small trees. It's the sunniest spot in the yard and seemed like the natural place for a garden.


So. Raised beds. We felt raised beds would be our best options because the ground is very clay-rich and doesn't drain well. So on top of being easier to weed and maintain, we're hoping raised beds will allow better drainage after rain and give our beds a more fertile start.


Tuesday, May 3

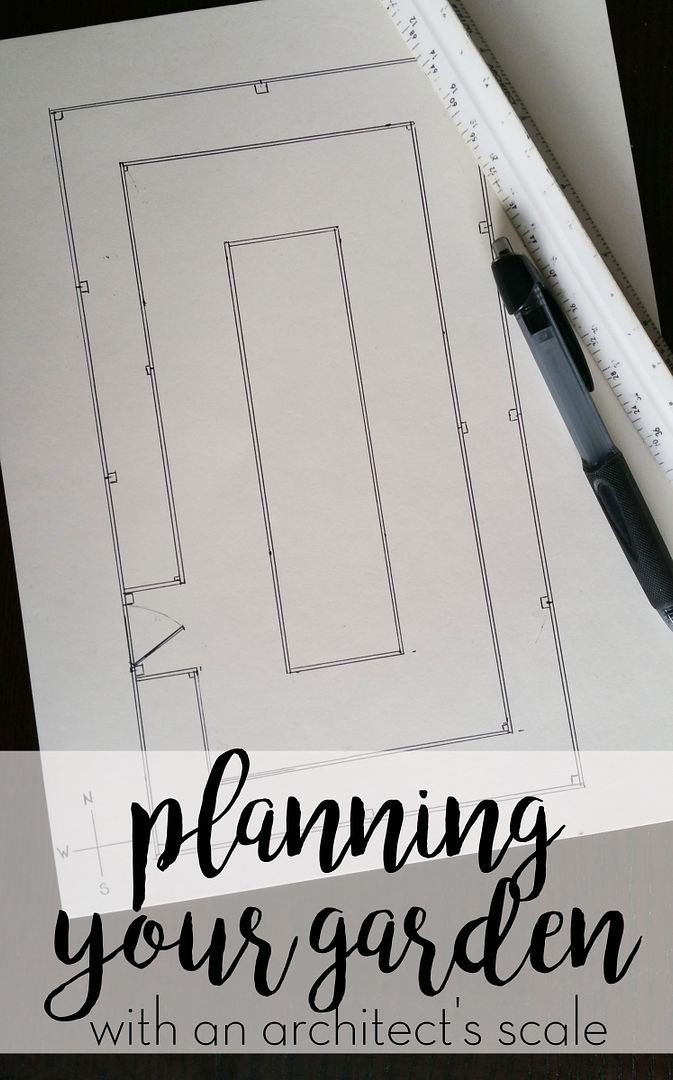
How to Plan a Garden with an Architect's Scale {Garden 2016...ish}

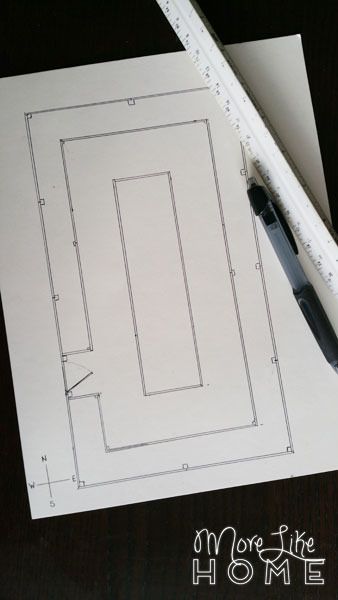
I've spent the last few weeks working on a plan for our new garden space. I've been leaning toward raised beds and finally realized the best way to decide what layout I like (and estimate the cost to build it) was to go ahead and draw it up. I usually hop on SketchUp to draw floor plans and layouts, but today I wanted to do something quick and tech-free while the kids were eating breakfast, so I pulled out a piece of paper and my architect's scale. This is my favorite low-tech tool for making scaled drawings, and it's fun to boot! I'll share a few easy tips to get started with one, but first let's start with our garden plan.


I'll tell you now, I don't know if we'll actually pull off much gardening this year. Considering it's already May and we have yet to break ground (or... add ground?) My hopes aren't too high to actually get plants in, but we should at least be able to get it ready for next year. I started with a little brainstorming of what we're looking for in our garden:
  • easy maintenance
  • high enough fence to keep deer out (we have deer now!)
  • space for both annuals and perennials
  • fruit bushes (or maybe plant these outside the fence)
  • improved drainage
This landed us in the world of raised beds with high enclosures. Then I was off to pinterest to search for ideas. I loved this simple enclosure/raised bed combo by Clover and Thyme.

https://cloverandthyme.com/2013/04/01/diy-garden-enclosure/

And who doesn't love a little Joanna Gaines' charm? I love the style of this one, but I'm not as crazy about the huge garden beds. Part of the point of raised beds is staying off the dirt so it doesn't get compacted and that is lost on this layout, plus it means more area for weeds to pop up. But still... it's oh so pretty.

http://www.countryliving.com/home-design/house-tours/g2546/chip-joanna-gaines-farmhouse-tour/


Then it was time to start working on my garden layout. Our new yard came with a pretty big garden already in place so I'm just working with that space. I started by measuring the existing garden. It was 14' x 25' so I drew a box that size on my paper, then got to work hashing out the raised bed layout. I decided on 2' deep beds around the perimeter (I should be able to reach things in the back easily), and a 4' deep bed in the center with a 3' pathway all around. These wide pathways are important if I do grass instead of gravel pathways because I want to be able to get the lawnmower in there! Grass saves a lot of money over adding gravel, plus I'd rather kneel on grass while I'm working. I also figured things like fence posts and a doorway into my drawing. This plan should roughly double the growing space of our last garden!


Wednesday, August 13

Freezing & Canning from the Garden

We love summer. Love it. We've been spending as much time as we can outside enjoying the heat and sunshine. Taking walks, going to the park, working in the garden. It's summer at its finest around here.

These stubby carrots are Big Brother's favorite thing in the garden. He was so surprised the first time we pulled some!

This is the first summer we've actually had a big garden that's actually been giving us some food (yay!), which also means it's our first summer trying to figure out how to preserve all this stuff for winter. It's extra time in the kitchen now that hopefully will pay-off big time later.


And yes. We've been totally neglecting the blog. But we'll get it all perked up again when we're stuck inside this winter. For now we spend our days like this:


And this:


But I did want to hop in today and share some of the things we've been preserving this week. Just in case you guys are in the same boat and looking for new ideas! And, seriously, if you have any new non-pickle things to do with cucumber please tell me. So many cucumbers. Here's the lowdown from the kitchen:

We're freezing the extra zucchini. I ran them through the grater attachment on our kitchenaid and scooped 3 cups into each quart size bag. Then flattened them out and stuck them in the freezer. Boom. Done. Easiest thing so far.


My dad gave me some rhubarb that I used to make this rhubarb vanilla bean jelly. I'll tell you right now, I don't know what I'm doing. This is not bright pink like the recipe picture and it also didn't set up right so it's kind of runny. I should also tell you I haven't tasted it yet. I should probably do that....


We used some of our many cucumber to make sweet pickle relish. It's a nice way to mix up the pickle monotony (plus I'm the only one who eats pickles so we don't need that many).


And last but not least, we're freezing corn from my grandpa's farm. My mom taught me how to do it and it's been working great, so I'll share the steps for you guys.


Start by bringing a pot of water to a boil. Throw some corn in. Let it boil about 3 - 5 minutes (I just did 3).


Move the corn to a bowl of ice water.


Once it's cooled down let it drain a little while in a colander.


Then use a knife to cut the kernels off each ear. I like to hold the ear over a large baking dish while I cut. The deep edges help catch all the corn.


Before you toss the ear, flip your knife over and run the dull side down each ear. This will get out any left over juice or bits of corn.


Not a great picture, but you can see the ear on the left has had the kernels cut off, and the ear on the right has also been done with the back of the knife. There's quite a bit more that comes out in that step.


Keep going until you have a nice pile of empty ears.


And a nice full pan like this:


Then divide 3 cups of corn into each quart size bag (we ended up with 5 bags), lay them flat, and freeze them. Pull them out in January when you're dreaming of summer. If you can wait that long.


We still have lots of cucumbers to put up and I'm hoping to have enough tomatoes for salsa and pizza sauce. We'll see! While we wait, let's admire the garden boys one more time.


What are you guys preserving this summer? Feel free to share your favorite recipes or tips!

Saturday, June 21

2x4 Garden Fence

You guys are pretty up to date on the status of our garden (from starting seedlings, to a mini greenhouse, to a bunny-proof salad garden, to companion planting and doubling the size our big garden) but we still have one more big change to share. Our latest move as we wage war against the bunnies. We fenced in the big garden!


You guys know we love a good 2x4 (you can see our full 2x4 series here) and we still had several sitting in our garage just waiting to turn into a fence. We love them because they are easy to work with and pretty affordable, not to mention sturdy - they hold up houses for goodness sake!


Throw a couple rolls of chicken wire in the mix and you're on your way to garden bliss. It takes a little work to get it all together, but the process is pretty straightforward and it's totally worth to protect your future produce!


Thursday, June 19

Companion Planting in the Garden

We finally got our plants in the ground a few weeks ago (our mini greenhouses really helped our little plants get strong and hardy for the transplant) and we tried something new this year to hopefully increase our yields. I started reading up on companion planting with a couple books from the library (available here and here). The gist of it is that some plant, when grown together, help each other thrive while others can actually keep each other from producing. 


There was a lot of information in those books, so I started by making a list of all the things we would be growing and making a column of thing that grew well with it and another column of things to avoid. From there, knowing I would have three garden beds to work with, I did my best to divide them into three list of compatible plants. In the first bed we planned tomatoes, carrots, cucumbers, eggplant, and some spinach. Those things also grow well with strawberries and asparagus, which already grow along the garage, so all these things went in the neighboring bed. In the second bed we planned broccoli, onions, cabbage, cauliflower, brussel sprouts, hyssop, and squashes (we have pumpkin, acorn, and I think zucchini but I didn't label them all and a few didn't make it this far... so we'll have some surprises!). They also grow well with chamomile which I'd love to add, maybe around the fence since it tends to spread. The third bed is just a little guy and he got stuck with all the things that didn't fit anywhere else - potatoes, beans, cantaloupe, and snake squash and tiny pumkiny things courtesy of my sister. I don't think those even are supposed to grow together... I do better next year.


Then I grabbed a handy print-out from my square foot garden book to use as a spacing reference during planting and headed out to the garden (which is now fenced in!).


But wait... did I say three beds? We also had to dig up two more. While we love our raised bed and hope to upgrade these in the future, the wood/bricks and especially the compost to fill them was not in the budget at this point. So we broke out the handy shovel and dug. And dug. And dug. Cried a little. Dug some more. Okay we didn't actually cry, but I don't think the neighbors would have judged us if we did. We added another long bed marked with flags in the pic below, and a smaller bed across the end of the garden (perfect for beans since it's right along the fence!).


We worked in small sections at a time loosening the soil, pulling up the grass (make sure you get those roots!), and shaking as much dirt off the roots and back into the bed as possible. Shaking the dirt off is important so you end up with a nice bed full of dirt instead of a big old hole.


Bye bye grass!


When it came time to actually get the plants in the ground I started by laying out all the pots to figure out the spacing and make sure everything would fit.

Friday, May 16

Critter-Proof Cage & Garden Update

Our little seedlings are still chillin' out clinging to life in their mini greenhouse and while they wait we are trying to get the rest of our yard & garden ready for transplanting. You may remember we had quite a problem with bunnies (and squirrels) eating all of our plants last time. So this year we hopefully found a way to at least keep them out of our small salad & herb garden.


We built a simple frame and covered it with chicken wire so the little furry fiends can't get in. It's made with 1x2s 1x3s so it's pretty lightweight. We just lift it off of the garden when we need in for planting or weeding. I realize "garden" is a strong word here. So far we have chives & sage that popped up from last year.


To build it we started with two square sections like this. The ends are 1x3s (because we had them left over and they were long enough) and the long sides are 1x2s we purchased for the project. We made it just big enough to sit on the sides of our raised bed, but if we did a bed that didn't sit against the house we would have made it a little larger fit around the outside of the bed and sit on the ground.


We screwed the ends together.


Wednesday, May 14

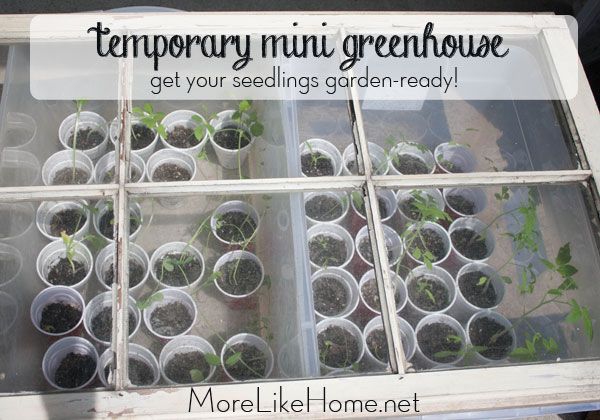
Temporary Mini Greenhouse for Garden Seedlings

It's been almost two months since we started the seeds for this year's garden and we're itching to get them in the ground! We basically have no idea what we're doing but figured it was better to jump in than to put it off. We've already been learning a lot along the way, and one thing we've struggled with is getting enough light for our plants. We put them in the sunniest window in our house, but even that doesn't seem to get enough hours of light during the day and the light doesn't reach the plants toward the back of the table (meaning we had to keep rotating the cups trying to get all the little fellas some sunshine). I'm thinking maybe next year we'll need some kind of light to help them grow instead? That would keep them warm because I suspect our house has been a bit on the chilly side for them.... Even so some of our more viney plants like pumpkins, beans, and zucchinis were able to grow around the window and really seem to be doing well.


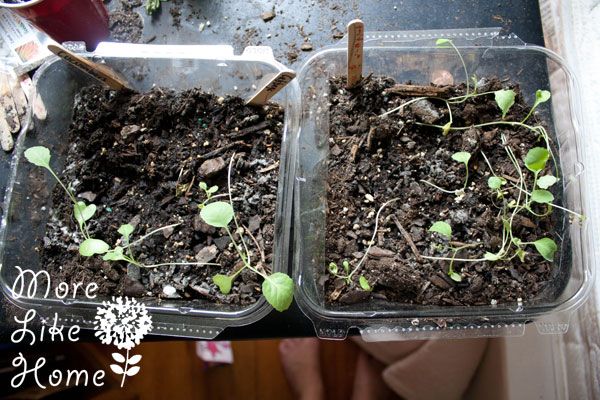
But several of our other plants are still just so tiny and weak. These are cauliflower, broccoli, and cabbage that just aren't doing well at all.


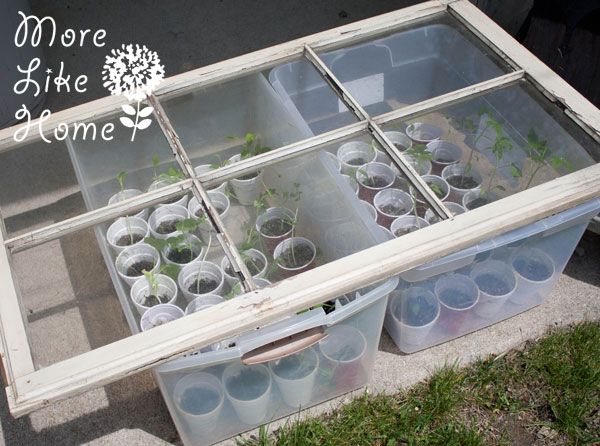
It may be too late to save them but we are going to try! At the suggestion of a pro-gardener friend we decided to try a small outdoor greenhouse to really get them sunny and warm. Since we don't have any greenhouse or a chance to make something if we want to try and save these babies in time for planting, we came up with this little make-shift solution.


We just put the plants into some clear plastic tubs (clear so lots of light can get through) and put an old window across the top. BOOM. Done.


Now we just keep them watered and wait. Most of the time we leave the window on top because they need to be protected from the wind & the squirrels, but on nice days when we're playing outside I take it off for awhile to try to acclimate them a bit. I don't know if it's the right thing to do. It feels right to me, but we all know I'm flying by the seat of my pants here.


If you don't have an old window, we added a third tub that had a clear lid and just put the lid on. So hopefully that works out. Now we just let these guys warm up a little and hope we can plant them in the next couple weeks!


Anyone else start seeds this year? How's it going?

Saturday, August 11

Garden Goodies and a Garden Baby

Baby B and I have made a habit of going out to the garden in the afternoon to pick tomatoes, check on our baby watermelons, and of course take a dip in the wading pool!

 I grow the teeniest tomatoes I've ever seen. It's a gift... and a curse.

 Our biggest baby watermelon! I spotted two more yesterday. Funny story - Baby B ALMOST picked the watermelon the other day. It's only funny because I stopped him just in time. If I hadn't it would be a very different kind of story.

 Baby eggplant that has since been eaten by a squirrel. :-( This means war.

 A whole mess of yellow zucchinis!

 The zucchini plant is out of control.

 My favorite garden scavenger

 "Who, me?"

 "I see a red one!"

 "I thought it was a red one...."

 He always pull the stems off right away. If I have a bowl of tomatoes picked, he will go through and pull all the stems off for me. Crazy pants.

 Got it!

Ooooooo, so soft and squishy!

"Neighbor? NEIGHBOR?!? I know you're there!"

Let's do it again tomorrow!
Subscribe