Tuesday, June 14

$28.75 - Confessions of a Yard-sale-aholic

I'm what you could call a yard-sale-aholic. There are few things I enjoy more than hunting down great stuff at great prices, then bargaining for an even better price. And there is no better place to do that than at a yard sale! I decided to start posting my yard sale finds because it's the main way I make my house feel like home without spending a fortune. The title will be the total amount I spent, and I'll break down the individual prices as well. I'm hoping to add a feature down the road where others can link in their yard sale finds so we can all see each others' great deals! (If you want some link fun this week, you can join the fun with The Nesting Place) For my first post I'm including the things I've found in the last 3 weeks. Here we go!

$0.25 - white serving dish. Our future kitchen remodel will include some shelving to display our white dishes on, and I though this would fit perfectly into that display.
 
 $2.00 - metal basket, serving tray, cork boards. Love some cheap storage!
 
$1.00 - 2 rolls of shelf liner and a bundle of wall paper. I plan to use this to line drawers and the back of book cases for some unexpected color.


 $5.00 - baby wrap. I've been wanting a Moby baby carrier, but couldn't fork over the $40 for one, so when I found this knock off I snatched it up! I've already used it a few times and Baby B loves it!

 $0.50 - small folding table. This will be getting a makeover. Then it will be a handy nightstand for the guest room.

$1.00 - big picture frame. I love finding picture frames at yard sales, and it's rare to find one that so big with glass and a matte for so cheap! A coat of paint and a new picture will turn this into a beautiful piece for our living room. 
 
$1.00 - salt & pepper shakers. I loved the great shape of these and I think a bright coat of paint will bring them up to date.

$0.25 - jammies for Baby B. He'll have to grow into them, but I can't resist stripes and plaids for the boy!

$1.00 - two floor cushions. We don't have room for a lot of seating in our living room, and tend to have a lot of guests when my family comes to town to visit Baby B. I plan to slip cover them and then I can pull them out when we have guests.


$7.00 - folding picnic table, laser level, and hammer. I've been wanting a folding table for camping and couldn't believe I found one so cheap! The stud finder will be super handy for our upcoming kitchen project, and the hammer was just so we can have one in the house and one in the garage because we're tired of going back and forth looking for the only one we have!

$1.50 - two flower pots. I'm planning to put the small one in the kitchen to hold measuring spoons. After a good washing, of course. 

$0.25 - new shoes for me

$3.00 - plastic salad bowl set for the patio, purple tote, and...be still my heart...a beautiful green purse. I'm definitely a purse girl, but after finding this baby I think I can get rid of all my other purses. That's how much I love it. 

 Tuck-and-run find of the day: (This is an item you feel like you got an outrageously good deal on. Something so good you instantly grab it, pay for it, and run before the seller realizes they could have made way more on it! You don't always find an item like that, but it sure is fun when you do!) Here's mine for this week:
$5.00 - brand new kitchen cabinet! I mentioned remodeling our kitchen in the future, and we need to do it as cheap as possible so we're planning to paint the existing cabinets and add a few more painted to match (so color of the new cabinets doesn't matter). Buying new cabinets would run over $100 each, so when I saw this for $5 I grabbed it and didn't let go! New kitchen, here I come! :)

And the one that got away: $130 for a whole set of kitchen cabinets. I passed because I only wanted to buy a few out of the set, but I'm totally kicking myself. I should have bought it and then put the ones I didn't want in my own yard sale! Oops.

That's it so far this summer.As for the rest of the summer, there are certain things I always keep my eyes open for at yard sales. For me they are camping supplies, tools, baskets & other storage, fabric, furniture that can be painted or refinished, and picture frames. I also have a few things I'm specifically looking for this year:
-cabinets (for the kitchen & a basement bar)
-bar stools for the kitchen remodel (I found the perfect ones last weekend, but they were $25 each and the sellers wouldn't come down. Too steep for me, so I'll keep hunting!)
-shower curtain
-lamp shades (really want some drum shades!)
-weed eater
-cast iron skillet
-area rugs (for living room, guest room, and bedroom...I dreamed I found them the other night. Yes, I dream about going to yard sales)
-garbage can (the kind with a pedal to open the lid)
-outdoor cushions (I may end up getting them at IKEA instead)

I'm doing things a little different this year and trying really hard not to buy anything unless I know I have a place and a use for it. So hard! But I know it will pay off because it will keep my house from being over cluttered. And of course I can  have yard sales of my own to make room for new things, too! I'm working on a big purge and planning a yard sale later this summer. I'll fill you in on that later.

For anyone interested in getting in on the yard sale action (whether as a shopper or a seller) I recommend this post by The Nester full of helpful tips and advice. And you're welcome to share your spoils (and the ones that got away) here! I'd love to see! Special thanks to Finding My Feet for inspiration for this post.

Saturday, June 11

Framed...Jewelry?

Who says art can't be functional? I was really needing something colorful and interesting to dress up the bedroom, when I came across the idea of using jewelry as an art piece. Genius! So I whipped up this framed jewelry organizer which not only looks fun & beautiful, but also keeps my jewelry so tidy and organized.


Here is my dresser before my little jewelry storage makeover. Pretty dark and boring. And I don't know what on earth is even in there! I'm not sure how long it's been since I ventured into the back recesses of that jewelry box. The framed organizer is a huge improvement!


Want to make your own framed jewelry organizer? Here's how I did it. What you need:
-An old picture frame, any size you want
-A piece of foam board cut to fit the frame
-Pretty paper or fabric to cover the foam board
-Tacks
-Glue
-Staple Gun

*If you have heavier jewelry you may want to use thin wood instead of foam board to make sure it can support the weight. If you do you could use screws or nails instead of tacks.


Step 1: If you don't like the color of your frame, now is the time to paint it! I painted  mine with left over semi-gloss white. I planned to do a second coat, but after the first coat I decided I like the rough antique look so I went with it!


Step 2: Attach paper or fabric to foam board. I used scrapbook paper and put it on with a thin layer of Elmer's glue. I picked a neutral color because I really wanted my jewelry to stand out!

Step 3: Decide how far apart the tacks need to be to fit your jewelry, and poke them in to the foam board. I put a small dot of Elmer's glue down before inserting my tacks to make sure they wouldn't wiggle & tear my foam board. Be careful, because they will probably reach through the back!


Step 4: After the tacks dry, I put a small dab of hot glue on the back of each tack. Just to protect my fingers when I move the foam board around. :)


Step 5: Put the foam board into the frame and use a staple gun to attach it from behind.


Step 6: Thank your helper.


That's it. Now you just have to hang it up and add your jewelry.


I actually just set my frame on the dresser and leaned it against the wall instead of mounting it. (And don't worry about all that wood paneling. There is paint in its future!)


Now my jewelry is a beautiful focal feature instead of being hidden in a box. It adds some much needed color and fun to my dresser.


I also added some small bowls to catch things like bracelets and post earrings.

I love that something can be so pretty and so functional all at the same time. That's what I call making the most of your space! :)

Pin It

Wednesday, June 1

2x4 Outdoor Sectional

 
We had family in town for a Memorial Day weekend full of food, walks, flower planting, and the occasional thunderstorm/tornado. It was a great weekend in spite of that last part. :) We also managed to knock out a little patio project while some very willing babysitters kept an eye on Baby B.


I've had my eye on this outdoor collection (picture below) from West Elm, but it cost $149-279 per piece! That was never going to happen for us. So we knew we would have to build it if we wanted to have a sectional for our patio.


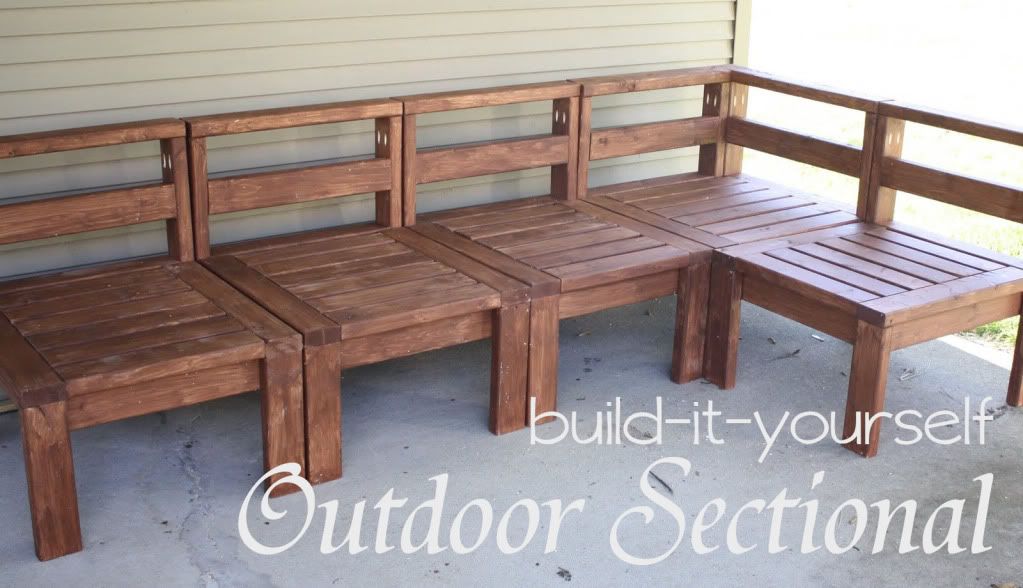
Fortunately for us, Ana White already had plans for a similar sectional on her website! (Want to build your own? You can find the plans here and here.) It turned out great and looks just like what I wanted! We did make a few changes from her plans, mainly because we used 2x4s instead of 1x4s, so we had to adjust some measurements to get the same overall dimensions. We chose 2x4s because they were actually about 1/2 the cost, but a bonus for me was the chunkier look we got with the 2x4s.

So, ready to make your own?


Here are the adjustments we made for using 2x4s for the armless sections (shown in red):
2 – 2×4 @ 24 1/2" (Seat Side Aprons)
1 – 2×4 @ 18" (Seat Front Apron)
2 – 2×4 @ 23" (Seat Supports)
2 – 2×4 @ 24″ (Seat Sides)
6 – 2×4 @ 17″ (Seat Boards)
2 – 2×4 @ 13 1/2" (Front Legs)
2 – 2×4 @ 27 1/2" (Back Legs)
1 – 2×4 @ 24″ (Back Top)
2 – 2×4 @ 21" (Seat Back Board and Seat Back Apron)
Step 2: over hang should be 1 1/2" instead of 3/4"
Step 5: You will have 13 1/2" below the seat back board instead of 14 1/4".
Plans here


For the corner seat:
1 – 2×4 @ 23" (Front Apron) AND 2 @ 23" (Seat Supports)
1 – 2×4 @ 24 1/2″ (Side Apron)
1 – 2×4 @ 24″ (Side Seat Board)
6 – 2×4 @ 20 1/2″ (Seat Boards)
2 – 2×4 @ 13 1/2" (Front Legs)
4 – 2×4 @ 27 1/2" (Back Legs)
2 – 2×4 @ 21" (Back, Short Top Apron and Seat End)
2 – 2×4 @ 22 1/2″ (Back, Long Top Apron and Seat End)
1 – 2×4 @ 24″ (Short Top)
1 – 2×4 @ 27 1/2″ (Long Top)
Step 2: over hang should be 1 1/2" instead of 3/4"
Step 5: You will have 13 1/2" below the seat back board instead of 15" to the top of the board.
Plans here


I think that's it!


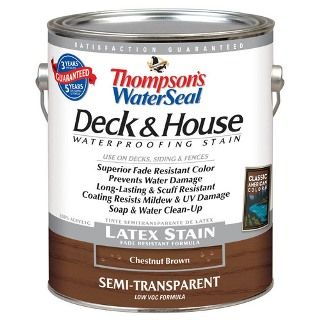
Like Ana suggested, we cut all the pieces and then finished all the sides of each piece before assembly. Instead of painting, we decided to try a waterproofing deck stain. It was super easy, we just painted on one coat and let it dry. It has a 3 year warranty for decks, and since our furniture is on a covered patio (and won't get traffic like a deck) we're hoping it will hold out just fine for our purposes. This is the one we used:


I had fun on this project using my first mother's day present - a miter saw! It made the cutting go SO much faster. I also broke in my Kreg Jig, which resulted in very sturdy furniture with almost no screw holes showing. I think it also made things go a lot faster.


Overall we probably spent about 10-12 hours on the whole project (mostly in one loooong day between storms). I probably wouldn't recommend tackling all the building in one day. Unless you have a babysitter in town and have to get it done while you can. :) For the project cost, we spent about $90 on wood, $20 on Kreg screws, and $20 on finishing. So our total was about $130, which is less than the cost of just one piece at West Elm! We're still looking for cushions, but haven't found a cheap enough option yet. :)


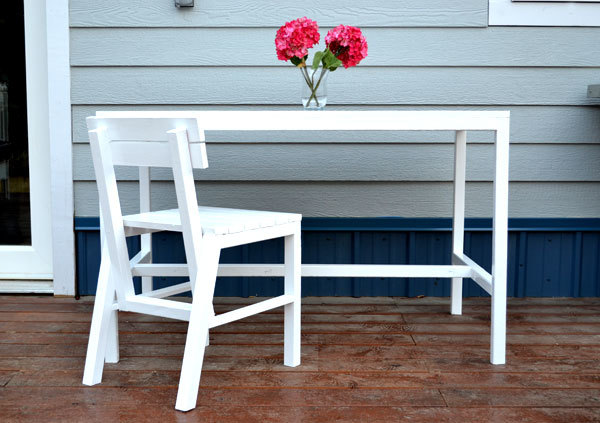
We're still planning to add some coffee table squares (plans here) and maybe a few chairs of some kind down the line. I'd also love to have this table set, but we may not have room for it on our current patio.


And just for the record, you probably shouldn't work in flip flops because 1) you might hurt your feet and 2) you'll probably ruin your nail polish.


So there you have our little weekend project. We can't wait to finish turning this patio into a great summer hang out!


We are SO ready for summer! :) 

*UPDATE: We found cushions on sale at Target and after some terrible experiences with customer service returned the two we had. Then seat cushions went on sale at Walmart so we grabbed some green ones! And we're hoping to get some inexpensive back cushions at IKEA. I'll keep you posted. :)


DIY Projects with More Like Home Make a Pottery Barn Inspired Coffee Table Build a Storage Bed Build an Attractive Console Table

Sunday, May 29

The nursery...finally!

It's been a long time coming, but I finally have pictures of the nursery! Baby B (who I like to call Mister) is seven weeks old all ready and has been keeping us pretty busy. So we'll hop right into the pictures, starting with a flash back to what happened so far:

We started by painting the whole room "pony brown," which I then decided was way too dark and boring for a nursery.


So we painted the top part of the room a lighter color that we found in the basement and added a chair rail we got on clearance and painted white. Much better, but then I decided I didn't want to keep the carpet.


This is where you could say we took a big step backward for a while. We pulled up the carpet and refinished the floors. This is me a week before my due date on the sanded floor. Nothing like waiting until the last minute, huh?


 But don't worry, because this is the floor 3 days before all shiny and finished! And he was almost a week late anyway. :)


And here it is on my due date, all ready and waiting. Ta-da!


We got this sweet road rug at Ikea. Since baby turned out to be a boy, it should get plenty of use! :)


This is a look at the wall on the right. B's auntie painted this picture for him. It's a cork board. (this is before it was mounted on the wall) She does all kinds of art & crafts, so you should definitely check out her Esty shop! It's called Timberline.


This is the reading corner with a comfy chair and a bookshelf. (if you want a shelf of your own, you can find a tutorial here)


The crib has an owl quilt made by Great-grandma, and Aunt B helped me make the birdie mobile. Each bird has a colorful card stock side and a side made from pages from an old book. We sandwiched the two together with string in between and tied them to some dollar tree wreathes. I'll admit the birds hang a little low. They'll need some adjusting once he can stand up to reach them!


The dresser is beside the door. I plan to add some shelves above it, but I'm not sure when that will happen. :)


And here is the closet. We put in some shelves (with enough room above for small clothes) and added some bins for more storage.


And that is the nursery! And here is the little boy we did it for:


He doesn't even sleep in there yet, but someday he'll appreciate it! :)
Subscribe