Monday, June 13

Craiglist Chandelier Makevoer

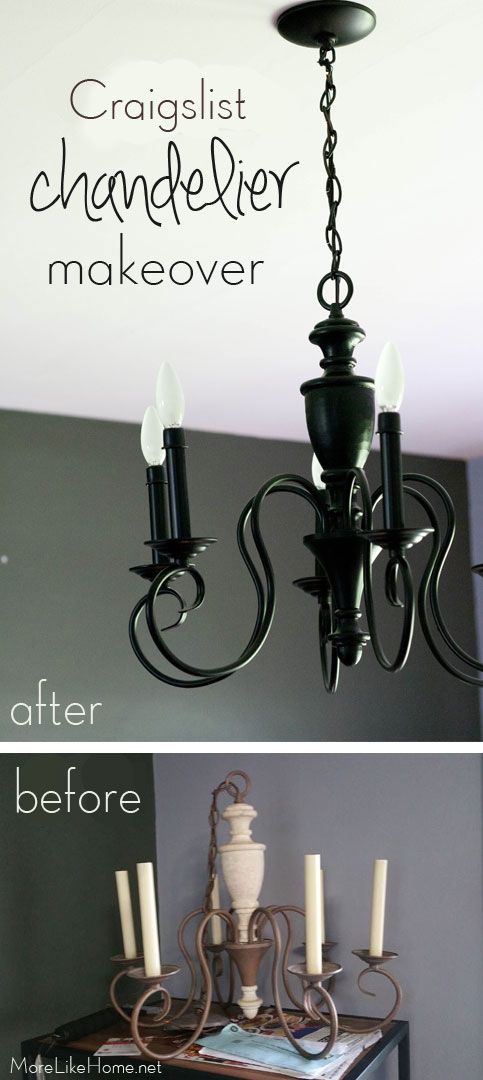
We just finished making over our latest craigslist find (I shared a sneak peek on instagram last week) and we're loving it! In the eight years we've been married, this is the first time we've had a dining room. And our first-ever dining room deserves our first-ever chandelier!


Ever since we moved in I've been thinking about hanging a chandelier there and even spent some time shopping around online. I finally found a few I liked at World Market. I went to see the wooden one in-store and it ended up being huge. No way it could work with our 8' ceilings. And the black one was only slightly smaller. Add that to the fact they are listed at $250 and $170 (yikes!), and we were back to square one.

http://www.worldmarket.com/product/wood-beaded-corinne-chandelier.do?&from=fn       http://www.worldmarket.com/product/rustic+wire+chandelier.do?&from=fn

After that sticker shock, I started wondering if I should just wait it out and hope I got lucky at a yard sale. But finding a chandelier at all (let alone one I like) seemed like a long shot. That's when I finally arrived at the solution I probably should have started with. Craigslist. The year-round online yard sale. And within 24 hours I had this guy sitting in my dining room.
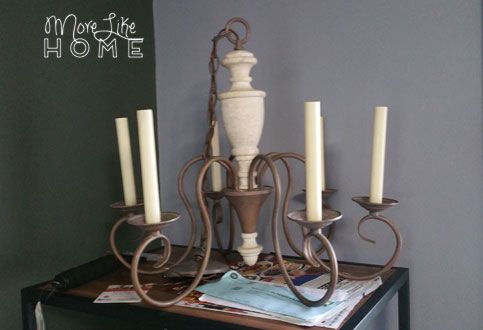

The best tip I can give you when shopping second-hand chandeliers is find is ignore the color. It can be the ugliest old brass you've ever seen (you'll probably pay even less if it is) but if it's a good shape, you can make it beautiful. Which brings us to step one of our chandelier makeover: spray paint. We went with Rustoleum Universal because we've had such good success using it in the past, specifically for painting metal. I wanted to match the finish of the lighting I liked at World Market so I went with satin black.

Friday, June 10

Modern Wall Vanity - Friday Hack

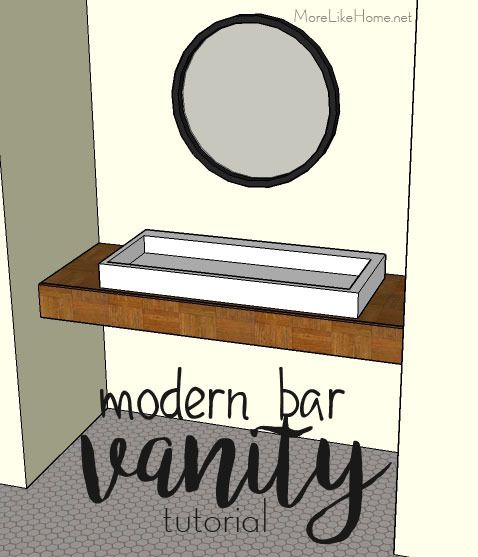
Today we're hacking a modern vanity that will span the whole wall. It would also make a sweet modern desk in an office or homework space. This is different than things I've hacked before, it's more of a built-in than a piece of furniture, but these vanities have caught my interest a few times so I figured it was worth a hack!

https://www.pinterest.com/pin/23714335515492744/
image via pinterest

This tutorial will work a little differently than the ones I've done in the past because this vanity will be super space-specific. I can't tell you how long to to cut the boards because it will depend on your space. But I can tell you exactly how to figure out what size you need, and how to put it all together (which is easier than you might think). So let's get started!


What you need:
  • 2x4s
  • 1x6
  • plywood OR 1x8s
  • 2"screws
  • 3-4" screws
  • Kreg Jig with 1 1/4" pocket screws OR 1 1/4" screws
  • finishing nails
Before you do any building, you need to measure your space. This vanity needs to run from wall-to-wall (or have a leg at the other end to support it), so it's great to tuck in an alcove. So start by measuring the width where you want it to fit. For this example, its 5' long. So cut two 2x4s 5' long.  This will be the front and back of your frame.


Monday, May 16

Colored Window Frames - What's your take?

I have a page I pulled out of a magazine that I keep going back too. I love the eclectic but natural feel of the room, and mid century modern dressers just might be my jam. But last week I noticed something I had kind of glanced over in the past. The blue window.


The frames and the muntins are all blue. Not the trim, mind you. The actual window frame. And I think I like it. Then I remembered another picture. This one I pulled specifically because I liked the fresh green window.


I flipped a few more pages and came across one of my favorite porches... and noticed black frames on both the windows and doors.

And just like that, I found a theme through the pages I've pulled from several magazines. Apparently colored trim tickles my fancy. Like this bright teal set against a rustic entryway.


Or this deep sea blue as a backdrop to fresh flowers.


Apparently I've been pulling colored windows for quite a while now, without consciously connecting the dots. I'm not sure it's something I actually want to commit to in my house (painting those muntins is not a fun job). But we do have original wood windows in our new house... so the thing is... I could.

And here's my question... if you could, would YOU? Let me know in this just-for-fun poll!


Brave enough to go with a color? Let me know which color you'd choose in the comments!

Friday, May 13

Rustic Entry Table - Friday Hack

Today's hack is based on one of my favorite entryway photos from pinterest. I love how it manages to look neat and clean, but still welcoming with a rustic vibe (and it works well with white walls, so it's a great style if you're renting!). The table is a super fast & easy build that can make your home feel warm and inviting the minute guests walk in the door. It's full of rustic charm that can work with almost any style.

https://www.pinterest.com/pin/102175485275157069/

We'll start with the plans for a Rustic Entry Table, but keep reading because we'll also show you how to complete the look with a few key accessories!

Shopping list:
3 -  1x8  @  8'
1 -  1x3  @  4'
1 1/4" kreg jig screws (and a Kreg Jig)
glue (use glue in each step!)
If you don't have a Kreg Jig get regular 1 1/4" screws and a 6' 1x2 board

Finished Dimensions:
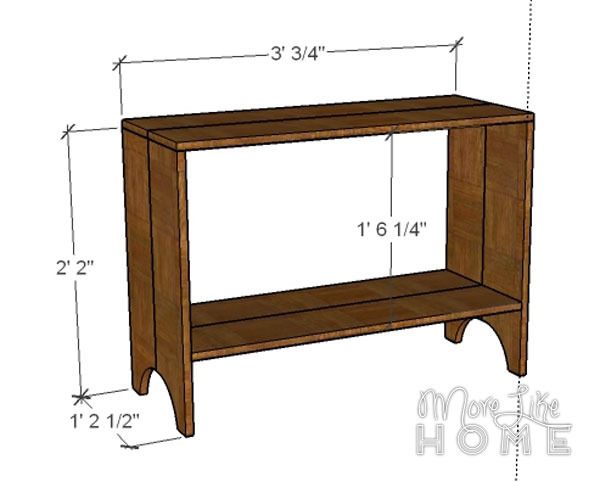
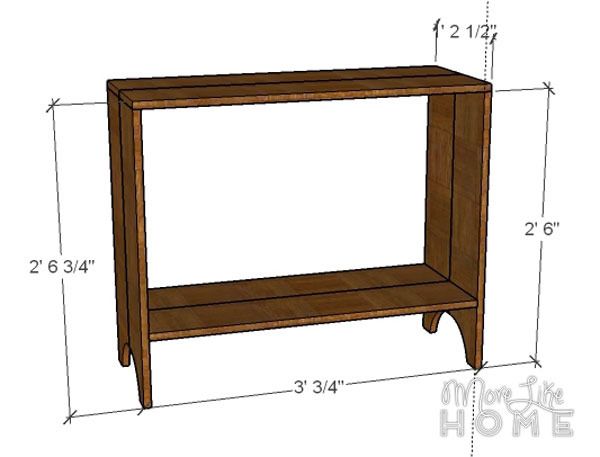
26" legs will give you a shorter table with the same proportions as the original photo, with finished dimensions of 36.75" wide x 26.75" tall x 14.5" deep


30" legs will give an average height table but the proportions will look slightly different (there's plenty of room for a second shelf!) with finished dimensions of 36.75" wide x 30.75" tall x 14.5" deep


Subscribe