

Whew, three weeks down already. :) You can see links to the complete series here, and read about my Lowe's gift card giveaway here. In this series, we're seeing what we can make out of 2x4s. I want to keep it cheap, keep it easy, and keep it totally doable for anyone. Most of our projects so far have been pretty modern, but today we're going to mix it up a little with a Craftsman Style End Table.
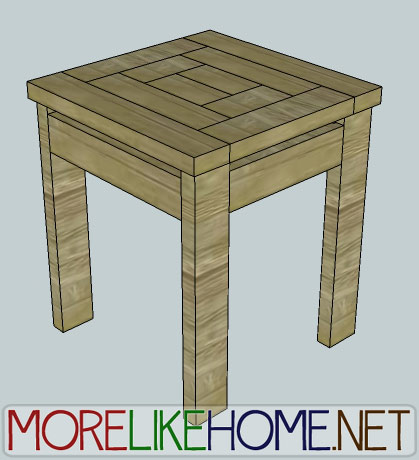
This table has a more traditional style and a patchwork tabletop. It's a great size to use by the couch or your favorite reading chair. Big enough to hold a lamp, a couple books, and of course a snack but compact enough to work in smaller spaces. Tuck a basket underneath to stash extra blankets, toys, or magazines. Ready to build an end table?
Shopping List:
2 - 2x4s @ 10' long
1 - 2x4 @ 8' long
Tools:
Saw
Drill
2 1/2” screws (or Kreg Jig & 2 1/2" self tapping screws)
4" screws (or Kreg Jig & 2 1/2" self tapping screws)
Wood glue
Wood filler
2x4 Cut List:
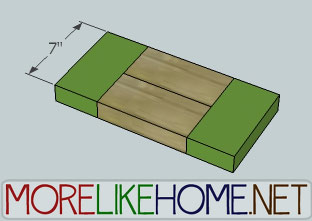
(A) - 4 @ 7" (top)
(B) - 4 @ 14" (top)
(C) - 2 @ 21" (top)
(D) - 4 @ 23" (legs)
(E) - 2 @ 13" (sides)
(F) - 2 @ 17" (front/back)
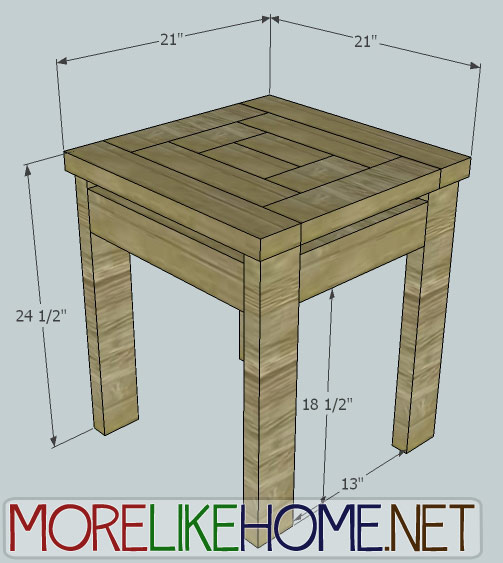
Dimensions: 21" wide x 24 1/2" tall x 21" deep
Please read all the directions before beginning, and cut your pieces
as you go, measuring before each cut. Use 2 1/2” screws or pocket holes
with 2 1/2" pocket screws unless otherwise indicated. Always use glue.
Pre-drill and countersink your screws. I have not built from these exact
plans, so measure lots to make sure things work out!
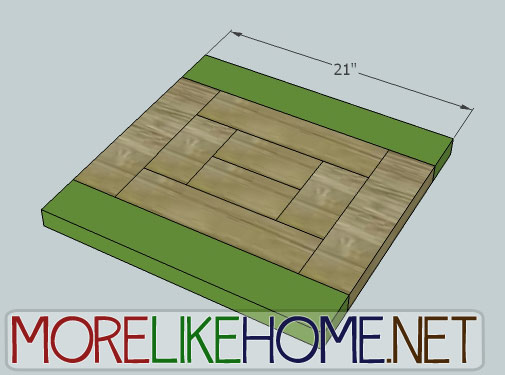
Step 1: Build the Top
***For all the top boards you will attach them using pocket holes and 2 1/2" pocket screws, or by drilling through the sides with 4" screw. Use glue.***
Start by attaching two top (A) boards together side by side to make a square as shown below:

Then attach the two remaining top (A) pieces across the ends of the square like this:
Now attach two of the top (B) boards across the long sides of the top. This will make the top square again.
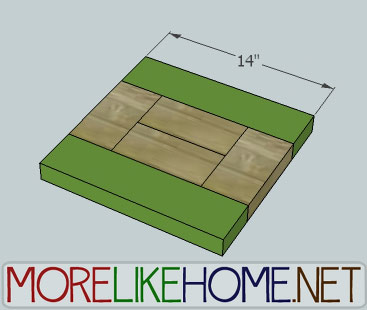
Next attach the remaining two top (B) boards across the ends of the top like this:

Now attach the top (C) pieces across the long edges. Now your top should be square again.
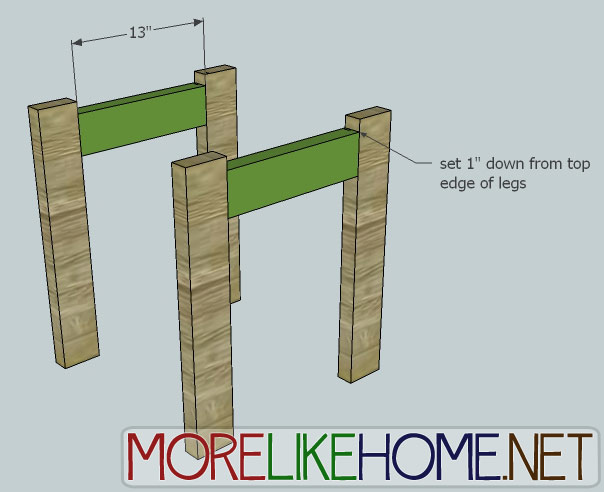
Step 2: Build the Base
Use one side board (E) to connect two legs (D) as shown below. The side boards should be set down 1" from the top of the legs. Use a Kreg Jig to attach the side, or drill through the leg into the ends of the side board with 4" screws. Use glue. Repeat to build the other side.
Now use the front/back boards (F) to connect the two side sections as shown below. They should be set down 1" from the top of the legs, and flush with the outside edges of the legs. Use a kreg jig to attach the boards, or drill through the legs into the front/back boards with 2 1/2" screws and glue.
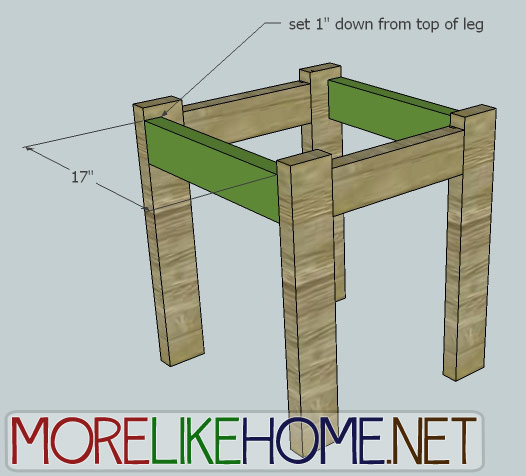
Check to make sure your table is square before you attach the top. Measure diagonally from corner to corner in both directions - the measurements should be the same if the table is square. If it's not, just shift the table a little until they match.

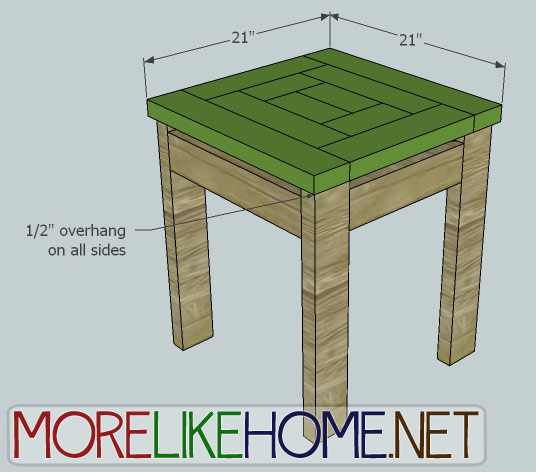
Step 3: Put it all together
Now attach the top to the base. Drill down through the top into the legs and secure it with 2 1/2" screws and glue.
Step 4: Finishing
Start by filling any holes and sanding everything smooth. Then just finish with any paint or stain and polyurethane you want. Keep the craftsman style with a rich stain, or give it a modern twist with a bright coat of paint.
Project 2x4 Cost:
$6.40 - 2 2x4s @ 10' long ($3.20 each)
$2.50 - 1 2x4 @ 8' long ($2.50 each)
$8.90 Total
This is an end table built by Matt. Thanks so much for sharing, Matt! It looks wonderful!

And here's one more by Holten. Beautiful work! Keep it up, guys!

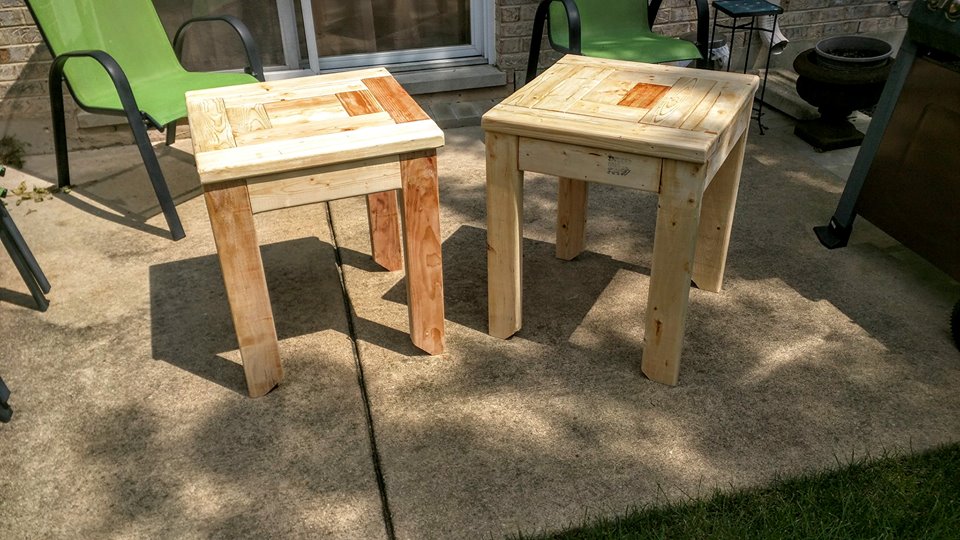
And this pair was built by Dave, who's been working his way through several projects in the 2x4 series.
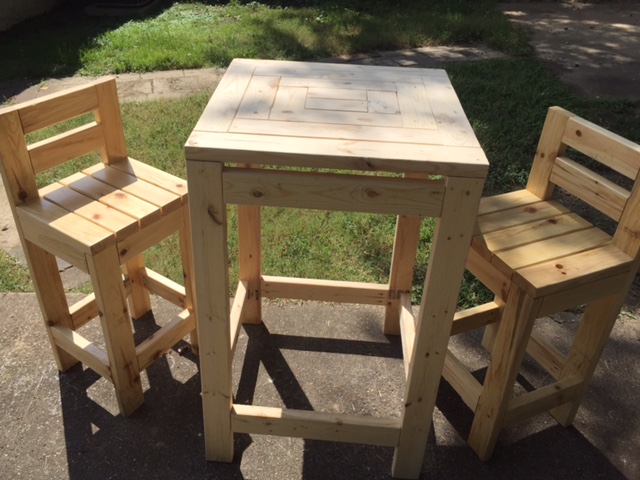
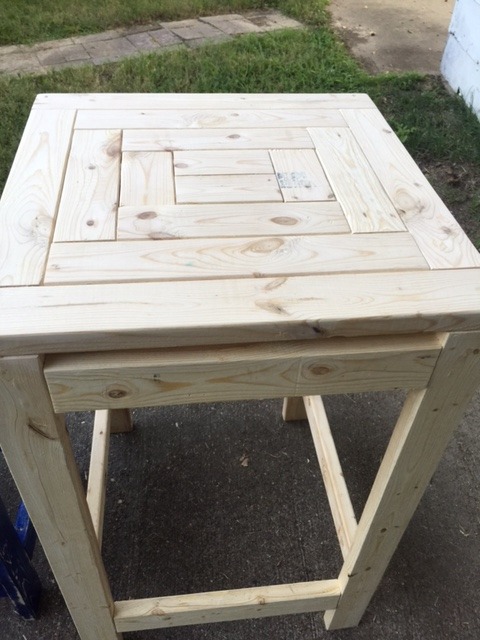
Rogers copied the tabletop to create a custom pub table. The top is 28x28" and the legs are 44" (although he plans to make them 42" next time). He finished the set with a pair of 2x4 Chunky Bar Stools.
See giveaway winners here.

Share on Facebook

I like the space between the top and the top supports, but I'm curious. Is the space for style or support?
ReplyDeleteThis would be nice for a living room or bedroom.
ReplyDeleteLove that the top of the end table as a bit of a design instead of just 2x4s straight across! Added to my project list!
ReplyDeleteI was just picturing a table top like that last week!
ReplyDeleteI like that you start in the middle so everything actually lines up.
ReplyDeleteI made this to put a mini fridge on. Very simple design, completed it in just a few hours.
ReplyDeleteThanks for commenting! I love to hear when someone uses one of my plans! :)
DeleteI'd love to build a matching coffee table. Don't have plans for that do you?
DeleteI don't. Sorry! :(
DeleteThis comment has been removed by the author.
ReplyDeleteHi Georgia!
ReplyDeleteI finished another one of your amazing plans and wanted to share it with you. This table came out great and I have you to thank for it.
https://drive.google.com/file/d/0B3gzCJwNfqXSLWk3M2RRNDR3Q2c/edit?usp=sharing
https://drive.google.com/file/d/0B3gzCJwNfqXSTDJjb3ZJVzJ5elE/edit?usp=sharing
https://drive.google.com/file/d/0B3gzCJwNfqXSS0ZoWXZPSVh1OGc/edit?usp=sharing
Wowed again, Matt! You're knocking these out of the park! Do you mind if I share this one in the post? :)
DeleteHi Georgia,
DeleteThat is fine with me. Thank you again! I'm hooked on your site!
- Matt
This comment has been removed by the author.
ReplyDeleteIs there a printer friendly version of these plans?
ReplyDeleteThere isn't, sorry about that. I've had a couple people ask so I'm looking into it for future plans!
DeleteShrunk down the dimensions for 2x3's and made a side table for each of my four patio chairs.
ReplyDeleteLove it! And thanks for the pic, it looks great!
DeleteI'd like to add a bottom to put books what are the measurements for that?
ReplyDeleteThe easiest way would be to add another set of front/back boards and side boards near the bottom of the table. Then cut four 17" long 2x4s and attach them between the side boards with a 1/2" gap between each board (use a krej jig or screw through the side boards into the ends of the shelf boards). Good luck!
DeleteThis comment has been removed by the author.
ReplyDeleteUsed your plans and turned out awesome! Going to build another to have a pair for my living room.
ReplyDeleteHow can I share a photo of my completed project?
So glad to hear it! You can share photos on my facebook page, or you can email them to me at morelikehome (at) gmail (dot) com. I'd love to see it! :)
DeleteLove this plan. Just finished my first one and see several more in my future.
ReplyDeletehttps://www.instagram.com/p/BFuvJJNDAXm/
According the first and second steps, the first two are cut 7" how is the second step cut 7" also when they are lined up next to two 2x4's wouldn't they be 8" cuts? Or am I looking at this wrong.? Thanks! Gary
ReplyDelete2x4's actually measure 1 1/2 inches by 3 1/2 inches
Delete^You got it! Thank you!! :)
DeleteI'm going to be building this little guy for my living room. Since 2x4's have rounded edges, do you keep them as is for this project or would you run them through a table saw to get a cleaner 90 degree edge? If the 2x4's were left as is (with the rounded edges) I'd think that crumbs and dust would easily get trapped in between the boards. What route did you all take?
ReplyDeleteHi! These plans are drawn using the boards as-is since many at-home builders don't have a table saw, but if you have one I would definitely shave off the rounded part! You'll need to adjust some of the measurements to fit the narrower boards as you go. Have fun! :)
DeleteI've gotten back to this after a hiatus. I decided to trim 3/16" off the rounded sides of the wood to make it easier to join the pieces flush. As expected, it threw everything off in terms of fit. Frustrating trying to figure out how to get everything to line up when deviating from the original measurements. Was 3/16" too much to remove?
DeleteNo,I think we've done similar. I didn't measure, but I would guess it was around 1/8 - 3/16" any time we've trimmed the edges. Whatever it takes to get the edges off. I agree it can be frustrating to work with different measurements. I hope you're still able to get it together. :)
DeleteHello..I am in the process of building this table right now but it seems like the 4" wood screws are not long enough...what am I doing wrong? Thank you.
ReplyDeleteYou could try using a countersink when drilling your holes or I'd personally use 4 1/2'' screws and also countersink if you aren't using a Kreg jig.
Delete^Great advice! Thank you! :)
DeleteThe instructions call for attaching the top to the legs by drilling screws down into the end grain of the legs. Is there another way to join the two that's stronger, like using a Kreg jig? Screwing into end grain seems weak to me.
ReplyDeleteAbsolutely!! I tried overall to make these plans do-able for anyone without a Kreg Jig and wrote it as such, but I would definitely use a Kreg Jig to attach the legs if doing it myself. I should have included both options in the instructions, sorry about that. I would put pocket holes at the top of the legs and attach the tabletop from underneath. :)
DeleteThat's what I ended up doing. Seems to work OK.
DeleteMy son just made this for a 4-h project. We made a shelf using the same design as the top only smaller.
ReplyDeleteI love this! I'm a former 4-h member myself, so this has a special place in my heart! :)
DeleteCan you give me the plan for the pub table? I really would like to build it instead of the end table.
ReplyDeleteSorry, I don't have plans for a pub table version!
DeleteHow can I downloade the plan
ReplyDelete