
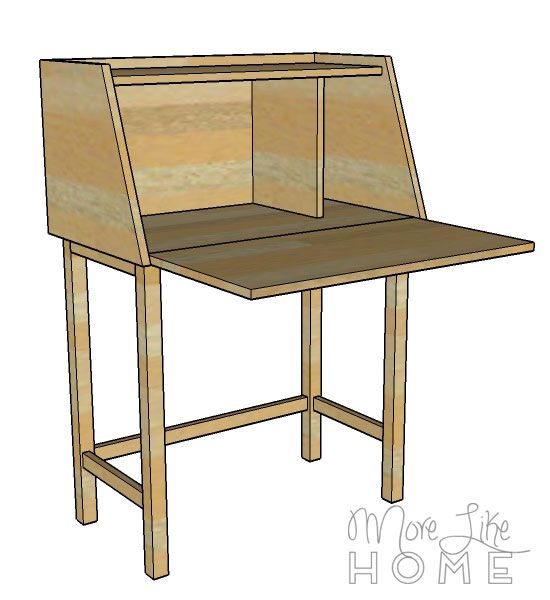
P.S. Check out the rest of our free DIY Desk Plan Series here!


The proportions are slightly different than the inspiration photo because I made the hutch tall enough to accommodate file folders. Just FYI.
Shopping List:
1 sheet 3/4" plywood
1 - 2x2 @ 6'
1 - 2x2 @ 8'
1 - 1x2 @ 6'
2 hinges
2 drop-front hinge supports
Kreg Jig and 1 1/4" pocket hole screws, and 2 1/2" pocket hole screws
1 1/4" wood screws (if you don't have a Kreg Jig)
2" wood screws
finishing nails
optional:a 28" set of hairpin legs or tapered legs (instead of building 2x2 legs)
Dimensions: 31 1/2" wide x 45" tall x 18" deep
Measure twice, cut once (seriously, though). Use glue in every step. Read through all the instructions before you begin. Use 1 1/4" screws unless otherwise indicated. If we mention pocket holes or the Kreg Jig, use 1 1/4" pocket hole screws unless otherwise indicated. Pre-drill and countersink all your screws. Be safe, have fun, and let me know if you have any questions!
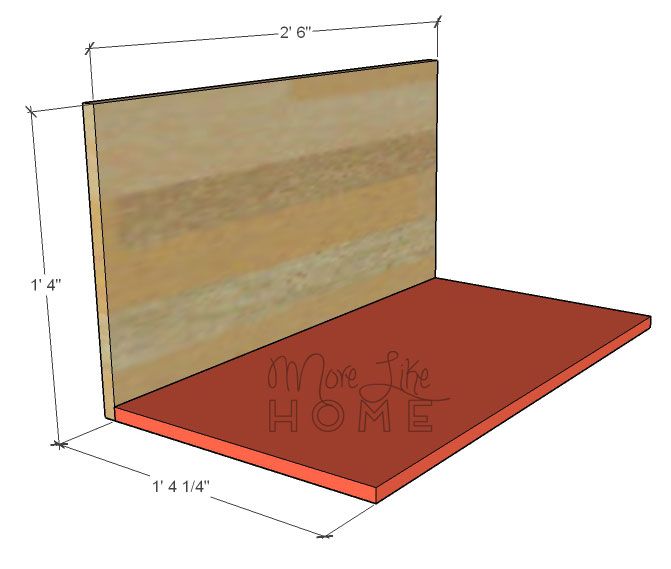
Cut List:(A) 1 - 3/4" plywood @ 30 x 16" (back)
(B) 1 - 3/4" plywood @ 30 x 16 1/4" (bottom)
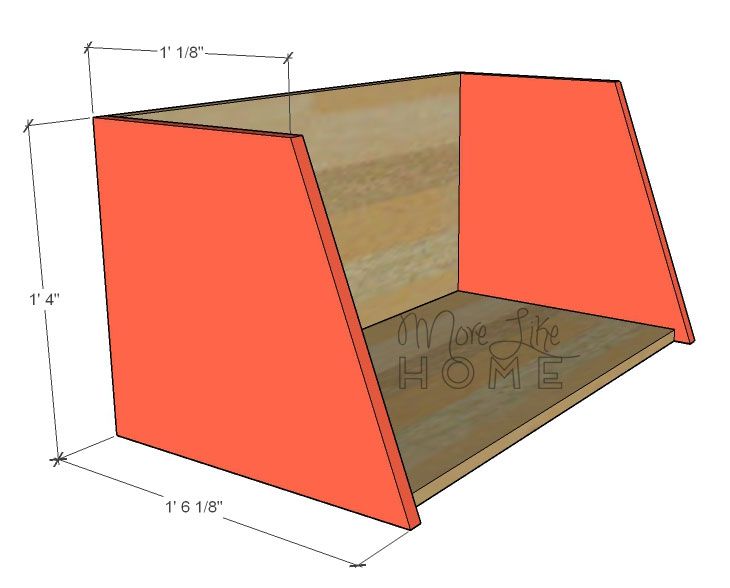
(C) 2 - 3/4" plywood @ 16 x 18 1/2" (sides)
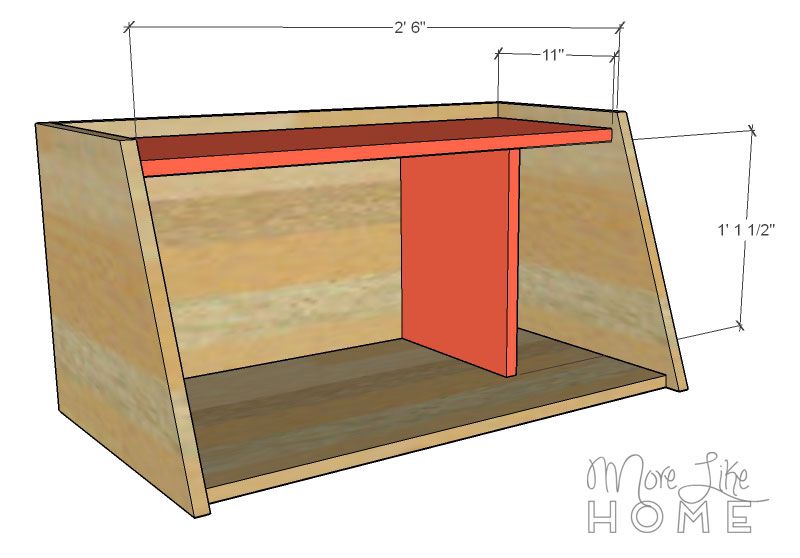
(D) 1 - 3/4" plywood @ 30 x 11 (top)
(E) 1 - 3/4" plywood @ 11 x 13 1/2" (divider)
(F) 4 - 2x2 @ 29" (legs)
(G) 2 - 2x2 @ 12 1/2" (side trim)
(H) 1 - 2x2 @ 26 1/2" (back trim)
(I) 2 - 1x2 @ 12 1/2" (side stretchers)
(J) 1 - 1x2 @ 26 1/2" (back stretcher)
(K) 1 - 3/4" plywood @ 15 1/2 x 29 3/4" (front)
Attach the back (A) to the bottom (B). Use pocket holes along the back edge of the bottom board, OR drill through the back board into the edge of the bottom board.
Cut the side pieces (C) at an angle as shown below. Measure over 12 1/8" from the top left edge, and drawer a line connecting that mark to the bottom right corner. Cut along the line. Then attach the sides, keeping the back and bottom edges flush (the front edge will stick out past the bottom board). Use pocket holes along the sides of the back and bottom, OR drill through the sides into the edges of the back and bottom.
Install the top (D). Use pocket holes along the sides and back of the top, or drill through the side and back boards into the edges of the top board. The top board should be set up 13 1/2" from the bottom of the hutch (make sure it's level).
Install the divider (E). Or two dividers, if you prefer! I've drawn it with an 11" space on the right side, but put it wherever works best for you. Just remember to leave a wide enough space on the left to fit a laptop, if that's where you plan to keep it. Attach the divider using finishing nails on the top, bottom, and back.
Build the base (if you purchased legs, skip this part). Start by attaching two legs (F) to each side trim piece (G). The trim should be flush with the top of the legs. Use pocket holes facing the ends of the trim boardswith 2 1/2" screws, OR drill through the legs into the ends of the trim with 2" wood screws.
Connect the two leg sections with the back trim piece (H). It should also be flush with the top, and attach it the same way you did the side trim.
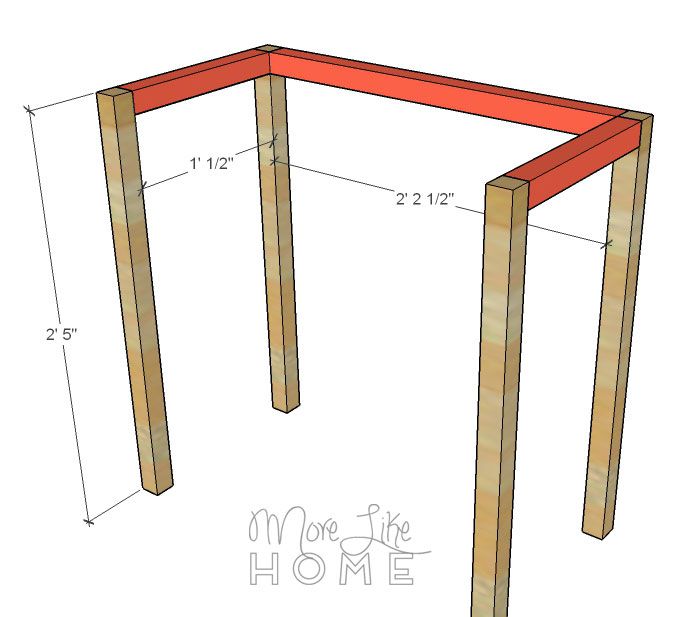
Install the side stretchers (I) and back stretcher (J) around the bottom of the legs. They are set up 6" from the floor. Attach them the same way you installed the trim pieces above.

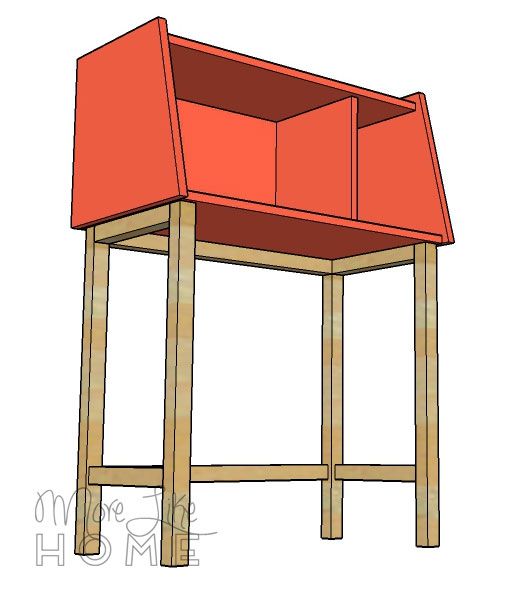
Now attach the hutch to the base (or to whatever legs you are using). Drill up through the side and back trim pieces into the bottom of the hutch (be careful not to drill all the way through!) and attach them with 2" wood screws. You don't have a big margin to countersink your screws without pulling all the way through, so be careful. :)
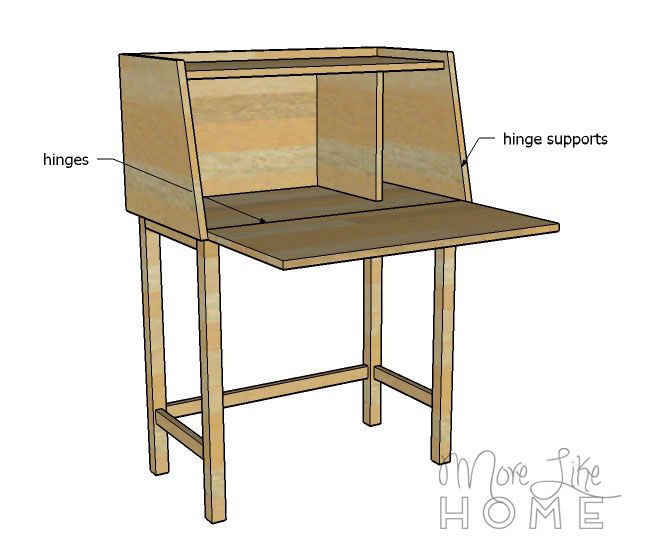
Finally, attach the front. It should be centered with a 1/8" gap on each side.

Use the hinges and drop-front supports, and make sure the front opens level with the base of the hutch so you have a flat work space.
To finish, fill any holes with wood filler then sand everything down really well. This is the most important step for a professional finish! Start with a rough sand paper, then go over everything with a medium paper, then again with a fine paper. Once it's super smooth, finish it with whatever paint or stain and sealer you like.
That's it! Come back tomorrow for another DIY desk plan, and check out the full series here!
)
Hi, just wondering what size the sheet of plywood is that you use? They come in different dimensions! Thank you!
ReplyDeleteHi! It's a 4x8' sheet. If you're looking at any other plans, it will always be that size unless it can be done with a half sheet (and if so I'll list it as such in the shopping list) since those seem to be the most widely available sizes. Hope that helps! :)
DeleteI just made this without the legs, for a tabletop catproof hobby chest. The front laps a bit over the table edge, but it's a nice piece. I widened it to 36" so that I could fit a couple of existing hobby organizers inside and use the flat surface as a painting space.
ReplyDeletethanks
ReplyDelete